How to Install Grommets in a Tarp: Step-by-Step Guide
Have you ever struggled to keep your tarp securely in place? Maybe you’ve faced gusty winds or heavy rains that made your tarp flap around or even rip.
If this sounds familiar, you’re not alone. Installing grommets in your tarp can be the game-changer you’ve been looking for. Imagine a tarp that stays put, protecting your belongings and offering peace of mind. We’ll walk you through the simple steps to install grommets in your tarp.
You’ll discover how easy it is to enhance its functionality and durability. With just a little effort, you can transform your tarp into a reliable cover that withstands the elements. Say goodbye to makeshift solutions and hello to a more secure setup. Keep reading to find out how you can make this practical improvement yourself, saving time and money in the process.
Tools And Materials Needed
Grommets help keep tarps strong. You’ll need some tools. Grommet kit is the first thing. It has rings and a tool. Hammer is also needed. It helps press grommets together. Scissors will help cut holes. Make sure they are sharp. A measuring tape helps find the right spots. Marker is for marking spots.
Protective gloves keep your hands safe. Work on a flat surface. This helps keep the tarp steady. All these tools help make the job easy. Happy grommeting!
Choosing The Right Grommet Size
Picking the right grommet size is very important. Grommets come in different sizes. Measure the hole where the grommet will go. Use a ruler or measuring tape. This helps find the correct size.
The inner diameter of the grommet should match the hole. The outer diameter should cover the hole. Make sure the grommet fits snugly. Loose grommets may fall out. Tight grommets may damage the tarp.
Check the material thickness of the tarp. Thicker tarps need larger grommets. Thin tarps may only need small ones. Always have extra grommets for mistakes. This saves time and trouble.
Marking The Tarp For Grommets
First, lay the tarp flat on a clean surface. Decide where the grommets will go. Measure the distance between each grommet. Use a ruler or measuring tape. Keep the spaces equal. Make sure to mark the spots clearly. A pencil or chalk works well. Avoid markers that can stain. Double-check your marks before moving on. Mistakes can be hard to fix.
Consider the edges of the tarp. Grommets should not be too close. Leave a few inches from the edge. This prevents tearing. Check for any folds or wrinkles. Smooth them out. Accuracy is key for a strong hold. Make sure your lines are straight. This helps the tarp stay tight.

Credit: m.youtube.com
Preparing The Tarp
First, lay the tarp flat on the ground. Use a ruler to measure the distance for each grommet. Mark the spots with a pencil. The marks will guide where to cut. Cutting the holes is the next step.
Use a sharp cutter to make small holes at each mark. Ensure the holes are not too big. They should fit the grommet snugly. A snug fit keeps the grommet secure. Be careful while cutting.
Place a piece of fabric tape around the edges. This makes the tarp stronger. It helps the tarp last longer. Reinforced edges keep the tarp from tearing. Make sure the tape is pressed firmly. This ensures it stays in place.
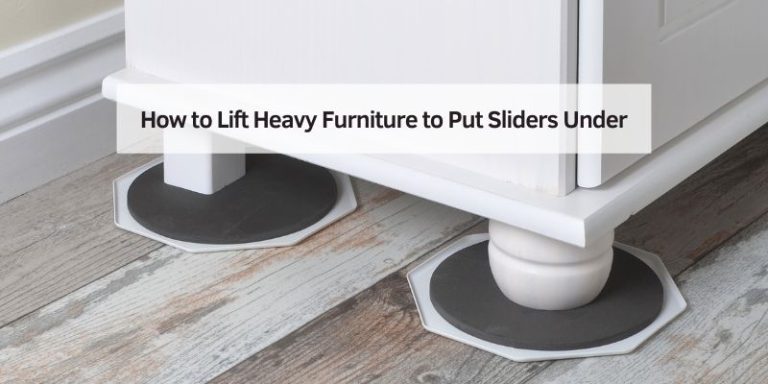
Installing The Grommets
First, place the grommet where you want it. Make sure the spot is flat. This helps the grommet stay tight. Use a marker to draw around the grommet. This circle shows where to cut. Cut the tarp inside the circle. The hole should be smaller than the grommet.
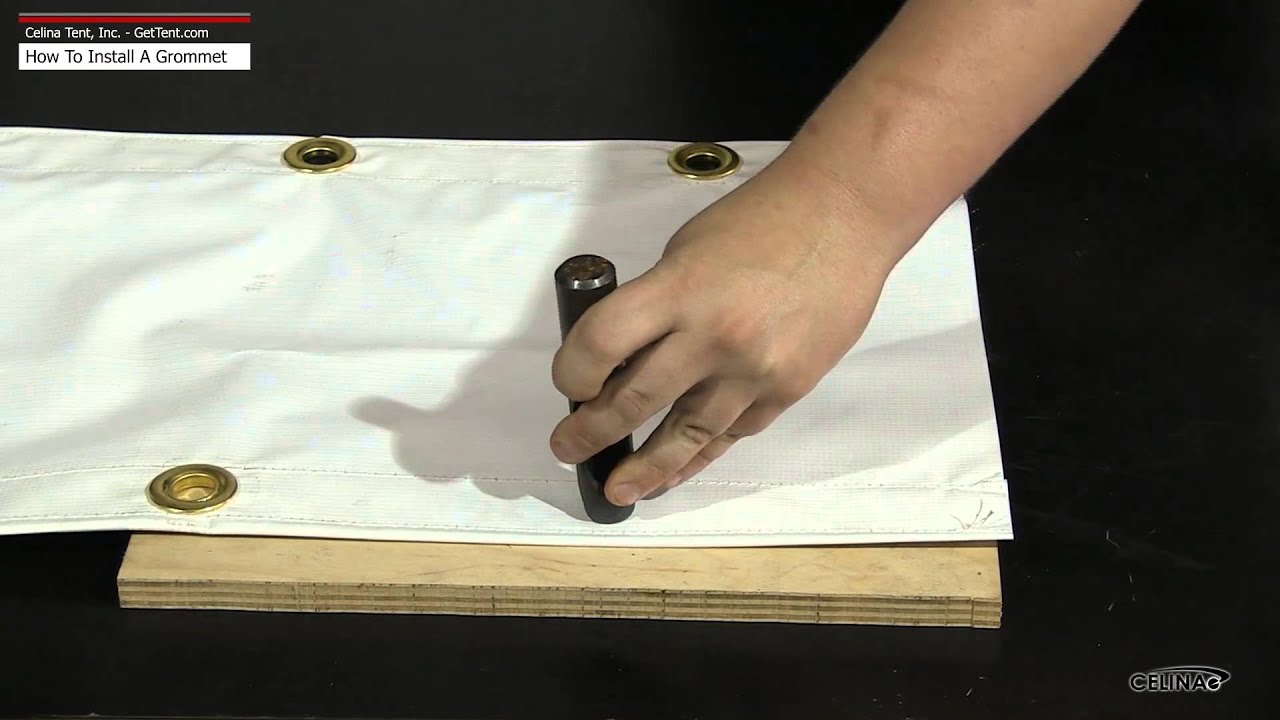
Put the grommet tool on the hole. The tool has two parts. Place the bottom part under the hole. Put the top part over the hole. The grommet fits between them. Press down firmly. The tool makes the grommet stay in place.
Use a hammer to secure the grommet. Hit the tool with the hammer. Tap gently at first. Check the grommet. It should be tight. Hit harder if needed. The grommet should not move. Repeat for each grommet. Now your tarp has strong grommets.
Checking The Grommet Installation
After installing grommets, check their tightness. Make sure they are not loose. Loose grommets can cause issues. They might fall out or tear the tarp. Ensure each grommet is secure. Look closely at the edges. No gaps should be visible. Press the grommets gently. They should not move or shift. If they do, reinstall them properly. Use a tool if needed. A rubber mallet can help. Tap the grommet lightly. This keeps it snug and secure. Check the tarp’s material too. It should not be damaged. A damaged tarp won’t hold grommets well. Replace any torn sections. This will ensure a strong hold.
Tips For Long-lasting Grommets
Grommets help make tarps stronger. Use good quality grommets for best results. Metal ones last longer than plastic ones. Measure the tarp carefully before starting. Mark the spots for each grommet. Make sure each hole is clean and smooth. This avoids tears in the tarp.
Press the grommet firmly with a tool. Use a hammer for metal grommets. Check each grommet to see if it is tight. Loose grommets can fall off. Store tarps in a dry place. Wet tarps can rust metal grommets.
Check grommets regularly for damage. Replace any broken ones fast. This keeps the tarp useful and strong. A little care goes a long way.
Credit: www.youtube.com
Common Mistakes To Avoid
People often cut the tarp unevenly. This makes the grommet fit poorly. Always measure the tarp edge carefully. Use a ruler or straight edge. Another mistake is choosing the wrong size grommet. Too big or too small won’t hold well. Check the size chart before buying.
Many forget to reinforce the tarp. Without this, grommets tear easily. Add an extra layer where the grommet goes. Strong materials last longer. Some use too much force when hammering. This can break the grommet. Tap gently until it’s secure.
Skipping instructions leads to errors. Read the guide before starting. Follow each step closely. Proper tools matter. Using incorrect tools damages the tarp. Use the correct punch tool and hammer. This ensures a neat finish.
Frequently Asked Questions
How To Install A Grommet In A Tarp?
To install a grommet in a tarp, first mark the desired spot. Use a grommet kit to punch a hole. Position the grommet halves on each side of the hole. Secure them using the provided tool and a hammer. Ensure the grommet is tightly fitted for durability.
How To Put In Grommets Without A Grommet Tool?
Use a hammer and nail to create a hole. Place the grommet halves on either side and gently tap them together with the hammer. Ensure the grommet is secure by tapping evenly around its edges. Be careful to avoid damaging the material.
How To Fasten A Tarp With Grommets?
Secure a tarp with grommets by threading bungee cords or rope through the grommets. Attach them to anchor points like stakes or hooks. Ensure the tarp is taut to prevent wind damage. Use additional ties for larger tarps to ensure even tension and stability.
How To Install Grommets In Plastic?
To install grommets in plastic, mark the hole location. Use a drill or punch to create the hole. Insert the grommet into the hole, ensuring a snug fit. Secure it using a grommet tool or pliers, pressing firmly until locked in place.
Check stability and adjust if needed.
Conclusion
Installing grommets in a tarp is simple with practice. Begin by gathering all necessary tools and materials. Mark the spots for each grommet with care. Use a hole cutter for clean cuts. Place the grommet halves properly. Secure them using a grommet tool.
Check the grommets for stability after installation. This ensures they hold up under pressure. With these steps, you can confidently install grommets. Your tarp will be ready for any task. Remember, practice makes perfect. Happy tarping!