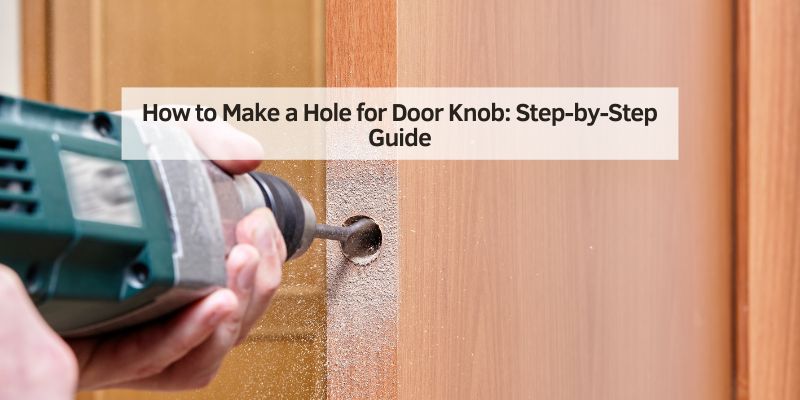
How to Make a Hole for Door Knob: Step-by-Step Guide
Are you ready to transform your door with a brand-new knob, but unsure about how to make the perfect hole for it? You’re not alone.
Whether you’re a seasoned DIY enthusiast or a beginner looking to enhance your home, creating a precise hole for a door knob can seem daunting. But here’s the good news: it’s easier than you think, and we’re here to guide you through every step.
Imagine the satisfaction of installing your door knob perfectly, knowing you did it yourself. You’ll discover the simple, step-by-step process that ensures accuracy and professionalism, leaving you with a door that not only functions beautifully but also boosts the aesthetic appeal of your space. Dive in and empower yourself with the skills to tackle this home improvement project with confidence!

Credit: m.youtube.com
Tools And Materials Needed
To make a hole for a door knob, gather these items. A drill is essential. You will need a hole saw bit. This makes the round hole. A tape measure helps with accuracy. A pencil marks where to drill. Safety glasses protect your eyes. Clamps keep the door steady. Use a screwdriver to attach the knob. A chisel may be needed for adjustments. Sandpaper smoothens edges. Keep a dustpan handy for cleanup.
Measuring The Door
Start by measuring from the floor to the desired knob height. Most doors have knobs at around 36 inches from the ground. Check this standard height. Use a measuring tape for accuracy.
Once you have the measurement, mark the spot on the door. This mark helps in drilling the hole later. Ensure the mark is visible and clear.
Position the mark at the center of the door’s width. This ensures the knob is in the right place. Use a ruler to find the center point. Mark it with a pencil or marker. Make sure the mark is straight and even.
Check the height and position again. Make sure they match your needs. The marks guide you when cutting the hole. Always double-check to avoid mistakes.
Selecting The Right Drill Bit
Different drill bits are used for different tasks. Wood, metal, and masonry bits are common types. Wood drill bits are used for soft materials. Metal drill bits are tougher and work on harder surfaces. Masonry drill bits are designed for concrete and brick. Choose the right bit for your project. This helps you make clean holes.
Size is important for drill bits. Measure the door knob shaft first. Pick a drill bit that matches the shaft size. Too big or small bit can cause problems. A tight fit is needed. This makes sure the knob stays in place. Measure twice and drill once for safety. Proper size ensures a neat and sturdy hole.
Preparing The Door
Creating a hole for a door knob involves careful measurement and drilling. First, mark the desired height on the door’s edge. Use a hole saw to drill the main hole, then a spade bit for the latch hole. Ensure alignment for smooth knob installation.
Securing The Door
First, make sure the door is steady. Use clamps to hold it in place. This will stop it from moving. Next, check for any obstacles around. Clear the space for safety.
Ensuring Safety Measures
Wear safety goggles to protect your eyes. Have gloves on to keep your hands safe. Keep a first aid kit nearby. Be careful with tools. Always follow the instructions on the tool. Safety is very important.
Drilling The Hole
First, mark the spot for the door knob. Use a pencil for this. The mark should be clear. Next, hold the drill straight. The drill must be steady. Align the drill bit with the mark. The drill should not tilt. Check the alignment carefully.
Use a spade bit for this step. The bit size must match the knob size. Place the drill on the mark. Start drilling slowly. Push gently and keep control. Stop when you reach the other side. Keep the hole clean and smooth.
Switch to a smaller drill bit. This bit is for the latch. Align with the door edge. Begin drilling slowly. Go straight into the door. Drill until the bit reaches the face bore. The hole should be neat and even.
Smoothing And Finishing
Creating a hole for a door knob requires precision and smooth finishing. Measure accurately to ensure the right placement. Use a drill bit to make the hole, then sand the edges for a clean look.
Removing Debris
Start by clearing away all loose debris from the hole. Use a small brush or cloth to wipe away wood dust and chips. This keeps the area clean and ready for sanding. Be gentle to avoid damaging the surrounding wood.
Sanding The Edges
Use sandpaper to smooth the edges of the hole. Choose a fine grit to ensure a smooth finish. Rub the sandpaper back and forth gently. This helps to remove any rough spots and sharp edges. Repeat until the surface feels even and soft.
For best results, check with your fingers. Ensure there are no splinters or jagged bits left. A smooth edge makes the door knob fit better.
Installing The Door Knob
Slide the latch into the hole on the door edge. Ensure it fits snugly. Align the latch faceplate with the door surface. Use a screwdriver to tighten the screws. Check the latch is secure. It shouldn’t wiggle or move.
Place one knob on each side of the door. Align the knobs with the latch. Insert the spindle through the latch hole. Twist the knobs to lock them in place. Use screws to fix the knobs firmly. Ensure the door opens and closes smoothly. Test the lock function.
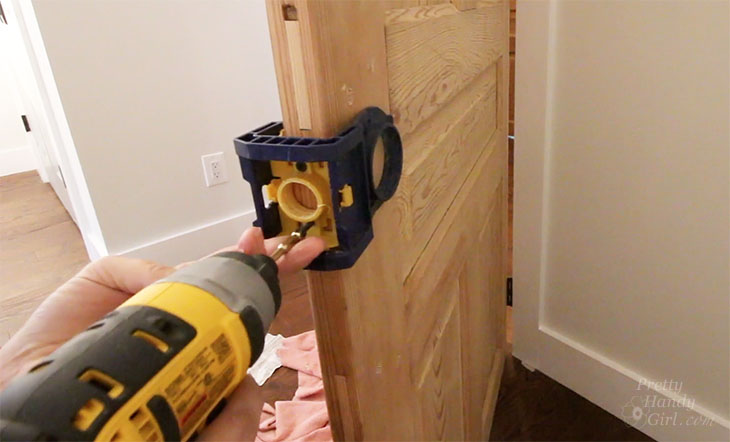
Credit: prettyhandygirl.com
Testing The Installation
Doors need a strong lock. Test the lock by turning the knob. Make sure it locks and unlocks easily. Try it several times. Listen for any strange sounds. If it sticks, it might need adjusting. Test the lock with the key. See if the key turns smoothly. Keys should not get stuck. If they do, check the lock again.
Turn the door knob slowly. Feel the motion. It should be smooth and easy. Open and close the door several times. Watch for any resistance. Doors should not be hard to move. Check the knob from both sides. Ensure it works well on both ends. If the knob feels loose, tighten it. A firm knob ensures proper function.

Credit: www.thestonehead.com
Frequently Asked Questions
How To Make A Hole In A Door For A Door Knob?
Mark the door knob’s location using a template or measurements. Drill a pilot hole with a small bit. Use a hole saw to cut the main hole for the knob. Ensure alignment with the latch hole. Test fit the knob and adjust if needed.
How To Drill A Lock Hole?
To drill a lock hole, mark the spot on the door. Use a power drill with a spade bit. Drill slowly, ensuring the hole is straight. Clean the edges with sandpaper for a smooth finish. Always wear safety goggles during the process.
What Size Hole Do You Drill For A Door Knob?
Drill a 2 1/8 inch hole for standard door knobs. Ensure proper alignment with the latch hole. Use a drill template for accuracy. Always check the manufacturer’s instructions for specific dimensions.
How To Drill Holes For Door Handles?
Measure door handle placement using a template. Mark drilling spots with a pencil. Use a drill with the correct bit size to create holes. Ensure alignment for smooth installation. Double-check measurements before proceeding to avoid mistakes.
Conclusion
Making a hole for a door knob is easy with the right tools. Measure carefully before you start. Use a drill and a hole saw for best results. Mark the spot clearly on the door. Drill steadily to avoid mistakes.
Keep your workspace tidy for safety. Check the hole size before installing the knob. Practice makes perfect, so don’t rush. Patience is key to a smooth finish. With these tips, your door will look great and function well. Enjoy the satisfaction of a job well done.