How to Make a Stained Glass Lamp Shade
I’ve always been fascinated by the warm, colorful glow of a stained glass lamp shade casting intricate patterns across a room. There’s something magical about turning simple pieces of glass into a functional work of art. If you’re curious about how to make a stained glass lamp shade, you’re in for a rewarding journey. I’ve spent years tinkering with glass, solder, and designs, and I’m excited to share my process with you. This guide will walk you through every step, from picking materials to assembling your lamp shade, in a way that’s clear for beginners and detailed enough for seasoned crafters. Let’s dive into this colorful adventure together!
Choosing Your Design and Pattern
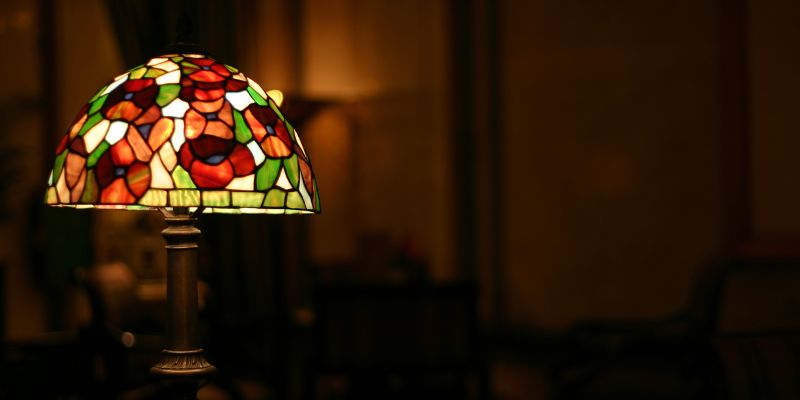
The first step in making a stained glass lamp shade is deciding on a design. When I started, I spent hours flipping through pattern books and sketching ideas. You can choose a classic Tiffany-style floral motif, a geometric pattern, or even something modern and abstract. Think about the vibe you want—cozy and traditional or bold and contemporary.
Start by picking a pattern that matches your skill level. Beginners should opt for simpler designs with larger glass pieces and fewer curves. I found a basic hexagonal pattern with repeating shapes to be a great starting point. You can find free patterns online or buy templates from craft stores. If you’re feeling creative, sketch your own design on graph paper, keeping the lamp shade’s 3D shape in mind. A typical lamp shade has multiple panels—anywhere from four to eight—so plan how your pattern will repeat across each one.
Once you have your design, scale it to fit your lamp base. Measure the base’s diameter and height to ensure your shade complements it. I once made a shade too small for the base, and it looked like a hat sitting awkwardly on a head! Save yourself the trouble by double-checking measurements early.
Gathering Your Materials and Tools
Before you start cutting glass, you’ll need the right supplies. I remember my first trip to the craft store for stained glass supplies—it felt like stepping into a candy shop! Here’s what you’ll need to make a stained glass lamp shade:
| Item | Purpose |
|---|---|
| Colored glass sheets | The main material for your lamp shade panels. Choose a variety of colors. |
| Glass cutter | For scoring and cutting glass into precise shapes. |
| Running pliers | To snap scored glass cleanly. |
| Grinder | Smooths glass edges for safety and fit. |
| Copper foil | Wraps glass edges for soldering. |
| Soldering iron and solder | Joins glass pieces together. |
| Flux | Helps solder flow smoothly. |
| Patina (optional) | Adds a black or copper finish to solder lines. |
| Lamp shade mold or jig | Guides the assembly to maintain the shade’s shape. |
| Safety gear | Glasses and gloves to protect against glass shards and fumes. |
I recommend choosing high-quality glass, like opalescent glass for a softer glow or cathedral glass for transparency. Each type affects how light passes through your shade, so experiment with samples if you can. For tools, invest in a reliable glass cutter and a grinder with a diamond bit—they’ll save you hours of frustration.
Preparing and Cutting the Glass
Cutting glass was the most intimidating part for me at first, but with practice, it became second nature. Start by laying your pattern pieces on the glass sheets. Trace each piece with a permanent marker, labeling them to avoid confusion later. I learned this the hard way after mixing up pieces and ending up with a puzzle that didn’t fit!
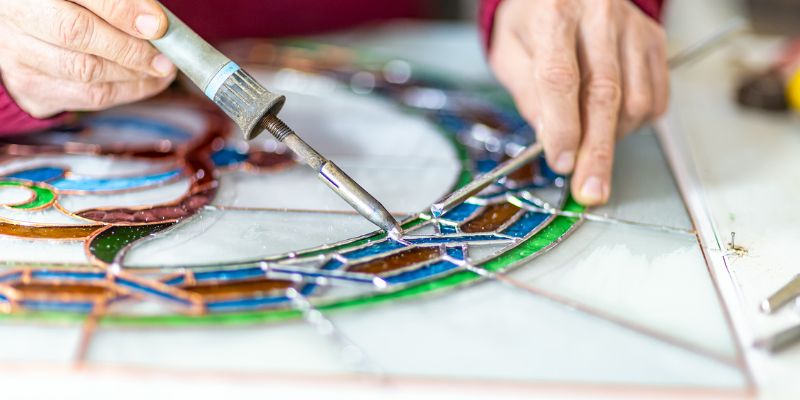
To cut the glass, hold your glass cutter firmly and score along the marked lines with steady pressure. You’ll hear a satisfying scratching sound—that’s how you know you’re doing it right. Then, use running pliers to snap the glass along the score line. If the edges are rough, don’t worry; that’s where the grinder comes in. I spend a good chunk of time grinding each piece to smooth out sharp edges and ensure a snug fit. Be patient here—precision makes all the difference when assembling your stained glass lamp shade.
Pro tip: Work in a well-ventilated area and wear safety glasses. Glass dust is no joke, and I’ve had a few close calls with tiny shards.
Applying Copper Foil
Once your glass pieces are cut and ground, it’s time to wrap them with copper foil. This step is crucial because the foil gives the solder something to stick to. I like to think of it as wrapping tiny presents—each piece gets its own shiny ribbon.
Peel the backing off the copper foil and center it along the edge of a glass piece. Press it down firmly, smoothing it with your fingers or a burnishing tool to ensure it sticks. Overlap the ends slightly and trim any excess. I’ve found that 7/32-inch foil works well for most projects, but you can adjust the width based on your glass thickness.
Take your time to avoid wrinkles or gaps. I once rushed this step and ended up with uneven solder lines that looked messy. If you’re new to foiling, practice on scrap glass first—it’s a skill that gets better with repetition.
Soldering the Pieces Together
Soldering is where your stained glass lamp shade starts to come to life. It’s also the part that feels most like magic to me. You’re turning a pile of glass pieces into a cohesive structure! Before you start, apply flux to the copper foil with a brush. This helps the solder flow smoothly.
Heat your soldering iron to the right temperature—usually around 700°F for stained glass work. Touch the iron to the solder and let a small drop melt onto the foil. Move slowly along the seams, creating a smooth, even bead. I aim for a slightly raised, rounded solder line; it looks polished and professional.
For a lamp shade, you’ll solder each panel separately, then connect them using a lamp shade mold or jig to hold the shape. I made my first shade without a mold, and let’s just say it leaned like a tipsy tower! A mold keeps everything aligned, especially for complex shapes like domes or cones.
Assembling the Lamp Shade
Assembling the panels is like putting together a 3D puzzle. Lay your soldered panels on the mold or jig, and use painter’s tape to hold them in place temporarily. Solder the seams where the panels meet, working carefully to maintain the shade’s shape. I find it helpful to tack-solder first—just a few quick dots to secure the panels—before going back to create full, smooth seams.
If your design includes a top or bottom ring (common in Tiffany-style shades), solder those on now. I use brass or copper channels for reinforcement, which also give the shade a finished look. Check that the shade fits your lamp base before finalizing the soldering. There’s nothing worse than finishing a gorgeous shade only to find it doesn’t sit right!
Adding Finishing Touches
Once your shade is assembled, it’s time to polish it up. Clean the glass thoroughly with a glass cleaner to remove flux residue and fingerprints. I use a soft cloth and a bit of elbow grease to make the glass sparkle. If you want a more refined look, apply patina to the solder lines for a black or copper finish. Just be sure to work in a well-ventilated area—patina fumes are strong!
Inspect your shade for any weak solder joints or rough edges. I’ve learned to give my projects a gentle shake to test their sturdiness. If anything wiggles, reinforce it with more solder. Finally, attach the shade to your lamp base, following the manufacturer’s instructions for your specific base.
Safety Tips for Working with Stained Glass
Safety is a big deal when making a stained glass lamp shade. Glass shards, hot solder, and chemical fumes can be hazardous if you’re not careful. Always wear safety glasses to protect your eyes from flying glass bits. I keep a pair of heavy-duty gloves handy for handling cut glass, though I take them off for detailed work like foiling.
Work in a well-ventilated space, especially when soldering or using patina. I set up a small fan to keep air moving in my workspace. Also, keep a first-aid kit nearby in case of minor cuts. Trust me, I’ve nicked my fingers more than once!
Customizing Your Lamp Shade
One of the best parts of making a stained glass lamp shade is adding your personal touch. You can play with color combinations to match your home’s decor—think warm reds and oranges for a cozy feel or cool blues and greens for a serene vibe. I once made a shade with a mix of clear and frosted glass for a client who wanted a modern twist, and it turned out stunning.
You can also experiment with textures. Beveled glass adds a prism-like effect, while iridescent glass creates a shimmering glow. If you’re feeling adventurous, incorporate glass jewels or nuggets for extra sparkle. Just make sure your design stays balanced—too many embellishments can overwhelm the lamp.
Troubleshooting Common Issues
Even with careful planning, things can go wrong. I’ve had my share of mishaps, like cracked glass or lumpy solder lines. If a glass piece breaks during cutting, don’t panic—just recut it, making sure to score deeply enough. If your solder looks uneven, reheat it and smooth it out with a steady hand.
Another common issue is a shade that doesn’t hold its shape. This usually happens if the solder joints are weak or the mold wasn’t used properly. I’ve fixed this by reinforcing seams with extra solder and double-checking the mold’s alignment. Patience is key—rushing leads to mistakes.
Maintaining Your Stained Glass Lamp Shade
Your stained glass lamp shade will last for years with proper care. Dust it regularly with a soft cloth to keep it looking vibrant. Avoid harsh chemicals that could damage the glass or solder. I clean mine with a mild glass cleaner and a microfiber cloth every few months.
If the shade gets loose on the base, check the fittings and tighten them as needed. Store the lamp in a safe place if you’re moving it—I learned this after a shade tipped over during a move and needed minor repairs.
Why Make Your Own Stained Glass Lamp Shade?
Crafting a stained glass lamp shade is more than just a project—it’s a way to create something beautiful and functional. Every time I turn on a lamp I’ve made, I feel a little spark of pride. It’s a chance to express your creativity, learn new skills, and make a piece that’s uniquely yours. Plus, handmade lamp shades make incredible gifts or conversation starters.
The process can be challenging, but that’s part of the fun. Each mistake teaches you something new, and each success feels like a victory. Whether you’re a beginner or a seasoned crafter, the glow of a finished stained glass lamp shade is worth every moment spent.
FAQs
What tools do I need to make a stained glass lamp shade?
You’ll need a glass cutter, running pliers, a grinder, soldering iron, copper foil, solder, flux, and a lamp shade mold. Safety gear like glasses and gloves is also essential.
How long does it take to make a stained glass lamp shade?
It depends on your skill level and the complexity of the design. My first shade took about 20 hours spread over a week, but with practice, I can now finish a simple one in 10-12 hours.
Can beginners make a stained glass lamp shade?
Absolutely! Start with a simple pattern and take your time. Practice cutting and soldering on scrap glass first to build confidence.
What type of glass is best for a stained glass lamp shade?
Opalescent glass is great for a soft glow, while cathedral glass is more transparent. Mix and match based on your design and lighting preferences.
How do I clean my stained glass lamp shade?
Use a soft cloth and mild glass cleaner to wipe down the shade. Avoid harsh chemicals, and clean gently to protect the solder lines.