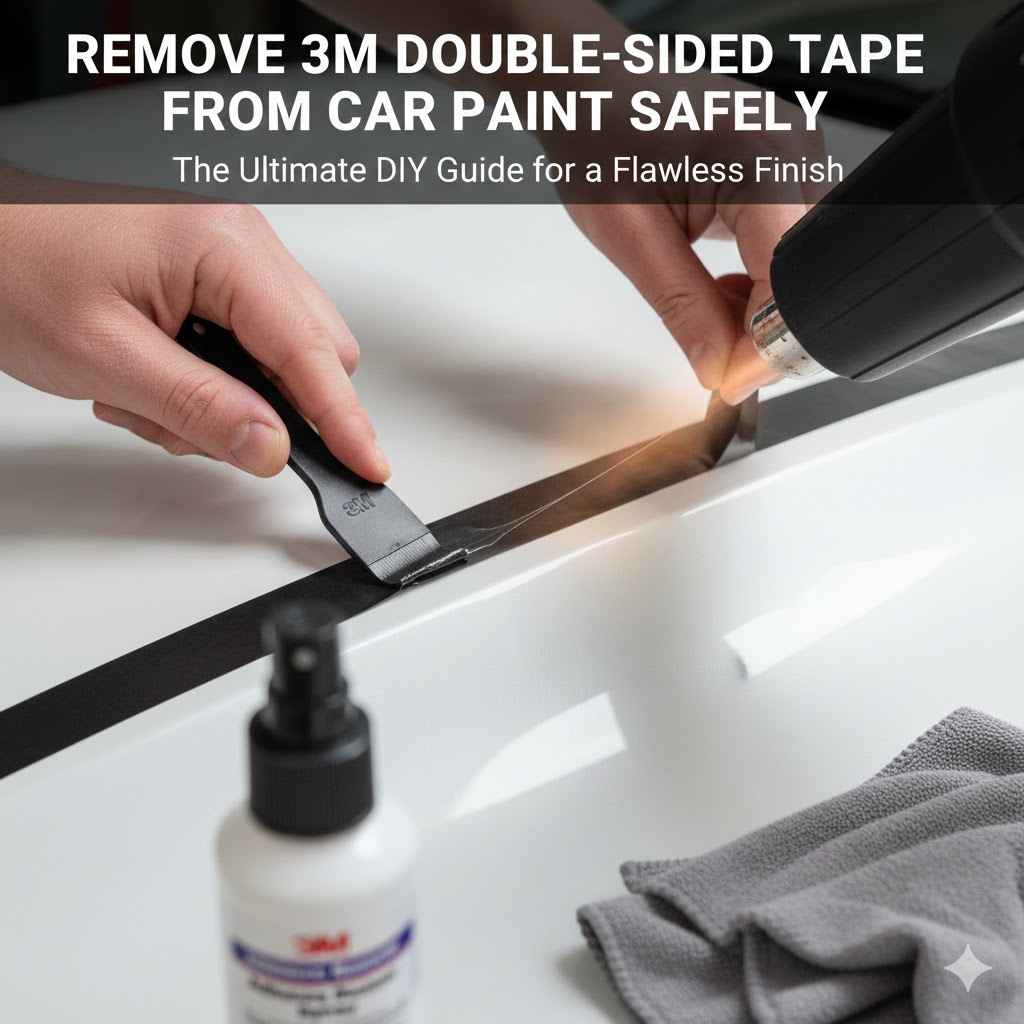
How to Remove 3M Double-Sided Tape From Car Paint Safely
If you’ve ever tried to remove 3M double-sided tape from your car’s paint, you know it can be a sticky situation, literally! It’s a common problem for anyone who adds accessories or decals to their vehicle. The tape is strong, and getting it off without damaging the paint can feel tricky. Don’t worry, though. This guide simplifies everything. We’ll show you exactly How to Remove 3M Double-Sided Tape From Car Paint with easy-to-follow steps and the right tools. Prepare to say goodbye to sticky residue and hello to a clean car surface. Let’s get started!
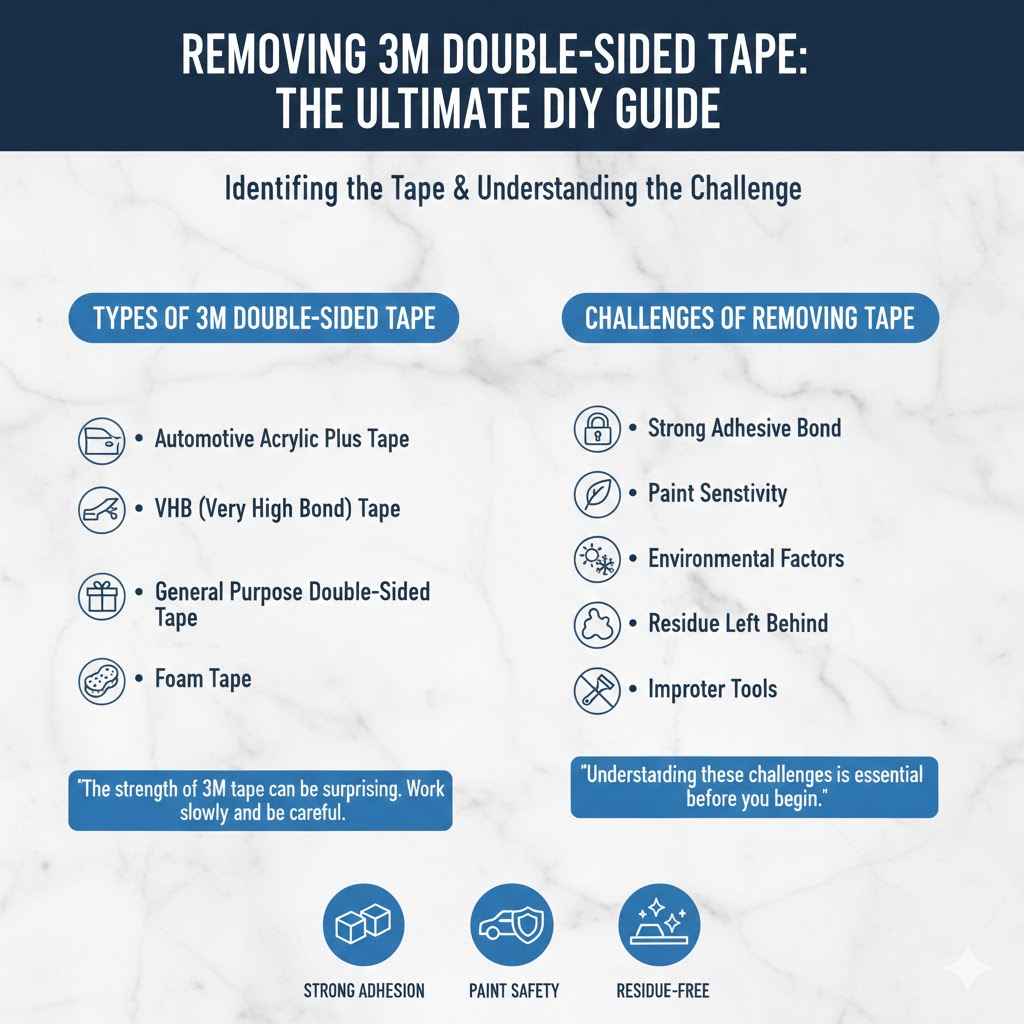
Identifying the Tape and Understanding the Challenge
Before you begin the removal process, it’s essential to understand the type of 3M tape used and the challenges involved. 3M makes various double-sided tapes, each with different adhesive strengths. Some are designed for permanent bonds, while others are for temporary use. Knowing what you’re dealing with will help you choose the appropriate method and avoid damage. Car paint itself also varies – some paints are more sensitive than others, making gentle techniques even more important. It is essential to choose the right approach to minimize the risk of scratches or paint removal.
Types of 3M Double-Sided Tape
3M offers a range of double-sided tapes, each designed for specific purposes. Identifying the exact type of tape used on your car can influence how easily it comes off. For example, the tape used for automotive trim is usually very strong. Knowing the type is helpful, but don’t worry if you aren’t sure. The methods described here work for most 3M tapes.
Automotive Acrylic Plus Tape: This tape is made for attaching exterior trim and accessories. It provides a permanent bond and offers excellent resistance to weather. Removing this type of tape requires patience and effective tools to avoid damaging the car’s paint.
VHB (Very High Bond) Tape: Known for its extreme holding power, VHB tape is used for more heavy-duty applications, such as attaching spoilers or side skirts. Its strong adhesive necessitates careful removal techniques.
General Purpose Double-Sided Tape: This is a more moderate bond tape suitable for lighter accessories or interior applications. It’s often easier to remove than the stronger automotive tapes, but care should still be taken.
- Foam Tape: Foam tapes often provide some level of cushioning. These might be found on some car accessories. They can sometimes be more fragile than other types when it comes to removal.
The strength of 3M tape can be surprising. When trying to remove any tape, remember to work slowly and be careful.
Challenges of Removing Tape
Removing 3M double-sided tape from car paint can be difficult because of the tape’s strong adhesive. Over time, the adhesive bonds firmly with the paint surface. Factors like heat and sunlight can make it even harder to remove. Incorrect removal techniques can lead to scratches, paint damage, or, in the worst-case scenario, paint removal. The surface area of the tape also plays a role – larger areas require more effort and a different strategy than smaller pieces.
Strong Adhesive Bond: The primary challenge is the strong bond the tape creates with the car’s paint. This bond is designed to be permanent, so removing it without damaging the paint requires some skills.
Paint Sensitivity: Car paints vary in their durability. Some paints are more easily scratched or damaged than others, which means extra care is needed to avoid harming the surface.
Environmental Factors: Heat from the sun can soften the adhesive, making it easier to remove, while cold temperatures can make the tape more brittle and difficult to work with.
Residue Left Behind: Even after removing the tape, there is often adhesive residue. Removing this residue without harming the paint is the final challenge in the process.
Improper Tools: Using the wrong tools, such as sharp blades or abrasive cleaners, can lead to paint scratches and damage.
Understanding these challenges is essential before you begin. Knowing the potential problems helps you choose the best methods and avoids mistakes.
Essential Tools and Materials for Safe Tape Removal
Having the right tools and materials is crucial for successfully and safely removing 3M double-sided tape from your car’s paint. Using the right tools protects the paint surface and makes the job easier. This preparation will help you work quickly and efficiently, minimizing the risk of damage. You’ll likely have many of these items around the house.
Tools to Use
Plastic Razor Blade or Scraper: These are essential for gently lifting the tape without scratching the paint. A plastic blade is less likely to damage the surface than a metal one.
Heat Gun or Hair Dryer: Applying heat softens the adhesive, making it easier to remove. A heat gun provides more focused heat, while a hair dryer is gentler but may take longer.
Microfiber Cloths: These are soft and non-abrasive, perfect for cleaning the surface and applying solvents. They help prevent scratches.
Spray Bottle: Useful for applying solvent to the tape and residue.
Gloves: Protect your hands from solvents and sticky residue.
Recommended Solvents and Cleaners
Using the correct solvents can significantly improve the removal process. Solvents break down the adhesive, making it easier to wipe away the tape and its residue. Always test any solvent in an inconspicuous area first to ensure it doesn’t damage the paint. Work in a well-ventilated space when using these solvents.
Isopropyl Alcohol (IPA): A common household item, IPA is effective for removing adhesive residue and is usually safe for car paint. It is less harsh than other solvents.
Goo Gone or Adhesive Remover: These products are specifically designed to remove adhesive residue. Follow the manufacturer’s instructions for best results.
WD-40: Often used as a solvent, WD-40 can help loosen the adhesive. Test it first to avoid any adverse reactions with the paint.
Citrus-Based Cleaners: Natural citrus cleaners are effective for some adhesive types. They’re often gentler on paint compared to stronger chemicals.
Soap and Water: For any remaining residue, a mild soap solution can often be used to give a final cleaning.
Gathering all these tools and materials before you begin will help make the tape removal process smoother and protect your car’s finish.
Step-by-Step Guide: How to Remove 3M Double-Sided Tape From Car Paint
This detailed guide will take you step-by-step through the process of removing 3M double-sided tape from your car’s paint. By following these steps, you can safely remove the tape and adhesive residue, protecting your car’s paint from damage. This process breaks down into clear stages, covering all the bases.
Preparation and Initial Assessment
Before you begin removing the tape, it’s essential to prepare the area and assess the situation. This helps determine the best approach and reduces the risk of paint damage. Taking your time here sets the stage for a successful removal process.
Park in a Shaded Area: Avoid direct sunlight, which can make the adhesive extra sticky.
Wash the Area: Clean the area around the tape with soap and water to remove dirt and debris.
Assess the Tape: Examine the tape’s condition. Is it old, cracked, or exposed to the elements? This assessment informs your approach.
Gather Supplies: Make sure all your tools and solvents are ready and within reach.
Test the Solvent: Try the chosen solvent in an inconspicuous area (like under a door handle) to check for paint damage.
These initial steps are key for a successful outcome. Taking the time to prepare will help you get the best results.
Using Heat to Soften the Adhesive
Applying heat is a critical step in making the adhesive more pliable. Heat softens the bond between the tape and the paint, making the removal process much easier and reducing the chances of damaging the car’s surface. Using heat is almost essential to successfully remove most types of 3M tape.
Apply Heat: Using a heat gun or hair dryer, apply heat to the tape. Move the heat source back and forth.
Maintain Distance: Keep the heat source at a safe distance from the paint (about 2-4 inches) to prevent overheating.
Monitor the Heat: Apply heat for short periods to test how the adhesive reacts. Overheating can damage the paint.
Feel the Adhesive: After heating for a few moments, gently touch the edge of the tape to see if it’s softening. It should feel somewhat pliable.
Heat and Lift: As the tape softens, gently try to lift an edge using a plastic scraper.
Applying heat properly can reduce the difficulty of tape removal and keep your car’s paint safe. This step is a game changer.
Lifting the Tape and Removing Adhesive Residue
Once you’ve softened the adhesive, you can begin the process of lifting the tape and removing any remaining residue. This requires patience and precision to avoid damaging the paint. Removing the tape and dealing with the residue often requires different approaches. Slow and careful work is essential here.
Lift an Edge: Using a plastic razor blade or scraper, gently lift an edge of the tape. Work slowly and try not to gouge the paint.
Peel at an Angle: Hold the scraper at a shallow angle and carefully peel the tape back, continuing to apply eat as needed.
Remove the Tape: Continue peeling the tape slowly and steadily. If it tears, reapply heat and try again.
Apply Solvent: Once the tape is removed, apply a solvent (like isopropyl alcohol or Goo Gone) to the remaining residue. Let it sit for a minute.
Wipe Away Residue: Gently wipe away the residue using a microfiber cloth. Reapply the solvent and repeat as necessary until all residue is gone.
Be patient and methodical during this stage to avoid damaging your car’s paint. Take your time, and the results will be better.
Dealing With Stubborn Residue and Post-Removal Cleaning
Sometimes, despite your best efforts, some adhesive residue might stubbornly remain on the car’s paint. Addressing this stubborn residue correctly is important to keep your car’s finish in top condition. This involves using more effective removal techniques and taking care of the area once the tape is gone.
Reapply Solvent: If the residue is persistent, apply a generous amount of solvent and let it soak for a few minutes. This can help break down the adhesive.
Use a Plastic Scraper: Gently use a plastic scraper to lift the softened residue. Avoid applying too much pressure to avoid scratches.
Try a Different Solvent: If one solvent doesn’t work, try another. Some adhesives respond better to different solvents.
Clean the Area: After removing the residue, wash the area with soap and water to remove any remaining solvent.
Wax the Area: Applying wax to the cleaned area helps protect the paint and restore its shine.
Patience and the right approach are necessary for removing stubborn residue. Getting the area clean is a step toward having a well-maintained car.
Common Mistakes to Avoid
While removing 3M double-sided tape from car paint can be done easily, certain common mistakes can lead to problems. Knowing these mistakes in advance can help you avoid them, protecting your car’s paint and making the process go more smoothly. Avoiding these errors will greatly increase your chance of success.
Using Sharp Objects
Using sharp objects, such as metal razor blades or knives, is a big mistake. The risk of scratching or gouging the paint is high. Always opt for plastic scrapers or razor blades made for automotive use. It’s much safer and more effective.
Risk of Scratches: Metal objects are likely to scratch the paint.
Paint Damage: Sharp edges can cut into the paint.
Recommended Tools: Use plastic scrapers or specialized automotive razor blades instead.
Applying Excessive Heat
Applying too much heat can cause damage to the paint. Excess heat can warp, blister, or even remove the paint. It’s important to control the temperature and keep the heat source at a safe distance from the car’s surface. A good rule of thumb is to keep the heat moving and stop as soon as the tape softens.
Overheating Paint: Heat can change the paint’s texture and appearance.
Paint Distortion: Heat can also warp the paint.
Heat Source Control: Maintain a safe distance and move the heat source.
Rushing the Process
Rushing the removal process is a common error that can lead to scratches and incomplete residue removal. Taking your time, working carefully, and following each step properly ensures a better outcome. Take your time and be patient.
Increased Risk of Damage: Rushing increases the likelihood of scratches and paint damage.
Incomplete Removal: Rushing can lead to some tape or residue left behind.
Patience Pays Off: Work carefully and methodically through each step.
Using Abrasive Cleaners
Using harsh or abrasive cleaners can damage the car’s paint, leaving scratches or a dull finish. Instead, use gentle cleaners that are safe for automotive finishes. Choosing the right cleaner is a good way to keep your car looking its best.
Paint Deterioration: Abrasive cleaners remove the clear coat.
Scratches: Abrasive cleaners can scratch the paint.
Safe Alternatives: Choose mild soaps or cleaners formulated for cars.
Ignoring Safety Precautions
Ignoring safety precautions can expose you to harmful chemicals and pose risks. Always work in a well-ventilated area and wear gloves to protect your skin. These simple precautions can make the entire process safer.
Chemical Exposure: Solvents can be hazardous if inhaled or absorbed through the skin.
Protective Measures: Always use gloves and work in a well-ventilated space.
Avoiding these common mistakes helps ensure a successful outcome and protects your car’s finish.
Alternative Methods for Tape Removal
While the standard method described above is usually effective, other methods can be helpful in specific situations. Some methods use alternative tools or combine different techniques. It is good to explore these methods for a broader toolkit.
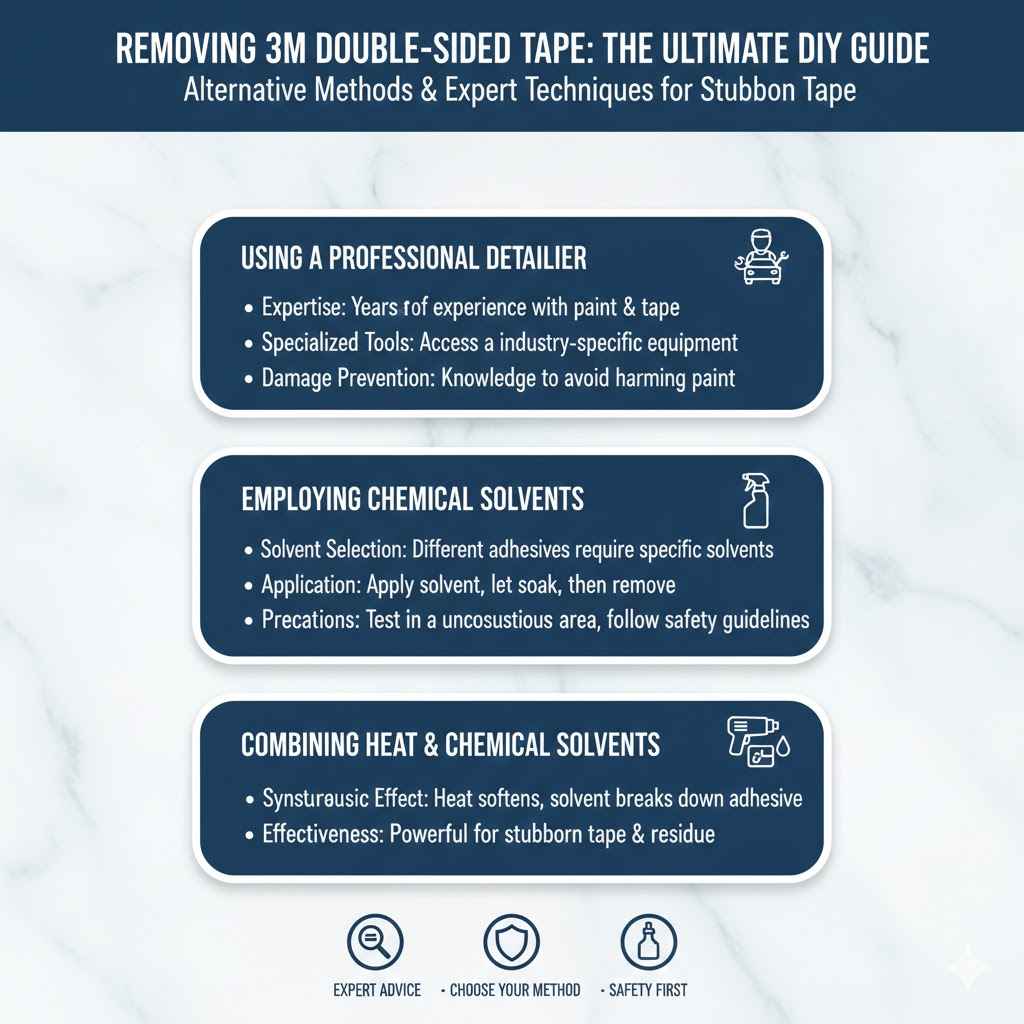
Using a Professional Detailer
When you’re not confident in your abilities, or if the tape is particularly stubborn, consider bringing in a professional detailer. Detailers have experience, the right tools, and the knowledge to remove tape safely without causing damage. It may cost money, but it may be worth the expense if your car is valuable or the job is complicated.
Expertise: Detailers have years of experience with paint and tape.
Specialized Tools: Detailers use special tools that are not typically available.
Damage Prevention: Detailers have knowledge and expertise to avoid damage.
Employing Chemical Solvents
Chemical solvents can be very effective in breaking down the adhesive. Some are more effective than others. Always test the solvent on an area that is not visible before use. Be sure to follow all the safety precautions and directions. These can be helpful when dealing with stubborn residue.
Solvent Selection: Different adhesives require different solvents.
Application: Apply the solvent and let it soak for some time.
Precautions: Always test solvents and follow the safety guidelines.
Combining Heat and Chemical Solvents
Combining heat and chemical solvents can create a one-two punch against stubborn adhesives. Apply heat to soften the adhesive, then use a solvent to break it down. These methods, in combination, can be very powerful when trying to get tape off.
Synergistic Effect: The heat softens the adhesive and the solvent breaks it down.
Application Method: Use heat first, then apply the solvent.
Effectiveness: This is a powerful combination for stubborn tape and residue.
By exploring these alternative methods, you can tailor your approach to the specific type of tape and your comfort level.
Frequently Asked Questions
Question: Can I use a razor blade to remove the tape?
Answer: It’s generally not recommended to use a standard razor blade, as it increases the risk of scratching your car’s paint. However, a plastic razor blade designed for automotive use is safer.
Question: What’s the best solvent for removing 3M tape?
Answer: Isopropyl alcohol (IPA) is often effective and safe for most car paints. Goo Gone or adhesive removers specifically designed for automotive use are also good choices.
Question: How can I prevent scratches when removing the tape?
Answer: Always use plastic scrapers or razors, apply heat carefully, work slowly, and keep the blade at a shallow angle. Be patient and take your time.
Question: Can I use a hairdryer instead of a heat gun?
Answer: A hairdryer can be used, but it might take longer than a heat gun. Heat guns provide more concentrated heat, so they are generally more efficient.
Question: What if the tape leaves a sticky residue?
Answer: Apply a solvent like IPA or Goo Gone, let it sit for a minute, and then gently wipe away the residue with a microfiber cloth. Repeat if necessary.
Final Thoughts
Removing 3M double-sided tape from car paint can be a straightforward process when you know the steps. Start by gathering the right tools, like plastic scrapers and appropriate solvents. Preparation is key; make sure the area is clean and the tape’s condition has been evaluated. Apply heat to soften the adhesive, making it easier to lift the tape without damaging the paint. Remember to work slowly and carefully, using a plastic scraper at a shallow angle to avoid scratches. Once the tape is removed, tackle any remaining residue with a solvent and finish with a cleaning to restore your car’s look.
Now, you’re ready to tackle that sticky situation with confidence. Have the right tools and patience, and you’ll be well on your way to a clean and flawless finish. Don’t be afraid to take your time and, when in doubt, consult a professional detailer. With a bit of care, you can restore your car’s paint to its original glory. Good luck!