How to Remove Glued Labels From Plastic Containers Genius
To remove glued labels from plastic containers, soak the container in hot, soapy water for 15-30 minutes to loosen the paper. Peel off what you can, then apply cooking oil or rubbing alcohol to a cloth and rub the remaining sticky residue in a circular motion until the glue dissolves and wipes away cleanly.
Have you ever bought a brand-new plastic container, only to spend the next 20 minutes picking at a stubborn price tag? That sticky, gummy residue left behind can be incredibly frustrating. It attracts dirt and lint, making your clean container look messy before you’ve even used it. You try to scrape it with your fingernail, but it just smears. Sound familiar? Don’t worry, you’re not alone. This is a common problem, but the good news is that it has a very simple solution.
In this guide, I’ll walk you through several genius, no-fuss methods to get those labels and their sticky glue off for good. We’ll use simple items you probably already have in your kitchen. Let’s make those containers look brand new again!
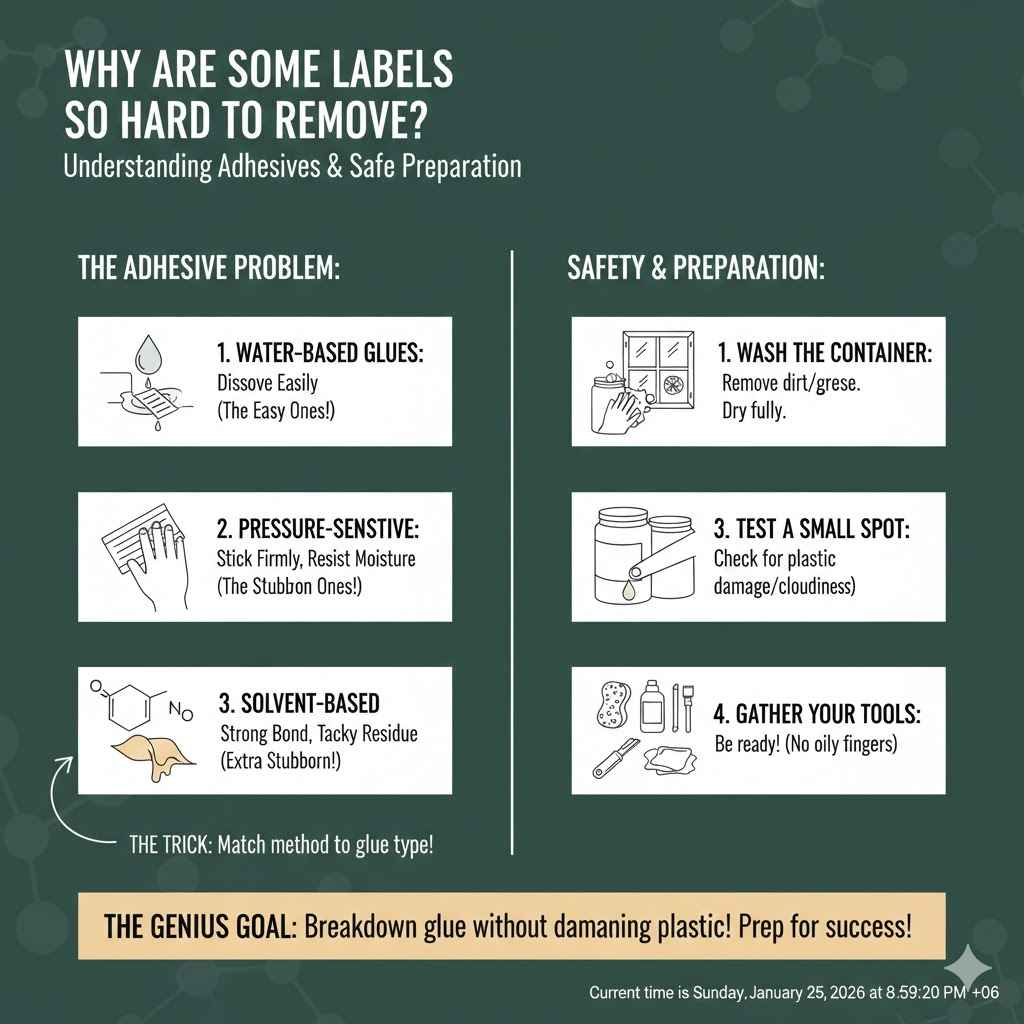
Why Are Some Labels So Hard to Remove?
Before we jump into the solutions, it helps to understand what we’re up against. The problem isn’t usually the paper label itself; it’s the adhesive—the glue—holding it onto the plastic. Manufacturers use different types of glues depending on the product and the type of plastic.
Some adhesives are water-based, which means they dissolve easily in water. These are the easy ones! Others are pressure-sensitive or solvent-based, which are designed to stick firmly and resist moisture. These are the stubborn ones that leave behind that tacky, messy film. The trick is to use a method that breaks down the specific type of glue you’re dealing with, without damaging the plastic underneath.
Safety and Preparation First!
Before you start any project, even a small one like this, a little prep goes a long way. It ensures you get great results safely and without making a mess. Here’s what to do first:
- Wash the Container: Give the plastic container a quick wash with soap and water to remove any dirt or grease. This helps the label removal methods work more effectively. Dry it completely.
- Work in a Ventilated Area: If you plan to use solvents like rubbing alcohol, it’s always a good idea to have some fresh air circulating. Open a window or work near a fan.
- Test a Small Spot: Some plastics can be sensitive. Before applying any substance to the entire label area, test it on a small, hidden spot first (like the bottom of the container). Rub a tiny bit on and wait a few minutes to make sure it doesn’t cause cloudiness, discoloration, or damage.
- Gather Your Tools: Having everything you need ready will make the process smooth and fast. You don’t want to be hunting for a cloth with oily fingers!
Method 1: The Hot Water and Dish Soap Soak
This is the simplest method and should always be your first try. It’s perfect for water-based glues and works surprisingly often. It requires a bit of patience but almost no effort.
What You’ll Need:
- A sink, basin, or bucket large enough to submerge the container
- Hot water (as hot as your tap will safely provide)
- Dish soap
- A soft cloth or sponge
Step-by-Step Instructions:
- Fill Your Basin: Fill a sink or basin with hot water. Add a generous squirt of dish soap and swish it around to create some suds.
- Submerge the Container: Place the plastic container in the hot, soapy water. Make sure the label is completely underwater. If the container floats, you can place something heavy inside it (like a mug) to keep it submerged.
- Let It Soak: Leave the container to soak for at least 30 minutes. For really stubborn labels, you can leave it for a few hours or even overnight. The hot water will soften the paper and the soap will help break down the adhesive.
- Peel and Wipe: After soaking, most of the label should peel or slide off easily. Use your fingers or a soft cloth to rub away any remaining paper and glue. If a little sticky residue remains, you can move on to one of the other methods below.
Method 2: The Cooking Oil Trick
If the hot water soak didn’t get rid of all the sticky stuff, your next stop is the kitchen pantry. Oil is fantastic at dissolving adhesives that are not water-soluble. It breaks down the gummy residue, allowing you to wipe it right off.
What You’ll Need:
- Cooking oil (any kind will work: vegetable, olive, canola, or coconut oil)
- A paper towel or soft cloth
- Dish soap and water for cleaning up
Step-by-Step Instructions:
- Peel Off the Paper: First, remove as much of the paper part of the label as you can. If needed, you can soak it in water first to help with this step. The goal is to expose the sticky adhesive layer underneath.
- Apply the Oil: Dab a small amount of cooking oil onto a paper towel or directly onto the sticky residue.
- Rub It In: Rub the oil into the glue using a firm, circular motion. You should feel the adhesive starting to dissolve and clump together. Add more oil if needed. Keep rubbing until all the stickiness is gone.
- Wash and Dry: Once the residue is gone, the area will be oily. Simply wash the container with warm water and dish soap to remove the excess oil. Dry it, and it will look perfect!
Method 3: The Baking Soda and Oil Paste
For truly tough, dried-on glue, combining the dissolving power of oil with a gentle abrasive like baking soda creates a powerful, non-toxic cleaning paste. This method is a fan favorite for good reason—it works wonders.
What You’ll Need:
- Baking soda
- Cooking oil
- A small bowl for mixing
- A soft cloth or your fingers
Step-by-Step Instructions:
- Create the Paste: In a small bowl, mix equal parts baking soda and cooking oil. Stir them together until you have a thick paste, similar in consistency to toothpaste.
- Apply the Paste: Smear the paste over the entire sticky area. Don’t be shy; lay it on thick so it completely covers the residue.
- Let It Sit: Allow the paste to sit on the adhesive for at least 30 minutes. This gives the oil time to break down the glue and the baking soda time to work its magic. For very stubborn spots, an hour is even better.
- Scrub Gently: Using a soft cloth or your fingers, scrub the area in a circular motion. The baking soda provides a gentle abrasion that lifts the softened glue without scratching the plastic.
- Wipe and Wash: Wipe away the paste and dissolved glue with a paper towel. Then, wash the container thoroughly with hot, soapy water to remove any remaining oil and baking soda.
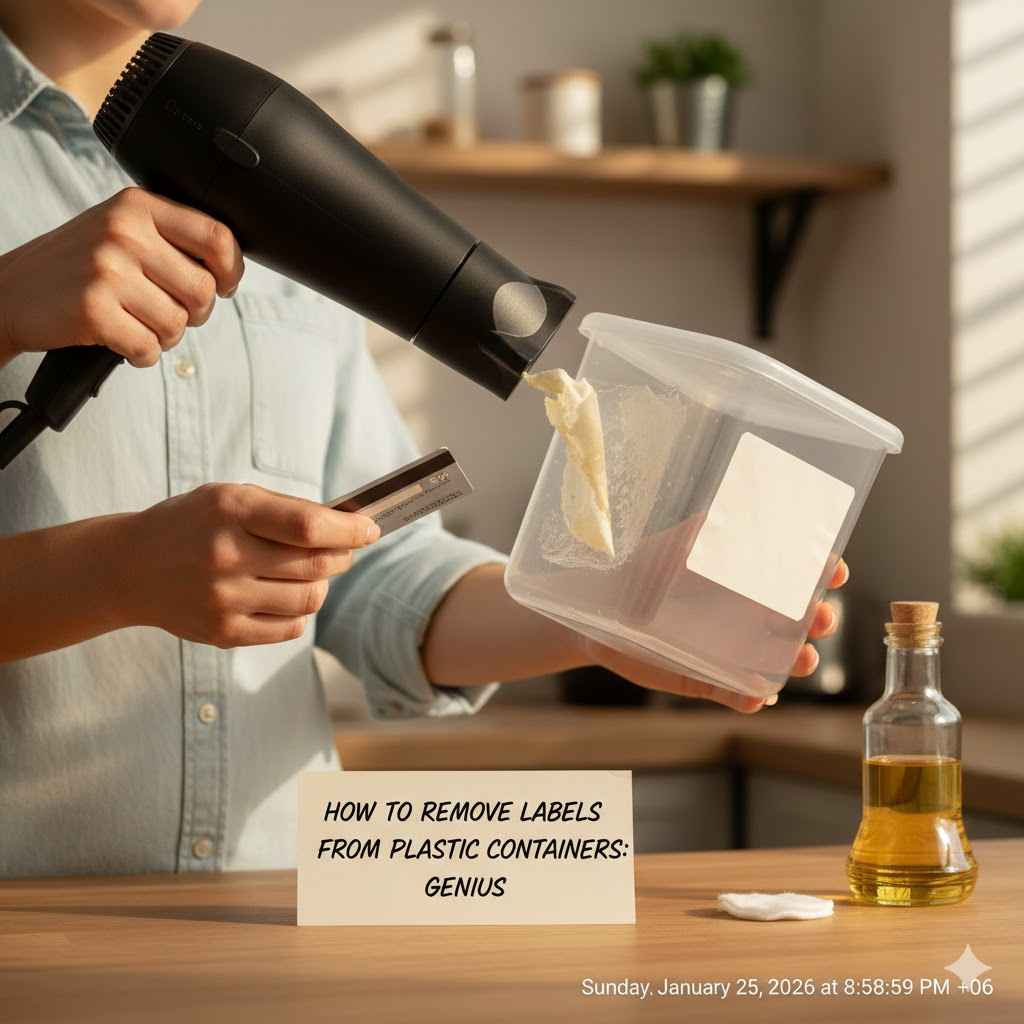
Method 4: Using a Hair Dryer for a Clean Peel
Sometimes the best approach is to prevent the residue from being left behind in the first place. Heat can soften the adhesive, allowing you to peel off the entire label in one clean piece. This method works best on foil or plastic-coated labels.
What You’ll Need:
- A hair dryer
- A plastic scraper, old credit card, or your fingernail
Step-by-Step Instructions:
- Heat the Label: Turn your hair dryer on to a medium or high heat setting. Hold it about 2-3 inches away from the label.
- Move It Around: Move the hair dryer back and forth over the entire surface of the label for about 30-45 seconds. Pay special attention to the edges. The heat will soften the glue underneath. Be careful not to hold it in one spot for too long, as excessive heat can warp thin plastic.
- Peel a Corner: Use your fingernail or a plastic scraper to gently lift one corner of the label. If it lifts easily, you’re ready to go. If it still feels stuck, apply a little more heat.
- Peel Slowly: Once you have a corner lifted, pull the label off slowly and steadily. Continue applying gentle heat with the hair dryer just ahead of where you are peeling. This keeps the glue soft as you go. The label should come off cleanly, leaving little to no residue behind.
- Clean Up: If any small bits of glue remain, you can easily remove them with a bit of oil or rubbing alcohol on a cloth.
Method 5: Solvents for the Toughest Jobs
When all else fails, it’s time to bring in something stronger. Solvents like rubbing alcohol (isopropyl alcohol) or white vinegar are excellent at dissolving stubborn, sticky adhesives. Remember to always test these on a small, hidden area of the plastic first.
What You’ll Need:
- Rubbing alcohol (70% isopropyl is fine) OR white vinegar
- A cotton ball, paper towel, or soft cloth
Step-by-Step Instructions:
- Test First: Dab a small amount of the solvent on an inconspicuous area of the container to ensure it doesn’t damage the plastic. Wait a minute or two to check for any adverse reactions.
- Saturate the Glue: Soak a cotton ball or the corner of a cloth with your chosen solvent (alcohol or vinegar).
- Apply and Wait: Press the soaked cloth onto the sticky residue and hold it there for a few minutes. This allows the solvent to penetrate and break down the adhesive.
- Wipe It Away: Rub the area in a circular motion. The glue should start to dissolve and ball up, making it easy to wipe away. Reapply more solvent if necessary. According to the EPA’s Safer Choice program, it’s always wise to use products with safer chemical ingredients when possible, and simple solvents like vinegar and alcohol are often effective household choices.
- Final Wash: After the residue is gone, wash the container with soap and water to remove any lingering solvent smell and residue.
Comparing the Methods: Which One Is Right for You?
Feeling a bit overwhelmed with options? Don’t be! Here is a simple table to help you choose the best method for your situation.
| Method | Best For | Pros | Cons |
|---|---|---|---|
| Hot Water & Soap | New labels, paper labels, water-based glues | Easiest method, no special ingredients needed | May not work on strong, waterproof adhesives |
| Cooking Oil | Sticky, gummy residue left after peeling | Very gentle on plastic, uses common kitchen items | Can be messy, requires a final wash |
| Baking Soda Paste | Dried-on, stubborn adhesive patches | Non-toxic, highly effective, gentle scrubbing power | Requires mixing and a bit more effort |
| Hair Dryer | Plastic or foil labels you want to remove in one piece | Quick, clean, prevents residue from the start | Risk of warping thin plastic if overheated |
| Solvents (Alcohol/Vinegar) | The toughest, most stubborn glue residue | Very powerful and dissolves glue quickly | Must test first as it can damage some plastics |
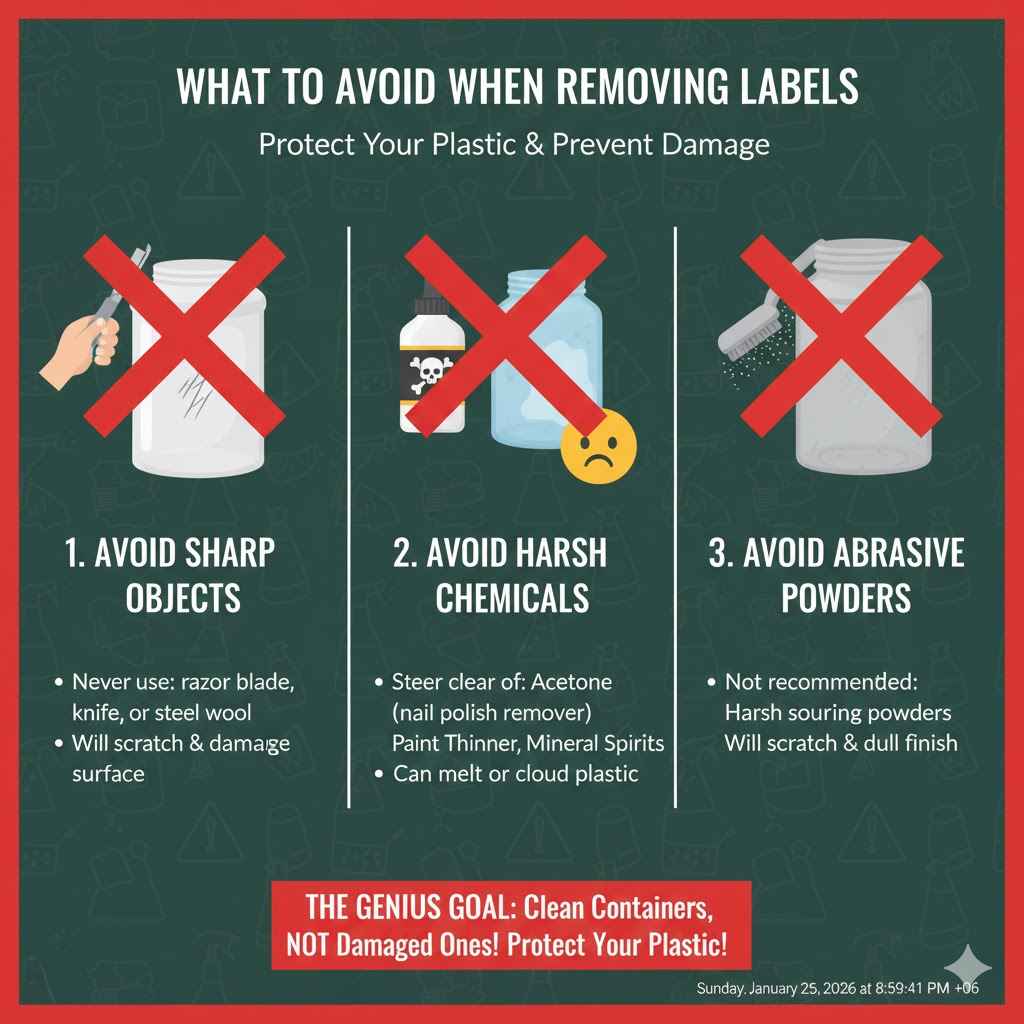
What to Avoid When Removing Labels
While trying to get your containers clean, it’s important to avoid doing more harm than good. Here are a few things you should not do:
- Avoid Sharp Objects: Never use a razor blade, knife, or steel wool to scrape labels off plastic. These will almost certainly scratch and permanently damage the surface.
- Avoid Harsh Chemicals: Steer clear of aggressive chemical solvents like acetone (nail polish remover), paint thinner, or mineral spirits unless you are absolutely sure they are safe for the specific type of plastic you are working with. Most of the time, they will melt or cloud the plastic.
- Avoid Abrasive Powders: While baking soda is a gentle abrasive, harsh scouring powders can scratch and dull the finish of your plastic containers.
Frequently Asked Questions (FAQ)
1. Can I use peanut butter to remove label residue?
Yes, you can! This is a popular life hack that works for the same reason cooking oil does. The oils in the peanut butter help dissolve the adhesive. Just apply a layer, let it sit for a bit, and then wipe it off. It can be a bit messier than plain oil, but it is effective.
2. Will these methods work on glass jars too?
Absolutely! All of the methods described here—soaking, oil, baking soda paste, heat, and solvents—work wonderfully on glass jars and bottles. In fact, since glass is less sensitive than plastic, you can use hotter water and stronger solvents without worry.
3. How do I know which type of plastic my container is made of?
Look for the recycling symbol on the bottom of the container. It’s usually a triangle with a number inside (1 through 7). While this won’t tell you exactly how it will react to solvents, plastics like #6 (polystyrene) are notoriously sensitive to chemicals, while #2 (HDPE) and #5 (polypropylene) are generally much more durable.
4. The rubbing alcohol made my clear plastic container cloudy. Can I fix it?
Unfortunately, if a solvent has hazed or clouded the plastic, the damage is often permanent. This is why testing on a small, hidden spot is so important. The cloudiness is a chemical reaction that has etched the surface of the plastic.
5. How long should I let the oil or paste sit on the glue?
A good rule of thumb is to let it sit for at least 15-30 minutes. This gives the oil enough time to penetrate and break down the glue. For very old, hardened adhesive, leaving it on for an hour or even longer can make removal much easier.
6. Can I use essential oils to remove stickers?
Yes, citrus-based essential oils, especially lemon or orange oil, are excellent at dissolving adhesives. They contain a natural solvent called limonene. Just put a few drops on a cloth and rub away the residue. Be sure to wash the area with soap and water afterward.
7. Is there a commercial product that works well?
There are several commercial adhesive removers available, like Goo Gone or WD-40, that are very effective. However, they are stronger chemical products. Always read the label to ensure they are safe for plastic, use them in a well-ventilated area, and follow the safety precautions. The DIY methods are often just as effective and use items you already have at home.
Conclusion: Enjoy Your Clean, Sticky-Free Containers!
There you have it! With just a few simple household items and a little bit of patience, you can conquer even the most stubborn glued-on labels. No more fighting with sticky residue or hiding a brand-new container because of a messy-looking price tag. From a simple hot water soak to a powerful baking soda paste, you now have a full toolkit of techniques to keep all your plastic containers looking clean and pristine.
The next time you’re faced with a frustrating label, you can approach it with confidence. Start with the gentlest method first and work your way up if you need to. Soon, removing labels will become a quick and satisfying task instead of a sticky struggle. Happy organizing!