How To Remove Permanent Marker From Hardwood Floor: Secret
To remove permanent marker from a hardwood floor, gently rub the stain with a small amount of isopropyl (rubbing) alcohol on a soft, clean cloth. Work from the outside of the mark inward to prevent spreading. For a gentler option, draw over the stain with a dry erase marker and wipe immediately. Always test any method on a hidden spot first.
Hello friend! It’s Md Meraj here. That moment your heart sinks when you spot a dark, bold permanent marker stain on your beautiful hardwood floor is something many of us have experienced. It feels like a disaster, a permanent mistake that will stare back at you forever. But I’m here to tell you not to worry. Getting that stubborn ink out is much easier than you think, and you likely already have the secret solution in your home right now. You don’t need harsh chemicals or expensive services.
In this guide, I’ll walk you through several simple, safe, and incredibly effective methods to lift that permanent marker stain right off your wood floors. We’ll cover the go-to techniques, what tools you’ll need, and how to protect your floor’s finish in the process. Ready to make that stain disappear for good? Let’s get started!
Understanding Your Hardwood Floor and the Stain
Before we jump into cleaning, let’s take a quick look at what we’re working with. Not all hardwood floors are the same, and understanding your floor’s finish is the key to choosing the right method. The finish is the protective top layer, and our goal is to remove the ink without harming it.
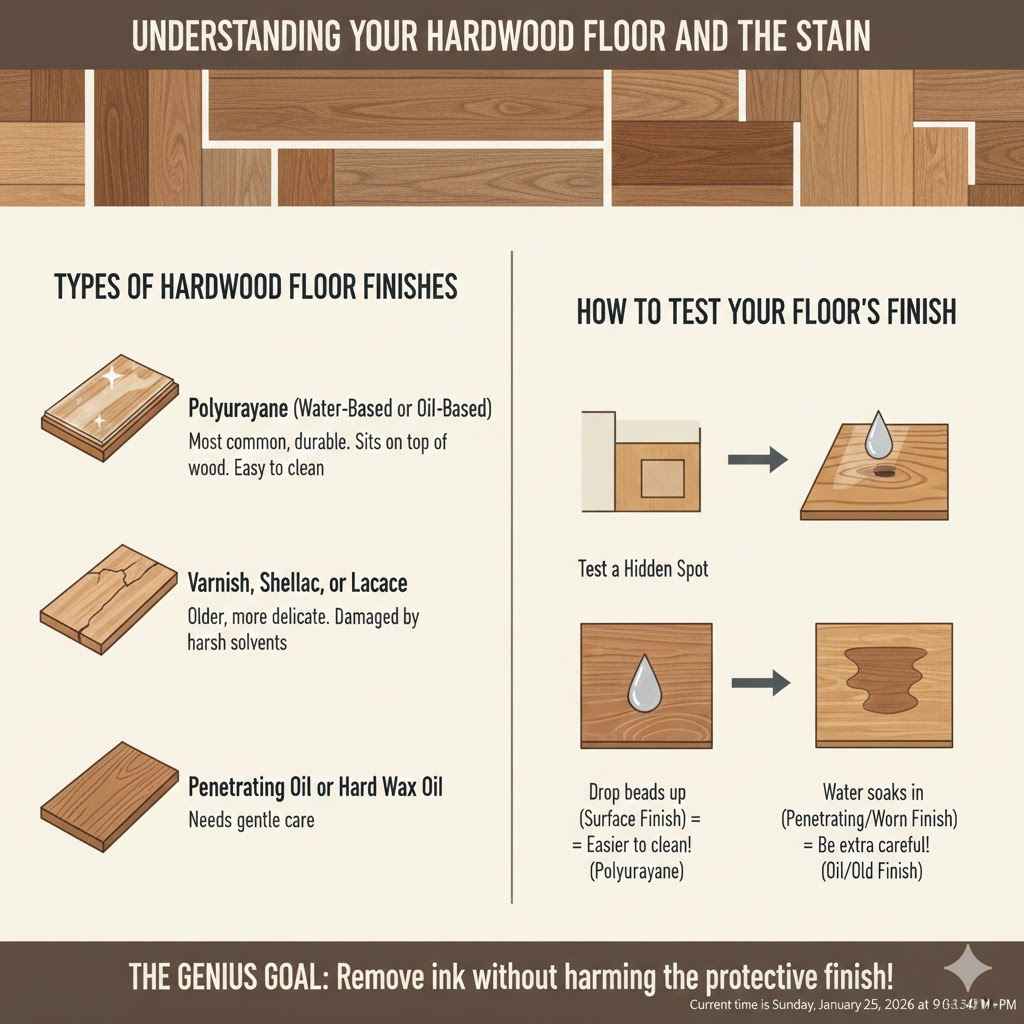
Types of Hardwood Floor Finishes
Most modern hardwood floors have a surface finish, which creates a protective barrier over the wood. Older floors might have a penetrating finish, which soaks into the wood itself.
- Polyurethane (Water-Based or Oil-Based): This is the most common finish today. It’s durable and sits on top of the wood like a clear coat of armor. It offers excellent protection against stains and is relatively easy to clean.
- Varnish, Shellac, or Lacquer: These are older types of finishes. They can be more delicate and may be damaged by harsh solvents like alcohol. It’s extra important to be gentle with these floors.
- Penetrating Oil or Hard Wax Oil: These finishes soak into the wood pores to protect from within, often leaving a more natural, low-sheen look. They need gentle care and can be more susceptible to certain cleaners.
How to Test Your Floor’s Finish
Not sure what you have? Here’s a simple test. In a hidden spot (like under a rug or in a closet), place a single drop of water on the floor.
- If the drop beads up and sits on the surface, you likely have a modern polyurethane or other surface finish. Good news! These are easier to clean.
- If the water soaks in after a few minutes and leaves a dark spot, you probably have a penetrating oil or an old, worn-out finish. You’ll need to be much more careful.
The Golden Rule: Always Test First!
I can’t say this enough: before you try any cleaning method on the visible stain, always test it on an inconspicuous area first. This simple step can save you from accidentally damaging your floor’s finish, which is a much bigger problem than a marker stain. A small spot in a closet, under a heavy piece of furniture, or beneath a rug is perfect for this test.
Apply a tiny amount of your chosen cleaner, follow the steps, wipe it clean, and let it dry completely. Check for any discoloration, dullness, or damage to the finish. If it looks good, you’re ready to tackle the main event.
Tools and Materials You’ll Need
The best part about these methods is that you probably have everything you need already. No need for a special trip to the store. Gather these simple supplies:
- Soft, clean cloths (microfiber cloths work wonders)
- Cotton balls or cotton swabs
- Your chosen cleaning agent (we’ll cover these next)
- A small bowl of clean water
- A dry, clean towel for buffing
Now, let’s explore the methods, starting with the safest and gentlest options first.
Method 1: The Surprising Dry Erase Marker Trick
This sounds strange, but it’s my secret weapon and often the most effective method for floors with a strong surface finish. The solvent in a dry erase marker is designed to be non-permanent, and it can dissolve the permanent ink, making it easy to wipe away.
Why This Works
Permanent markers use a pigment and a strong adhesive solvent that sticks to surfaces. The solvent in a dry erase marker contains non-polar molecules that can break down that adhesive, essentially “re-wetting” the permanent ink. For a deeper dive into how solvents work, check out this educational resource on solvents from the American Chemical Society.
Step-by-Step Instructions:
- Choose Your Weapon: Grab a dry erase marker. A black one works best, as it helps you see exactly where you’ve applied it.
- Color Over the Stain: Carefully and completely draw over the permanent marker stain with the dry erase marker. Make sure you cover every bit of the ink.
- Wipe Immediately: Don’t wait! As soon as you’ve colored it in, take a clean, soft cloth and wipe the area firmly. The dry erase ink and the permanent marker ink should lift off together.
- Clean the Area: Use a separate, damp cloth to wipe away any remaining residue.
- Dry and Buff: Finish by drying the spot with a clean towel to restore its shine.
Method 2: Isopropyl (Rubbing) Alcohol
Rubbing alcohol is the classic solution for permanent marker stains on non-porous surfaces. It’s an excellent solvent that dissolves the ink quickly. However, you must be cautious, as it can potentially dull some older floor finishes if used improperly.
Step-by-Step Instructions:
- Prepare the Alcohol: Pour a small amount of isopropyl alcohol (70% is fine, but 90%+ works faster) onto a cotton ball or the corner of a soft cloth. Don’t pour it directly onto the floor.
- Dab, Don’t Rub: Gently dab the stain with the alcohol-soaked cotton ball. You should see the ink start to transfer from the floor to the cotton.
- Wipe Gently: Once the ink starts to dissolve, switch to a clean part of your cloth and wipe the stain gently. Work from the outside edges of the stain inward to avoid spreading it.
- Repeat if Necessary: For stubborn stains, you may need to repeat the process with a fresh cotton ball. Don’t apply too much pressure or scrub harshly.
- Rinse and Dry: After the stain is gone, wipe the area with a cloth dampened with clean water to remove any alcohol residue. Immediately dry the spot with a clean towel.
| Method | Best For | Pros | Cons |
|---|---|---|---|
| Dry Erase Marker | Floors with a strong polyurethane finish | Very gentle; surprisingly effective; no harsh chemicals | May not work on older, more porous stains or finishes |
| Isopropyl Alcohol | Most modern sealed hardwood floors | Highly effective solvent; works quickly on fresh stains | Can potentially damage or dull delicate finishes if overused |
| Toothpaste & Baking Soda | Tougher, set-in stains on durable finishes | Mildly abrasive to lift stubborn ink; readily available | Requires careful application to avoid scratching the finish |
| Lemon Essential Oil | Sealed finishes; for a natural approach | Natural and chemical-free; smells great; gentle on most finishes | Slower to work; may leave an oily residue that needs cleaning |
Method 3: The White Toothpaste and Baking Soda Paste
If the alcohol didn’t quite do the trick, a mild abrasive might be needed. A paste made from non-gel white toothpaste and baking soda can gently scrub the ink away. Use this method with care, as any abrasive carries a small risk of creating micro-scratches.
Why This Works
White toothpaste (not the gel kind) contains very fine abrasives designed to polish tooth enamel. When combined with baking soda, it creates a gentle scouring paste that can physically lift the ink particles from the surface of the floor’s finish without being overly harsh.
Step-by-Step Instructions:
- Create the Paste: In a small bowl, mix a dab of white toothpaste with an equal amount of baking soda. Stir until it forms a smooth paste.
- Apply the Paste: Using your finger or a soft cloth, apply a small amount of the paste directly onto the permanent marker stain.
- Rub Gently: With a clean, damp cloth, rub the paste into the stain using a gentle circular motion. Apply minimal pressure. You are polishing, not sanding!
- Let It Sit (Briefly): Let the paste sit on the stain for just a minute or two. Don’t let it dry out.
- Wipe Clean: Use a clean, damp cloth to wipe away the paste and the dissolved ink. You may need to rinse your cloth and wipe a few times.
- Dry and Inspect: Thoroughly dry the area with a towel and check your work. Repeat if a faint mark remains, but be gentle.
Method 4: Using Lemon Essential Oil
For a more natural approach, lemon essential oil can be a great option. The d-limonene in the oil acts as a natural solvent that can break down the ink. Plus, it leaves your room smelling fresh and clean!
Step-by-Step Instructions:
- Apply the Oil: Put a few drops of pure lemon essential oil directly onto the permanent marker stain.
- Let It Soak: Allow the oil to sit on the mark for 3-5 minutes. This gives the d-limonene time to work on the ink’s adhesive.
- Wipe Away: Take a clean, dry cloth and wipe the area firmly. The ink should begin to lift.
- Clean the Residue: Essential oils can leave a slight residue. Clean the area afterward with a cloth lightly dampened with water and a tiny drop of mild dish soap.
- Rinse and Dry: Wipe with a water-dampened cloth to rinse, then dry completely with a clean towel.
What to Do if the Stain Remains
If you’ve tried the gentle methods and a faint shadow of the stain is still there, don’t panic. Sometimes, a stain that has been sitting for a long time can be incredibly stubborn. At this point, you have two options:
- Repeat the Gentlest Method: Sometimes, a second or third application of the dry erase marker or isopropyl alcohol will finally lift the last remnants of the ink. Patience is key.
- Consider Professional Help: If the stain won’t budge or if you’ve accidentally damaged the finish, it may be time to consult a professional floor refinisher. They have specialized tools and knowledge to repair the finish or address the stain without causing further damage. For more on professional care, the National Wood Flooring Association offers resources for homeowners.
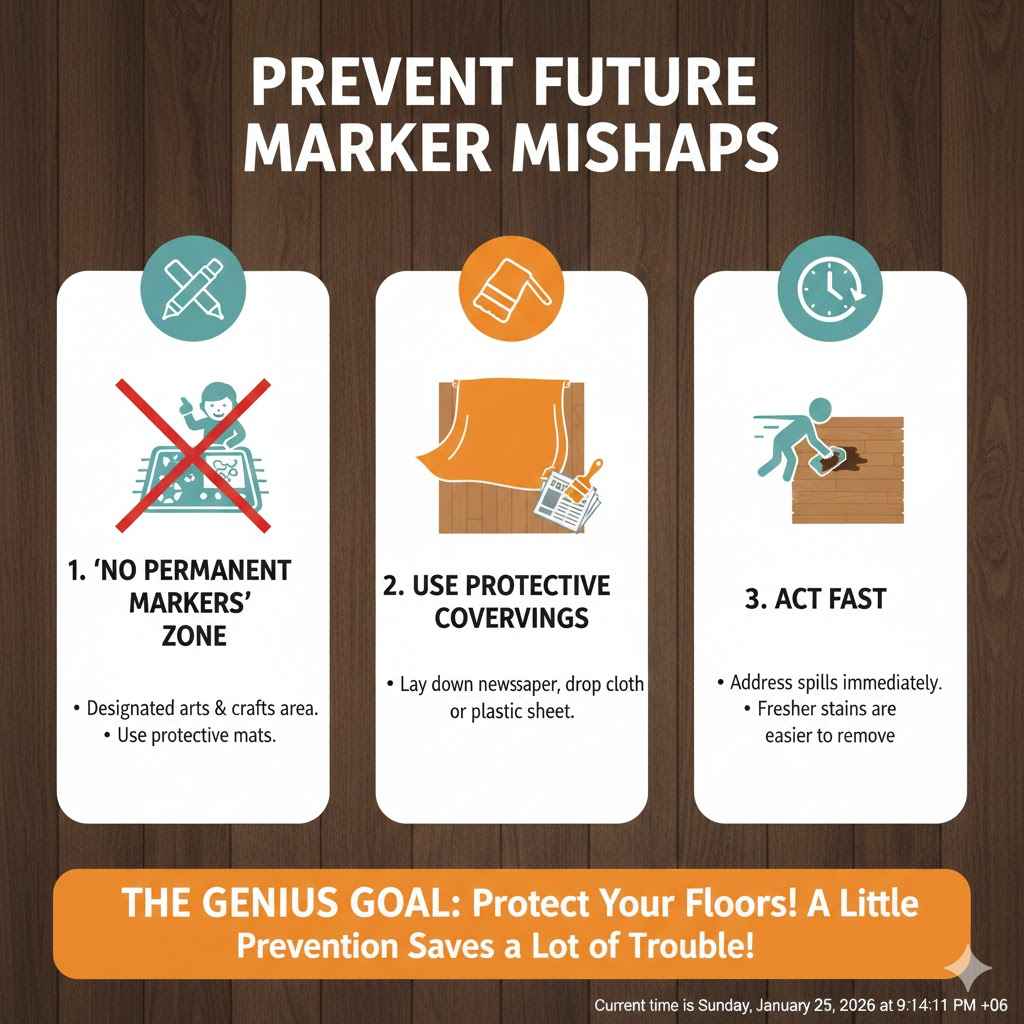
How to Prevent Future Marker Mishaps
The best way to fix a stain is to prevent it from happening in the first place! Here are a few simple tips to keep your beautiful hardwood floors safe:
- Establish a “No Permanent Markers” Zone: For households with kids, create a designated arts and crafts area on a tile floor or use a protective mat.
- Use Protective Coverings: When you or your family are working on projects, always lay down newspaper, a drop cloth, or a plastic sheet to protect the floor.
- Act Fast: If a marker accident does happen, address it immediately. The fresher the stain, the easier it is to remove. Ink that has had time to cure is much harder to lift.
Frequently Asked Questions (FAQ)
Can I use a magic eraser on my hardwood floor?
I strongly advise against using a magic eraser. While it might remove the stain, a magic eraser is a micro-abrasive (like extremely fine sandpaper). It works by physically sanding away the stain, which means it will also sand away and permanently dull your floor’s protective finish.
Will nail polish remover (acetone) work?
No, please do not use acetone or nail polish remover. Acetone is a very harsh solvent that is almost certain to strip the finish right off your hardwood floor, creating a much more significant and costly repair problem.
What’s the safest method to try first?
Always start with the gentlest, least invasive method. The dry erase marker trick is the safest first step for floors with a modern polyurethane finish. If that doesn’t work, move on to a small, controlled amount of isopropyl alcohol.
How do I know if I’ve damaged my floor’s finish?
If you’ve damaged the finish, the area will likely look dull, hazy, or slightly discolored compared to the surrounding floor. It might also have a different texture. This is why testing in a hidden spot is so crucial.
Does this work for all types of permanent markers, like Sharpies?
Yes, these methods are effective for most standard permanent markers, including the popular Sharpie brand. The solvents in alcohol and dry erase markers are specifically good at breaking down the type of ink used in these markers.
What if my floor has an oil or wax finish instead of polyurethane?
For oiled or waxed floors, you must be extremely cautious. Avoid alcohol entirely. Start with a very small amount of lemon oil or try buffing the spot with a bit of the same finishing wax or oil used on the floor. These finishes are more delicate, and it’s often best to consult the flooring manufacturer’s care guide.
How long should I scrub the stain?
You shouldn’t have to scrub hard at all. The goal is to let the solvent do the work of dissolving the ink. Use gentle wiping or dabbing motions. If you find yourself scrubbing with a lot of force, stop and try a different method or a fresh application, as you risk damaging the finish.
Conclusion: Your Floors Are Safe!
There you have it! That permanent marker stain that seemed like a catastrophe is really just a simple problem waiting for the right solution. By understanding your floor’s finish, testing your method in a hidden spot, and starting with the gentlest option first, you can confidently remove even the most stubborn ink marks.
Remember, your beautiful hardwood floors are resilient, and with a little bit of know-how, you are more than capable of handling these small household mishaps yourself. So take a deep breath, grab a soft cloth and a dry erase marker, and bring your floor back to its original, spotless beauty. Happy DIY-ing!