How to Remove Rust From Metal Before Painting: Easy Steps
Removing rust from metal before you paint can seem like a big chore, especially if you’re new to DIY projects. It’s easy to feel unsure about the best way to get it done right. But don’t worry, it’s not as tricky as it sounds! This guide will show you How to Remove Rust From Metal Before Painting: Easy Steps. We’ll break it all down so you can get your metal surfaces ready for a smooth, lasting paint job. Let’s get started with simple, clear instructions that anyone can follow.
Why Rust Removal Matters Before Painting
Getting rid of rust before painting is super important for a good finish. Rust is like a flaky, weak spot on metal. If you paint over it, the new paint won’t stick well. It will start to bubble, peel, or chip off pretty quickly. This means all your hard work painting might be wasted. Properly removing rust ensures the paint has a strong surface to grip onto. This leads to a much longer-lasting and better-looking paint job. It makes your project look professional and protects the metal from rusting again.
Understanding Rust and Its Effects
Rust happens when iron or steel is exposed to oxygen and moisture. It’s a chemical reaction that creates a reddish-brown, flaky substance. This substance is called iron oxide.
This iron oxide weakens the metal itself. It can even eat away at the metal over time, making it thinner and more fragile.
When you paint over rust, the paint is basically covering a weak layer. It doesn’t have a solid surface to bond with.
Think of it like trying to build a house on sand. It might look okay for a little while, but it won’t be stable.
The Importance of Surface Preparation
Surface preparation is the most critical step in any painting project. It sets the stage for the entire job.
Getting the surface clean and smooth means the paint can adhere properly. This ensures a durable and attractive finish that lasts.
Skipping this step is a common mistake beginners make. They might think they can just slap some paint on.
But without proper preparation, the paint will fail prematurely. This leads to frustration and the need to repaint sooner.
Proper prep work is an investment in the longevity of your painted item. It makes all the difference.
Methods For How to Remove Rust From Metal Before Painting Easy Steps
There are several effective ways to tackle rust. The best method often depends on how much rust there is and the tools you have. We’ll explore some common and easy-to-use techniques.
Using Abrasive Tools
Abrasive tools are great for removing rust. They physically scrape or grind the rust away from the metal surface.
These tools can range from simple sandpaper to more powerful power tools.
Sandpaper is a basic but effective option for light rust.
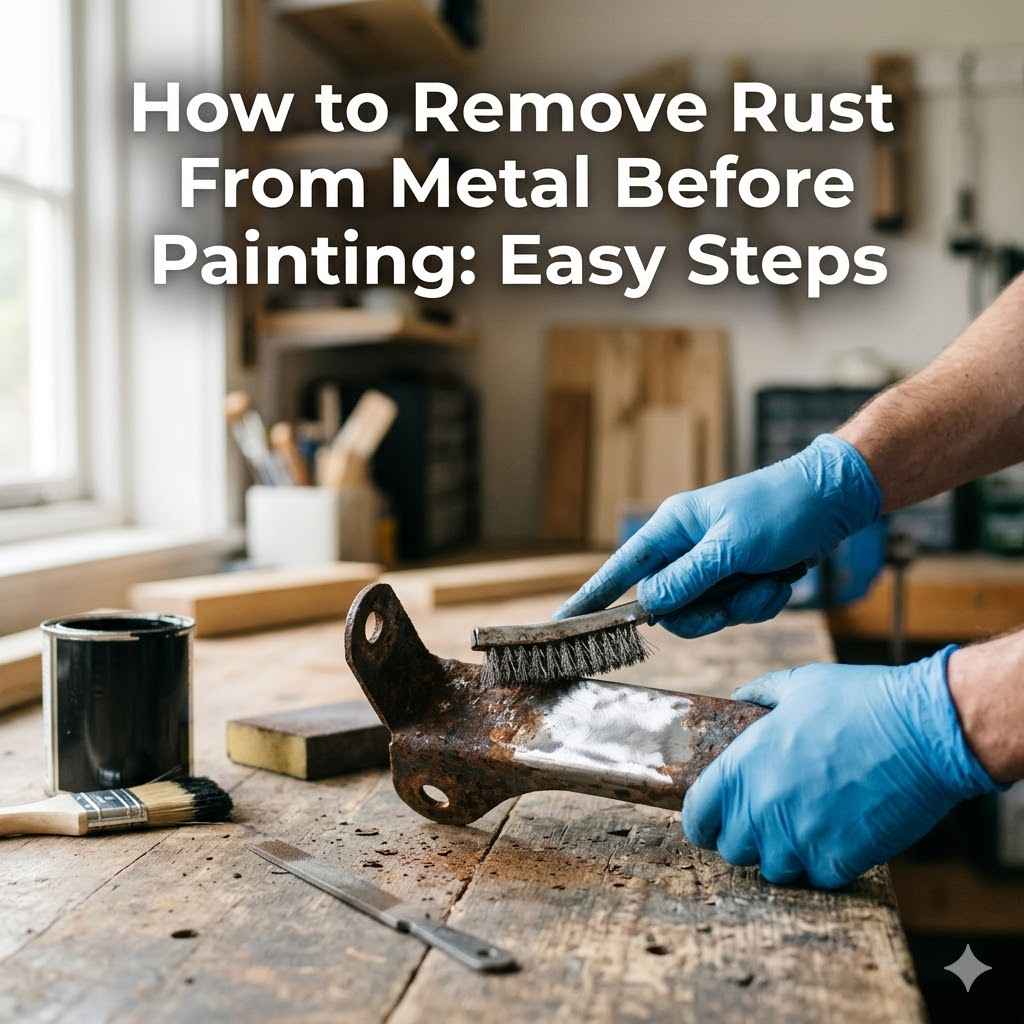
Wire brushes are also very useful for scrubbing away rust.
For heavier rust, you might use a wire wheel on a drill or an angle grinder.
These tools work by friction. They rub away the rust particles.
You need to be careful with power tools. They can remove metal quickly.
Always wear safety glasses when using abrasive tools.
Using Chemical Rust Removers
Chemical rust removers are products designed to dissolve rust. They use acids or other chemicals to break down the iron oxide.
You apply the chemical to the rusted area. Then, you let it sit for a specified time.
The chemical works to loosen the rust. It makes it easier to wipe or wash away.
Different products have different strengths. Some are stronger than others.
Always follow the product instructions carefully.
Wear gloves and eye protection when using chemicals.
Work in a well-ventilated area.
These removers can be very effective. They can get into nooks and crannies.
Natural Rust Removal Methods
Sometimes, you can use common household items to remove rust. These are often good for light rust or when you don’t want to use harsh chemicals.
Vinegar is a popular choice. Its acidity can help break down rust.
You can soak small items in vinegar. For larger items, you can apply vinegar with a cloth.
Baking soda is another option. You can make a paste with baking soda and water.
This paste can be applied to rust. Let it sit, then scrub it off.
Lemon juice and salt can also work. The acid in the lemon and the salt’s abrasive nature help.
These methods might take a bit longer. They are generally safer and more eco-friendly.
Sandpaper Techniques for Rust Removal
Sandpaper is one of the most common tools for rust removal. It works by abrasion, essentially sanding away the rust particles from the metal surface. The grit of the sandpaper is important. Finer grits are for lighter rust or for smoothing after using a coarser grit. Coarser grits are better for removing heavier rust more quickly. You can use sandpaper by hand, which is good for smaller areas or intricate shapes. For larger flat surfaces, you might use a sanding block to help keep the pressure even. Power sanders can speed up the process significantly.
When sanding, always work in the direction of the metal’s grain if possible. This helps to hide the sanding marks. After sanding, it’s important to clean the area thoroughly to remove all dust and debris. This ensures that no rust particles are left behind to cause problems later.
Using Different Grits
The grit of sandpaper refers to the size of the abrasive particles. Grits are numbered, with lower numbers meaning coarser sandpaper and higher numbers meaning finer sandpaper. For initial rust removal, start with a coarser grit, like 80 or 120. This will quickly remove thicker layers of rust. Once the bulk of the rust is gone, you’ll want to move to finer grits, such as 220 or even higher. This is to smooth out the surface and prepare it for painting.
This progression from coarse to fine is crucial. If you only use coarse sandpaper, the surface will be too rough for paint to adhere well. It will also leave visible scratches. Think of it like preparing a surface for waxing a car; you smooth it out before the final polish. Each grit removes the scratches left by the previous one.
Hand Sanding vs. Power Sanding
Hand sanding is ideal for small projects, delicate items, or areas with tight corners. It gives you a lot of control and is less likely to damage the surrounding material. It is also a good workout! However, hand sanding can be time-consuming and tiring for larger surfaces.
Power sanding, using tools like orbital sanders or belt sanders, is much faster. It’s great for large, flat areas. You can remove rust in a fraction of the time compared to hand sanding. However, power sanders can remove metal very quickly. You need to be careful not to over-sand or create divots in the metal. Always use light pressure and keep the sander moving.
Cleaning After Sanding
After you finish sanding, the metal surface will be covered in dust and fine rust particles. This dust is not just unsightly; it can prevent paint from sticking properly. You need to clean the surface thoroughly. A tack cloth is an excellent tool for this. It’s a sticky cloth that picks up fine dust particles.
You can also use a brush or compressed air to remove loose dust. Wiping the surface down with a degreaser or mineral spirits after dusting is also a good idea. This removes any oils or residues that might interfere with paint adhesion. A clean surface is key to a lasting paint job.
Wire Brushes and Wheels for Tough Rust
Wire brushes are excellent for scrubbing away rust, especially on rough surfaces or in crevices. They can be used manually or attached to a drill. A wire wheel, which is a circular brush made of wire bristles, is particularly effective when attached to a drill or an angle grinder.
These tools work by physically scraping and abrading the rust off the metal. They are very good at removing scale and heavy rust deposits. The bristles can get into many of the small pits and imperfections where rust likes to hide.
When using wire brushes or wheels, always wear safety glasses. The wires can break off and fly around.
Also, wear gloves to protect your hands.
For very tough rust, a wire wheel on an angle grinder is a powerful solution. It can strip rust away quickly. However, it can also be aggressive and might scratch the metal surface.
Manual Wire Brushes
Manual wire brushes are simple tools with bristles made of steel, brass, or nylon. Steel bristles are the strongest and best for removing heavy rust. Brass bristles are softer and less likely to scratch the underlying metal, making them good for less aggressive cleaning or for brass and copper items. Nylon bristles are the softest and are usually used for cleaning rather than rust removal.
You use a manual wire brush by applying pressure and scrubbing the rusted area. It’s effective for smaller spots, edges, and hard-to-reach areas where power tools might be too large or difficult to control. It takes more physical effort, but it offers precise control.
Wire Wheels for Drills and Grinders
Wire wheels attach to drills or angle grinders and spin at high speeds. This spinning action makes them incredibly effective at removing rust. They can strip away layers of rust quickly from larger surfaces. You can get different types of wire wheels, including knotted wire wheels, which are more aggressive, and crimped wire wheels, which are less aggressive.
When using a wire wheel, start with low speed if possible and gradually increase it. Let the tool do the work; don’t force it. Always maintain a firm grip and stand to the side of the spinning wheel to avoid flying debris. These are best for larger, more accessible areas.
Considerations for Metal Type
The type of wire brush or wheel you use can depend on the metal you’re cleaning. For common steel or iron, steel wire brushes are usually fine. However, if you’re working with softer metals like aluminum or stainless steel, you might want to use brass wire brushes to avoid scratching or damaging the surface. If you’re unsure, it’s always best to test on an inconspicuous area first.
Chemical and Natural Ways to Remove Rust
Sometimes, abrasive methods are not ideal, or you need a way to get into tight spots. Chemical and natural solutions offer alternatives.
Using Commercial Rust Removers
Commercial rust removers are formulated to break down rust efficiently. They come in various forms, like liquids, gels, and sprays.
These products often contain phosphoric acid or oxalic acid, which react with iron oxide. This reaction converts the rust into a soluble salt that can be easily wiped or washed away.
Some rust removers also contain rust inhibitors, which can help protect the metal after the rust is removed.
Always read and follow the manufacturer’s instructions carefully.
Wear appropriate personal protective equipment, such as gloves and eye protection.
Work in a well-ventilated area.
These products can be very effective for moderate to heavy rust.
They require less physical effort than sanding or wire brushing.
Types of Chemical Rust Removers
Rust removers come in several forms. Liquid rust removers are often used for soaking small parts. Gels are useful for vertical surfaces as they cling to the metal. Sprays offer convenience for larger areas. Some products are designed to be rinsed off, while others can be wiped away.
There are also rust converters. These don’t remove rust but chemically change it into a stable, black, paintable surface. This can be a good option if you can’t remove all the rust.
Application and Safety
When applying chemical rust removers, ensure the metal surface is clean of dirt and grease. Apply the remover according to the product’s directions. For soaking, submerge the rusted item. For gels or sprays, apply a uniform coat.
Allow the product to work for the recommended time. You may need to agitate the rust with a brush. After the rust is loosened, wipe or rinse it away. Always dispose of chemical waste responsibly, following local regulations.
Rinsing and Neutralizing
After using a chemical rust remover, it’s crucial to rinse the metal thoroughly. Any remaining chemical residue can interfere with the paint adhesion or cause new rust to form. Some rust removers might require a neutralizing step, often with baking soda and water. This cancels out any remaining acidity.
Drying the metal immediately and completely is also vital. Water is a key ingredient for rust formation. Thorough drying prevents new rust from appearing right after you’ve cleaned it.
DIY Rust Removal with Household Items
You can often remove rust using common items you might already have at home. These are great for light rust or when you want a gentler approach.
Vinegar is a fantastic rust remover. Its acetic acid breaks down rust effectively.
You can soak small items in white vinegar. For larger surfaces, you can apply vinegar with a cloth or sponge.
Let it sit for a few hours, or even overnight for tough spots.
Baking soda is another good option. Mix it with water to make a paste.
Apply the paste to the rust and let it sit. Then, scrub it off with a brush or steel wool.
This method is less harsh than many commercial cleaners.
Lemon juice and salt also work. The citric acid in lemon juice helps.
The salt acts as a mild abrasive.
Using Vinegar Effectively
For small items, pouring white vinegar into a container and submerging the rusted piece is very effective. Leave it for several hours, or even overnight. Then, scrub the rust off with a brush or steel wool. For larger items, you can soak rags in vinegar and lay them over the rusted areas.
After the vinegar has worked, rinse the metal thoroughly with water. Then, dry it completely. It’s important to remove all traces of vinegar. This prevents the metal from becoming too acidic.
Baking Soda Paste Method
To make a baking soda paste, mix baking soda with a small amount of water. You want a thick paste consistency, like toothpaste. Apply this paste generously to the rusted areas. Let it sit for at least an hour.
Then, use a brush, steel wool, or a scrub pad to scrub the rust away. The baking soda acts as a mild abrasive and helps lift the rust. After scrubbing, rinse the area with water and dry it thoroughly.
Lemon Juice and Salt Combination
This method is best for light rust. Sprinkle salt over the rusted area. Then, squeeze fresh lemon juice over the salt until it’s well-saturated. Let it sit for a couple of hours.
The combination of the acid from the lemon and the abrasive salt helps to lift the rust. Scrub with a brush or steel wool, then rinse and dry. This is a more natural and less aggressive option.
Surface Preparation After Rust Removal
After you’ve successfully removed the rust, your work isn’t quite done. The metal surface needs further preparation before painting.
This next stage ensures the paint will stick well and last a long time.
It involves cleaning, smoothing, and priming the metal.
These steps create the perfect base for your new paint job.
Skipping these can undo all your hard rust-removal work.
Cleaning the Surface Thoroughly
Once the rust is gone, the metal will likely have dust, debris, or residue from the rust removal process. It’s essential to clean this off completely.
You can use a clean cloth and water to wash away any loose particles.
For a more thorough clean, use a degreaser or mineral spirits.
This removes any oils, grease, or leftover chemicals.
A clean surface is vital for paint adhesion.
Any remaining dirt or oil will prevent the paint from sticking.
This can lead to peeling or bubbling later on.
Drying the metal completely after cleaning is just as important.
Water left on the surface can cause new rust to form.
Using Degreasers and Solvents
Degreasers are cleaning agents designed to remove grease, oil, and grime. They are very effective for preparing metal surfaces before painting. You can apply a degreaser with a clean cloth and wipe down the metal. Follow the product instructions for rinsing or wiping off the degreaser.
Mineral spirits are another common solvent used for cleaning metal. They help to dissolve oils and residues without leaving too much of a film. Always use these products in a well-ventilated area and wear gloves.
Importance of Drying
After cleaning, the metal must be completely dry. Even small amounts of moisture can lead to problems. You can air dry the metal, but it’s better to speed up the process. Use a clean, dry cloth to wipe away excess water. For very thorough drying, a hairdryer or a heat gun on a low setting can be used carefully.
This step is critical because water is the primary element that causes rust. Leaving any dampness invites rust to start forming again before you even get to paint.
Priming for Protection and Adhesion
Primer is a special type of coating that goes on before the paint. It’s designed to help the paint stick better to the surface. It also seals the metal.
For rusted metal that has been cleaned, using a rust-inhibiting primer is highly recommended.
This type of primer contains chemicals that help prevent rust from forming.
It creates a barrier between the metal and the paint.
This adds an extra layer of protection.
Primer also helps to create a uniform surface. If you have some faint discoloration or minor imperfections after rust removal, primer can help cover them.
This results in a smoother, more even color when you apply your top coat of paint.
Choosing the Right Primer
For metal surfaces, especially those that have had rust removed, you’ll want to use a primer specifically designed for metal. Look for primers labeled as “rust-inhibiting,” “metal primer,” or “direct-to-metal” (DTM) primers. These are formulated to provide excellent adhesion and corrosion resistance.
If the metal is bare after rust removal, a rust-inhibiting primer is essential. If you used a chemical rust remover that left a slight discoloration, a good quality primer will create an even base.
Application of Primer
Apply primer in thin, even coats. Follow the manufacturer’s instructions regarding application methods (brush, roller, or spray) and drying times between coats. Too much primer applied too thickly can lead to drips and an uneven surface.
Allow the primer to dry completely according to the product’s recommendations. Some primers may require light sanding with a fine-grit sandpaper (like 220 or 320 grit) after drying to create a perfectly smooth surface for the topcoat. This is called scuff sanding.
Painting the Prepared Metal Surface
With your metal surface clean, dry, and primed, you’re ready for the final step: painting. The right paint and proper application will ensure a beautiful and long-lasting finish.
This part is where your project starts to look finished and professional.
It’s exciting to see the transformation!
Selecting the Right Paint for Metal
Choosing the correct paint is crucial for durability and appearance. Not all paints are suitable for metal.
For exterior metal surfaces, you’ll need an exterior-grade paint that can withstand weather conditions.
For interior metal, durability and appearance might be your main concerns.
Enamel paints are often a good choice for metal. They are durable, hard-wearing, and provide a smooth finish.
There are oil-based and water-based (latex) enamels. Oil-based enamels tend to be more durable and provide a harder finish, but they can be harder to clean up. Water-based enamels are easier to work with and clean up.
Specialty metal paints are also available, offering enhanced rust protection or specific finishes.
Types of Metal Paints
There are several categories of paint suitable for metal. Alkyd enamel paints are very common and offer good durability. Acrylic enamel paints are water-based but still offer good hardness and flexibility. Epoxy paints are extremely durable and offer excellent chemical and abrasion resistance, often used for high-traffic or industrial applications.
There are also spray paints specifically designed for metal. These are convenient for applying a smooth, even coat quickly. Always choose a paint that is suitable for the specific type of metal and its intended use (indoor/outdoor).
Paint Finishes
Paints come in various finishes, from matte to high gloss. A matte finish hides imperfections but can be harder to clean. A satin or semi-gloss finish offers a balance of durability and a slight sheen, making them easier to clean. A high-gloss finish is very durable and easy to clean, but it will highlight any imperfections on the surface.
Consider the look you want to achieve and the practical needs of the item you are painting.
Application Techniques for a Smooth Finish
Applying paint correctly is just as important as preparing the surface. Smooth, even coats lead to the best results.
You can use brushes, rollers, or spray cans. Each has its advantages.
Brushes are good for detail work and small areas.
Rollers are efficient for larger flat surfaces.
Spray cans offer a fast and even application, especially for intricate shapes or when a very smooth finish is desired.
Always apply paint in thin, even coats. It’s better to apply two thin coats than one thick one.
This prevents drips and runs.
Allow each coat to dry thoroughly according to the paint manufacturer’s instructions.
This ensures proper adhesion and durability.
Using Brushes and Rollers
When using brushes, choose good quality synthetic bristles for water-based paints and natural bristles for oil-based paints. Apply paint with smooth, even strokes. For rollers, use a high-density foam roller or a short-nap roller for smooth surfaces. Load the roller evenly and avoid pressing too hard.
Work in sections and try to maintain a wet edge to avoid lap marks where one section of paint meets another that has already started to dry. This ensures a continuous, smooth finish.
Spray Painting Tips
If using spray paint, shake the can vigorously for at least a minute. Hold the can upright and about 8-12 inches away from the surface. Move the can in a steady, sweeping motion, overlapping each pass by about half.
Apply in thin, even coats. It’s better to apply multiple light coats than one heavy coat. This prevents runs and drips. Allow adequate drying time between coats. Work in a well-ventilated area and wear a respirator mask to avoid inhaling fumes.
Frequently Asked Questions
Question: What is the best way to remove rust from a car bumper before painting?
Answer: For a car bumper, start by washing it to remove dirt. Use sandpaper, starting with a coarser grit (like 100-150) to remove the rust, then move to finer grits (like 220-320) to smooth the area. Clean with a degreaser and apply a metal primer specifically designed for automotive use before painting.
Question: Can I use a wire brush on stainless steel?
Answer: It is generally not recommended to use a steel wire brush on stainless steel. Steel bristles can embed themselves in the stainless steel, causing it to rust. If you need to abrade stainless steel, use stainless steel wire brushes or abrasive pads.
Question: How long does it take for rust removers to work?
Answer: The time it takes for rust removers to work varies depending on the product’s strength and the severity of the rust. Some products work within minutes, while others may require several hours or even overnight soaking. Always follow the manufacturer’s instructions.
Question: Do I need to prime if I’m painting over a rust converter?
Answer: Yes, even after using a rust converter, it is highly recommended to apply a primer. Rust converters create a stable surface, but a primer provides better adhesion for your topcoat and adds an extra layer of protection against moisture and future corrosion.
Question: How do I prevent rust from returning after painting?
Answer: Proper preparation is key. Ensure all rust is removed and the metal is completely dry. Use a good quality rust-inhibiting primer.
Apply multiple thin coats of paint, ensuring full coverage. For outdoor items, consider a sealant or clear coat for added protection.
Summary
Taking the time to properly remove rust before painting is essential for a lasting, good-looking finish. By following easy steps like sanding, using wire brushes, or trying household remedies, you can effectively clear away rust. Always clean and prime the metal afterward, using products designed for metal surfaces. Then, apply your chosen paint in thin, even coats for a professional result that protects your items from future rust.