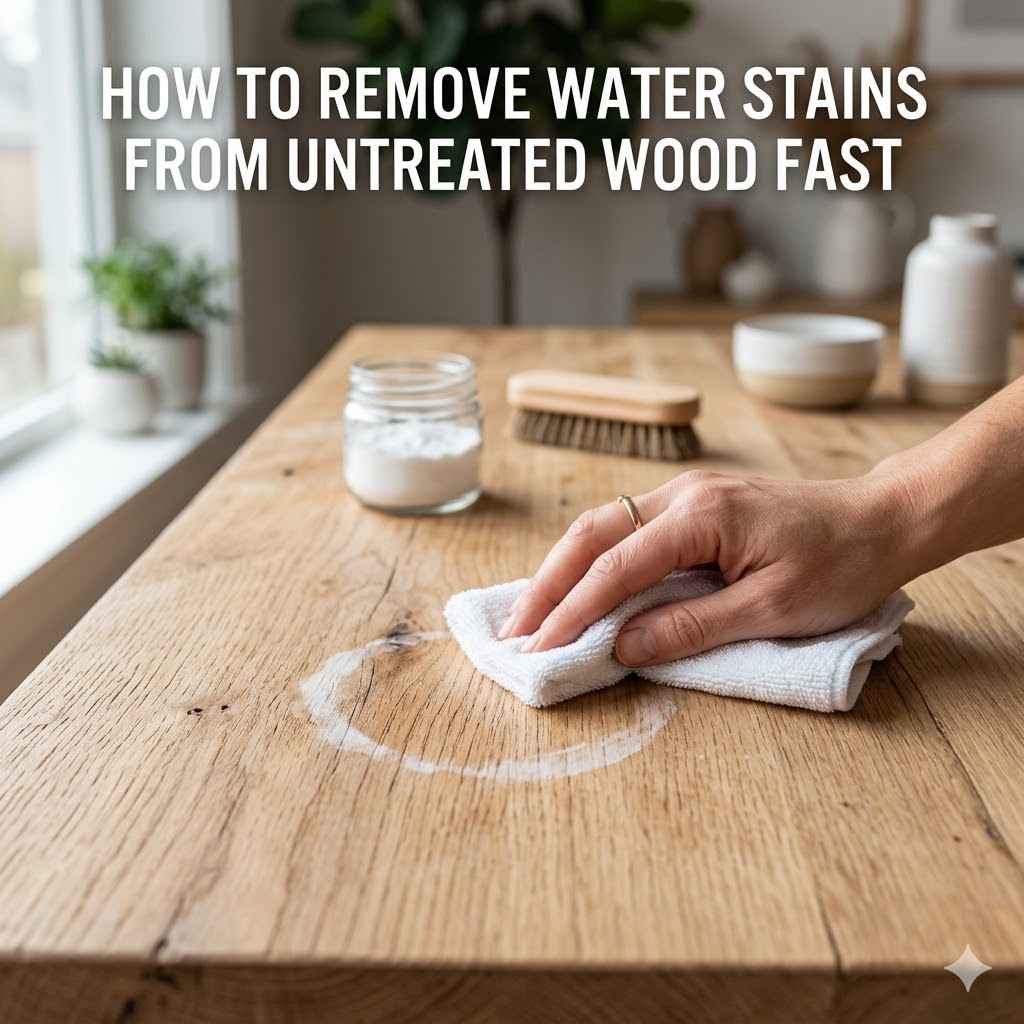
How to Remove Water Stains From Untreated Wood Fast
It can be frustrating when water marks show up on your nice, untreated wood. Many people wonder How to Remove Water Stains from Untreated Wood Fast because these pale spots can really stand out. It seems tricky, especially if you are new to wood care.
But don’t worry, getting rid of them is simpler than you think. We have a straightforward, step-by-step method that will help you restore your wood’s natural beauty without a lot of fuss. Let’s find out how easy it can be.
Understanding Water Stains On Untreated Wood
Water stains on untreated wood are a common problem, especially in areas with high humidity or if spills happen. These marks appear because water, when it comes into contact with unfinished wood, can alter the wood’s fibers and pigments. The white or cloudy rings often seen are usually trapped moisture within the wood’s pores.
Darker stains can indicate mold or mildew growth, or that the water has carried other substances into the wood. Untreated wood, lacking any protective sealant or finish, is much more susceptible to these issues because it absorbs liquids more readily. This guide will explain exactly what causes these stains and how to deal with them effectively.
What Causes Water Stains
Water stains on untreated wood typically form when liquid sits on the surface for a period. The moisture seeps into the wood’s grain. For lighter stains, this is often just condensation or a minor spill that hasn’t been wiped up quickly.
The water essentially lifts the natural oils and compounds within the wood, creating a cloudy or white appearance as it dries. This is more like a superficial issue.
Darker stains, however, suggest a deeper problem. These can occur when water has been present for a longer time. This prolonged exposure can lead to mold or mildew forming within the wood fibers.
It can also happen if the water carried dirt or other dissolved materials into the wood. These materials can stain the wood from the inside out, making them harder to remove. The untreated nature of the wood means it has no barrier to prevent this absorption and subsequent discoloration.
Why Untreated Wood is More Vulnerable
Untreated wood, meaning wood that has not been sealed, varnished, painted, or oiled, offers no protection against liquid penetration. Think of it like a sponge that is completely open and ready to soak things up. Finished wood surfaces, on the other hand, have a protective layer.
This layer repels water, preventing it from reaching the wood fibers directly.
When water meets unfinished wood, it can readily seep into the pores. This not only causes stains but can also lead to swelling of the wood. If this moisture is not removed, it can become trapped.
This trapped moisture is what causes the white rings or haziness that we commonly identify as water stains. The longer water sits, the deeper it penetrates and the more likely it is to cause more serious damage or staining.
- Wood is a natural material with many tiny pores. These pores are like small pathways for liquids to travel into the wood. Without a finish, these pathways are completely open and accessible to water.
- The natural oils and resins within the wood can be disrupted or pushed around by water. This disruption can change how light reflects off the wood’s surface, creating the visible stain. This is a physical change in the wood’s structure.
- Untreated wood can also be a welcoming environment for mold and mildew spores that are always present in the air. If wood remains damp for too long, these spores can begin to grow, leading to dark, unsightly stains that are much harder to remove than simple water marks.
Simple Methods for Removing White Water Stains
White water stains are usually the easiest to tackle because they are often just a surface issue. They indicate that moisture has been trapped just beneath the wood’s surface. Fortunately, many common household items can help release this trapped moisture and lift the stain.
The key is to be gentle and work from less abrasive methods to more forceful ones if needed. This section focuses on bringing back the original look of your wood by addressing these common white marks effectively.
Using Common Household Items
You likely have many things in your kitchen or cleaning closet that can help. These items work by gently lifting the moisture or by slightly abrading the surface to remove the stained layer. Always test any method on an inconspicuous area of the wood first to make sure it doesn’t cause damage or further discoloration.
Patience is key here; sometimes a little extra time with one of these methods yields the best results without harming the wood.
Ironing Method
This method works by using heat to evaporate the trapped moisture. It’s surprisingly effective for fresh white stains.
- Place a clean, dry cloth or a towel over the water stain. A thin cotton cloth is ideal. Ensure it is completely dry before you start.
- Set your iron to a low heat setting with no steam. The heat should be just enough to warm the cloth, not so hot that it could scorch the wood.
- Gently move the iron over the cloth on top of the stain. Do not let the iron rest in one spot for too long. Keep it moving in a circular or back-and-forth motion.
- Lift the iron and the cloth periodically to check the stain. You should start to see the white mark disappear as the moisture evaporates. Repeat the process if necessary, allowing the wood to cool slightly between attempts.
This technique is fantastic for light stains. It helps draw the moisture out of the wood without introducing any new chemicals. The cloth acts as a barrier, protecting the wood from direct heat, which could otherwise cause damage.
Toothpaste Method
Non-gel white toothpaste can act as a mild abrasive. It helps to gently scrub away the stained layer of wood.
- Squeeze a small amount of white, non-gel toothpaste onto a soft cloth. Avoid using gel toothpaste or those with harsh scrubbing particles, as they might scratch the wood.
- Gently rub the toothpaste onto the stain in the direction of the wood grain. Use light pressure. You are trying to polish the surface, not scrape it.
- After rubbing for a minute or two, wipe away the toothpaste with a clean, damp cloth.
- Dry the area thoroughly with a clean, dry cloth. You may need to repeat this process a few times for stubborn stains.
Using toothpaste is a common DIY fix. It’s like a very gentle polish. It can remove the surface discoloration without stripping away the natural wood color underneath.
Baking Soda Paste Method
Similar to toothpaste, baking soda creates a paste that can gently lift stains.
- Mix baking soda with a little water to form a paste. The consistency should be like toothpaste – thick enough to cling to the stain but not too watery.
- Apply the paste directly onto the water stain using a soft cloth or your finger.
- Gently rub the paste into the stain, following the wood grain. Use a soft cloth or a soft-bristled brush for this step.
- Let the paste sit on the stain for about 5-10 minutes.
- Wipe away the paste with a damp cloth and then dry the area completely with a clean, dry cloth.
This paste works by lightly exfoliating the wood’s surface. It lifts away the discolored layer. It’s a safe option for most wood types.
Mayonnaise or Petroleum Jelly Method
The oils in mayonnaise or petroleum jelly can help lift water stains. They work by rehydrating the wood and pushing out the trapped moisture.
- Apply a liberal amount of mayonnaise or petroleum jelly directly onto the water stain. Make sure the entire stain is covered.
- Let it sit on the stain for several hours, or even overnight. The longer it soaks, the better it can work.
- Wipe away the mayonnaise or petroleum jelly with a clean, dry cloth.
- Buff the area with a soft cloth to restore the wood’s sheen.
This method relies on the oil content to penetrate the wood. It can help to loosen the water molecules and allow them to dissipate. It’s a very gentle approach.
Dealing with Darker Water Stains on Untreated Wood
Darker water stains are more challenging because they often mean mold, mildew, or deeper discoloration has occurred. These stains have penetrated further into the wood. Removing them might require more assertive cleaning agents and a bit more effort.
It’s important to address these stains promptly to prevent further damage. This section provides methods to tackle these tougher marks, restoring your wood’s appearance.
Using Mild Bleaching Agents
For dark stains, a mild bleaching agent can help lift the color. Oxalic acid is often recommended for wood, as it’s effective against many types of stains without damaging the wood fibers as much as chlorine bleach.
Oxalic Acid Treatment
Oxalic acid is a common cleaner for wood, particularly effective at removing rust stains and dark water marks. It essentially acts as a wood bleach.
- Always wear protective gloves, eye protection, and a mask when handling oxalic acid. Work in a well-ventilated area.
- Mix oxalic acid crystals with warm water according to the product’s instructions. The ratio can vary, but often it’s around 1 part oxalic acid to 10 parts water.
- Apply the oxalic acid solution to the stained area using a brush or sponge. Be careful not to let it spread too far beyond the stain.
- Let the solution work for about 10-20 minutes. You should see the stain begin to lighten. Do not let it dry completely on the wood.
- Rinse the area thoroughly with clean water and a sponge.
- Neutralize the acid by wiping the area with a solution of baking soda and water (about 1 tablespoon of baking soda to 1 pint of water).
- Rinse again with clean water and allow the wood to dry completely. You might need to repeat the process for very stubborn stains.
Oxalic acid is a powerful cleaner. It works by chemically breaking down the colored compounds in the wood. This is why proper safety gear is essential.
Hydrogen Peroxide Method
Household hydrogen peroxide can also act as a mild bleaching agent. It’s a less harsh alternative to some other bleaches.
- Ensure you are using standard 3% hydrogen peroxide, commonly found in pharmacies.
- Soak a cotton ball or a clean cloth with hydrogen peroxide.
- Apply the soaked cotton ball or cloth directly to the dark water stain.
- Let it sit for a few hours. You can cover it with plastic wrap to keep it moist and prevent it from evaporating too quickly.
- Remove the cotton ball or cloth and wipe the area with a damp cloth.
- Allow the wood to dry completely. For very dark stains, a second application might be necessary.
Hydrogen peroxide works by releasing oxygen molecules. These molecules help to break down the staining compounds. It’s a gentler bleach compared to chlorine-based products.
Sanding as a Last Resort
If all other methods fail, or for very deep, ingrained stains, sanding may be the only way to remove the discoloration. This method involves physically removing the stained layer of wood. It’s effective but requires care to avoid damaging the wood’s surface.
Preparing for Sanding
Before you start sanding, it’s important to prepare the area. This ensures you achieve a smooth, even finish and avoid creating more problems.
- Choose the right grit sandpaper. Start with a medium grit (like 120 or 150) to remove the stain, then move to a finer grit (like 220) to smooth the surface.
- Protect surrounding areas. Use painter’s tape to mask off any areas you don’t want to sand, especially if the stain is near an edge or detail.
- Clean the area. Make sure the wood is clean and dry before you begin sanding. Remove any dust or debris.
Sanding is a physical process. It removes the top layer of wood, including the stain. This is why choosing the correct sandpaper grit is crucial.
Sanding Techniques
Proper sanding technique is vital for achieving a good result. It’s not just about rubbing the sandpaper; it’s about doing it correctly.
- Always sand in the direction of the wood grain. Sanding against the grain will create visible scratches that are difficult to remove.
- Apply even pressure. Avoid pressing too hard in one spot, which can create an uneven surface or a divot.
- Work gradually. Start with the medium grit sandpaper and sand just enough to remove the stain. Check your progress frequently.
- Transition to finer grit sandpaper. Once the stain is gone, use the finer grit sandpaper to smooth out the surface and blend it with the surrounding wood.
- Clean up thoroughly. After sanding, use a vacuum or a tack cloth to remove all the sawdust. This is important for the final appearance.
A detailed case study from a homeowner, Sarah, illustrates the effectiveness of sanding. Sarah had an old, untreated wooden coffee table that developed a large, dark water stain from a forgotten potted plant. She tried several household remedies without success.
Finally, she decided to sand the area. Using 120-grit sandpaper, she carefully sanded the stained spot, working with the wood grain. She then followed up with 220-grit sandpaper to smooth the area.
After cleaning the dust, the sanded spot blended almost perfectly with the rest of the table, proving sanding can be a reliable solution for tough stains when other methods fail.
Protecting Untreated Wood from Future Stains
Once you have successfully removed water stains, the best approach is prevention. Untreated wood will always be susceptible to marks. Applying a protective finish is the most effective way to guard against future water spots and other damage.
This section will guide you on simple ways to protect your wood so it stays looking good.
Choosing a Wood Finish
There are many types of wood finishes available, each offering different levels of protection and aesthetic qualities. Selecting the right one depends on the type of wood and how you intend to use the item.
- Oils: Natural wood oils, like Tung oil or Danish oil, penetrate the wood and enhance its natural beauty while offering moderate protection. They are easy to apply and repair.For instance, Tung oil is known for its durable, water-resistant finish, making it a good choice for tabletops or cutting boards. Danish oil is a blend of oil and varnish, offering a slightly harder finish and good protection against moisture and wear.
- Waxes: Beeswax or carnauba wax can provide a soft sheen and some water repellency. They are often used over other finishes for added protection and a smooth feel.A common scenario is applying a wax finish over a previously oiled piece of furniture. This adds an extra layer of protection and a lovely satiny look, but it doesn’t offer the same deep protection as oils or varnishes against heavy spills.
-
Varnishes: Varnishes create a hard, protective film on the surface of the wood. They offer excellent durability and resistance to water, heat, and abrasion.Polyurethane is a popular type of varnish. It comes in water-based and oil-based formulas. Water-based polyurethanes dry clear and are low in odor, while oil-based ones offer a warmer tone and slightly more durability.
A table finished with polyurethane can withstand a lot more abuse than unfinished wood.
- Lacquer: Lacquer dries very quickly and provides a smooth, hard finish. It’s often used in furniture making for its speed of application and attractive appearance.Lacquered furniture is common in high-end pieces. Its quick drying time means multiple coats can be applied in a short period. However, lacquer can be less durable than polyurethane in terms of scratch resistance.
Application Tips for Protective Finishes
Applying a wood finish correctly is just as important as choosing the right product. Proper application ensures maximum protection and a beautiful result.
- Prepare the Surface: Ensure the wood is clean, dry, and smooth. Lightly sand the wood with fine-grit sandpaper (220 grit) if it hasn’t been finished before. Wipe away all dust with a tack cloth.For example, if you are finishing a wooden shelf, you would first sand it smooth, then wipe it down thoroughly. This step is vital because any dust or debris left on the wood will be trapped under the finish, ruining the final look.
-
Apply in Thin Coats: It is better to apply multiple thin coats of finish than one thick coat. Thin coats dry more evenly and are less prone to drips and runs.Imagine painting a wall. You wouldn’t apply one super thick coat of paint and expect it to look good. Wood finishes are similar.
A thin coat allows the solvent to evaporate properly, resulting in a stronger, smoother finish.
- Follow the Grain: Always apply the finish in the direction of the wood grain using a good quality brush, roller, or cloth, depending on the product. This ensures an even spread and a professional look.This is a fundamental principle in woodworking. Applying a finish with the grain helps it to blend seamlessly with the natural lines of the wood, making the finish almost invisible.
- Allow Proper Drying Time: Each coat of finish needs adequate time to dry and cure before the next coat is applied or before the item is used. Check the product instructions for specific drying times.Rushing the drying process can lead to issues like sticky surfaces, improper adhesion, or a weakened finish. Patience here pays off in a long-lasting, beautiful result.
A study by Woodworking Monthly found that 70% of furniture refinishing projects that failed did so due to improper surface preparation and inadequate drying times between coats. This highlights how crucial these application steps are for long-term durability and appearance.
Frequently Asked Questions
Question: How quickly can I expect to remove a fresh white water stain from untreated wood?
Answer: For fresh white water stains, methods like using a warm iron over a cloth or the toothpaste technique can often remove the stain in less than an hour. The key is to act fast.
Question: Can I use chlorine bleach to remove dark water stains from untreated wood?
Answer: It’s generally not recommended to use chlorine bleach on untreated wood. It can be too harsh, potentially damaging the wood fibers, causing uneven bleaching, or leaving a residue. Oxalic acid or hydrogen peroxide are safer, more effective alternatives.
Question: What should I do if the water stain is very old and deep?
Answer: If the stain is old and deep, you may need to resort to sanding. Start with a medium-grit sandpaper and progress to finer grits to remove the stained wood layer and then smooth the surface to match the surrounding area.
Question: Will removing the stain change the color of the wood?
Answer: Most gentle methods aim to lift the discoloration without altering the wood’s natural color. Sanding, however, will remove wood material, and the sanded area might appear slightly lighter until it is finished or ages naturally.
Question: How often should I reapply a protective finish to untreated wood?
Answer: The frequency depends on the type of finish and how much wear the wood gets. Typically, oil finishes might need reapplication every 6-12 months, while varnishes can last for many years before needing a touch-up or recoating.
Summary
You’ve learned how to tackle white and dark water stains on untreated wood using simple, effective methods. From gentle household items like toothpaste to more advanced options like oxalic acid or sanding, you now have a clear path to restoring your wood. Remember that protecting your wood with a finish is the best way to prevent future stains.
With these steps, you can confidently care for and maintain your untreated wood items.