How to Easily Fix Mirror Desilvering: Proven Repair Methods
Small desilvering spots fix with a $15-30 silvering kit at home, but black edge damage is better covered with repair tape or a frame – full re-silvering is a professional job, not a DIY one. Using the wrong fix wastes money on a kit that can’t reach edge damage. This guide covers spotting desilvering, DIY kit repair, and when to call a pro instead.
Understanding Mirror Desilvering
Mirror desilvering is a common issue that can occur over time. To repair it, you need to understand the causes and take appropriate steps. By following the right techniques, you can restore the mirror’s original beauty and functionality.
Mirror desilvering is a common problem that occurs when the reflective coating on the back of a mirror starts to deteriorate. This deterioration can lead to a cloudy or hazy appearance on the mirror’s surface, affecting its overall clarity and reflectivity. If you’ve noticed that your mirror has lost its shine, it’s likely experiencing desilvering. In this section, we will delve into the details of what mirror desilvering is, its causes, and how you can repair it.
What is mirror desilvering?
Mirror desilvering refers to the process in which the reflective coating on a mirror becomes damaged or deteriorated over time. This coating, usually made of silver or aluminum, is responsible for the mirror’s ability to reflect light and produce a clear image. When the reflective coating starts to break down, it can create imperfections on the mirror’s surface, resulting in a less vibrant and distorted reflection. Desilvering is a natural occurrence that can happen over time due to various factors, but luckily, it can be repaired.
Causes of mirror desilvering
Several factors can contribute to mirror desilvering. Understanding these causes can help you prevent or address the issue effectively. Here are the most common causes:
1. Moisture and humidity: Excessive exposure to moisture and humidity can cause the mirror’s reflective coating to degrade and peel off. Bathrooms and other areas with high humidity levels are particularly vulnerable to this problem.
2. Chemical exposure: Certain chemicals, such as ammonia-based cleaning solutions, can react with the mirror’s coating and cause it to deteriorate. It is crucial to avoid using harsh chemicals when cleaning your mirrors to prevent desilvering.
3. Age and wear: Over time, the mirror’s reflective coating can naturally wear off due to everyday use and exposure to environmental factors. Old or antique mirrors are more prone to desilvering since their reflective coatings may be less durable. See our full home improvement guides for more repair projects like this one.
4. Incorrect installation: Improper installation or mounting of the mirror can lead to stress on its surface, causing the reflective coating to peel or crack. It is essential to ensure proper support and handling during installation to avoid damage.
Now that you understand what mirror desilvering is and the common causes behind it, you can take the necessary steps to repair and prevent further deterioration. In the next sections, we will discuss some effective methods to repair mirror desilvering and offer tips to maintain your mirrors’ longevity.
Identifying Mirror Desilvering
If you’re faced with a damaged or deteriorating mirror, it’s important to identify the problem correctly. One common issue that may arise is mirror desilvering, where the mirror coating starts to deteriorate, resulting in a cloudy or streaky appearance. Identifying mirror desilvering is crucial to determine the appropriate repair method. In this article, we’ll discuss the signs of mirror desilvering and provide DIY tests to help you confirm the presence of this problem.
Signs Of Mirror Desilvering
Before diving into the DIY tests for mirror desilvering, it’s helpful to understand the signs that may indicate this issue:
- Cloudy or streaky patches on the mirror surface
- Loss of reflectivity, making the mirror appear dull or hazy
- Black spots or blotches on the mirror
- Discoloration or yellowing of the mirror coating
These signs are indicators that the mirror’s silvering layer might be deteriorating, resulting in a compromised reflective surface. If you notice any of these signs, it’s essential to take further steps to confirm the presence of mirror desilvering.
Diy Tests For Mirror Desilvering
If you suspect that your mirror is experiencing desilvering, there are a few simple DIY tests you can perform to confirm the issue:
- Paper Test: Place a plain white sheet of paper behind the mirror and observe the reflection. If you notice black spots or blotches on the reflected image, it indicates desilvering.
- Fingernail Test: Gently scrape a small area of the mirror with your fingernail. If the coating easily flakes off, it’s likely desilvering.
- Hot Water Test: Dampen a cloth with hot water and gently rub a small area of the mirror surface. If the silvering layer comes off easily or leaves residue on the cloth, it confirms the presence of mirror desilvering.
These DIY tests provide initial confirmation of mirror desilvering. However, it’s always recommended to consult a professional for a more accurate assessment and proper repair guidance.
Proven Repair Methods For Mirror Desilvering
Mirror desilvering can be a frustrating problem that affects the appearance and functionality of your mirrors. Thankfully, there are proven repair methods that you can use to fix mirror desilvering and restore the beauty of your mirrors. In this guide, we will walk you through three effective repair methods: removing the damaged silver coating, reapplying a new silver coating, and taking preventive measures to avoid future desilvering issues.
Removing Damaged Silver Coating
If you notice areas on your mirror where the silver coating has become damaged or worn out, it is important to remove it before applying a new coat. (If the damage is scratches rather than desilvering, see our guide on restoring a scratched mirror back instead.) Here’s how you can do it:
- Clean the mirror surface thoroughly using a mild glass cleaner or a mixture of vinegar and water.
- Apply a commercial silver stripper or ammonia to a soft cloth or sponge.
- Gently rub the damaged areas of the mirror in circular motions until the silver coating begins to lift off.
- Rinse the mirror with clean water and dry it using a lint-free cloth.
Reapplying Silver Coating
After removing the damaged silver coating, you can proceed with reapplying a new silver coating to the mirror. Follow these steps to ensure a successful application:
- Protect the edges of the mirror with painter’s tape to prevent the silver coating from pooling onto the sides.
- Apply a thin and even layer of silvering solution to the mirror surface using a sprayer or a clean, soft cloth.
- Allow the silvering solution to dry according to the manufacturer’s instructions.
- Apply a protective layer of sealer or clear lacquer to enhance the durability of the new silver coating.
- Once the sealer has dried, remove the painter’s tape and your mirror will be good as new.
Preventive Measures For Mirror Desilvering
Prevention is always better than cure! By taking some preventive measures, you can prolong the lifespan of your mirrors and minimize the risk of desilvering. Consider the following tips:
- Keep your mirrors away from areas with high humidity and moisture.
- Avoid using abrasive cleaners or harsh chemicals on the mirror surface.
- Use a soft, lint-free cloth or microfiber cloth to clean your mirrors.
- Apply a protective coating or wax to the mirror surface to minimize the effects of oxidation.
- Regularly inspect your mirrors for signs of desilvering and address any issues promptly.
By following these simple preventive measures, you can enjoy clear and elegant mirrors for years to come.
Mirror Resilvering Kits: What’s Actually in the Box
A mirror resilvering kit typically costs $15-30 and includes a reflective silvering spray or solution plus applicator – enough to patch small desilvered spots, not resurface a whole mirror. Clean the area, apply the solution in thin coats, and let it cure per the label before sealing.
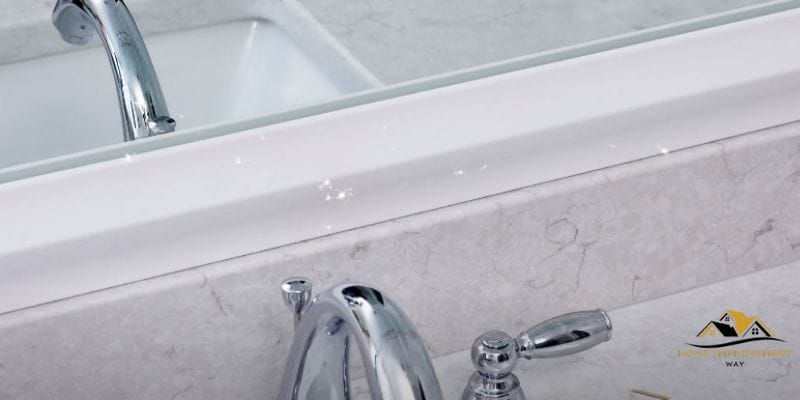
Kits work best on isolated spots away from the edge. For black edges specifically – the most common desilvering pattern – two cheaper alternatives skip the kit entirely: mirror edge repair tape, which covers the darkened strip directly, or a mounted frame that hides the edge damage under trim. Neither restores reflectivity, but both are faster and cheaper than a kit for edge-only damage.
📊 Professional mirror resilvering costs $110-$340 (avg $220), versus $15-30 for a DIY kit — Source: Angi, 2026 cost data
Best Mirror Resilvering Kit Pick
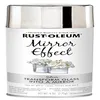
Rust-Oleum Specialty Mirror Spray (6 oz, Silver)
A reflective silver spray at the same $15-30 price point this guide covers, made for exactly this kind of spot repair.
- Best for: small isolated desilvered spots away from the edge
- Why we picked it: recognized brand, priced right at this guide’s DIY kit range
- Main drawback: won’t match older mirrors’ original tint exactly
Compare more mirror repair options
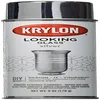 Option 1 Krylon Looking Glass Silver Aerosol
|
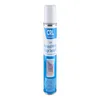 Option 2 CRL Aerosol Mirror Edge Sealant
|
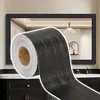 Option 3 Black Mirror Border Repair Tape
|
As an Amazon Associate we earn from qualifying purchases.
Frequently Asked Questions
Can You Fix Mirror Desilvering Yourself?
Yes, for minor spots away from the edge – a DIY silvering kit ($15-30) can restore small areas. Full resilvering involves toxic chemicals like nitric acid and silver nitrate, and is best left to professionals.
Is It Cheaper to Repair or Replace a Desilvered Mirror?
If damage covers more than about 15% of the mirror’s surface, professional resilvering costs roughly the same as a full replacement, so a new mirror is usually the better value. Small, isolated spots are cheaper to repair with a kit.
Does Toothpaste or Vinegar Fix Mirror Desilvering?
No. Household remedies like toothpaste or vinegar only clean surface grime – they cannot restore the reflective coating damaged underneath the glass. A silvering kit or professional resilvering is required for actual repair.
How Long Does a Mirror Resilvering Kit Repair Last?
A kit repair typically holds up for years if the mirror stays dry, though it won’t perfectly match the color of aged surrounding silvering and can degrade faster in humid rooms like bathrooms.
Conclusion
Match the fix to the damage: a $15-30 kit for isolated spots, edge tape for black-edge damage, or a $110-340 professional job for antique or large-area resilvering. Skip ammonia-based cleaners going forward – they’re the most common cause of desilvering in the first place.
Sponsored / affiliate links. As an Amazon Associate I earn from qualifying purchases. I may earn additional commission from eligible campaigns.