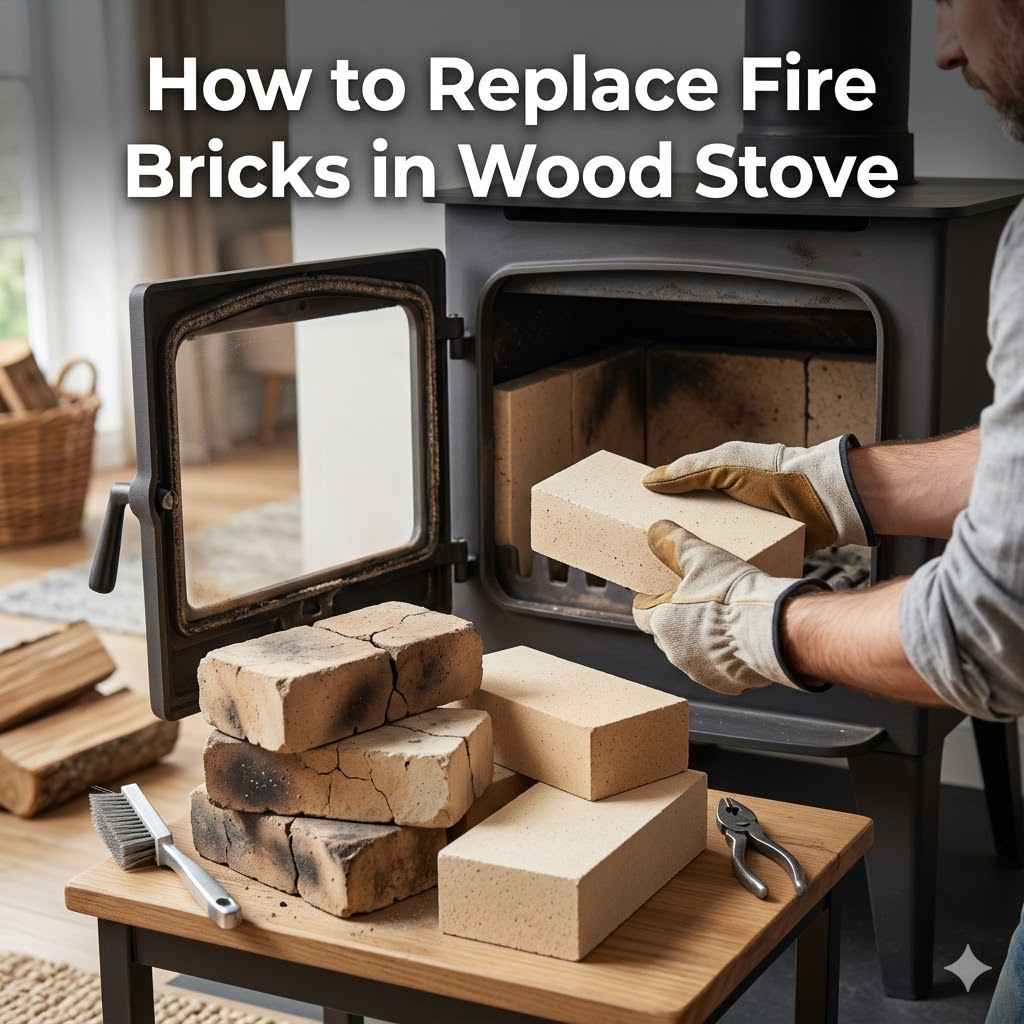
How to Replace Fire Bricks in Wood Stove
Many folks who own wood stoves find themselves needing to replace the fire bricks. It can seem a little tricky at first if you have never done it before. You might worry about making a mistake.
But don’t worry, it is actually a pretty straightforward job! We will walk you through it step-by-step, making the process of How to Replace Fire Bricks in a Wood Stove easy to follow. Get ready to make your stove work like new again!
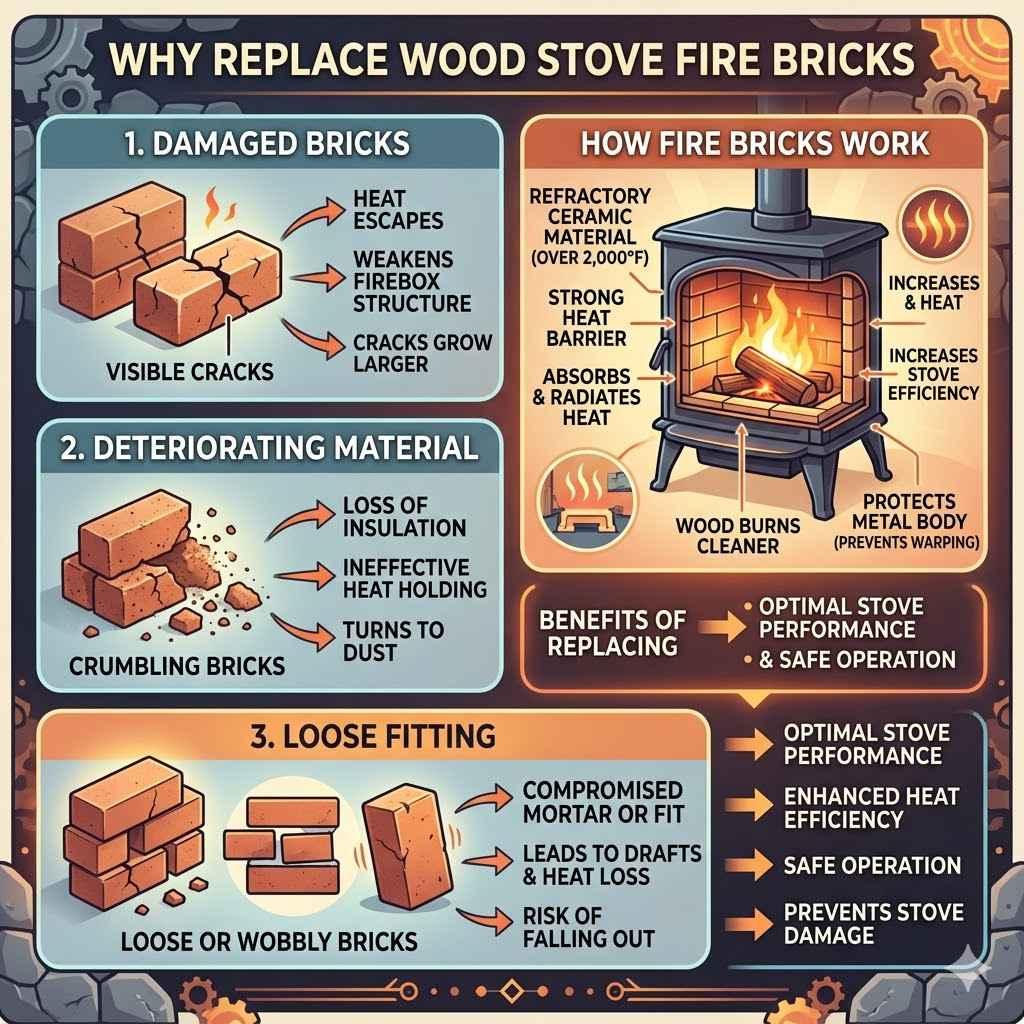
Why Replace Wood Stove Fire Bricks
Fire bricks are the heart of your wood stove’s performance. They are special bricks made to handle intense heat and protect the stove’s metal body. Over time, these bricks can crack, crumble, or wear down.
This happens from constant heating and cooling cycles and the impact of burning logs. When they get damaged, your stove might not heat as well. It can also make the stove less safe.
Replacing them is important to keep your stove efficient and safe for use. This section talks about why it is sometimes necessary to change these bricks.
Signs Your Fire Bricks Need Replacing
You can usually tell when it is time for new fire bricks. Look for visible cracks that go all the way through the brick. If bricks are broken into pieces or just crumbling away, it is definitely time for a change.
Another sign is if the bricks seem loose or wobbly inside the stove. Sometimes, you might see pieces of brick falling into the ash pan. These are all clear indicators that your stove’s inner lining needs some attention.
Visible cracks all the way through the brick.
Cracks allow heat to escape and can weaken the entire structure of your stove’s firebox. A crack that starts small can grow bigger with each heating and cooling cycle, leading to more damage.
Bricks are crumbling or breaking apart.
This means the material is deteriorating. Crumbling bricks do not offer good insulation or protection anymore. They can break down into dust, which is not effective at holding heat.
Loose or wobbly bricks.
Bricks should fit snugly. If they move around easily, it means the mortar or the fit is compromised. This can lead to drafts and heat loss.
It also increases the risk of a brick falling out of place.
How Fire Bricks Work
Fire bricks are made from a material called refractory ceramic. This means they can withstand very high temperatures, often over 2,000 degrees Fahrenheit. Their main job is to create a strong barrier between the burning wood and the metal body of the stove.
They absorb a lot of heat and then radiate it back into the room. This makes your stove more efficient and helps it burn wood cleaner. Without good fire bricks, the metal parts of the stove can get too hot.
This can cause them to warp or even fail.
Gathering Your Supplies For Replacement
Before you start taking out old bricks, you need to get everything ready. Having the right tools and materials makes the job much easier and safer. Think of it like preparing for a simple DIY project around the house.
Getting all your supplies together in one place means you won’t have to stop mid-job to run to the store. This section covers what you will need.
Essential Tools For The Job
You will need a few basic tools to do this job well. A good pair of work gloves is a must to protect your hands from sharp edges and dust. Safety glasses are also very important to keep dust out of your eyes.
You’ll likely need a sturdy putty knife or a small chisel. These help to gently pry out old bricks and scrape away old mortar. A shop vacuum is really helpful for cleaning up the dust and debris.
You might also want a wire brush to clean up the areas where the new bricks will sit.
Work gloves
These protect your hands from scrapes and cuts. Fire bricks can have rough edges, and old mortar can be sharp. Good gloves make the job more comfortable and safe.
Safety glasses
When you remove old bricks and clean the stove, dust and small particles can become airborne. Safety glasses are vital to prevent eye injuries from this debris.
Putty knife or chisel
These tools are used to carefully separate the old fire bricks from the stove lining. They help to chip away stubborn old mortar without damaging the stove itself.
Shop vacuum
A shop vacuum is ideal for cleaning out the fine dust and ash that accumulates inside the stove. It makes the cleanup process much more effective and less messy.
Wire brush
A wire brush can be used to clean the surfaces where the new bricks will be placed. This ensures a good, solid fit for the new bricks.
Choosing the Right Replacement Bricks
It is important to get the correct type of fire bricks for your wood stove. Not all bricks can handle the high heat. You need to know the size and shape of the bricks your stove uses.
Some stoves use standard rectangular bricks. Others might have special shaped bricks for corners or curves. It’s best to check your stove’s manual or measure the old bricks carefully.
You can find replacement bricks at stove shops, hardware stores, or online. Make sure they are rated for high temperatures.
Measure existing bricks
Before buying new ones, measure the length, width, and thickness of your old bricks. This ensures the new bricks will fit perfectly in their spots.
Identify brick shape
Stoves often use different shapes. Some might be standard rectangles, while others are designed for specific angles or curves in the firebox. Note any unique shapes.
Check stove manual
Your stove’s manufacturer usually specifies the exact type and size of fire bricks recommended. The manual is the best source of information for this.
Purchase from a reputable dealer
Buy your replacement bricks from a store that specializes in wood stoves or hearth products. This ensures you are getting high-quality, correctly rated bricks.
Mortar or Not Mortar
Some wood stoves use fire bricks that are simply placed in position. Others use a special high-temperature refractory cement, often called mortar. This cement helps to hold the bricks in place and seal any small gaps.
Check your stove’s manual or look at how the old bricks are installed. If there is evidence of cement, you will need to buy some refractory cement. If the bricks are just dry-stacked, you won’t need it.
How to Replace Fire Bricks in a Wood Stove Step-by-Step
Now we get to the actual work of replacing the fire bricks. This is where you put all the preparation to good use. We will break down each step so you can follow along easily.
Remember to take your time and work carefully. Doing it right means your stove will be safer and work better. This section guides you through the process.
Step 1 Prepare Your Stove
First, make sure the stove is completely cool. Never work on a hot stove. Open the stove door and remove all the ash from the firebox.
Use a shovel or a dedicated ash bucket. Make sure the area around the stove is clear and protected. You might want to lay down some newspaper or a drop cloth to catch any dust or debris that falls.
This makes cleanup much easier later on.
Ensure stove is cold
Safety first! Always wait until the stove has cooled down completely. This can take several hours after the last fire has burned out.
Remove all ash and debris
Use a shovel or ash pan to carefully scoop out all the ash. This will give you a clear view of the fire bricks and the stove’s interior.
Protect surrounding area
Lay down newspaper or a drop cloth on the floor in front of the stove. This catches any dust or small pieces that may fall during the process.
Step 2 Remove Old Bricks
Now, start removing the old fire bricks. If your stove uses mortar, you will need to chip away at it carefully. Use your putty knife or chisel to gently pry the bricks loose.
Try not to force them too much, as you don’t want to damage the stove’s metal walls. If a brick is very stubborn, work around it and try to loosen the mortar on the sides. Place the old bricks aside in a pile, so you can dispose of them later.
If your bricks are not mortared, they should come out more easily, just lift them out.
Gently pry out bricks
Use your putty knife or chisel to carefully work the tool between the brick and the stove wall or between bricks. Apply steady, gentle pressure to loosen the bond.
Chip away old mortar
If mortar is present, you may need to gently chip it away from the edges of the bricks and the stove. Be careful not to gouge the metal of the stove.
Work around stubborn bricks
If a brick is very difficult to remove, focus on loosening the mortar around it. Sometimes, patience and repeated gentle efforts will free it.
Step 3 Clean The Firebox Interior
Once all the old bricks are out, you need to clean the inside of the firebox. Use your shop vacuum to suck up all the loose dust, ash, and mortar fragments. If there is any hardened mortar stuck to the metal, you can try to scrape it off gently with your chisel or putty knife.
A wire brush can also help to clean the surfaces where the new bricks will sit. A clean firebox ensures the new bricks will fit snugly and securely.
Vacuum all loose debris
Thoroughly vacuum the entire firebox. Get into all the corners and crevices to remove every bit of dust and ash.
Scrape away hardened deposits
Use your putty knife or chisel to carefully remove any hard, baked-on residue. Avoid scratching the metal liner of the stove.
Brush surfaces clean
Use a wire brush on any surfaces where the new bricks will rest. This creates a clean, even surface for a good fit.
Step 4 Install New Bricks
Now it is time to put in the new fire bricks. Start by placing the bottom bricks first, then work your way up. If your stove uses refractory cement, follow the instructions on the cement packaging.
Typically, you mix the cement with water to a putty-like consistency. Apply a thin layer to the back of the brick or to the stove surface before placing it. Gently tap each brick into place.
Make sure there are no large gaps between the bricks or between the bricks and the stove walls. The goal is a tight fit.
Place bottom bricks first
Start with the bricks that form the base of your firebox. This provides a stable foundation for the rest of the bricks.
Apply refractory cement if needed
If your stove uses cement, mix it according to directions. Apply a thin, even layer to the brick or the stove’s interior where the brick will sit.
Tap bricks gently into place
Once positioned, tap each brick gently with your hand or a rubber mallet. This ensures it is seated firmly without excessive force.
Ensure tight fit
The bricks should fit snugly against each other and the stove walls. Minimize gaps as much as possible for better efficiency and safety.
Step 5 Allow Cement To Cure
If you used refractory cement, it needs time to dry and harden properly. This process is called curing. The cement package will have specific instructions, but it usually takes at least 24 to 48 hours.
During this time, do not use the stove. You need to let the cement cure fully. This ensures the new fire bricks will be held securely in place.
Rushing this step can cause the cement to crack and the bricks to loosen again.
Follow cement instructions
Always read and follow the specific curing instructions provided by the manufacturer of the refractory cement you used. They know their product best.
Avoid using the stove
During the curing period, resist the temptation to light a fire. The cement needs this time to become strong and stable.
Allow adequate drying time
Typically, this means waiting at least 24 to 48 hours. Some products might require longer, especially in humid conditions.
Maintaining Your Wood Stove Fire Bricks
Once you have replaced your fire bricks, you will want them to last as long as possible. Proper maintenance can extend their life significantly. It also helps your stove perform at its best.
This section offers tips on how to care for your new bricks. Keeping them in good shape means fewer repairs down the road.
Proper Firing Techniques
How you use your stove makes a big difference. Avoid firing the stove too quickly. Rapid temperature changes can stress the bricks.
Build small fires initially when the stove is cold. Gradually increase the size of the fire as the stove heats up. Also, avoid overloading the stove.
Overloading can cause excessive heat and stress on the fire bricks. Burning seasoned hardwood is also better, as it burns hotter and cleaner, producing less creosote.
Start with small fires
When lighting a fire, especially after replacing bricks or in a cold stove, start with smaller pieces of wood and a smaller flame. This allows the bricks to heat up gradually.
Gradually increase heat
As the stove warms up, you can add larger pieces of wood and build a hotter fire. This slow and steady approach prevents thermal shock to the bricks.
Avoid overloading
Packing the firebox too full can lead to overheating and excessive pressure on the bricks. Follow your stove’s guidelines for safe loading.
Burn seasoned hardwood
Well-seasoned hardwood burns more efficiently and produces less creosote, which can help protect your fire bricks from harsh buildup.
Regular Inspection and Cleaning
Make it a habit to inspect your fire bricks regularly. After every few fires, take a quick look for any new cracks or signs of wear. Keep the ash removed from the firebox.
Too much ash can block air flow and cause bricks to overheat. A clean firebox helps the bricks function as they should. Don’t use water to clean the inside of a hot stove.
Wait until it is completely cool.
Inspect after every few fires
Make a quick visual check each time you use your stove. Look for any new cracks, chips, or signs of damage.
Remove ash regularly
Keep the ash level low. Excessive ash can trap heat and prevent proper air circulation, leading to premature brick wear.
Clean only when cool
Never try to clean the inside of the stove or its bricks when they are hot. Always wait for the stove to cool down completely to avoid burns and potential damage.
When to Call a Professional
While replacing fire bricks is a manageable DIY task, there are times when calling a professional is the best option. If your stove is very old or has extensive damage to its metal components, a professional can assess the situation. If you are unsure about any step of the process or feel uncomfortable, it is wise to seek expert help.
They have the experience and tools to handle complex repairs safely and correctly. They can also advise on the overall condition of your stove.
Extensive stove damage
If the metal parts of your stove show signs of significant warping, rust, or damage, a professional can determine if repairs are possible or if the stove needs replacement.
Uncertainty about the process
If you have any doubts about your ability to complete the job safely or correctly, it’s better to hire someone who does.
Complex stove models
Some modern or specialized wood stoves may have unique construction that requires expert knowledge to service.
Frequently Asked Questions
Question: How long do wood stove fire bricks typically last
Answer: Fire bricks can last anywhere from 5 to 10 years or even longer, depending on how you use your stove, the quality of the bricks, and regular maintenance. Frequent use at high temperatures and rapid cooling can shorten their lifespan.
Question: Can I use regular house bricks instead of fire bricks
Answer: No, you absolutely cannot use regular house bricks. They are not designed to withstand the extreme heat of a wood stove and will likely crack, crumble, or even explode, which is very dangerous.
Question: Do I need to use special mortar for fire bricks
Answer: Yes, if your stove requires mortar, you must use a high-temperature refractory cement or mortar. Standard masonry mortar will not survive the heat and will break down quickly.
Question: How do I know if my fire bricks need replacing
Answer: Look for large cracks that go all the way through the brick, crumbling material, or bricks that feel loose. Any significant damage to the fire bricks means it is time for them to be replaced for safety and efficiency.
Question: Can I just replace one cracked fire brick
Answer: While you can replace a single brick if it’s the only one damaged, it’s often a good idea to check the surrounding bricks as well. If other bricks are showing signs of wear or minor cracks, it might be best to replace them all at once to ensure consistent performance and prevent future issues.
Conclusion
Knowing how to replace fire bricks in a wood stove makes your heating system safer and more efficient. You can do this job yourself with the right tools and steps. Take your time, clean carefully, and install new bricks securely.
Proper care and firing habits will keep your stove working well for years to come.