How to Replace a Husqvarna Chainsaw Fuel Line (Any Model)
A Husqvarna chainsaw fuel line usually needs replacing every 2–3 years because ethanol-blended gas dries and cracks the rubber — most homeowner models (135, 136, 140, 235, 236, 240, 340, 345, 350) use 1/8-inch ID tubing. A cracked line leaks fuel near a hot cylinder and won’t hold prime, so the saw won’t start. This guide covers removing the old line and primer bulb, sizing and cutting the new line, routing it correctly, and testing for leaks.
Quick Answer
Drain the tank, pull the old fuel line and primer bulb out with needle-nose pliers, measure the old line for length, cut new 1/8-inch ID fuel line to match, push it through the tank grommet and onto the carburetor nipple, reinstall the primer bulb, refill, and test-run for leaks. Most Husqvarna homeowner saws (135–450 series) take about 20–30 minutes start to finish.
Tools and Materials Needed
Gather everything before draining the fuel — opening the saw twice wastes time and lets dust into the carburetor.
- Screwdriver (Torx T25 on most 2010+ models, flathead/Phillips on older saws) to remove the cover
- Needle-nose pliers to grip and pull the old line without crushing the carburetor nipple
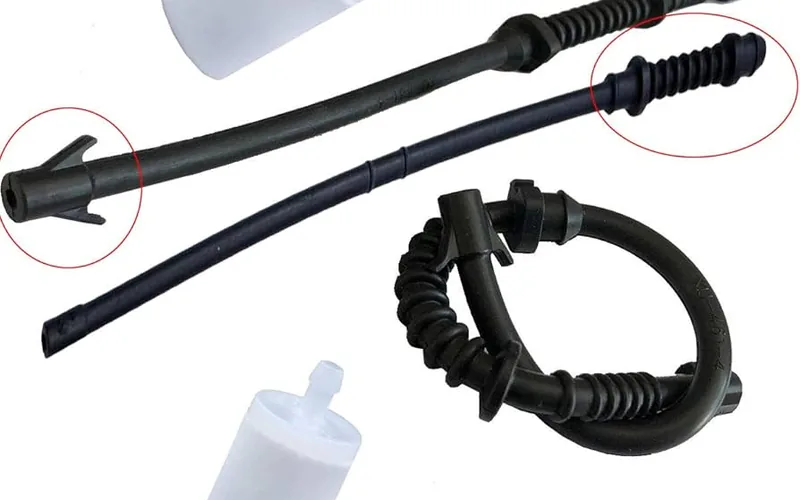
- New fuel line sized to your model — see the size table below
- Replacement primer bulb and inline fuel filter (replace both while the tank is already open)
- Utility knife or flush-cut pliers to cut the new line square
- Clean rag and a small funnel for draining and refilling fuel
Fuel Line Size by Husqvarna Model
Using the wrong diameter is the most common reason a DIY fuel line replacement leaks or won’t seat. Match the inside diameter (ID) to your engine size, then confirm against the old line before cutting.
| Engine Size | Typical Fuel Line ID | Example Husqvarna Models |
|---|---|---|
| Under 40cc | 1/8″ ID x 1/4″ OD | 135, 136, 140, 235, 236, 240 |
| 40–60cc | 3/16″ ID x 5/16″ OD | 340, 345, 350, 445, 450 |
| 60cc+ | 1/4″ ID x 3/8″ OD | 455, 460, 555, 555XP, 562XP |
These are typical OEM sizes, not universal — always measure the old line’s outer diameter with calipers or compare it side-by-side at the hardware counter before buying, since running-change parts vary by production year.
Best Fuel Line + Primer Bulb Kit Pick
Fuel Line Kit with Primer Bulb (4-Pack) – $15.57
Bundles the line and the primer bulb this guide has you replace in the same session — four sets means enough spares for two saws or two future repairs.
- Best for: replacing a cracked line and hardened primer bulb together, as recommended above
- Why we picked it: covers the two most common failure points in one purchase, matching the 1/8″ ID size most homeowner saws use
- Main drawback: universal fit — measure your old line’s OD first, it isn’t Husqvarna-branded OEM
Compare more fuel line repair options
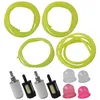 Option 1 Fuel Line Hose Kit (4-Pack) – $10.39
|
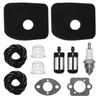 Option 2 Fuel System Tune-Up Kit – $15.11
|
 Option 3 6-Inch Needle Nose Pliers – $5.99
|
As an Amazon Associate we earn from qualifying purchases.
Why Husqvarna Fuel Lines Crack
A chainsaw fuel line is a short length of ethanol-rated rubber or vinyl tubing that carries gasoline from the tank to the carburetor. It hardens and cracks faster than most people expect because ethanol-blended fuel (E10 and above) dissolves the plasticizers that keep the rubber flexible, and it absorbs far more water than pure gasoline. A line stored with stale fuel for even one off-season is a common failure point.
📊 E10 gasoline absorbs up to 50 times more water than pure gasoline, and ethanol dissolves the rubber and plastic compounds used in older small-engine fuel lines and gaskets. — Source: Husqvarna US, Ethanol-Free Fuel Guide, 2026
If you’re also dealing with bar and chain lubrication on a smaller saw, our guide on how to oil a mini chainsaw chain covers the other fluid system that needs regular attention.
Safety Precautions
Ensure the chainsaw is off and cool, work in a well-ventilated area away from any spark or flame source, and keep a Class B fire extinguisher within reach since you’ll have an open fuel tank.
- Safety glasses — old fuel line snaps back when pulled free
- Nitrile gloves — gasoline dries out skin and carries carcinogenic additives
- Clear, well-lit work area with all tools laid out before you drain the tank
Removing the Old Fuel Line
Begin by draining the fuel tank completely into an approved container, then remove the cover screws and lift the cover off to expose the tank and carburetor.
- Drain the tank: Tip the saw over a container and let all fuel drain out completely.
- Remove the cover: Take out the cover screws with a screwdriver and set them aside in a small dish.
- Locate the fuel line: Find the rubber tube running from the tank grommet to the carburetor inlet nipple.
- Detach from the carburetor: Grip the line with needle-nose pliers close to the fitting and pull it straight off the nipple.
- Pull the tank end through: Use the pliers or a bent wire hook to draw the old line and grommet out through the tank opening.
- Inspect the primer bulb and filter: Replace both now if they’re original — they fail on the same timeline as the line.
Installing the New Fuel Line
Cut the new line slightly longer than the old one, then trim to fit — it’s easier to shorten a line than to stretch one.
- Measure and cut: Lay the new line beside the old one and cut it to the same length with a sharp blade for a clean, square end.
- Feed the tank end: Push the new line through the tank grommet until it seats fully against the fuel filter.
- Connect the carburetor end: Push the free end firmly onto the carburetor inlet nipple until it’s fully seated with no gap.
- Reinstall the primer bulb: Seat the new bulb into its housing and confirm both line barbs are secure.
- Check for kinks: Route the line so it can’t rub against the cylinder fins or get pinched when the cover goes back on.
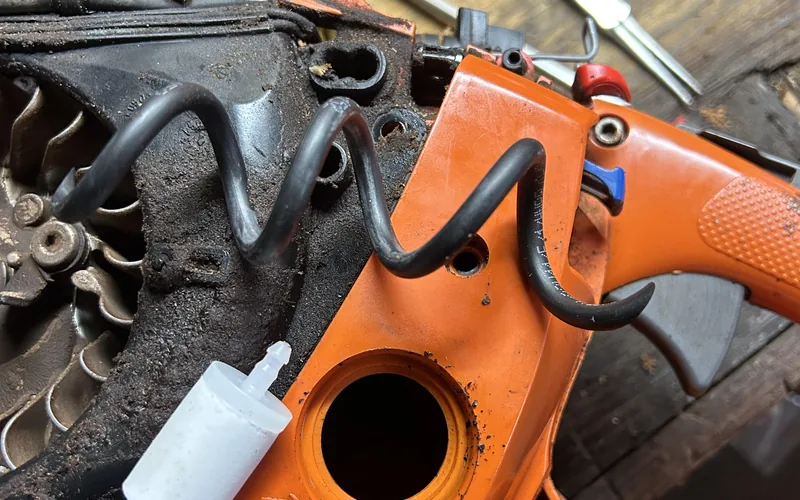
Reassembling the Chainsaw
Place the cover back on, align the screw holes, and tighten the screws snug — not overtightened, which can crack the plastic housing over time.
Refill the tank with fresh, properly mixed fuel (never fuel that’s been sitting more than 30 days), wipe away any spills, and close the cap tightly before starting the saw.
Testing the Chainsaw
Hold the saw firmly on the ground and pull the starter cord. If the engine doesn’t fire within 4–5 pulls, check the spark plug and the primer bulb seal before assuming the line is the problem.
Let it idle for a minute and inspect the new line closely. Any wet sheen, a fuel smell stronger than normal, or a soft spot under a fingertip means a connection isn’t fully seated — shut the saw off immediately and reseat that fitting before running it again.
Model-Specific Notes
The core procedure above applies across the Husqvarna homeowner lineup, but a few models need an extra step:
- 235 / 236 / 240: The carburetor sits close to the tank grommet — loosen the two carburetor mounting screws and tilt it slightly to get pliers on the fuel nipple.
- 340 / 345 / 350: Remove the two rear vibration-dampener screws first for enough clearance to work the line free without kinking it.
- 445 / 450 / 460: These use the longer 3/16″ line and often route it behind the flywheel shroud — note the routing path with a phone photo before removal.
- 555 / 555XP and other pro models: Air-injection saws route a second small hose alongside the fuel line — replace both at once and reconnect them to their original ports.
Maintenance Tips
Check the fuel line every time you sharpen the chain — the two tasks fall on roughly the same interval for an occasional user. Look for stiffness, discoloration, or a soft/spongy feel, and replace the line at the first sign rather than waiting for a leak.
If your saw sits unused for more than 30 days, run the tank dry or add a fuel stabilizer — stale ethanol fuel sitting in the line is the single biggest cause of early cracking. For general fuel storage and mixing gear, see our gas and oil can picks for chainsaws.
Frequently Asked Questions
How Do I Identify a Damaged Fuel Line?
Yes, a damaged fuel line is usually visible: look for cracks, stiffness, a soft or swollen feel, or a fuel odor near the tank. If your chainsaw won’t hold a prime or starts hard, inspect the line before checking anything else.
What Tools Do I Need for Replacement?
You need needle-nose pliers, a screwdriver matching your cover screws, a sharp utility knife, and correctly sized replacement fuel line. Replacing the primer bulb and inline filter at the same time is recommended but not required.
Can I Replace the Fuel Line Myself?
Yes, replacing a chainsaw fuel line is a beginner-friendly repair that doesn’t require special tools. Follow the steps in order, match the line diameter to your model, and test for leaks before returning the saw to regular use.
How Long Does It Take to Replace?
Replacing a fuel line typically takes 20 to 30 minutes once you have the correct size line on hand. Add 10 minutes if you’re also replacing the primer bulb and inline fuel filter at the same time.
What Size Fuel Line Does a Husqvarna Chainsaw Use?
Most homeowner Husqvarna chainsaws under 40cc (135, 136, 140, 235, 236, 240) use 1/8-inch ID fuel line. Mid-size 40–60cc saws (340, 345, 350, 445, 450) typically use 3/16-inch ID. Always confirm against your old line before buying.
Why Does My New Fuel Line Keep Cracking Again?
Recurring cracking almost always traces back to stale ethanol fuel left sitting in the line during storage. Use fresh fuel, add a stabilizer for saws stored more than 30 days, and choose ethanol-rated tubing rated for E10 fuel.
Conclusion
Replacing a Husqvarna chainsaw fuel line is a straightforward 20–30 minute repair once you’ve matched the correct diameter to your model. Drain the tank, pull the old line and primer bulb, cut the new line to length, route it without kinks, and test-run before putting the saw back to work.
Replace the fuel filter and primer bulb at the same time to avoid a repeat teardown, and check the line whenever you sharpen the chain. If you’re shopping for a new saw instead of repairing an aging one, our best chainsaw picks guide compares current homeowner and pro models.
Sponsored / affiliate links. As an Amazon Associate I earn from qualifying purchases. I may earn additional commission from eligible campaigns.