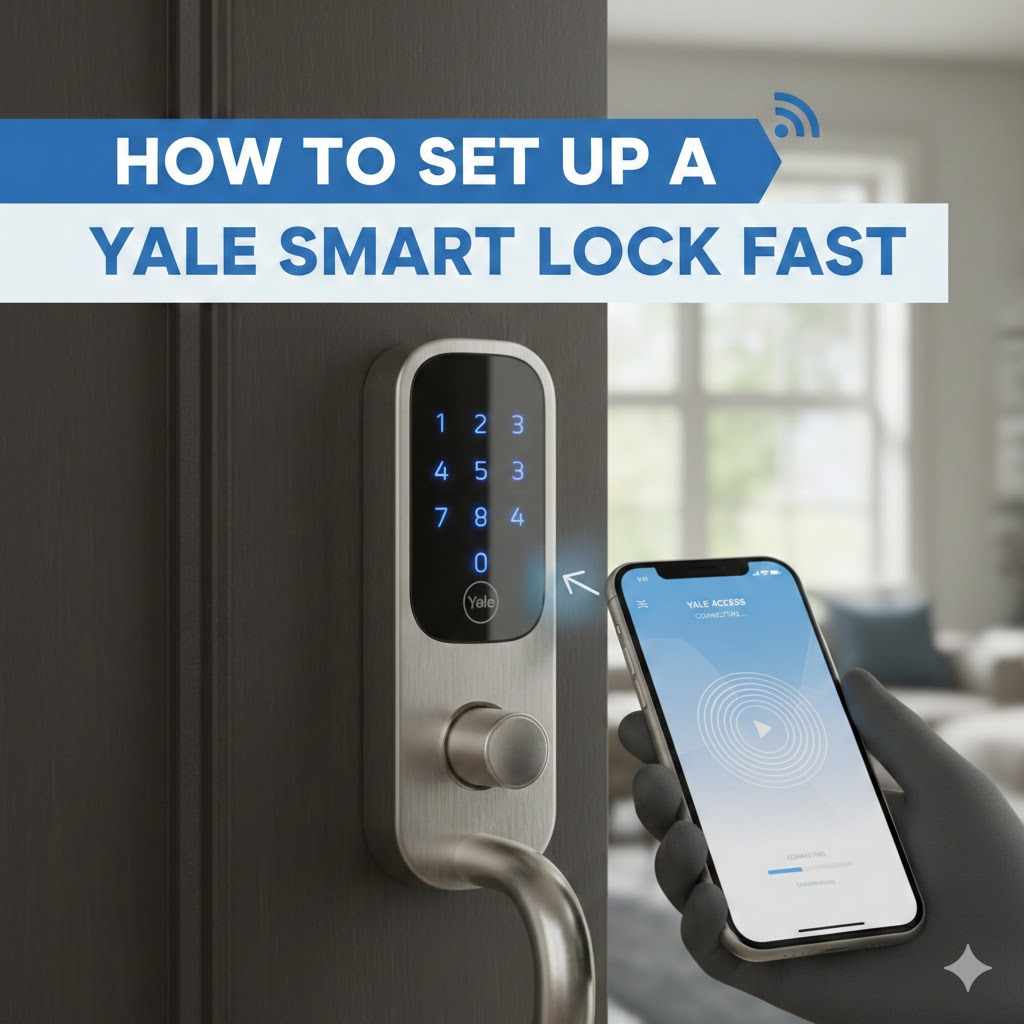
How to Set Up a Yale Smart Lock Fast
Setting up a new smart lock might seem like a tricky job, especially if you haven’t done it before. Many people wonder about How to Set Up a Yale Smart Lock Fast because the instructions can sometimes feel a bit confusing. Don’t worry, though!
We’re here to make it super simple. This guide will walk you through each step clearly, so you can get your new Yale smart lock working in no time. Get ready to enjoy the convenience of a keyless entry.
Getting Your Yale Smart Lock Ready
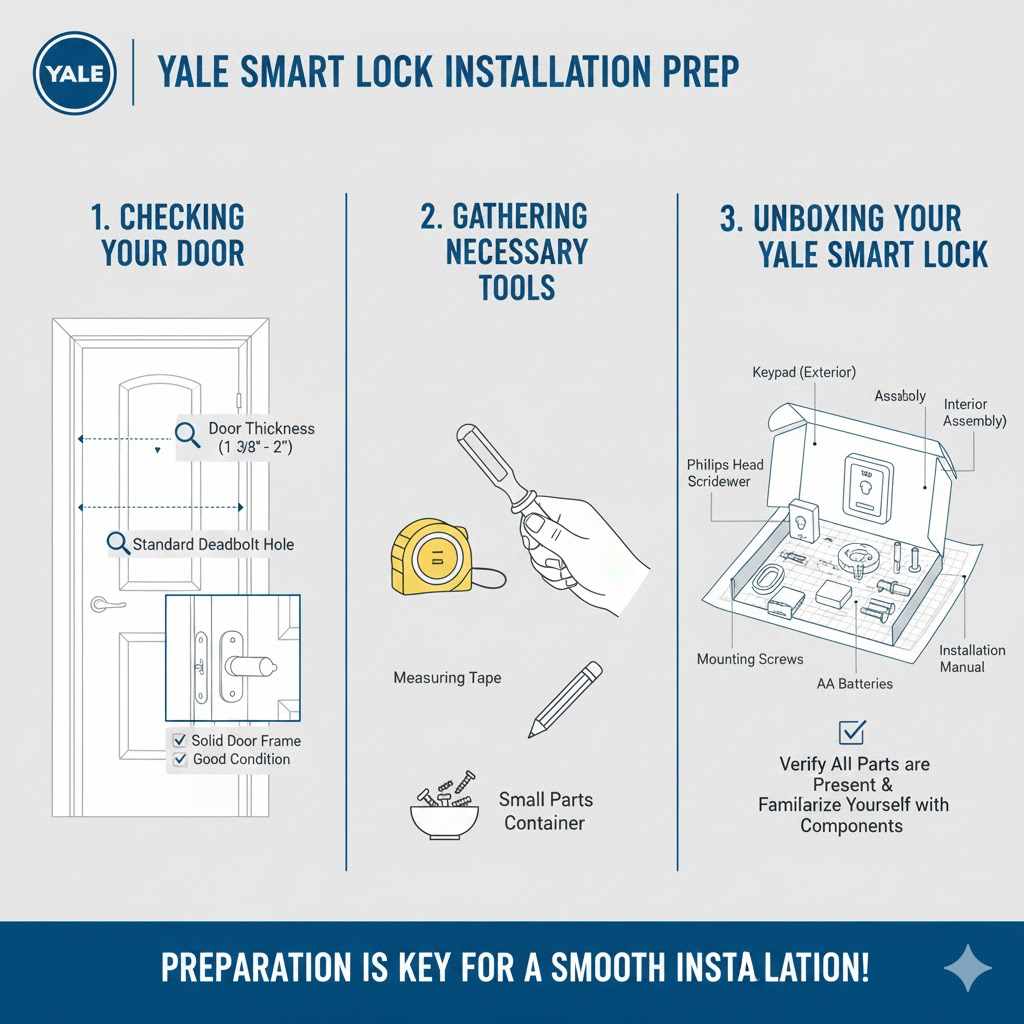
This section covers everything you need to do before you even start installing the lock. It’s all about preparation to ensure a smooth process. You’ll learn about checking your door, gathering tools, and unboxing your new Yale smart lock.
Being prepared means you won’t hit any unexpected snags later on.
Checking Your Door and Door Frame
Before you buy or install your Yale smart lock, make sure your door is ready. Your door needs to have a standard deadbolt hole. The thickness of your door is also important.
Most smart locks fit doors between 1 3/8 inches and 2 inches thick. Check the measurements on your door before you begin.
Also, look at your door frame. The strike plate, which is the metal piece on the frame where the deadbolt enters, needs to be in good shape. If it’s damaged or too loose, you might need to replace it.
A solid door frame ensures your lock is secure.
Gathering Necessary Tools
You won’t need a lot of special tools to install a Yale smart lock. Most installations can be done with a standard Phillips head screwdriver. Some models might come with a small tool, but a basic screwdriver set is usually all you need.
You might also want a measuring tape to double-check measurements. A pencil can be handy for marking drill spots if you need to make any adjustments. Having a small bowl or container to keep track of screws and small parts is also a good idea.
Unboxing Your Yale Smart Lock
When you open the box, take a moment to check that all the parts are there. You should find the keypad, the interior assembly, the deadbolt mechanism, batteries, mounting screws, and an installation manual. Compare these parts to the list in the manual.
Lay out all the pieces so you can see them clearly. This helps prevent you from losing anything. Familiarize yourself with the different parts before you start.
Knowing what each piece is called will make following the instructions much easier.
How to Install the Yale Smart Lock Hardware
This part is about the physical installation of the Yale smart lock onto your door. It involves removing your old deadbolt and fitting the new Yale components. We will guide you through each step to make sure it’s done correctly and securely.
Removing Your Old Deadbolt
First, you’ll need to take off your existing deadbolt. Most deadbolts have screws on the inside part of your door. Unscrew these completely.
Then, you should be able to pull the interior and exterior parts of the deadbolt off the door.
Once the main parts are off, you’ll see the bolt mechanism that goes through the door edge. Unscrew and remove this part too. Make sure your door is slightly ajar when you do this, so you don’t accidentally lock yourself out if the bolt is still partially engaged.
Installing the New Deadbolt Mechanism
Now, take the new deadbolt mechanism from your Yale smart lock kit. It has a tailpiece that sticks out. This tailpiece needs to go through the hole in the edge of your door.
Make sure the flat side of the tailpiece faces up.
Slide the deadbolt into the hole. The exterior side should have a place for the tailpiece to connect. Ensure the bolt is aligned properly with the door frame.
You might need to adjust its position slightly.
Attaching the Exterior Keypad
Next, take the exterior part of your Yale smart lock. This is usually the part with the keypad and the keyhole. There will be a wire harness that connects to the interior assembly.
Make sure this wire is fed through the hole in the door and doesn’t get pinched.
Align the exterior assembly with the deadbolt mechanism. The tailpiece from the deadbolt should slide into the slot on the back of the exterior assembly. Press it firmly against the door.
Securing the Interior Assembly
Now, take the interior assembly. This is the part that houses the batteries and control buttons. It will have screw holes that line up with the exterior assembly.
Before you attach it, connect the wire harness from the exterior unit to the corresponding port on the interior assembly.
Carefully place the interior assembly onto the door. It should fit snugly against the exterior part. Use the mounting screws provided to secure it to the exterior assembly.
Make sure the screws go in straight to avoid damaging the threads. Tighten them until the lock is firmly in place, but don’t overtighten.
Installing the Batteries
Open the battery compartment on the interior assembly. Most Yale smart locks use AA batteries. Insert the batteries according to the polarity markings inside the compartment.
Typically, you’ll need four AA batteries.
Once the batteries are in, the lock might beep or a light might flash. This means it has power. You can usually close the battery cover now.
Setting Up Your Yale Smart Lock Features
With the hardware in place, it’s time to set up the smart features. This involves programming your codes and connecting the lock to your home network if it’s a Wi-Fi model. This is where your lock becomes truly “smart.”
Creating Your Master or Owner Code
The first step is usually to set up a master or owner code. This code gives you full control over the lock. The manual will tell you the default code or how to create a new one.
Often, you press a specific button and then enter a temporary code followed by your new code.
This master code is important for adding other users or changing settings later. Keep it secret and don’t share it. If you forget this code, resetting the lock might be necessary.
Adding User Codes
Now you can add codes for family members or guests. The process is similar to setting the master code. You’ll usually press a button, enter the master code, and then enter the new user code.
You can often set different types of codes, like permanent or temporary ones.
Some locks allow you to set schedules for these codes, meaning they only work at certain times or on certain days. This is great for letting a dog walker in during specific hours. Keep a list of all user codes in a safe place.
Connecting to Wi-Fi (If Applicable)
If your Yale smart lock has Wi-Fi capabilities, you’ll need to connect it to your home network. This usually involves downloading a companion app from Yale. Follow the app’s instructions to add your lock.
You’ll typically need to put the lock into pairing mode, which might involve pressing a button or a sequence of key presses. Then, your phone will scan for the lock. You’ll select your home Wi-Fi network and enter your Wi-Fi password.
Once connected, you can control your lock remotely through the app.
Testing the Lock and Codes
Before you rely on your new smart lock, test everything thoroughly. Try locking and unlocking the door from the outside using a user code and the master code. Then, try from the inside.
Ensure the bolt extends and retracts smoothly.
If you connected to Wi-Fi, use the app to lock and unlock the door. Check that all features work as expected. If any code doesn’t work, you may need to reset and re-enter it.
Troubleshooting Common Issues
Even with careful installation, you might run into minor problems. This section helps you solve the most common issues quickly. Knowing these solutions can save you time and frustration.
Lock Not Responding
If your lock isn’t responding at all, first check the batteries. Make sure they are inserted correctly and are fresh. Sometimes, a loose battery connection can cause issues.
If the batteries are good, try resetting the lock. This usually involves removing the batteries for a minute and then reinserting them. For Wi-Fi models, ensure your Wi-Fi signal is strong enough for the lock to connect.
Keypad Not Working
If the keypad is unresponsive, check the wire connection between the exterior and interior assemblies. A pinched or loose wire can prevent it from working. Ensure the wire is plugged in securely at both ends.
Also, make sure your hands are clean and dry when trying to enter codes. Dirt or moisture can sometimes interfere with the keypad’s sensors. If the problem persists, you might need to contact Yale customer support.
Door Not Locking or Unlocking Smoothly
This issue usually relates to alignment. Check if the deadbolt is hitting the strike plate on the door frame. You might need to adjust the strike plate or the deadbolt itself.
Ensure the door is closing properly without sagging.
Sometimes, the deadbolt mechanism can get misaligned during installation. Loosen the mounting screws slightly, adjust the deadbolt, and then retighten. Make sure the tailpiece is fully engaged in the interior assembly.
Maintaining Your Yale Smart Lock
Once your Yale smart lock is installed and working, a little maintenance will keep it running smoothly for years. This includes keeping the batteries fresh and cleaning the lock.
Battery Replacement Schedule
Yale smart locks will usually give you a low battery warning through the app or with an indicator light on the lock itself. It’s a good practice to replace batteries when you get the first warning. This prevents your lock from dying unexpectedly.
Using high-quality alkaline batteries is recommended. Avoid rechargeable batteries unless specifically recommended by Yale, as their voltage can sometimes be inconsistent.
Cleaning and Care
Clean the exterior of your Yale smart lock regularly with a soft, damp cloth. Avoid using harsh chemicals or abrasive cleaners, as they can damage the finish or the keypad. For the keypad, a slightly damp cloth is usually sufficient to remove fingerprints and dirt.
If you notice any debris around the bolt mechanism, you can gently clean it with a soft brush. Keeping the moving parts clean ensures they operate without sticking.

Frequently Asked Questions
Question: How long does it typically take to install a Yale smart lock?
Answer: For most people, installing a Yale smart lock takes about 30 to 60 minutes. This includes unboxing, removing the old lock, and setting up the new one.
Question: Do I need to drill new holes in my door?
Answer: Usually, no. Yale smart locks are designed to fit standard deadbolt openings, so you typically won’t need to drill new holes.
Question: What if I forget my master code?
Answer: If you forget your master code, you will likely need to perform a factory reset on the lock. The manual will provide instructions on how to do this.
Question: Can I control the lock from my phone if it’s not a Wi-Fi model?
Answer: If your Yale smart lock is Bluetooth-only, you can control it from your phone when you are within Bluetooth range. Wi-Fi models allow for remote control from anywhere.
Question: How secure are Yale smart locks?
Answer: Yale smart locks use advanced encryption and security features to protect against unauthorized access. They are generally considered very secure when properly installed and managed.
Summary
You have now learned How to Set Up a Yale Smart Lock Fast. We covered preparing your door, installing the hardware step-by-step, and setting up the smart features like codes and Wi-Fi. Troubleshooting common problems and basic maintenance were also discussed.
Your new smart lock is now ready to use.