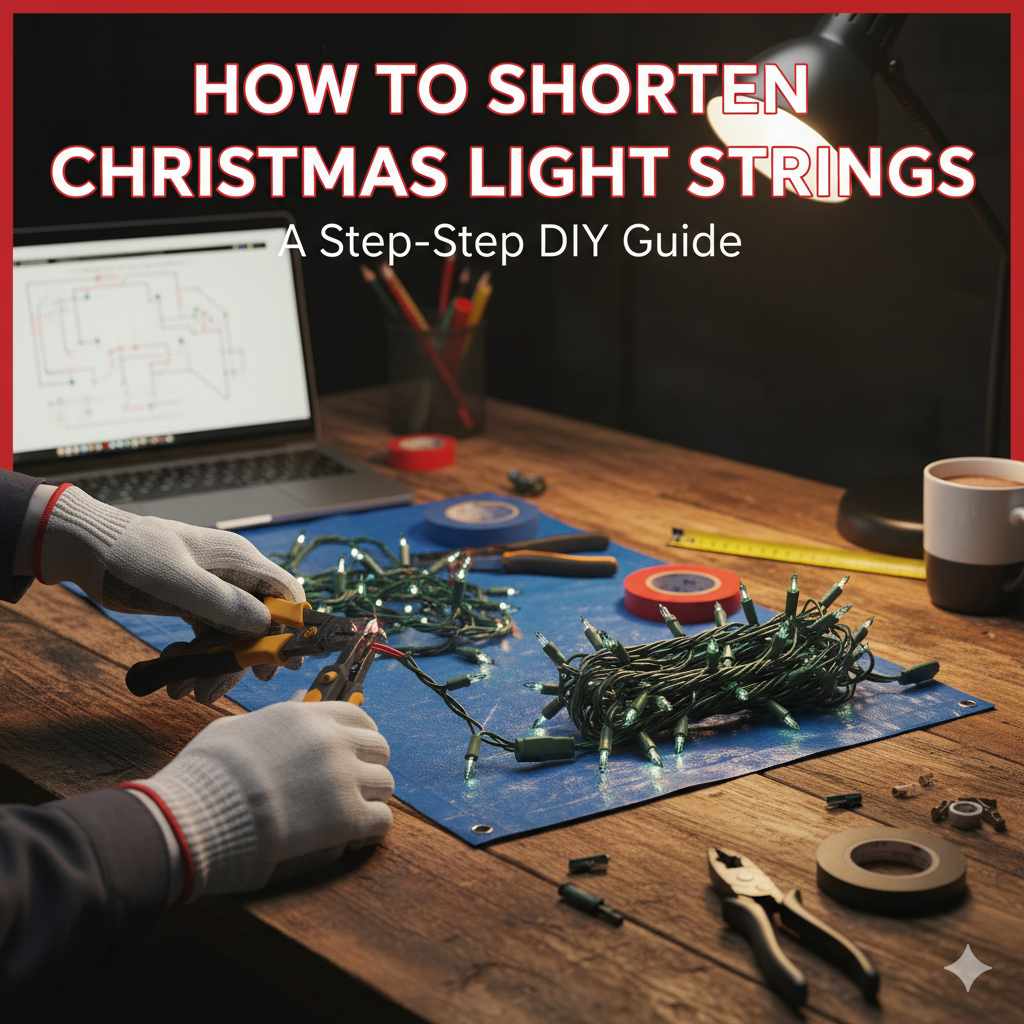
How To Shorten Christmas Light Strings: Genius Tip
Quick Summary:
Shortening Christmas light strings is simple with a clever cutting and splicing method. This guide shows you how to safely remove excess length, connect the ends, and ensure your lights fit perfectly, saving you hassle and frustration. Get ready for a perfectly lit display!
Is there anything more frustrating than having Christmas lights that are just a little too long for your tree or your roofline? You end up with unsightly bundles of wire, or worse, lights that don’t quite reach where you want them to. It feels like a problem that needs a professional electrician, right? Well, I’ve got some good news for you! With a few simple tools and a straightforward technique, you can easily shorten your Christmas light strings to fit your exact needs. No need to buy new sets or struggle with awkward lengths this year. Let’s get those lights looking just right!
Why You Might Need to Shorten Christmas Lights
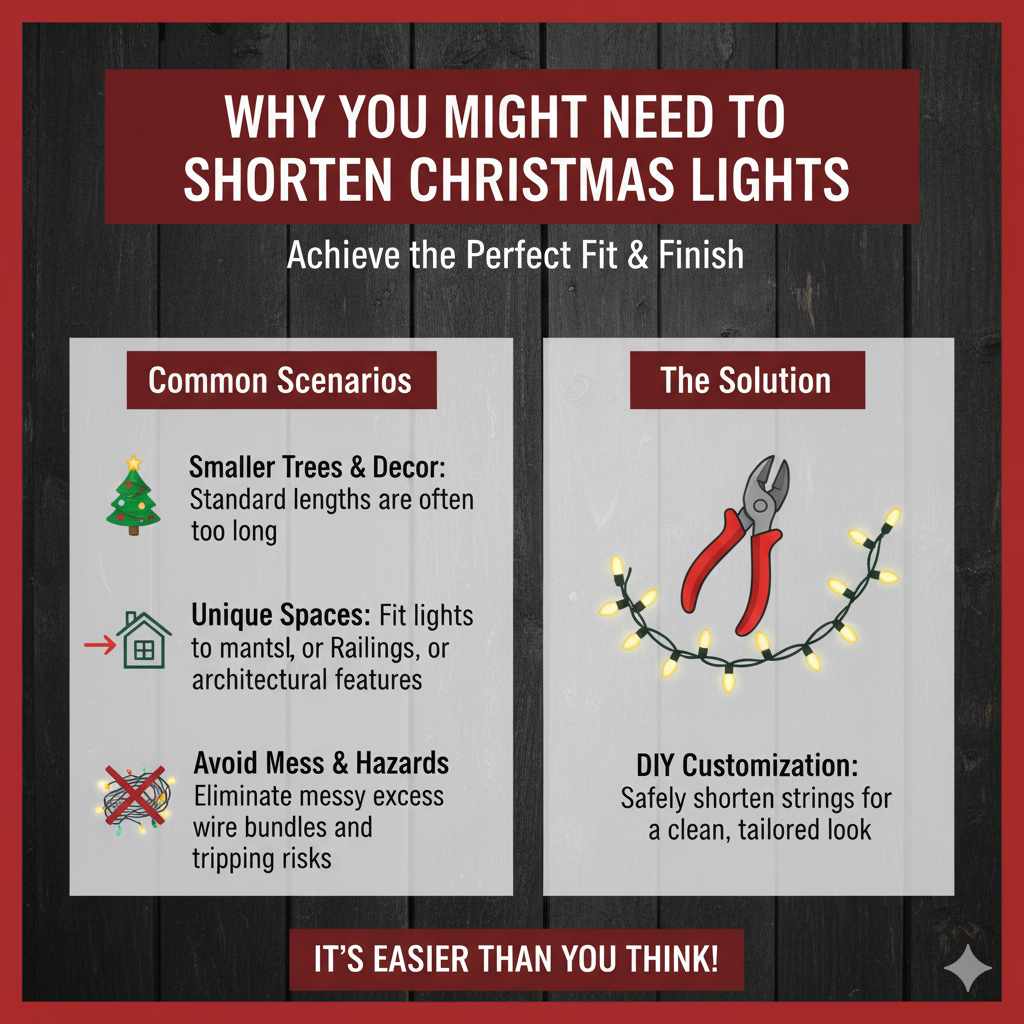
We’ve all been there. You’ve meticulously decorated your tree, or you’re finally tackling that outdoor display, and you realize your light strings are just a bit too long. Maybe you’re decorating a smaller tree than usual, or perhaps you’re trying to fit lights around a specific architectural feature on your house. Sometimes, the standard lengths just aren’t designed for every unique space. Tucking away excess wire can look messy, and it can even create tripping hazards if not done carefully. The good news is, shortening them is a completely achievable DIY task. It’s all about understanding how the lights are wired and using the right method to make them the perfect length.
Understanding Christmas Light Wiring
Before we grab any tools, it’s helpful to understand a bit about how those strings of lights work. Most common Christmas lights, especially the older incandescent types and many LED strings, are wired in parallel. This means each bulb has its own path to receive power. However, within a string, the wires often run in series for segments, and then those segments are wired in parallel. This is why if one bulb goes out in older strings, the whole section might go dark. Modern LED lights often have more robust circuits, but the principle of needing to maintain a continuous electrical path remains the same.
When you shorten a light string, you’re essentially cutting out a section of wire and then reconnecting the two remaining ends. The key is to ensure that the electrical connection is secure and properly insulated to prevent shorts and ensure safety. We’re not changing the voltage or the number of bulbs significantly, just the physical length of the wire connecting them.
For a deeper dive into electrical basics, understanding circuits is crucial. The U.S. Department of Energy offers some great resources on understanding electricity and home wiring:
Tools You’ll Need
You don’t need a professional electrician’s toolkit for this. Most of these items can be found around the house or at any hardware store. Having the right tools makes the job easier and safer!
| Tool | Why You Need It |
|---|---|
| Wire Strippers/Cutters | To cleanly cut the wire and strip insulation. |
| Electrical Tape | For securely insulating the spliced connection. Use good quality tape! |
| Small Wire Nuts (Optional, but recommended) | To create a secure mechanical and electrical connection between wires. |
| Scissors or Utility Knife | To cut the excess light string material if needed. |
| Safety Glasses | Always protect your eyes when cutting or stripping wires. |
| Work Gloves (Optional) | To protect your hands. |
The Genius Tip: How to Shorten Christmas Light Strings Safely
The “genius tip” here isn’t some complex rewiring; it’s a straightforward method that relies on careful cutting and secure splicing. We’re going to remove the unwanted length and then bridge the gap. The most crucial part is ensuring the electrical connection is sound and safe.
Here’s how to do it, step-by-step:
Step 1: Plan Your Cut
First, decide exactly how much length you need to remove. Lay out your light string and measure the area where you want them to fit. It’s always better to measure twice and cut once! Identify the section of wire you want to remove. You’ll want to cut between two bulbs, ensuring you have enough wire on both sides of your cut to work with.
Important Note: You must cut the wire between two bulbs. Never cut the wire at a bulb socket or the plug end. Cutting at these points would disrupt the circuit in a way that’s very difficult to repair safely.
Step 2: Unplug the Lights!
This is the MOST IMPORTANT safety step. Always, always, ALWAYS make sure the light string is unplugged from the power source before you do any cutting or splicing. Electricity and water (or even just exposed wires) are a dangerous combination. Never work on any electrical project while the power is on.
Step 3: Make the Cut
Using your wire cutters, snip through the wire where you’ve decided to shorten the string. Make a clean cut. You should have two separate ends of the wire, each leading to a different section of the light string.
Step 4: Strip the Wires
Now, carefully use your wire strippers to remove about ½ to ¾ inch of the outer insulation from the ends of both wires you just cut. You’ll see two smaller wires inside (usually a black and a white wire, or sometimes a colored and a white wire). You need to strip a small section of insulation from each of these smaller wires as well. Be gentle so you don’t nick the copper wire itself.
If your wire strippers have a gauge selector, choose the appropriate size for the wire. If not, you can carefully use the cutting notch to score the insulation and then pull it off with your fingers or pliers. Always aim for a clean strip without damaging the conductor.
Step 5: Connect the Wires
This is where you’ll reconnect the electrical path. You have two main options here, and both require good insulation.
Option A: Using Wire Nuts (Recommended for a secure connection)
Take the corresponding wires from each end of your cut. For example, twist the stripped black wire from one side together with the stripped black wire from the other side. Then, do the same for the white wires.
Place a wire nut over the twisted ends of the black wires and screw it on clockwise until it’s snug. Repeat with the white wires. Give the wires a gentle tug to ensure they are securely held within the wire nut. Wire nuts provide both a mechanical and electrical connection.
You can find electrical wire nuts at any hardware store. They come in various sizes, so choose one that fits snugly around your wires. For Christmas lights, small, plastic-capped ones are usually best.
Option B: Direct Splicing and Electrical Tape
If you don’t have wire nuts, you can directly splice the wires and use electrical tape. Twist the stripped ends of the black wires together securely. Then, twist the stripped ends of the white wires together securely. These twisted connections form your electrical splice.
Once the wires are twisted together, you MUST insulate them thoroughly with electrical tape. Wrap the tape tightly and completely around each splice, ensuring no bare copper is exposed. Overlap the tape generously. Then, to add an extra layer of security and to prevent the two splices from touching each other (which would cause a short circuit), wrap both insulated splices together with another layer of electrical tape. Make sure the tape is wrapped smoothly and securely.
Why Electrical Tape is Crucial: Not all tape is created equal! Standard household tape or duct tape will not suffice. Electrical tape is specifically designed to be an insulator and remain flexible without degrading. You can find high-quality electrical tape from brands like 3M.
Step 6: Test Your Work
Before you go to hang your lights, it’s essential to test them. Plug the shortened light string into a GFCI-protected outlet (Ground Fault Circuit Interrupter). These outlets are designed to shut off power if they detect a fault, adding an extra layer of safety. If the lights turn on and all the bulbs illuminate correctly, you’ve done a great job!
If they don’t light up, or only some of them do, unplug them immediately and recheck your connections. Ensure the wires are making good contact within the wire nuts or that your splices are secure and that no bare wire is exposed.
Step 7: Secure and Tidy Up
Once you’ve confirmed the lights work, you can tidy up the connection. If you used wire nuts, you might want to wrap them with a bit of electrical tape for extra protection against moisture and physical strain. If you used direct splicing, ensure your electrical tape is smooth and secure.
You can then trim any excess wire you might have left sticking out from the connection. Make sure the insulated connection is not stressed or pulled tight. It should have a little slack.
Alternative Methods and Considerations
While the cutting and splicing method is the most common and effective DIY solution, there are a couple of other things to keep in mind:
Cutting Off the Plug End
You can shorten a light string by cutting off the plug end and then rewiring a new plug. However, this is more complex and requires special tools and knowledge to ensure the plug is wired correctly and safely. For beginners, it’s much easier and safer to shorten the string in the middle.
Pre-made Short String Lights
For some applications, it might be easier to simply purchase pre-made shorter strings of lights. Many manufacturers offer various lengths, and for very specific needs, this can be a good option. However, if you have a lot of lights that need custom lengths, modifying existing ones is often more cost-effective.
LED vs. Incandescent Lights
The method described above works for both LED and older incandescent Christmas lights. However, LED lights are generally more durable and less prone to breakage. When working with LED strings, be extra careful not to damage the small LED components or their delicate wiring.
Weatherproofing for Outdoor Lights
If you are shortening lights that will be used outdoors, pay extra attention to the insulation. Ensure your wire nuts are rated for outdoor use, or that your electrical tape creates a completely waterproof seal around the splice. Moisture is the enemy of electrical connections and can lead to corrosion and short circuits. Consider using outdoor-rated wire nuts or a heat-shrink tubing specifically designed for electrical splicing if you want the most robust outdoor solution.
Safety First!
I can’t stress this enough: safety is paramount when working with any electrical project, even something as seemingly simple as Christmas lights. Here are some key safety reminders:
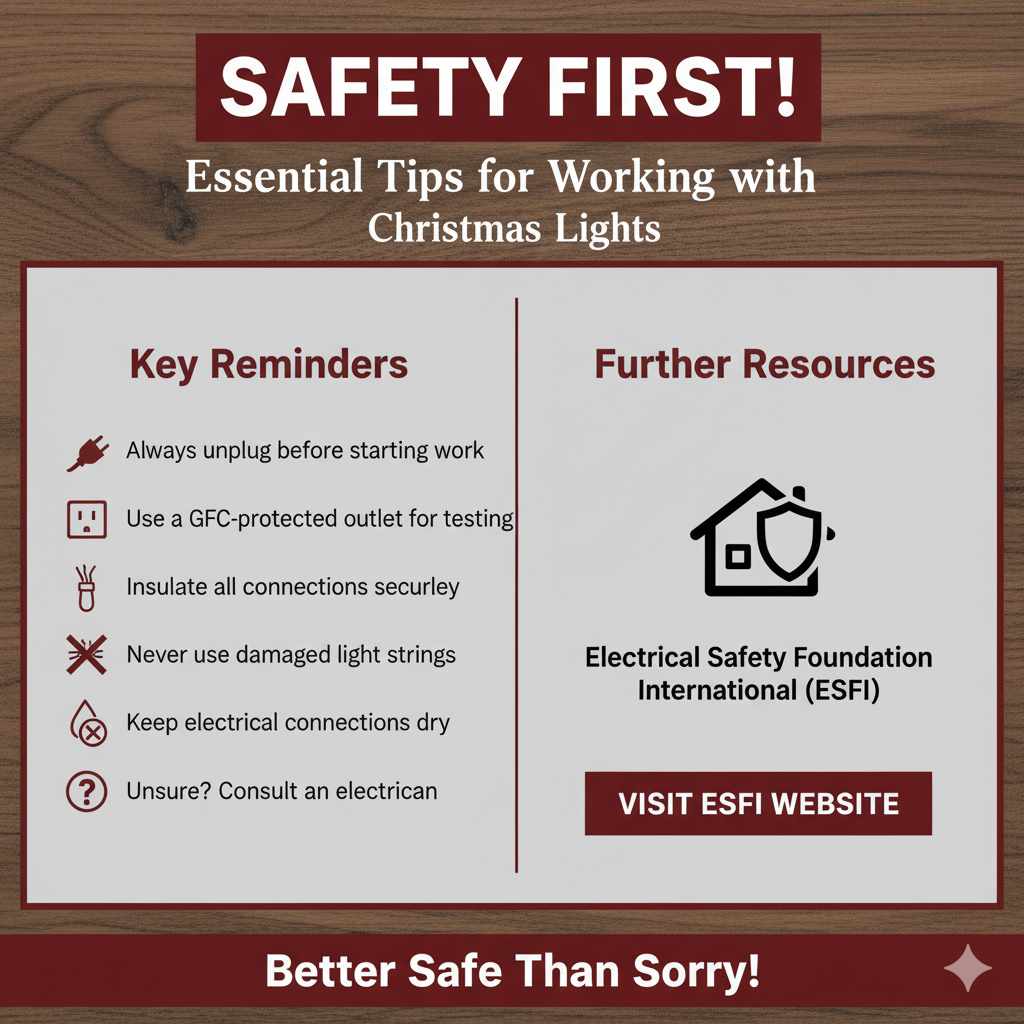
- Always unplug the lights before you begin any work.
- Use a GFCI-protected outlet for testing.
- Ensure all connections are securely insulated with high-quality electrical tape or appropriate wire nuts.
- Never use damaged light strings. If the wire insulation is cracked or frayed, discard the string.
- Keep electrical connections dry, especially for outdoor use.
- If you’re unsure at any point, stop and consult with someone more experienced or a qualified electrician. It’s better to be safe than sorry!
For more general electrical safety tips for homeowners, resources like the Electrical Safety Foundation International (ESFI) are invaluable:
Troubleshooting Common Issues
Even with careful work, sometimes things don’t go perfectly the first time. Here are a few common issues and how to fix them:
| Problem | Possible Cause & Solution |
|---|---|
| Lights don’t turn on at all. |
Cause: Bad connection, loose wire nut, or a bulb in the original string might have been out. Solution: Unplug the lights. Recheck all your splices and wire nut connections. Ensure wires are making good contact. Try wiggling the bulbs in their sockets to ensure good contact. If the string had a burnt-out bulb before you shortened it, that might be the issue. |
| Only some bulbs light up. |
Cause: Loose connection at your splice, or a break in the wire within the string itself. Solution: Unplug and carefully inspect your spliced connection. Make sure the wires are twisted together tightly and secured by the wire nut or tape. If the problem persists, there might be an issue with the original wiring of the light string that you can’t easily fix. |
| Lights flicker or are dim. |
Cause: Poor electrical connection, or the wire gauge might be too small for the length of the string (less likely with standard Christmas lights but possible). Solution: Unplug and re-secure your splices. Ensure the wire nuts are tight. If it’s a consistent issue across a very long string, it might be an inherent limitation of the string’s design. |
| The connection feels warm. |
Cause: This is a serious safety concern! It indicates a poor connection, resistance, or the wire is too small for the load. Solution: Unplug the lights IMMEDIATELY. Re-do the splice, ensuring a very secure connection. If it continues to be warm, the light string is likely not safe to use and should be discarded. |
Frequently Asked Questions (FAQ)
Q1: Can I shorten any type of Christmas light string?
A1: Yes, this method generally works for most common incandescent and LED Christmas light strings. However, always inspect the wires and construction. If a string looks unusually complex or fragile, it might be best to avoid modifying it.
Q2: How much length can I safely remove?
A2: You can remove a significant amount of length, but avoid removing so much that you’re left with only a few bulbs on a very long wire. The goal is to remove excess, not to fundamentally change the string’s design. Focus on removing a manageable section between bulbs.
Q3: Do I need to use wire nuts, or is electrical tape enough?
A3: While electrical tape can work if applied meticulously and generously, wire nuts provide a more secure mechanical and electrical connection. For the best and safest results, especially for outdoor lights, using appropriate wire nuts is recommended.
Q4: What happens if I cut the wire too close to a bulb?
A4: If you cut too close to a bulb socket, you might not have enough wire to make a secure splice. This can lead to a weak connection that might fail or, worse, create a safety hazard. Always aim to cut in a clear section of wire between bulbs.
Q5: Can I shorten a string that’s already damaged or has broken bulbs?
A5: It’s generally not recommended to modify a light string that is already damaged or has broken bulbs. The internal wiring might be compromised, and attempting to shorten it could exacerbate the problem or create new safety issues. It’s best to discard damaged light strings.
Q6: Will shortening my lights affect their brightness?
A6: For standard Christmas light strings, shortening them will have a negligible effect on brightness. The power delivered to each bulb is determined by the voltage and the bulb’s resistance, not the length of the wire connecting them (unless the wire is excessively long and thin, which is rare for typical light strings).
Q7: Is this method safe for outdoor lights?
A7: Yes, but with extra caution. Ensure your splices are completely waterproofed with high-quality electrical tape or outdoor-rated wire nuts. Moisture is a significant risk for outdoor electrical connections, so take extra steps to protect your work from the elements.
Conclusion
See? Shortening your Christmas light strings doesn’t have to be a daunting task. By following these simple, step-by-step instructions and prioritizing safety, you can customize your lights to fit any space perfectly. Whether it’s for a cozy indoor tree or a precisely placed outdoor display, you now have the knowledge to make your holiday decorating a breeze. Remember to always unplug your lights, use good quality materials like electrical tape and wire nuts, and test your work. With a little bit of care and these handy tips, you’ll have beautifully fitted lights that enhance your holiday spirit. Happy decorating!