How to Stack Solid Hardwood for Perfect Acclimation
Getting ready to install new hardwood flooring can be super exciting! But before you even think about putting those beautiful planks down, there’s a vital step many folks miss: acclimation. Figuring out How to Stack Solid Hardwood to Acclimate It Properly can seem tricky at first. Don’t worry, though; this is a common issue for anyone new to wood flooring. The good news is, I’m here to show you exactly how to do it right. I’ll walk you through the entire process, step by step, so you can prep your wood perfectly. Let’s get started!
What Is Acclimation and Why Is It Needed?
Acclimation is the process of letting your solid hardwood get used to the environment where it will be installed. Think of it like a new house guest needing to get comfortable. Wood is a natural material, and it changes based on the humidity and temperature of its surroundings. When wood absorbs or loses moisture, it expands or contracts. If you skip acclimation and install the wood immediately, these changes can cause problems like gaps, cupping, or even buckling of your floor. The goal of acclimation is to bring the wood’s moisture content into equilibrium with the environment, so it settles into its new home.
The Science Behind Wood’s Behavior
Wood’s behavior is primarily influenced by its cellular structure and the presence of moisture within its cells. Wood fibers act like tiny straws, constantly absorbing or releasing moisture from the air. This process is called hygroscopicity. The moisture content (MC) of the wood is the weight of water present in the wood expressed as a percentage of the oven-dry weight of the wood. When the MC changes significantly, the wood’s dimensions change. High humidity means more moisture absorption and swelling, while low humidity leads to moisture loss and shrinkage. This expansion and contraction can create stress within the wood, which is why proper acclimation is vital. Understanding wood’s behavior helps you prepare the wood for its environment.
- Moisture Content (MC): This measures how much water is in the wood. It’s expressed as a percentage. For example, if the MC is 10%, that means 10% of the wood’s weight is water.
- Equilibrium Moisture Content (EMC): This is the MC at which the wood stops absorbing or releasing moisture. It’s reached when the wood’s MC matches the surrounding environment’s humidity and temperature.
- Expansion and Contraction: Wood expands when it absorbs moisture and contracts when it loses moisture. This happens along the grain more than across the grain.
- Wood Species Matters: Different wood species behave differently. Some are more stable than others. For example, woods like oak and maple are more dimensionally stable than softer woods like pine.
The Importance of Humidity and Temperature
Humidity and temperature are the main drivers of wood’s moisture content. High humidity means the air holds a lot of water vapor, and wood will absorb this moisture. Low humidity means the air is dry, causing wood to release moisture. Temperature also affects the amount of moisture the air can hold. Warmer air can hold more moisture than cooler air. In addition to knowing about the climate, you must have a way to measure the moisture content of the wood and the environment where it will be installed. Using a moisture meter is a key part of the process, ensuring that the wood’s MC is appropriate for the installation site, which gives you the best chance for a beautiful and long-lasting floor.
- Relative Humidity (RH): This is the amount of moisture in the air compared to the maximum amount of moisture the air can hold at a specific temperature, usually expressed as a percentage. It is measured with a hygrometer.
- Temperature: Temperature affects the rate at which wood absorbs or loses moisture. Warmer temperatures generally speed up the process, while cooler temperatures slow it down.
- Seasonal Changes: The environment can change throughout the year. In the summer, humidity levels are typically higher, and in the winter, they are lower due to heating systems.
- Installation Site Conditions: The installation site must have stable temperature and humidity levels to prepare your floors successfully. HVAC systems can help.

Getting Ready: What You’ll Need
Before you start stacking your hardwood, it’s essential to have everything you need. This will make the entire process much smoother and more effective. Gather all the required materials and tools beforehand so you’re not interrupted. This will lead to the best results.
Essential Tools and Materials
You’ll need a few key items to get the job done right. These aren’t specialized tools, and most are available at your local hardware store. Good prep is the most important part of this process.
- Moisture Meter: This is your most important tool. It measures the moisture content of the wood. There are two main types: pin-type and pinless. Pin-type meters have small pins you insert into the wood, and pinless meters measure the moisture content by scanning the surface. A good meter helps you track the changes in moisture content during acclimation.
- Hygrometer: A hygrometer measures the relative humidity (RH) of the air. This tells you how much moisture is in the air. Digital hygrometers are easy to read and provide accurate readings.
- Thermometer: A thermometer measures the temperature of the room. Temperature affects the rate of moisture exchange in the wood.
- Spacer Blocks: These are used to create space between the stacked planks, allowing for air circulation. Small wooden or plastic spacers work perfectly.
- Protective Gear: Safety glasses and gloves will keep you safe.
- The Hardwood Flooring: The star of the show!
Preparing the Installation Site
Prepare the installation site for the acclimation process. The room should be as close as possible to the conditions it will have once the flooring is installed. This includes stable temperature and humidity levels. If you have an HVAC system, run it before you bring in the wood and keep it running during acclimation. This creates a balanced environment where your hardwood can adjust. This step is a necessary factor in ensuring the success of acclimation.
- Control the Environment: Ensure the temperature is between 60-80 degrees Fahrenheit (15-27 degrees Celsius) and the relative humidity is between 30-50%. The ideal range may vary based on your geographic location.
- Clean the Subfloor: The subfloor should be clean, dry, and level. Remove any debris.
- Seal the Perimeter: Close windows and doors to keep out extreme external conditions.
- Avoid Extreme Conditions: Do not acclimate the wood in direct sunlight, or near a heat source.
The Correct Way to Stack Solid Hardwood to Acclimate
Stacking hardwood properly is a crucial step in the acclimation process. Incorrect stacking can lead to uneven drying and warping. Following these simple steps will set your floor up for success. Remember, patience is key. The amount of time depends on many factors, like the wood species, climate, and initial moisture content of the wood.
Step-by-Step Stacking Instructions
Here’s the step-by-step process for stacking your hardwood correctly:
- Prepare the Area: Make sure the installation site is ready, the HVAC is running, and you have all your tools on hand.
- Open the Boxes: Open the boxes of hardwood flooring. This allows air to circulate around the planks. If the flooring is wrapped in plastic, remove the wrapping.
- Create a Base: Start by placing spacer blocks on the subfloor. Space the blocks about 12-16 inches apart to create a base. These blocks will lift the wood off the floor.
- First Layer: Place the first layer of hardwood planks on the spacer blocks. Arrange the planks side by side, leaving a small space between each plank for air circulation.
- Subsequent Layers: Continue stacking layers of planks on top of each other, using spacer blocks between each layer. Ensure that the planks in each layer are perpendicular to the ones below. This helps prevent cupping or warping.
- Stagger the Joints: Stagger the end joints of the planks in each layer. This avoids creating weak spots.
- Monitor the Moisture Content: Use your moisture meter to check the wood’s MC and compare it to the MC of the subfloor. This information will help you to know when the wood has acclimated.
- Monitor the Environment: Use your hygrometer and thermometer to monitor the temperature and relative humidity of the room. This helps you track changes.
- Time: Allow sufficient time for acclimation. A common estimate is about 7-10 days, but it can take longer depending on environmental conditions.
Best Practices for Stacking
Use these extra tips to improve the acclimation process. Small adjustments can make a big difference in the results.
- Air Circulation: Ensure adequate air circulation around each plank. This promotes even moisture exchange.
- Staggering: Always stagger the end joints of the planks in each layer. Avoid lining them up.
- Ventilation: Make sure there’s some air circulation in the room. This could mean opening a window slightly, depending on your climate, to allow for some air exchange.
- Avoid Direct Contact: Don’t let the hardwood touch the walls or any external objects during acclimation.
- Placement: Keep the stacks away from direct sunlight, heat sources, and damp areas.
Monitoring the Process
Watching the progress of acclimation is as important as the stacking process. This includes tracking changes in moisture content and the room environment. These steps ensure that the wood is ready for installation. Proper monitoring minimizes the risk of issues after the floor is installed.
Using a Moisture Meter Effectively
A moisture meter is key to understanding the status of your wood. Knowing how to use it correctly is critical to achieving a successful acclimation. Familiarize yourself with how to use your meter. If you’re using a pin-type meter, insert the pins into the wood. If you’re using a pinless meter, hold it flat against the surface. Take readings at multiple points on the boards, and on several boards throughout the stacks. This will give you a good average. It’s also wise to check the subfloor’s MC. You can then compare the wood and subfloor moisture content to see if they are within the acceptable range.
- Regular Checks: Check the wood’s moisture content daily, or every other day, depending on the environment.
- Multiple Readings: Take readings from several boards in different locations within the stack.
- Compare Readings: Compare the wood’s MC readings with the MC of the subfloor.
- Note Changes: Keep records of the moisture content readings to track changes over time.
- Understand the Results: Wood flooring is usually ready to install when the wood’s MC is within 2-4% of the subfloor’s MC. Consult the manufacturer’s recommendations.
Tracking Environmental Conditions
Monitoring the temperature and humidity levels is equally important as checking the wood. This will help you know the effect your environment has on the acclimation.
- Record Readings: Record the temperature and humidity readings daily or more often.
- Maintain Consistency: Aim for a consistent temperature and humidity range. If the levels are outside of the recommended range, adjust your HVAC.
- Seasonal Changes: Be aware of seasonal changes and make adjustments as needed.
- Document Progress: Keep a log of your readings to track the process.
According to the National Wood Flooring Association (NWFA), the ideal environment for hardwood floors is between 60-80 degrees Fahrenheit (15-27 degrees Celsius) and 30-50% relative humidity. Maintaining these conditions can help to prevent issues with your hardwood floor.
Addressing Common Issues
Even with careful preparation, problems can arise during the acclimation process. Early attention to common problems can prevent larger issues. Addressing these problems is crucial to maintaining a healthy environment for your flooring to acclimate successfully.
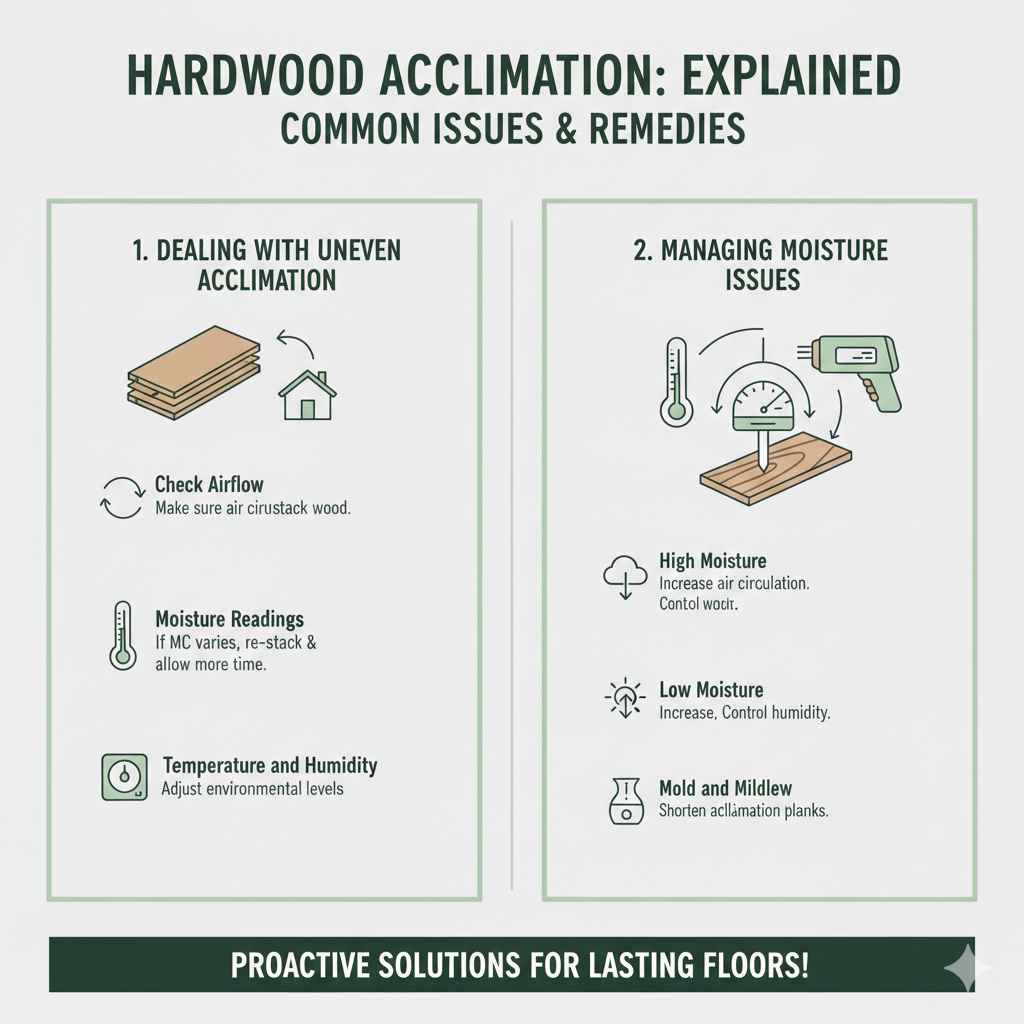
Dealing with Uneven Acclimation
Sometimes, hardwood may not acclimate evenly. This can happen if the environment isn’t consistent or if the wood is stacked improperly. Here are some of the ways to address it:
- Check Airflow: Make sure air is circulating freely around the planks. Re-stack the wood.
- Moisture Readings: If MC readings vary widely, re-stack the wood and give it more time.
- Temperature and Humidity Control: Adjust the temperature and humidity levels.
Managing Moisture Issues
Moisture issues during acclimation can lead to warping or other problems. Address these issues quickly to prevent further damage.
- High Moisture: If the wood is absorbing too much moisture, increase air circulation and control the humidity.
- Low Moisture: If the wood is drying out too quickly, increase humidity or consider shortening the acclimation time.
- Mold and Mildew: Check for any signs of mold. If you see it, discard the affected planks.
Frequently Asked Questions
Question: How long does hardwood flooring need to acclimate?
Answer: The acclimation time varies based on the wood species, climate, and initial moisture content. A typical range is 7-10 days, but sometimes longer.
Question: Can I speed up the acclimation process?
Answer: It’s best not to rush acclimation. Maintaining stable environmental conditions and proper stacking methods is key to the best results.
Question: What happens if I skip acclimation?
Answer: Skipping acclimation can lead to gaps, cupping, or buckling of the floor after installation, as the wood adjusts to the environment.
Question: What is the ideal humidity level for acclimation?
Answer: The ideal relative humidity is generally between 30-50%, though the right levels depend on the local climate.
Question: Should I open the windows during acclimation?
Answer: It’s generally best to keep windows closed to maintain a stable environment, unless you’re in a place with very dry conditions.
Final Thoughts
Successfully acclimating solid hardwood requires a bit of patience and following the right steps. By understanding why acclimation is necessary, gathering the right tools, and knowing How to Stack Solid Hardwood to Acclimate It Properly, you can ensure your flooring adjusts to its environment before installation. Remember to measure the moisture content regularly using a moisture meter, and monitor the temperature and humidity to create the best environment possible. Following these methods, you’ll be on your way to a beautiful, long-lasting hardwood floor that you will be proud to show off. Get ready to enjoy your new floor!