How to Stain Maple: Expert Tips for Seamless Results
To stain maple, start by sanding the wood with fine-grit sandpaper and wiping off any debris. Next, apply a pre-stain wood conditioner to help the maple absorb the stain evenly.
Once the conditioner is dry, use a brush or cloth to apply the wood stain in the direction of the grain. Allow the stain to penetrate for several minutes before wiping off any excess. Finally, apply a topcoat sealer to protect the stained maple.
Staining maple wood can enhance its natural beauty and add richness to its appearance. By following the proper steps and techniques, you can achieve a professional-looking finish that enhances the grain and color of the maple. Whether you are staining furniture, flooring, or any other maple wood project, the process is essential to ensure a smooth, even, and long-lasting finish.
Understanding Maple Wood Characteristics
When it comes to staining maple wood, understanding its natural characteristics is crucial for achieving the desired results. Maple wood is known for its hardness, durability, and attractive light-colored appearance. However, its tight grain pattern and natural resistance to absorbing stains require special considerations for successful staining. Let’s delve into the natural properties of maple wood and how its grain affects stain absorption.
Natural Properties Of Maple Wood
Maple wood, characterized by its pale cream to light reddish-brown hue, possesses a fine and consistent grain pattern that contributes to its distinctive appearance. Its hard and dense nature makes it a popular choice for furniture, cabinetry, and flooring due to its excellent durability and resistance to wear and tear. However, its dense grain structure presents challenges when it comes to staining, as it tends to resist absorbing pigments.
How Wood Grain Affects Stain Absorption
The tight, close-grained nature of maple wood means that it has a low porosity, making it less receptive to stains compared to other woods with a more open grain. Due to this characteristic, maple often requires preconditioning with a wood conditioner to ensure uniform stain absorption and prevent blotchiness. Understanding how the direction of the grain influences absorption and adjusting the staining technique accordingly is crucial for achieving a smooth, even finish on maple wood surfaces.
Pre-staining Preparation
When it comes to staining maple, the pre-staining preparation is crucial for achieving a professional-looking finish. Preparing the wood before applying the stain ensures that the surface is smooth and ready to absorb the stain evenly. In this guide, we will delve into the importance of sanding and smoothening the maple surface, as well as choosing the right type of stain applicator for optimal results.
Importance Of Sanding And Smoothening
Sanding the maple wood is a critical step in the pre-staining preparation process. Proper sanding helps to remove any existing finish, smooth out imperfections, and open up the pores of the wood to allow the stain to penetrate evenly. Use a progression of sandpaper grits, starting with a coarse grit to remove any blemishes or old finish, and gradually move to finer grits to achieve a smooth surface. Always sand in the direction of the wood grain to avoid creating visible scratches.
Choosing The Right Type Of Stain Applicator
Once the maple wood is sanded and smoothened, selecting the right type of stain applicator is essential for achieving a flawless finish. Brushes, cloths, or foam pads are popular choices for applying stain to maple. Each applicator type offers its advantages, and the selection depends on the desired finish and personal preference. A brush allows for precise application, while a cloth or foam pad may provide a more uniform finish. Consider experimenting with different applicators on scrap wood to determine which method yields the best results for your staining project.
Selecting The Right Stain
Choosing the right stain for your maple wood project is crucial to achieving the desired finish. The stain not only enhances the natural beauty of the maple wood but also protects it from wear and tear. In this section, we will discuss the key factors to consider when selecting the right stain for your maple wood project.
Considering Different Types Of Wood Stains
When selecting a wood stain for your maple project, it’s essential to understand the different types available in the market. Oil-based stains offer deep penetration and rich color, while water-based stains are known for their quick drying time and low odor. Additionally, there are gel stains that are ideal for vertical surfaces as they do not run. Pre-stain conditioners can also be used to achieve an even finish on maple wood, which tends to absorb stain unevenly.
Matching Stain Color To Maple Wood Nuances
Maple wood has a unique grain pattern and natural color variation, making it crucial to choose a stain that complements these nuances. Lighter stains allow the natural beauty of maple to shine through, while darker stains can provide depth and richness. It’s important to test the stain on a small, inconspicuous area of the wood to see how it reacts with the natural characteristics of maple.
Application Techniques For Seamless Results
Staining maple wood can be a rewarding process when done correctly. The application techniques are crucial for achieving seamless results that enhance the natural beauty of the wood. In this guide, we will explore the proper staining process for maple wood and provide valuable tips for achieving an even stain application.
Proper Staining Process For Maple Wood
Before diving into the application techniques, it’s essential to understand the proper staining process for maple wood. Maple is known for its tight grain and density, which can pose challenges when staining. To ensure a successful outcome, follow these steps:
- Prepare the wood surface by sanding it with fine-grit sandpaper to create a smooth and uniform texture.
- Apply a pre-stain conditioner specifically designed for maple to help the wood absorb the stain evenly.
- Select a high-quality, oil-based stain that complements the natural color of maple and test it on a small, inconspicuous area to ensure it achieves the desired shade.
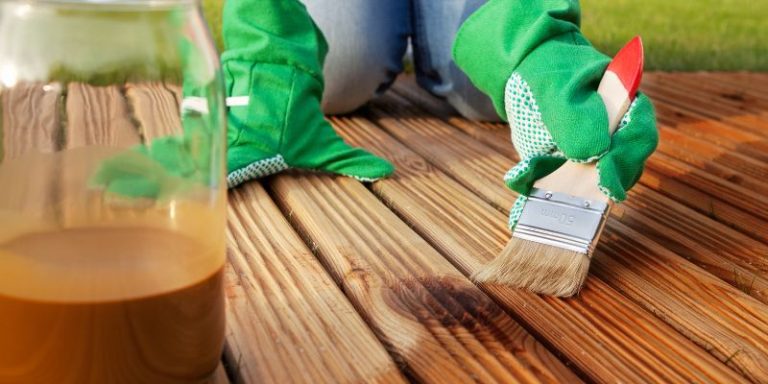
- Use a brush or cloth to apply the stain in the direction of the wood grain, working in manageable sections to ensure consistent coverage.
- Allow the stain to penetrate the wood for the recommended duration, then wipe off any excess stain with a clean cloth.
Tips For Achieving An Even Stain Application
To achieve an even stain application on maple wood, consider the following tips:
- Work in a well-lit area to identify any uneven application or missed spots.
- Apply multiple thin coats of stain rather than a single heavy coat to prevent streaks and blotches.
- Use a high-quality synthetic brush or a lint-free cloth for smooth and uniform application.
- Allow each coat to dry completely before applying the next layer to build up the desired depth of color.
- Consider using a gel stain for maple wood, as it adheres well and minimizes blotching.
Finishing And Maintenance
When it comes to finishing and maintaining stained maple, proper sealing and regular maintenance are crucial to preserving the wood’s beauty and durability. In this section, we will discuss the importance of sealing the stained maple and provide guidelines for maintaining the stained maple finish.
Importance Of Sealing The Stained Maple
Sealing the stained maple is essential to protect it from moisture, stains, and scratches, ensuring longevity and preserving its natural luster. A quality sealant acts as a barrier, preventing the wood from absorbing liquids and preventing damage from everyday use. Additionally, it enhances the color and grain of the maple, giving it a polished and professional look. Using a compatible sealer is important to ensure the stained maple retains its beauty and strength over time.
Guidelines For Maintaining The Stained Maple Finish
- Regular Cleaning: Use a gentle cleanser and a soft cloth to wipe the stained maple surface, avoiding harsh chemicals and abrasive materials that could damage the finish.
- Avoiding Moisture: Protect the stained maple from excessive moisture, as prolonged exposure can lead to warping or discoloration.
- Protective Measures: Use coasters for beverages and protective pads for hot items to prevent heat and moisture damage to the stained maple surface.
- Checking and Retouching: Periodically inspect the stained maple for any signs of wear or damage, and promptly address any issues by reapplying the appropriate finish or sealant to maintain its protective properties.
Following these maintenance guidelines will ensure that the stained maple retains its beauty and durability, providing enjoyment and functionality for years to come.
Frequently Asked Questions Of How To Stain Maple
How To Prepare Maple Wood For Staining?
To prepare Maple wood for staining, sand the surface with fine-grit sandpaper, apply wood conditioner, and sand again. Ensure the wood is clean and dry before staining for even absorption of the stain.
What Type Of Stain Is Best For Maple Wood?
Oil-based stains are the best choice for staining Maple wood as they provide deep and rich color penetration. Water-based stains may not penetrate Maple wood as effectively as oil-based stains.
How To Achieve An Even Finish When Staining Maple Wood?
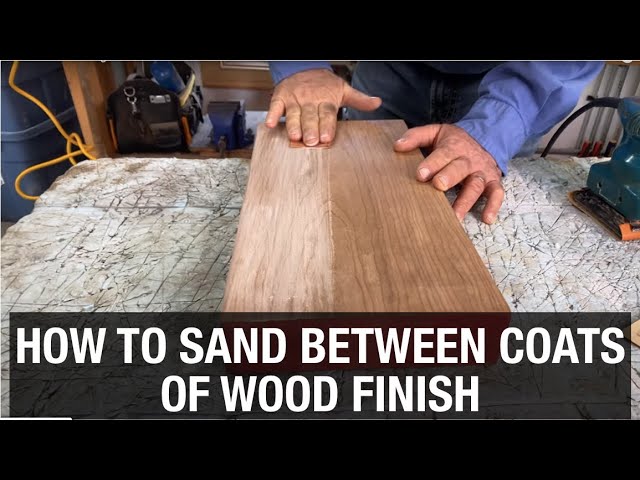
To achieve an even finish when staining Maple wood, apply a pre-stain wood conditioner to prevent blotchiness. Ensure the stain is applied evenly and allow it to penetrate for a consistent color result. Sand lightly between coats for a smooth finish.
Can You Apply Multiple Coats Of Stain To Maple Wood?
Yes, you can apply multiple coats of stain to Maple wood to achieve the desired color depth. Ensure each coat is allowed to dry completely before applying the next coat. Sand lightly between coats for a smooth and even finish.
Conclusion
Staining maple can be a rewarding DIY project with the right techniques and materials. By following the steps outlined in this guide, you can achieve a beautiful and professional-looking finish on your maple wood surfaces. Remember to always test your stain on a small, inconspicuous area before proceeding with the entire project to ensure the desired results.
With patience and attention to detail, you can bring out the natural beauty of maple wood with a stunning, custom stain.