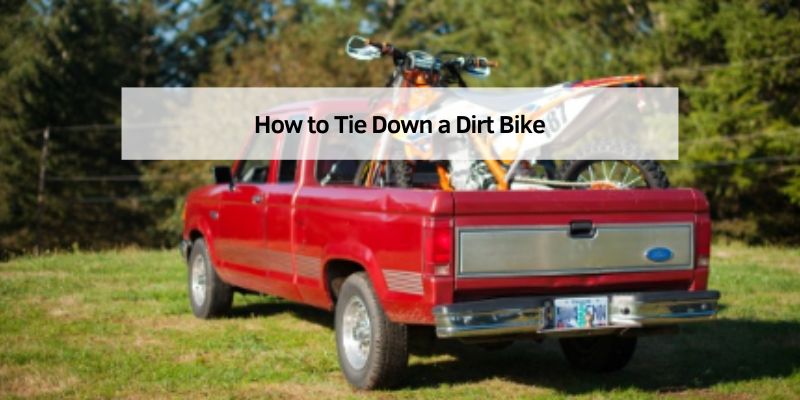
How to Tie Down a Dirt Bike
Hey there! If you’ve ever tried hauling a dirt bike to the trails, you know the sinking feeling of watching it wobble in the back of your truck or trailer, wondering if it’ll make it in one piece. I’ve been there, sweating bullets on my first attempt to tie down my Yamaha YZ250, praying it wouldn’t tip over on the highway. After years of trial and error—plus a few heart-stopping moments—I’ve nailed down the art of securing a dirt bike for transport.
Whether you’re heading to a motocross race or just moving your bike across town, I’m excited to share my hard-earned tips on how to tie down a dirt bike safely and securely. This guide is packed with practical steps, personal stories, and everything you need to keep your bike steady and your mind at ease. Let’s get rolling and make sure your dirt bike stays put!
Why Tying Down a Dirt Bike Properly Is Crucial
Picture this: I’m driving to a local trail, my brand-new dirt bike in the truck bed, tied down with some old ropes I found in the garage. Halfway there, I hear a thud. My bike had tipped over because the ropes stretched. No major damage, but the scratched handlebars still haunt me. That’s when I realized: tying down a dirt bike isn’t just about keeping it in place—it’s about protecting your investment, avoiding accidents, and keeping the road safe.
A loose bike can slide, tip, or even fall out, damaging the bike, your vehicle, or worse, causing a crash. Proper tie-downs keep the bike stable, protect its components, and ensure you’re not a hazard on the road. Plus, it saves you from the embarrassment of explaining a toppled bike to your riding buddies. Trust me, it’s worth doing right.
Choosing the Right Tie-Down Straps
The first step to securing your dirt bike is picking the right tie-down straps. I learned this the hard way after those stretchy ropes failed me. Now, I only use ratchet straps or heavy-duty cam buckle straps designed for motorcycles.
Ratchet straps are my go-to. They’re strong, adjustable, and lock tightly. I use 1.5-inch-wide straps with a 1,500-pound load rating—overkill for a 200-pound dirt bike, but it gives me peace of mind. Cam buckle straps are lighter and easier to use, but less secure for long hauls. I save those for short trips to nearby trails.
Look for straps with soft loops or padded hooks to protect your bike’s handlebars and frame. I once used cheap straps with bare metal hooks, and they scratched my bike’s paint. Spend a little extra—$20–$30 for a good set of four straps is worth it. Check for wear and tear before each use; frayed straps are a disaster waiting to happen.
Preparing Your Dirt Bike for Transport
Before you start strapping, prep your bike. I always give mine a quick once-over to make sure it’s ready for the ride. First, clean the bike. Mud or grease can make straps slip. I learned this when my muddy tires caused a strap to loosen on a bumpy road.
Next, put the bike in neutral and turn off the fuel valve to prevent leaks. I also fold in the mirrors (if your bike has them) and tuck in any loose parts like levers. For extra stability, I lower the suspension by loosening the front forks slightly—this keeps the bike from bouncing too much. If you’re not sure how, check your bike’s manual or ask a mechanic friend.
Finally, make sure the bike is upright. I use a wheel chock or a friend to hold it steady while I start tying it down. If you’re alone, a cheap wheel chock ($30–$50) is a game-changer—it holds the front wheel while you work.
Positioning the Bike for Maximum Stability
Where you place your dirt bike matters. I’ve hauled mine in truck beds, trailers, and even a van, and positioning is key. In a truck bed, center the bike over the rear axle for balance. I made the mistake of placing my bike too far forward once, and the truck handled like a seesaw.
If you’re using a trailer, position the bike so the weight is evenly distributed—usually in the middle or slightly forward. For a van, place it as close to the front axle as possible to avoid stressing the rear. Always face the bike forward so the front wheel takes the brunt of any bumps.
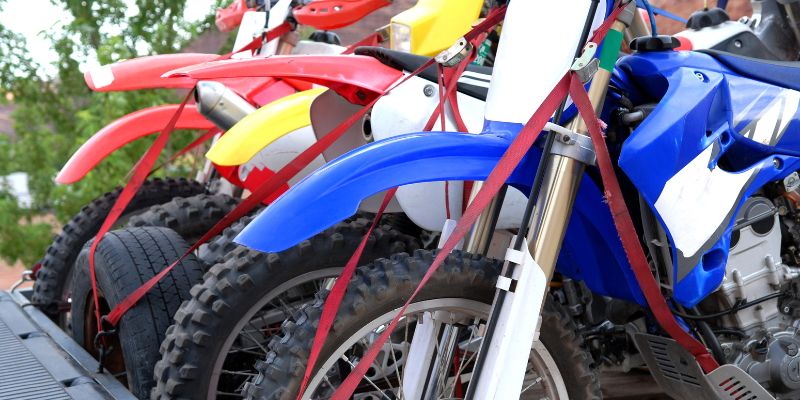
Use a wheel chock or tie the front wheel to a secure point to keep it from rolling. I also make sure the kickstand is up—leaving it down caused my bike to lean and loosen the straps on one trip. If you’re hauling multiple bikes, leave enough space between them to avoid scratches. I learned to pad the handlebars with foam or old towels after two bikes rubbed together.
Step-by-Step Guide to Tying Down Your Dirt Bike
Now, let’s get to the good stuff—actually tying down the bike. Here’s how I do it, step by step, after years of refining my technique:
- Set the bike in place. Position it in the truck bed or trailer, centered and upright. I use a wheel chock to hold the front wheel.
- Attach the front straps. Hook two ratchet straps to the handlebars or front forks, using soft loops to avoid scratches. Connect the other ends to secure anchor points in the truck or trailer, like tie-down loops or D-rings. I pull the straps at a 45-degree angle to compress the front suspension slightly.
- Tighten the front straps. Ratchet them down until the front suspension is compressed about one-third of its travel. I check that the bike is upright and the wheel doesn’t move.
- Secure the rear. Attach two more straps to the rear frame or swingarm, avoiding brake lines or exhaust. Hook them to the anchor points, keeping the same 45-degree angle. I tighten these just enough to keep the bike stable without over-compressing the rear suspension.
- Double-check everything. Walk around the bike, tugging each strap to ensure it’s tight. I also shake the bike gently to make sure it doesn’t budge. If it moves, I add more tension or reposition the straps.
- Add extra security. For long trips, I toss in a fifth strap across the seat or frame to a central anchor point. It’s overkill, but it saved my bike on a windy highway once.
This process takes me about 10 minutes now, but it’s foolproof. The bike stays rock-solid, no matter how rough the road.
Choosing Anchor Points
Anchor points are where you attach the straps to your truck or trailer. I’ve learned to be picky about this—weak anchor points can ruin your day. In a truck bed, look for built-in tie-down loops or D-rings. My old truck didn’t have them, so I installed aftermarket anchor points for $15. Worth every penny.
In a trailer, use the frame’s tie-down points or welded loops. Avoid hooking to flimsy parts like wooden slats or plastic trim—I did this once, and the strap pulled loose mid-trip. If your vehicle doesn’t have good anchor points, a cargo net or bungee cords can add extra security, but they’re not a substitute for proper straps.
Always check that anchor points are rated for the weight of your bike. My 250-pound bike needs points that can handle at least 500 pounds each to be safe. Spread the straps evenly to distribute the load—two in front, two in back, angled outward.
Comparing Tie-Down Straps
With so many straps out there, it helps to know which ones work best. Here’s a table based on my experience:
| Strap Type | Best For | Pros | Cons | Cost |
|---|---|---|---|---|
| Ratchet Straps | Long hauls, heavy bikes | Super strong, adjustable, secure | Can be bulky, harder to use | $20–$30 for 4 |
| Cam Buckle Straps | Short trips, light bikes | Easy to use, lightweight | Less secure, can loosen | $15–$25 for 4 |
| Soft Loops | Protecting bike | Prevent scratches, cheap | Need other straps to work | $5–$10 for 4 |
| Bungee Cords | Extra support | Quick to use, flexible | Not strong enough alone | $5–$15 |
I stick with ratchet straps for most trips, but I keep cam buckles for quick jaunts. Soft loops are a must to protect my bike’s finish.
Tips for Safe Transport
Tying down the bike is only half the battle. Here’s how I make sure the whole trip goes smoothly:
- Check straps regularly. I stop after 10–15 minutes of driving to check for loosening. Bumps can shift things, especially on new straps.
- Drive carefully. Avoid sudden stops or sharp turns. I learned this when a quick swerve almost tipped my bike over.
- Cover the bike. For open trailers or truck beds, I use a tarp to protect against rain or debris. Just make sure it’s tied down so it doesn’t flap and scratch the bike.
- Use a ramp. Loading and unloading is easier with a sturdy ramp. I got a folding aluminum one for $50, and it’s saved my back.
- Know your weight limits. Check your vehicle’s payload capacity. My truck can handle 1,500 pounds, so one bike is fine, but two plus gear gets close to the limit.
These habits keep my bike safe and make every trip stress-free.
Common Mistakes to Avoid
I’ve made my share of blunders, so let me save you some trouble. Here are mistakes to steer clear of:
- Using old or weak straps. Frayed ropes or worn straps can snap. I replace mine every couple of years or if I see damage.
- Over-tightening straps. Cranking too hard can damage the suspension or frame. I compress the suspension just enough to stabilize the bike.
- Bad anchor points. Hooking to weak spots like plastic trim can fail. I always use metal loops or D-rings.
- Not prepping the bike. Leaving the kickstand down or the fuel valve on caused leaks and leaks for me. Prep properly every time.
- Ignoring weight distribution. An off-center bike can make your vehicle handle poorly. I learned this when my truck swayed with a poorly placed bike.
Avoid these, and you’ll save yourself headaches and repair bills.
My Dirt Bike Hauling Triumph
Last summer, I hauled my dirt bike 300 miles to a motocross event. I was nervous—long drives are tough on tie-downs. But I used four heavy-duty ratchet straps, a wheel chock, and a sturdy trailer. I wrapped the handlebars in soft loops, checked the straps every hour, and drove smoothly. The bike arrived without a scratch, and I even got compliments on my setup at the track. That feeling of nailing it after years of mistakes? Priceless. You can do this too—just follow the steps and stay patient.
Conclusion: Secure Your Dirt Bike and Hit the Road
Tying down a dirt bike doesn’t have to be a nerve-wracking ordeal. With the right straps, a solid setup, and a little know-how, you can haul your bike anywhere with confidence. I’ve gone from wobbly disasters to rock-solid transports, and I’m thrilled to share what I’ve learned. Whether you’re a weekend rider or a motocross pro, these tips will keep your bike safe, your vehicle undamaged, and your adventures stress-free. So grab those ratchet straps, secure that bike, and hit the road. Your next ride is waiting, and your dirt bike will get there ready to rip!
FAQs
What’s the best type of strap for tying down a dirt bike?
Ratchet straps are the best for most trips. I use 1.5-inch-wide ones with a 1,500-pound rating. They’re strong and adjustable. Cam buckles work for short trips but can loosen.
Can I tie down a dirt bike in a van?
Yes! I’ve done it. Place the bike near the front axle, use a wheel chock, and tie it to sturdy anchor points. Make sure there’s enough padding to avoid scratches.
How many straps do I need?
Four is ideal—two for the front, two for the back. I sometimes add a fifth across the seat for extra security on long trips.
Will tying down my bike damage the suspension?
Not if you do it right. I compress the suspension about one-third of its travel. Over-tightening can strain it, so go easy on the ratchet.
Can I use bungee cords to tie down my bike?
Not alone. I’ve tried, and they stretch too much. Use bungees for extra support, but rely on ratchet or cam buckle straps for the main tie-down.
What if my truck doesn’t have anchor points?
Install aftermarket D-rings or tie-down loops. I added some to my truck for $15. They’re strong and make tying down a breeze.
How do I know if my bike is secure?
Shake it gently after tying it down. If it doesn’t move, you’re good. I also check the straps after 10–15 minutes of driving to be sure they’re tight.