How to Tie Down Inflatables for Home Safety
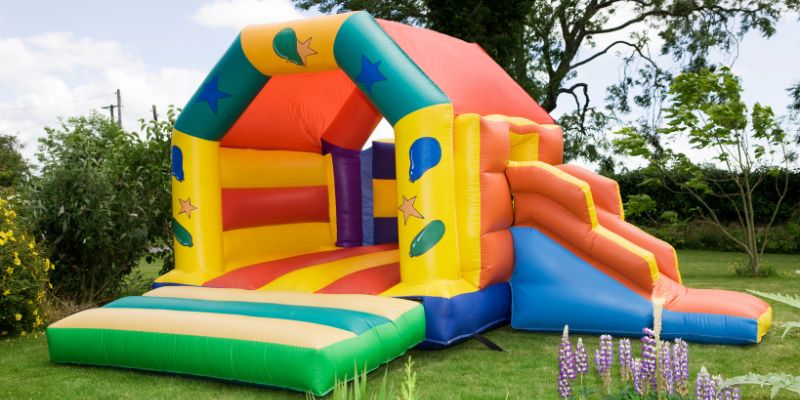
Hey there! If you’ve ever set up a giant inflatable Santa in your yard or a bouncy castle for a kid’s party, you know how exciting it can be to bring that festive or fun vibe to your home. But let’s be real—those inflatables can turn into a headache if they’re not secured properly. A strong gust of wind can send your inflatable tumbling down the street, causing damage or even injury.
I’ve been there, wrestling with ropes and stakes in my own backyard, trying to keep my holiday decorations from becoming a neighborhood runaway. That’s why I’m thrilled to share everything I’ve learned about how to tie down inflatables safely and effectively. Whether you’re decking out your lawn for Halloween or hosting a backyard bash, this guide will help you keep those inflatables steady, no matter the weather. Let’s dive in!
Why Securing Inflatables Matters
Picture this: you’ve spent hours setting up a massive inflatable snowman, and it’s the talk of the neighborhood. Then, a sudden windstorm hits, and your snowman is halfway across the street, tangled in your neighbor’s shrubs. Not fun, right? Securing inflatables isn’t just about keeping your decorations in place—it’s about safety, protecting your investment, and avoiding embarrassment. Unsecured inflatables can damage property, injure people, or even disrupt power lines if they get caught up in the wrong place.
In my experience, taking the time to tie down an inflatable properly saves you from costly repairs or replacements. Plus, it gives you peace of mind knowing your setup can handle a windy day. Whether it’s a holiday decoration, a bounce house, or a promotional balloon, proper tie-downs are non-negotiable. Let’s talk about how to do it right.
Choosing the Right Tie-Down Materials
Before you start hammering stakes into the ground, you need the right tools. Over the years, I’ve tried different ropes, stakes, and weights, and not all are created equal. The materials you choose depend on the size of your inflatable, the surface you’re working with, and the weather conditions in your area.
For most home inflatables, heavy-duty nylon ropes or straps work best. They’re strong, weather-resistant, and won’t fray easily. I’ve also used polyester ropes, which are great for smaller inflatables because they’re lightweight but still durable. Avoid cheap, thin ropes—they’ll snap under pressure. For stakes, go for metal ones at least 12 inches long for grassy or dirt surfaces. Plastic stakes might work for small decorations, but they’re no match for a windy day.
If you’re setting up on concrete or asphalt, sandbags or water-filled weights are your best friends. I once tried securing a bounce house on my driveway with just ropes and no weights—big mistake. It shifted every time the kids jumped. Sandbags filled with at least 20 pounds of sand or gravel will keep things stable. Here’s a quick table to help you choose:
| Surface Type | Best Tie-Down Material | Notes |
|---|---|---|
| Grass/Dirt | Metal stakes (12-18 inches) | Drive stakes at a 45-degree angle for maximum hold. |
| Concrete/Asphalt | Sandbags or water weights | Use at least 20-40 pounds per anchor point. |
| Indoor Setup | Weighted bases or sandbags | Ensure weights are evenly distributed. |
Pro tip: Always check the manufacturer’s recommendations for your specific inflatable. Some come with their own tie-down kits, but I’ve found those are often flimsy and need upgrading.
Assessing Your Setup Location
Where you place your inflatable is just as important as how you tie it down. I learned this the hard way when I set up a giant inflatable pumpkin too close to a tree branch. One windy night, it got caught and tore. Trust me, you don’t want to patch up a giant inflatable in the middle of a storm.
Start by picking a flat, open area away from trees, fences, or power lines. If you’re on a slope, the inflatable is more likely to tip or shift. Check the ground for rocks or roots that could damage the inflatable’s base or make staking difficult. For outdoor setups, avoid low-lying areas where water might pool during rain—soggy inflatables are harder to secure and can get damaged.
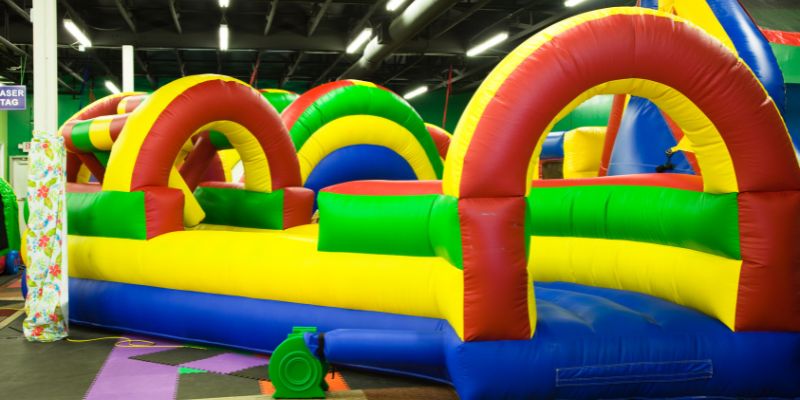
If you’re setting up indoors, like for a party in a gym or community center, make sure the floor is clean and dry. I once set up an inflatable slide on a polished floor, and it slid slightly because I didn’t account for the slick surface. Using non-slip mats or extra weights solved the problem.
Weather is another big factor. Check the forecast before setting up. Most inflatables can handle light breezes (up to 15-20 mph), but anything stronger calls for extra precautions. I always keep an eye on wind speeds, especially during fall and winter when storms can pop up unexpectedly.
Step-by-Step Guide to Tying Down Inflatables
Now, let’s get to the nitty-gritty of securing your inflatable. I’ve broken this down into steps that I follow every time I set up my holiday decorations or party inflatables. It’s straightforward, but attention to detail makes all the difference.
Step 1: Prepare the Inflatable
Before inflating, lay out your inflatable on the ground to check for any tears or weak spots. Make sure all tie-down loops or anchor points are intact. Most inflatables have built-in loops or D-rings at the base—those are your anchor points. If your inflatable doesn’t have them, you might need to attach straps to secure spots, but check with the manufacturer first to avoid damage.
Step 2: Position and Inflate
Place the inflatable in your chosen spot and start inflating it. Don’t fully inflate it yet—just enough to get it upright. This makes it easier to adjust the position and attach tie-downs. I’ve made the mistake of fully inflating first, only to realize I needed to move it a few feet. Save yourself the hassle and keep it partially inflated at this stage.
Step 3: Attach Ropes or Straps
Take your ropes or straps and attach them to the anchor points. I like to use a bowline knot because it’s strong and easy to untie later. Make sure each rope is long enough to reach the ground at a 45-degree angle—this angle gives the best stability. For a standard 6-foot inflatable, I use at least four anchor points, but larger ones, like a 12-foot bounce house, might need six or eight.
Step 4: Secure to the Ground
For grassy or dirt surfaces, drive your metal stakes into the ground at a 45-degree angle, pointing away from the inflatable. This angle helps the stakes resist pulling out. I use a rubber mallet to drive them in deep—about 10-12 inches for most stakes. Tie the ropes to the stakes using a taut-line hitch knot so you can adjust tension easily.
For concrete or asphalt, place sandbags or weights at each anchor point. Loop the ropes through the handles of the sandbags and pull tight. I’ve found that stacking two smaller sandbags (20 pounds each) works better than one heavy one because it’s easier to adjust.
Step 5: Fully Inflate and Test
Now, fully inflate the inflatable and check the tension on all ropes. They should be taut but not so tight that they strain the anchor points. Walk around and give the inflatable a gentle push to test stability. If it wobbles too much, add more stakes or weights or adjust the rope angles.
Step 6: Monitor and Adjust
After setup, keep an eye on your inflatable, especially in the first few hours. Weather can change, and ropes can loosen. I check my setups daily during windy seasons to make sure everything’s secure. If you notice any shifting, tighten the ropes or add more weight.
Extra Tips for Different Types of Inflatables
Not all inflatables are the same, and I’ve learned that different types need special attention. Here’s what I’ve picked up from setting up various kinds:
- Holiday Decorations: These are usually smaller, like inflatable Santas or pumpkins. They’re easier to secure but more likely to be exposed to winter storms. Use extra stakes if you’re expecting snow or high winds. I once lost a snowman because I didn’t account for icy ground—double stakes saved the day the next time.
- Bounce Houses: These are heavy and take a lot of abuse from kids jumping. Use at least six anchor points and check the stakes daily, as the constant movement can loosen them. I also recommend placing bounce houses on grass rather than concrete for better grip.
- Advertising Balloons: These are often tall and narrow, making them prone to tipping. Use wide-spaced anchor points to create a stable base. I’ve seen businesses lose balloons because they only used two tie-downs—four is the minimum for these.
- Water Inflatables: If you’re setting up an inflatable pool slide or float, make sure the surface is level and use water-resistant ropes. I’ve found that nylon straps work better than ropes for water setups because they don’t absorb moisture.
Safety First: Avoiding Common Mistakes
I’ve made my fair share of mistakes, and I want to save you from the same headaches. One big one is underestimating the wind. Even a “light breeze” can lift a poorly secured inflatable. Always check the wind rating on your inflatable’s manual—most can’t handle gusts over 20 mph. If a storm’s coming, deflate and store the inflatable.
Another mistake is using weak knots. I once tied a rope with a simple overhand knot, and it came undone in hours. Stick to strong knots like the bowline or taut-line hitch. Also, don’t skimp on stakes or weights. Cheap plastic stakes might seem fine for a calm day, but they’ll fail when it gets windy.
Finally, never set up near power lines. I saw a neighbor’s inflatable get tangled in a low-hanging line, and it was a nightmare to resolve. Keep a safe distance—at least 15 feet—from any electrical hazards.
Maintaining Your Inflatables for Longevity
Tying down your inflatable is only half the battle. Proper maintenance keeps it secure and looking good for years. After each use, clean the inflatable with mild soap and water to remove dirt or grass stains. I let mine air dry completely before storing to prevent mold. Check the ropes and stakes for wear and replace them if they’re frayed or bent.
When storing, fold the inflatable loosely to avoid creasing the material. I store mine in a dry, cool place to prevent damage from heat or moisture. If you notice any small tears, patch them immediately with a repair kit—most inflatables come with one. Ignoring tears can lead to bigger rips, especially under wind pressure.
When to Call in the Professionals
Sometimes, tying down an inflatable is more than a DIY job. If you’re dealing with a massive inflatable, like a 20-foot advertising balloon or a commercial bounce house, consider hiring professionals. I tried setting up a huge inflatable slide for a community event once, and it was overwhelming without the right equipment. Professional companies have heavy-duty anchors and experience with tricky setups. They’re also insured, which is a lifesaver if something goes wrong.
If you’re not sure whether to go pro, ask yourself: Is the inflatable taller than 10 feet? Is it on a tricky surface like a steep slope? Are you expecting extreme weather? If the answer to any of these is yes, a pro might be worth the cost.
Conclusion
Tying down inflatables might seem like a small detail, but it’s the key to keeping your decorations or party setups safe, secure, and stress-free. From choosing the right ropes and stakes to picking the perfect spot, every step matters. I’ve had my share of runaway Santas and wobbly bounce houses, but with the tips I’ve shared, you can avoid those pitfalls. Whether you’re sprucing up your yard for the holidays or hosting the ultimate kids’ party, a well-secured inflatable lets you focus on the fun, not the worry.
So grab your stakes, tie those knots tight, and enjoy the peace of mind that comes with a rock-solid setup. Happy decorating!
Frequently Asked Questions
How many stakes do I need for my inflatable?
It depends on the size. For small inflatables (under 6 feet), four stakes are usually enough. Larger ones, like bounce houses, need six to eight. Always check the manufacturer’s guidelines, but more stakes are better in windy conditions.
Can I use regular rope to tie down an inflatable?
Regular rope might work for small inflatables, but I recommend heavy-duty nylon or polyester ropes for better strength and weather resistance. Thin or old ropes can snap, so invest in quality ones.
What should I do if a storm is coming?
Deflate the inflatable and store it if winds are expected to exceed 20 mph. It’s not worth risking damage or injury. If you can’t deflate it in time, add extra stakes or weights and double-check all tie-downs.
Are sandbags better than stakes?
It depends on the surface. Stakes are great for grass or dirt, while sandbags are ideal for concrete or asphalt. I use sandbags when I can’t drive stakes into the ground, and they work just as well if they’re heavy enough.
How often should I check my inflatable’s tie-downs?
Check them daily, especially in windy weather. Ropes can loosen, and stakes can shift. A quick walk-around each day ensures everything stays secure.
Can I set up an inflatable indoors?
Yes, but use weights or sandbags instead of stakes. Make sure the floor is clean and non-slip. I’ve used rubber mats under indoor inflatables to prevent sliding.