How to Tint Wood Stain: Expert Tips and Techniques
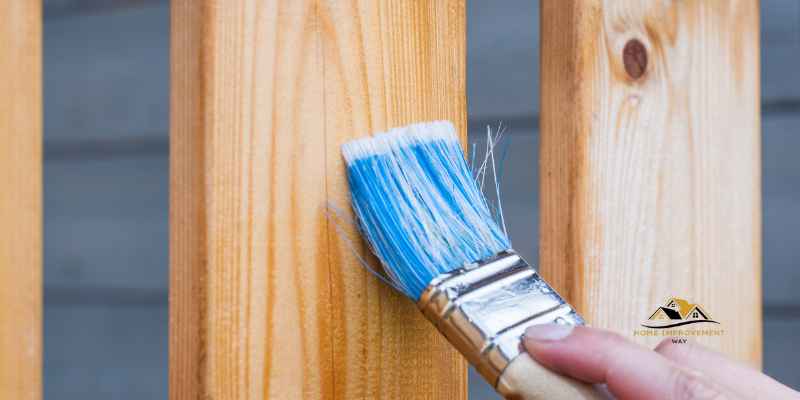
To tint wood stain, use pigment-based tint with water or oil-based stains. Use a clear or pre-tinted stain, and thoroughly mix the tint to add or deepen the color.
Tint wood stain by incorporating pigment-based tint with water or oil-based wood stains. Utilize a clear or pre-tinted stain as a base and ensure that the pre-tinted stain is pigment-based. Thoroughly mix the tint to add or deepen the color.
Tinting wood stain allows for customization and personalization of wood finishes. Whether you want to deepen the color or create a unique shade, understanding the process of tinting wood stain can be beneficial for various DIY woodworking projects or professional wood finishing tasks.
In this guide, we’ll explore the process of tinting wood stain and provide practical tips for achieving the desired color and finish with custom-tinted wood stains. Whether you’re a beginner or an experienced woodworker, understanding how to tint wood stain can enhance your woodworking skills and allow you to create customized finishes for your projects.
Techniques For Tinting Wood Stain
Dye Stain: Enhances the wood’s natural grain and provides vibrant colors.
Steps to Use Dye Stain:
- Select a dye stain suitable for your project.
- Apply the dye evenly, following the wood grain.
- Allow the stain to penetrate for optimal color intensity.
Mix Your Own Color Wood Stain: Allows customization and unique color options for your woodworking projects.
Process of Mixing Your Own Color Stain:
- Gather the necessary pigments and base stain.
- Measure your desired color formula accurately.
- Mix the pigments thoroughly into the base stain.
Key Tips:
- Experiment with different pigment ratios for varying shades.
- Test the color on a scrap piece of wood before applying to your project.
Tinting Wood Stain Techniques:
Enhance your woodworking skills by mastering techniques for tinting wood stain, such as using dye stains and mixing your own custom colors.
Mastering The Art Of Tinting:
Dive into the world of woodworking and unlock endless possibilities with tinting wood stain techniques that bring out the beauty of natural wood.
Adding Pigment-based Tint To Wood Stain
Adding pigment-based tint to wood stain can elevate the appearance of your woodworking project and provide a unique, customized touch. By incorporating pigment-based tint to wood stain, you can tailor the color to your specific preferences and achieve a desired hue that complements your interior or exterior wood surfaces. In the following sections, we will discuss the types of tints suitable for water-based and oil-based stains, as well as the preparation steps for adding pigment-based tint to wood stain.
Types Of Tints Suitable For Water-based And Oil-based Stains
When considering the addition of pigment-based tint to water-based stains, it is crucial to select tints specifically designed for water-based applications. Similarly, for oil-based stains, it is essential to opt for tints formulated for compatibility with oil-based products.
Preparation Steps For Adding Pigment-based Tint
Before adding pigment-based tint to wood stain, ensure that you have the necessary tools and materials, including the wood stain, the desired tint, and mixing utensils. Thoroughly mix the tint into the wood stain using a stirring stick or implement, ensuring uniform distribution of the pigment throughout the mixture. Test the tinted wood stain on a small, inconspicuous area to assess the color before applying it to the entire surface. Once you achieve the desired color, proceed with applying the tinted wood stain to your woodworking project.
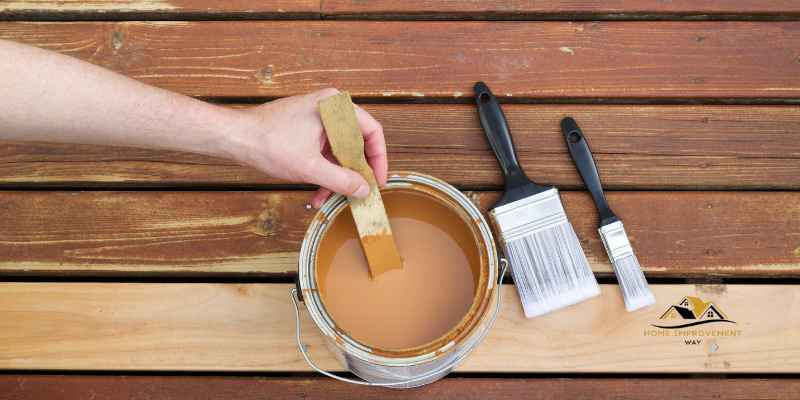
Enhancing Wood Stain Color
When it comes to staining wood, achieving the perfect color is essential. Fortunately, there are several techniques you can use to enhance the color of your wood stain. Whether you want a darker hue or a more vibrant shade, these methods will help you achieve the desired result. In this article, we will explore two techniques for enhancing wood stain color: applying a second coat for a darker color and substituting glazes or gel stains for liquid stains.
Applying A Second Coat For Darker Color
If you find that your initial coat of wood stain is not dark enough, applying a second coat can help deepen the color. This simple step can make a significant difference in the final appearance of your wood. However, it is important to note that adding an additional coat will slow down the staining process and require more time for drying. Nevertheless, the end result will be a richer and darker color that enhances the natural beauty of the wood.
Substituting Glazes Or Gel Stains For Liquid Stains
If you’re looking for a more intense and vibrant wood stain color, consider substituting liquid stains with glazes or gel stains. Glazes and gel stains typically contain a higher ratio of pigment, resulting in a deeper and more dramatic color. These products offer greater control over the level of intensity you want to achieve, allowing you to customize the color to your liking. Whether you prefer a bold, statement-making shade or a subtle, nuanced hue, glazes and gel stains are excellent options for enhancing wood stain color.
In conclusion, enhancing the color of your wood stain is achievable with a few simple techniques. Whether you opt for applying a second coat for a darker color or substituting glazes or gel stains, these methods will help you achieve the desired result. By taking the time to enhance the wood stain color, you can transform any project into a beautiful, eye-catching masterpiece.
Specific Color Tinting Techniques
Tinting wood stain to achieve specific colors requires the use of various techniques. Through the use of organic materials and mixing in pigments, a wide range of colors can be achieved. Below are two specific color tinting techniques that can be used to customize wood stain.
Using Walnut Husks For Base Tinting
One effective technique for tinting wood stain is to use walnut husks as a base tint. These can be dried and powdered or boiled down to extract a base tint that can then be added to the wood stain. The natural pigments present in walnut husks can impart unique and rich hues to the stain, allowing for a customized coloration of the wood.
Mixing Acrylic Paint With Wood Stain
Another method for achieving specific colors when tinting wood stain is to mix acrylic paint with the wood stain. This technique allows for precise color matching and can be used to create custom shades that may not be readily available in pre-made wood stains. By carefully blending the acrylic paint with the wood stain, a wide spectrum of hues and tones can be achieved, enabling the creation of truly unique finishes.
Unique Wood Stain Color Ideas
Discover unique wood stain color ideas and learn how to tint wood stain to create beautiful and custom finishes. Explore different techniques and mix your own colors to achieve the desired look for your woodworking projects. Customize your oil-based or water-based wood stains with pigment-based tints for a personalized touch.
Unconventional Wood Stain Colors
When it comes to wood staining, most people stick to traditional colors like brown, red, or black. But why limit yourself to the ordinary when there are so many unique and unconventional wood stain colors to choose from? By thinking outside the box and getting creative, you can transform your wood projects into eye-catching pieces that stand out from the crowd.
Innovative Wood Staining Techniques
If you’re looking to take your wood staining skills to the next level, consider trying out some innovative techniques. These methods can help you achieve stunning and one-of-a-kind results that will impress everyone who sees your finished project.
1. Layering: Instead of sticking to a single color, try layering different shades of stain to create depth and dimension. This technique works particularly well on furniture or large surfaces, where you can play with various tones to achieve a unique and interesting look.
2. Color Mixing: Don’t be afraid to mix your own custom colors by combining different stains together. This gives you full control over the final shade, allowing you to create something truly unique and personalized.
3. Wood Bleaching: This technique involves bleaching the wood before staining it, which lightens the natural color and opens up the pores. Once bleached, you can apply a stain of your choice to achieve a vibrant and striking hue that you wouldn’t be able to obtain with traditional staining methods.
4. Color Wash: A color wash involves diluting the stain with water to create a translucent effect that still allows the natural wood grain to show through. This technique is great for achieving a soft and subtle wash of color that adds a touch of elegance to any wood project.
5. Tinted Top Coat: Instead of tinting the wood directly, you can apply a tinted top coat over a clear stain to add a pop of color without completely obscuring the natural wood tones. This gives your project a more subtle and sophisticated look that is perfect for those who prefer a more understated approach.
Remember, the key to achieving unique and vibrant wood stain colors is experimentation. Don’t be afraid to mix and match different techniques until you find the perfect combination that suits your style and vision.
Innovative Wood Staining Techniques:
– Layering
– Color Mixing
– Wood Bleaching
– Color Wash
– Tinted Top Coat
Expert Tips For Customizing Wood Stain
Revamp your wood projects by customizing the stain color using PolyShades®.
- Choose a desirable color from the PolyShades® range.
- Apply the PolyShades® product over your existing wood stain to alter the color.
- Ensure to follow the application instructions carefully for best results.
Harmonize your wood glue with the wood/stain color for a seamless finish.
- Identify the desired wood/stain color.
- Add a small amount of wood stain to the wood glue and mix thoroughly.
- Test the tinted wood glue on a scrap piece of wood to ensure a perfect match.
Advanced Techniques For Wood Stain Customization
Enhancing the beauty of wood with personalized stain colors elevates the appeal of any woodworking project. Exploring advanced techniques allows for unique customization options that add a touch of individuality to your creations.
Intermixing And Layering Stains
By blending different wood stain colors, you can create a custom palette that reflects your personal style. Layering stains adds depth and dimension to the wood, resulting in a rich and complex finish.
Lightening Tones With Wood Finish Natural
Wood Finish Natural is a versatile product that can be used to lighten the tones of wood stains. It offers a subtle, natural effect that softens the overall color of the wood, perfect for achieving a more muted or weathered look.
Frequently Asked Questions
Can I Tint Wood Stain?
Yes, you can tint wood stain by adding pigment-based tint to water-based or oil-based wood stains. Use a clear or pre-tinted wood stain as the base and mix the tint thoroughly to deepen the color. You can also apply a second coat or substitute a glaze or gel stain for a darker finish.
How Do You Color Stain Wood?
To color stain wood, use pigment-based tint mixed with clear or pre-tinted stain for desired color. Ensure thorough mixing for consistent results. Apply with care for a vibrant finish.
Can Minwax Stain Be Tinted?
Yes, Minwax stain can be tinted by adding pigment-based tint to clear or pre-tinted wood stain to customize the color.
What Can I Add To Wood Stain To Make It Darker?
To make wood stain darker, you can add pigment-based tint. Mix the tint with a clear or pre-tinted wood stain, making sure both are pigment-based. Apply a second coat of stain or use a glaze or gel stain for a richer color.
Tinting wood glue is also an option.
Conclusion
Tinting wood stain is an effective and creative way to customize the color of your wood projects. By using pigment-based tint with water-based or oil-based wood stains, you can achieve the desired color and depth. Experimenting with different color options and following application tips can lead to vibrant and unique results.
With the knowledge gained from this post, you can confidently enhance the appearance of your woodworking projects.