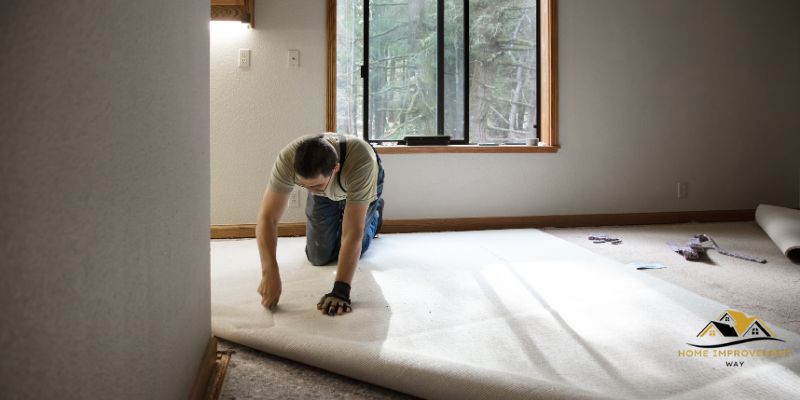
Tucking the carpet next to the tile is done by using a carpet trim or a transition strip. The strip is installed along the edge of the tile, allowing the carpet to be neatly tucked in for a seamless transition between the two surfaces.
Tucking carpet next to tile can be a daunting task, especially if you want to achieve a seamless and professional finish. Whether you’re remodeling your home or simply replacing the flooring in a particular room, knowing how to properly tuck the carpet next to a tile is essential.
By using a carpet trim or transition strip, you can ensure that the edges of the carpet are neatly tucked in, creating a smooth transition from the carpeted area to the tiled surface. We’ll take a closer look at the steps involved in tucking carpet next to tile, so you can achieve a clean and polished look in your space.
Preparing The Floor
Preparing the floor is an essential step before tucking the carpet next to the tile. By properly cleaning the area and removing any existing carpet or adhesive, you can ensure a smooth and seamless transition between the two surfaces. In this section, we will guide you through each step, providing clear instructions on how to prepare the floor for a successful carpet installation.
Cleaning The Area Thoroughly
Before you start tucking the carpet next to the tile, it is crucial to clean the area thoroughly. Dirt, dust, and debris can hinder the adhesive’s effectiveness and create an uneven surface. To ensure a clean floor, follow these steps:
- Remove all furniture and objects from the area to have a clear working space.
- Use a broom or vacuum cleaner to remove loose dirt and debris from the floor. Pay extra attention to corners and edges where dirt tends to accumulate.
- Wipe the floor with a damp cloth or mop to eliminate any remaining dust or dirt particles.
- Allow the floor to dry completely before moving on to the next step.
Removing Any Existing Carpet Or Adhesive
If there is an existing carpet or adhesive on the floor, it must be removed before tucking the new carpet next to the tile. Follow these instructions to ensure a clean surface:
- Start by cutting the existing carpet into manageable sections using a utility knife. Roll up each section and remove it from the area.
- Inspect the floor for any remaining adhesive. If there is adhesive residue, use a scraper or putty knife to carefully scrape it off. Take care not to damage the tile surface.
- If the adhesive is stubborn and does not come off easily, consider using a commercial adhesive remover. Follow the manufacturer’s instructions and ensure proper ventilation in the area.
- Once all the adhesive has been removed, thoroughly clean the floor again to eliminate any residue or debris.
- Allow the floor to dry completely before proceeding with the carpet installation.

Installing The Carpet
Learn how to seamlessly tuck your carpet next to the tile with these simple steps. Create a smooth transition between the two surfaces for a polished and professional look.
Measuring And Cutting The Carpet
Before you can install your carpet, you need to ensure that it will fit perfectly alongside the tile. This involves measuring and cutting the carpet to the appropriate size. Follow these steps:
- Start by measuring the width and length of the area where the carpet will be installed. Make sure to add a few inches to each measurement to allow for any adjustments.
- Transfer these measurements onto the back of the carpet using a measuring tape and a marker. Be sure to use a straight edge to ensure accurate lines.
- Once the measurements are marked, use a sharp utility knife to carefully cut the carpet along the lines. Take your time and use steady, controlled motions to avoid any jagged or uneven edges.
Adding Tack Strips Around The Perimeter
Tack strips are essential for securing the carpet in place and ensuring a tight fit. Here’s how to install them:
- Measure and cut the tack strips to fit along the perimeter of the room. They should be approximately 1/2 inch away from the edge of the tile.
- Using a hammer, firmly nail the tack strips to the subfloor. Make sure the nails are angled towards the wall to provide a better grip.
- Continue this process around the entire room, leaving a gap at doorways to allow for proper carpet installation.
Installing The Carpet Pad
The carpet pad provides cushioning and insulation under the carpet, enhancing its comfort and durability. Follow these steps to install the carpet pad:
- Measure the length and width of the room, just like you did for the carpet.
- Roll out the carpet pad and trim it to fit the measurements, using a utility knife.
- Secure the carpet pad to the subfloor using double-sided carpet tape, ensuring it is completely flat and free of wrinkles or folds.
Laying The Tile
When it comes to tucking the carpet next to the tile, laying the tile properly is essential to achieve a seamless transition between the two surfaces. In this step-by-step guide, we will walk you through the process of laying the tile, ensuring a smooth and professional finish. With the right preparation and tools, you’ll be able to complete this task with ease.
Preparing The Tile Layout
Before you begin laying the tile, it’s important to prepare the tile layout to ensure a visually pleasing result. Follow these steps:
- Start by measuring the area where you will be laying the tile. Take accurate measurements, accounting for any irregularities in the space.
- Once you have the measurements, create a layout plan on paper. This will help you determine how the tiles should be arranged and ensure that the pattern looks balanced.
- Consider the orientation of the room and the main entrance when planning the layout. In general, it’s best to start laying the tile from the center of the room and work your way outwards.
- If you are using different tile sizes or patterns, make sure to plan their placement accordingly. This will prevent any awkward cuts or odd-looking transitions.
Applying Thin-set Mortar
Once you have prepared the tile layout, it’s time to apply thin-set mortar. Here’s how:
- Start by mixing the thin-set mortar according to the manufacturer’s instructions. Use a clean bucket and a mixing paddle for an even consistency.
- Using a trowel, apply a thin layer of mortar to a small section of the floor, using the notched edge of the trowel to create ridges.
- Place the first tile in the mortar, pressing it firmly into place. Make sure to align it with your layout plan and adjust it if necessary.
- Continue spreading mortar and laying the tiles in small sections, working your way across the floor. Use tile spacers to ensure an even gap between the tiles.
Setting The Tiles
Setting the tiles properly is crucial for a flawless finish. Follow these steps:
- Once you have laid the tiles, use a level to check that they are all at the same height and properly aligned.
- If any tile needs adjusting, gently lift it and add or remove mortar accordingly. Use a rubber mallet to tap it into place.
- Continue setting the tiles, making sure to periodically check their alignment and levelness.
- Allow the thin-set mortar to dry according to the manufacturer’s instructions before proceeding with the next steps of tucking the carpet.
By following these steps for laying the tile, you’ll be on your way to achieving a seamless transition between your carpet and tile surfaces.
Seaming The Carpet And Tile
Learn how to seamlessly tuck carpet next to tile with these easy steps. Achieve a professional finish by following our tips for seaming the carpet and tile together.
Creating a transition strip:
– To seamlessly transition between your carpet and tile flooring, you’ll need to create a transition strip that will fill the gap between the two materials.
– The transition strip can be made of various materials such as wood, metal, or vinyl.
– It should be wide enough to cover the gap and long enough to extend past the ends of the carpet and tile.
Aligning the carpet and tile edges:
– Before installing the transition strip, it’s crucial to align the edges of the carpet and tile.
– Start by cutting the carpet along the line where it meets the tile, using a sharp utility knife.
– Make sure to leave a small gap of about 1/4 inch between the carpet and the tile to allow for the transition strip.
Securing the seam:
– Once the edges of the carpet and tile are aligned, you can secure the seam using adhesive or double-sided carpet tape.
– Apply the adhesive or tape to the transition strip, making sure to cover the entire surface.
– Carefully press the strip into place, ensuring that it is firmly attached to both the carpet and the tile.
Table: Comparison of transition strip materials
| Material | Pros | Cons |
|---|---|---|
| Wood | Durable and aesthetically pleasing | Requires regular maintenance and can warp over time |
| Metal | Strong and resistant to wear and tear | May be noisy when stepped on and prone to scratching |
| Vinyl | Easy to install and maintain, affordable | May not offer as much durability as wood or metal |
Ordered list: Steps to create a transition strip
- Determine the material you want to use for the transition strip.
- Measure the width of the gap between the carpet and tile.
- Cut the transition strip to the appropriate length.
- Sand and finish the strip if necessary.
- Place the strip over the gap and ensure it fits properly.
- Secure the strip using screws, adhesives, or nails.
Unordered list: Tips for aligning the edges
- Use a straight edge or ruler to guide your cut along the line where the carpet meets the tile.
- Make small, controlled cuts to avoid damaging either the carpet or tile.
- Double-check the alignment before securing the strip.
- Consider using a knee kicker or carpet stretcher to ensure the carpet is taut against the tile.
Remember, properly seaming the carpet and tile is essential for a clean and polished finished look. By following these steps and using the right materials, you’ll be able to create a seamless transition that enhances the overall aesthetics of your space.

Finishing Touches
Learn how to seamlessly tuck carpet next to tile for a polished finish. Follow these simple steps to achieve a seamless transition between carpet and tile flooring.
Introduction: Finishing Touches
After successfully tucking the carpet next to the tile, it’s time for the crucial finishing touches. Paying attention to these details will provide your flooring with a polished, professional look. In this section, we’ll discuss two important steps: trimming excess carpet and performing a final cleanup and inspection.
Trimming Excess Carpet
With the main tucking complete, you may notice some excess carpet that needs to be trimmed. This step is important to achieve a clean and seamless transition between the tile and the carpet. Here’s how you can trim the excess carpet:
- Start by using a sharp utility knife or pair of scissors to carefully cut the excess carpet close to the edge of the tile. Make sure to avoid cutting into the tile itself.
- Hold the knife or scissors at a slight angle to create a slightly beveled edge, blending it seamlessly with the tile.
- Trim any frayed edges or stray fibers for a neat and tidy finish.
Clean Up And Final Inspection
After trimming the excess carpet, it’s time for the final clean-up and inspection. Here’s what you need to do:
- Remove any debris, dust, or loose carpet fibers by vacuuming or sweeping.
- Thoroughly inspect the entire area to ensure that the carpet is securely tucked and there are no visible gaps or uneven edges.
- If needed, gently press down on any loose carpet to secure it in place.
- Double-check the tucking along the entire length of the transition to ensure a consistent appearance.
By following these steps, you have successfully finished tucking the carpet next to the tile. Take a step back and admire your handiwork, knowing that your flooring looks seamless and professionally done.
Conclusion
Tucking the carpet next to the tile can be achieved with a few simple steps. By following the guidelines provided in this blog post, you can ensure a seamless transition between the two flooring materials. Remember to properly measure and trim the carpet, use adhesive or tack strips for secure attachment, and finish off with a smooth and even edge.
With a little patience and care, you can achieve a professional-looking result that will enhance the overall aesthetics of your space.


