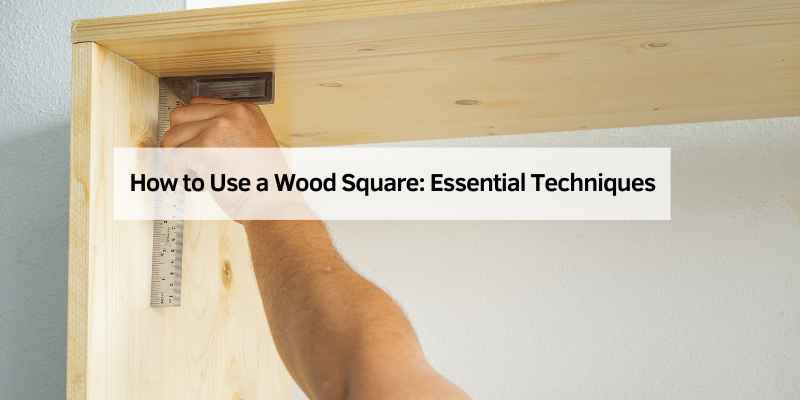
How to Use a Wood Square: Essential Techniques
To use a wood square, start by noting the graduated scales and measuring a cut. Then, mark a line along the edge of the other arm and mark out a cut line.
The arm used for marking is determined by the length of the mark needed – use the blade for a longer mark and vice versa. Finally, cut along the mark. Wood squares are versatile tools commonly used for measuring and marking angles in woodworking projects.
They can aid in achieving precise cuts and ensuring the accuracy of the workpiece. Whether you are a professional woodworker or a DIY enthusiast, understanding how to properly use a wood square is essential for creating accurate and neat woodwork. We will provide step-by-step instructions on how to use a wood square effectively.
Getting Started
Before you begin any woodworking project, it’s important to have the right tools at your disposal. One tool that is essential for accurate measurements and layout is a wood square. Whether you’re a beginner or an experienced woodworker, understanding how to properly use a wood square is key to achieving precise results.
Selecting The Right Wood Square
There are different types and sizes of wood squares available, so it’s important to select the right one for your project. The most common type of wood square is the try square, which features a 90-degree angle on one side and a straight edge on the other. When choosing a wood square, look for one that is made from a sturdy and durable material, such as hardwood or stainless steel, to ensure accuracy and longevity.
Understanding The Components Of A Wood Square
Before you start using a wood square, it’s important to familiarize yourself with its components. A typical wood square consists of two main parts: the blade and the handle. The blade is the longer side of the square and is used for measuring and marking straight lines. The handle is the shorter side of the square and provides stability and grip while using the tool. Some wood squares also feature additional markings or scales, which can be useful for specific measurements and angles.
Once you have selected the right wood square and familiarized yourself with its components, you’re ready to start using it for your woodworking projects. In the next section, we will explore the step-by-step process of using a wood square, including measuring, marking, and cutting.
Basic Techniques
When it comes to woodworking, a wood square is an essential tool for achieving precision and accuracy in your projects. Mastering the basic techniques of using a wood square is crucial for ensuring your measurements and cut lines are perfectly aligned. Whether you are a beginner or an experienced woodworker, these fundamental skills are the foundation for creating high-quality woodworking projects.
Measuring With A Wood Square
Using a wood square for measuring involves aligning the square against the material’s edge to ensure that it is perfectly squared off. This ensures accurate measurements and helps maintain consistency throughout the project, resulting in professional-quality woodworking.
Marking Cut Lines Accurately
When marking cut lines with a wood square, precision is key. By using the edge of the square as a guide, you can accurately mark the cut lines on your material, ensuring that your cuts are straight and precise.
Advanced Applications
Wood squares are a versatile tool that can be used for more than just basic measurements and straight cuts. In this section, we will explore some advanced applications of wood squares that can elevate your woodworking projects to the next level.
Utilizing Wood Squares For Angles
Wood squares, also known as try squares or carpenter squares, are excellent tools for measuring and marking angles with precision. When working on projects that require accurate angles, such as creating mitered corners or building furniture with intricate joinery, a wood square can be your best companion.
Here’s a step-by-step guide on how to use a wood square for angles:
- Press the fence of the wood square against the edge of the board you want to measure.
- Hold the pivot point steady with one finger and carefully swing the tool outward along the board until you reach the desired angle on the leg opposite the pivot point.
- Mark the angle on the board using a pencil.
By following these simple steps, you can ensure that your angles are precise, resulting in perfectly fitting pieces in your woodworking projects.
Incorporating Wood Squares In Complex Woodworking Projects
Wood squares are not only helpful in measuring and marking angles but can also assist in complex woodworking projects. Whether you’re working on a custom-built cabinet or a decorative wooden box, wood squares can be used to ensure accuracy and improve the overall quality of your craftsmanship.
Here are some ways you can incorporate wood squares in complex woodworking projects:
- Checking for squareness: Before joining pieces together, use a wood square to confirm that the corners are perfectly square. This step is crucial in ensuring that your project is structurally sound.
- Aligning components: When assembling multiple parts, use a wood square to align and hold them at precise angles. This will result in a finished product that is visually appealing and well-constructed.
- Creating templates: Wood squares can be used to create templates for complex shapes and angles. These templates serve as guides for cutting and shaping other pieces, ensuring consistency throughout your project.
By incorporating wood squares in advanced woodworking projects, you can elevate your skills and achieve professional-level craftsmanship in your creations.
With these advanced applications of wood squares, you can take your woodworking projects to new heights. Whether you’re aiming for precise angles or tackling complex projects, wood squares are a valuable tool in your arsenal. Embrace their versatility and let them enhance your woodworking journey.
Speed Squares Demystified
As a versatile tool, the speed square is a valuable asset for carpenters and woodworkers alike. Understanding the essential features and functions of a speed square can greatly enhance the precision and efficiency of various woodworking tasks. Let’s delve into the differences between a wood square and a speed square, as well as the essential features and functions of the speed square.
Difference Between Wood Square And Speed Square
When differentiating between a wood square and a speed square, it’s essential to recognize their distinct purposes and designs. While a wood square is primarily used for measuring and marking right angles, a speed square encompasses a broader range of functionalities, including determining roof pitches, angles, and making cuts. The speed square’s multifaceted nature makes it an indispensable tool for carpentry and woodworking projects, surpassing the capabilities of a traditional wood square.
Essential Features And Functions Of A Speed Square
The speed square features various essential components, such as a protractor, scribing notches, and a ruler, enabling carpenters to measure angles accurately and make precise markings. Additionally, the lip of the square serves for efficient rafter layout and cutting stair stringers.
Furthermore, the speed square’s pivot point aids in determining and marking complex angles, enhancing the versatility of the tool. Overall, the speed square’s incorporation of multiple functions in a compact design makes it an invaluable asset for woodworking and carpentry projects.
Practical Tips And Tricks

Using a wood square is an essential skill in woodworking, as it helps ensure precision and accuracy in your projects. Whether you’re a beginner or an experienced woodworker, it’s crucial to follow some practical tips and tricks to maximize the effectiveness of this versatile tool. In this section, we’ll explore two important aspects: Ensuring Precision in Woodworking with Wood Squares and Common Mistakes to Avoid When Using a Wood Square.
Ensuring Precision In Woodworking With Wood Squares
When it comes to woodworking, precision is key. Here are some tips to ensure accuracy when using a wood square:
- Choose a High-Quality Wood Square: Invest in a high-quality wood square made from durable materials such as hardwood or stainless steel. This ensures its stability and accuracy.
- Check for Squareness: Before using your wood square, make sure it is perfectly square. To do this, place it against a flat surface and check if the sides are aligned without any gaps.
- Use the Right Side: Wood squares typically have two arms, a long one called the blade and a short one called the stock. For longer marks, use the blade, and for shorter marks, use the stock. This ensures precise measurements.
- Secure the Wood Square: To prevent movement and ensure accurate measurements, securely clamp or hold down the wood square while marking or measuring.
- Double-Check Measurements: Always double-check your measurements before making any cuts or marking. Even a slight deviation can lead to significant errors in your woodworking project.
Common Mistakes To Avoid When Using A Wood Square
Using a wood square correctly is crucial for accurate woodworking. Here are some common mistakes to avoid:
- Using a Damaged or Inaccurate Wood Square: Using a wood square that is damaged or not perfectly square can result in inaccurate measurements and flawed woodworking projects. Regularly check and replace your wood square if needed.
- Improper Placement: Ensure that your wood square is placed flush against the edge of the material you are measuring. Any gaps or misalignment will lead to inaccurate measurements.
- Not Securing the Wood Square: Failing to secure the wood square firmly in place can lead to unwanted movement, resulting in incorrect measurements and markings.
- Ignoring Calibration: If your wood square has calibration markings, make sure they are accurate and aligned. Incorrect calibration can throw off your measurements.
- Forgetting to Account for Kerf: Kerf refers to the thickness of the saw blade. When marking or measuring, remember to account for the kerf to ensure accurate cuts.
By following these practical tips and avoiding common mistakes, you can make the most of your wood square and achieve precise and accurate woodworking results.
Enhancing Skills
1. Begin by practicing basic square measurement techniques on scrap wood.
- Align the wood square perfectly with the edge of the wood.
- Practice marking and cutting straight lines using the wood square as a guide.
2. Challenge yourself by measuring and marking angles with precision using the wood square.
- Start with simple angles, gradually progressing to more complex ones.
- Ensure accuracy by double-checking your measurements before cutting.
1. Create geometric designs by combining multiple wood squares in different orientations.
- Experiment with patterns such as chevrons, herringbone, or diamond shapes.
2. Use wood squares as a tool for crafting intricate joinery for woodworking projects.
- Utilize the precision of wood squares to achieve seamless joints in furniture making.
Frequently Asked Questions For How To Use A Wood Square
How Do You Use A Square In Wood Work?
To use a square in woodwork, note the graduated scales, measure and mark a cut line using the appropriate arm of the square, then cut along the mark. Use a fence against the edge of the board for angled cuts.
How Do You Use The Square Tool?
To use a square tool, follow these steps: 1. Note the scales on the tool. 2. Measure and mark a cut line along the edge of one arm. 3. Cut along the mark. To find angles, press the fence against the board and swing the tool outward to the desired angle.
Mark it with a pencil.
What Are Wood Squares Used For?
Wood squares are commonly used in woodworking for measuring, marking, and ensuring right angles in cuts.
How Do You Use A Carpenter’s Square For Angles?
To use a carpenter’s square for angles, press the fence on the board’s edge, pivot the tool outward, and mark the desired angle with a pencil.
Conclusion
Using a wood square can greatly assist in your woodworking projects. By following a few simple steps, you can accurately measure cuts, mark lines, and create angles with precision. Whether you’re a beginner or an experienced woodworker, incorporating a wood square into your toolkit is essential.
It’s a versatile tool that will ensure the quality and accuracy of your work. So, start using a wood square today and elevate your woodworking skills to the next level.