How To Waterproof The Inside Of A Wood Planter Box: Genius
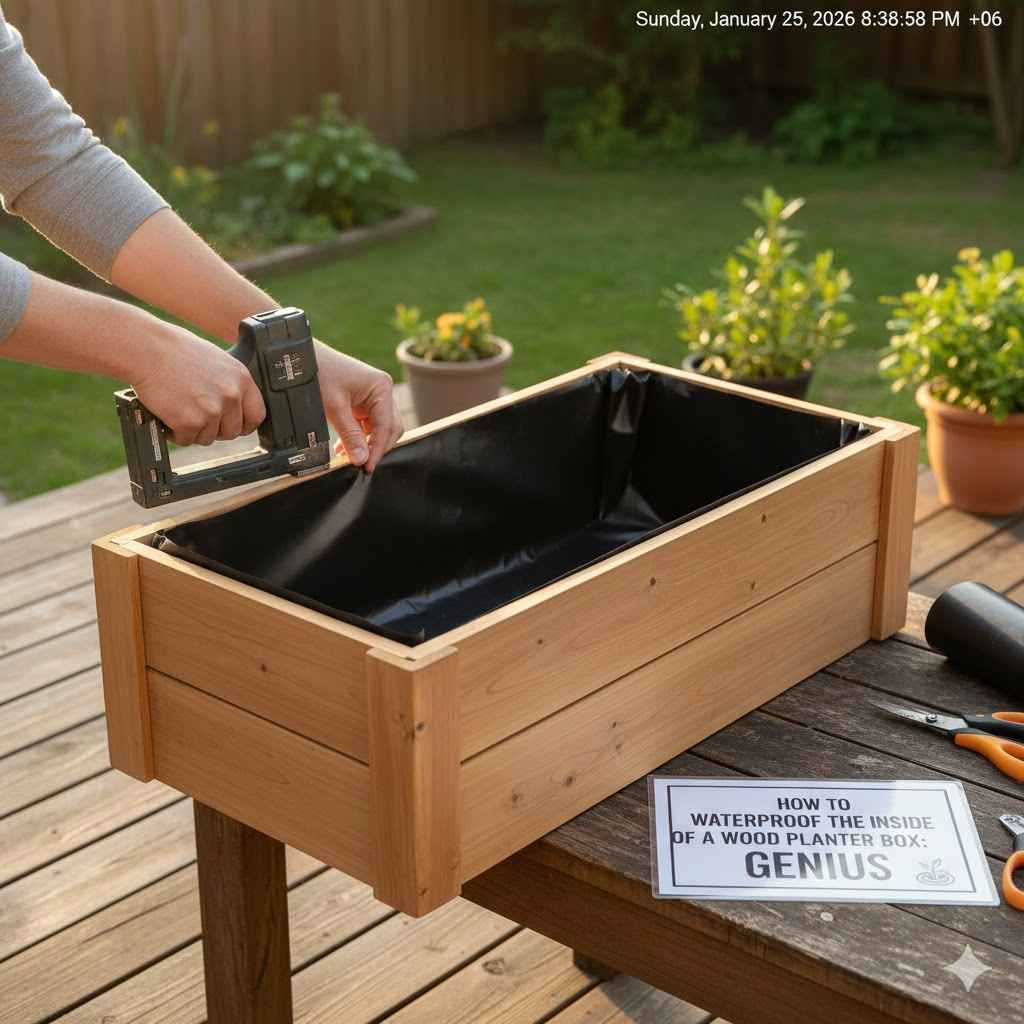
To waterproof the inside of a wood planter box, the easiest and most effective method is to use a thick plastic liner. Simply clean the box, staple a heavy-duty plastic sheet (like a pond liner or painter’s plastic) to the inside walls, and trim the excess. Finally, poke holes through the plastic that align with the planter’s drainage holes.
Hello there, fellow home enthusiast! I’m Md Meraj, and today we’re tackling a project that seems small but makes a huge difference: waterproofing the inside of a wood planter box. You’ve built or bought a beautiful wood planter, and you want it to last for years, right? The biggest enemy of that beautiful wood is constant moisture from the soil. It leads to rot, mold, and a planter that falls apart way too soon.
It’s a frustrating problem, but I promise you, the solution is simple. You don’t need to be a woodworking expert or have a workshop full of fancy tools. With a few basic supplies and a little bit of time, you can protect your planter and keep it looking great season after season. In this guide, I’ll walk you through the easiest and most effective methods. Let’s get started and give that planter the protection it deserves!
Why You Absolutely Must Waterproof Your Wood Planter
Before we dive into the “how,” let’s quickly cover the “why.” Understanding this part will make you feel great about the little bit of effort you’re about to put in. Wood is a natural, porous material. When it’s constantly in contact with damp soil and water, a few things happen, and none of them are good for your planter.
- Wood Rot: This is the main villain. Constant moisture invites fungi that break down the wood fibers, turning your sturdy planter into a soft, crumbly mess. Once rot starts, it’s very difficult to stop.
- Mold and Mildew: Damp wood is a perfect breeding ground for mold and mildew. Not only is it unsightly, but it can also be unhealthy for you and your plants.
- Warping and Cracking: As wood absorbs and releases water, it swells and shrinks. This constant movement can cause the boards to warp, crack, or split, ruining the structure of your box.
- Chemical Leaching: If your planter is made from pressure-treated wood, constant moisture can cause the chemicals in the wood to leach into your soil. This is especially important to prevent if you’re growing edible plants. According to the U.S. Environmental Protection Agency, creating a barrier is a great way to use treated wood more safely in gardens.
By creating a waterproof barrier, you stop this process before it even starts. You are essentially separating the wet soil from the wood, which dramatically extends the life of your planter. It’s a simple step that saves you from having to repair or replace your planter box every couple of years.

Gather Your Tools and Materials
The best part about this project is how few things you need. We’ll cover a couple of different methods, but the core tools are mostly the same. Here’s a checklist to get you ready. Don’t worry if you don’t have everything; I’ll suggest simple alternatives where possible.
Essential Tools:
- Tape Measure: For getting accurate measurements of your planter’s interior.
- Staple Gun: An absolute must-have for the plastic liner method. A simple manual staple gun works perfectly.
- Utility Knife or Scissors: For cutting your liner to size and trimming the excess.
- Drill with a Small Bit: To create or clear out drainage holes.
- Safety Glasses and Gloves: Always a good idea, especially if you’re working with sealants.
Materials (Choose one method):
- For the Plastic Liner Method (Easiest): A thick plastic sheet. You can use a 6 mil painter’s drop cloth, a pond liner, or even a heavy-duty trash bag in a pinch.
- For the Liquid Sealant Method (Most Durable): A can of liquid rubber sealant or a similar waterproof, flexible coating. Make sure it is non-toxic and plant-safe if you’re growing edibles.
- For All Methods: A clean cloth or rag for wiping down the planter. Optional: sandpaper (medium grit) if the inside of your box is rough.
Choosing the Best Waterproofing Method for You
There isn’t just one way to waterproof a planter. The best method for you depends on your budget, how much time you have, and what you plan to grow. Let’s break down the most popular options. I’ve put them into a handy table so you can compare them at a glance.
| Method | Pros | Cons | Best For |
|---|---|---|---|
| Plastic Liner | • Very inexpensive • Extremely easy and fast • Creates a complete physical barrier • Easily replaceable |
• Can be punctured by roots or tools • Not as permanent as a liquid sealant |
Beginners, budget-friendly projects, and anyone who wants a quick and effective solution. |
| Liquid Rubber Sealant | • Creates a seamless, durable coating • Very long-lasting • Conforms to any shape • Puncture-resistant |
• More expensive • Requires drying/curing time • Can have a strong odor during application |
Planters with unusual shapes, those wanting a professional-grade finish, and long-term durability. |
| Pond Liner | • Extremely tough and durable • UV and puncture-resistant • Flexible and easy to work with |
• Can be more expensive than basic plastic • A bit thicker, so folding corners can be tricky |
Large planter boxes, raised garden beds, and anyone wanting maximum durability from a liner. |
For most people, and especially for beginners, I recommend the Plastic Liner Method. It’s what I call the “genius” solution because it’s so simple, cheap, and effective. We’ll walk through that one first.
Step-by-Step Guide: The Plastic Liner Method (The Easiest Way)
Ready to get this done in under 30 minutes? This method is my go-to for its simplicity and reliability. Let’s get that planter protected!
Step 1: Clean and Prep the Planter
First things first, make sure the inside of your planter box is clean and dry. If it’s a new planter, just give it a quick wipe to remove any sawdust. If it’s an old planter, use a stiff brush to scrub out any old dirt or debris. Let it dry completely. You want the staples to have clean, solid wood to grab onto.
Step 2: Check Your Drainage Holes
This is a step you cannot skip! Flip your planter over and make sure it has drainage holes. Without them, your planter will turn into a swamp, and your plant roots will rot. If there are no holes, drill several of them using a 1/2-inch drill bit. If there are already holes, just make sure they are clear of any debris.
Step 3: Measure and Cut the Plastic Liner
Unroll your plastic sheet. You need a piece that is large enough to cover the bottom and go all the way up the four inside walls, with a little extra to hang over the top edge. A simple way to measure is to place the plastic inside the box and just eyeball it. It’s much better to cut it too big than too small. You can always trim the excess later.
Step 4: Fit the Liner Inside
Drape your cut piece of plastic inside the planter. Gently push it down so it sits flat against the bottom and press it into the corners. Don’t worry about making it perfect yet. Just get it roughly in place. Try to smooth out any large wrinkles, but small folds, especially in the corners, are totally fine.
Step 5: Staple the Liner in Place
Now for the fun part! Starting with one of the long walls, pull the plastic taut (but not so tight that it might rip) and fold the excess over the top edge of the planter. Use your staple gun to place one staple in the center, about an inch down from the top edge on the inside. Now move to the opposite wall and do the same, again pulling it snug. Finish by stapling the other two walls.
Once the center of each wall is secured, work your way out towards the corners, placing a staple every 3-4 inches. When you get to the corners, just fold the plastic neatly (like you’re wrapping a gift) and put a couple of staples in to hold the fold flat.
Step 6: Trim the Excess Plastic
With the liner securely stapled, take your utility knife or a sharp pair of scissors. Carefully trim the excess plastic from around the outside top edge of the planter. You want the plastic to end right at the top rim of the box, so it will be hidden once you add your soil.
Step 7: Poke Holes in the Liner for Drainage
This is the final, crucial step. Using your utility knife or the tip of your scissors, carefully poke holes in the plastic liner that line up with the drainage holes you drilled in the wood. Don’t just make a tiny slit; make an “X” cut or cut out a small circle of plastic over each hole to ensure water can drain freely. If water can’t get out, you’ve defeated the purpose of the drainage holes!
And that’s it! You now have a fully waterproofed planter box ready for soil and plants. That was easy, right?
Alternative Guide: Using a Liquid Sealant (The Pro Method)
If you prefer a more permanent, seamless finish and don’t mind a bit of painting, a liquid rubber sealant is a fantastic option. It creates a tough, bonded layer that’s completely waterproof.
Step 1: Clean and Sand the Interior
Just like before, start with a clean, dry planter box. For this method, it’s a good idea to lightly sand the interior surfaces with medium-grit sandpaper. This scuffs up the wood just enough to help the sealant adhere much better. Wipe away all the sanding dust with a damp cloth and let it dry completely.
Step 2: Apply Painter’s Tape (Optional but Recommended)
To get a really clean line, apply painter’s tape along the top inside edge of the planter box. This prevents you from accidentally getting the sealant on the top rim or the outside of your beautiful planter.
Step 3: Apply the First Coat
Open your liquid sealant and stir it thoroughly. Using a paintbrush, apply a generous, even coat to the entire interior of the planter. Start with the corners and edges, then fill in the flat surfaces. Make sure to cover the bottom and all four walls completely. Don’t apply it too thick, as this can lead to slow and uneven drying.
Step 4: Let it Dry
Patience is key here. Check the instructions on the can for the recommended drying time between coats. It can range from a few hours to a full day, depending on the product, temperature, and humidity. Place the planter in a well-ventilated area to dry.
Step 5: Apply a Second Coat
Once the first coat is dry to the touch, apply a second coat. This ensures you have a complete, pinhole-free waterproof barrier. Pay special attention to any areas that looked thin after the first coat. Let this second coat dry completely.
Step 6: Let it Cure Fully Before Planting
Even after the sealant feels dry, it needs time to fully cure and harden. This can take anywhere from 24 to 72 hours. During this time, the sealant off-gasses any remaining fumes. It is critical to wait for the full cure time, especially if you plan to grow edible plants. Once it’s fully cured, it’s completely inert and plant-safe. Remember to clear out the drainage holes with a drill or screwdriver if any sealant clogged them up.
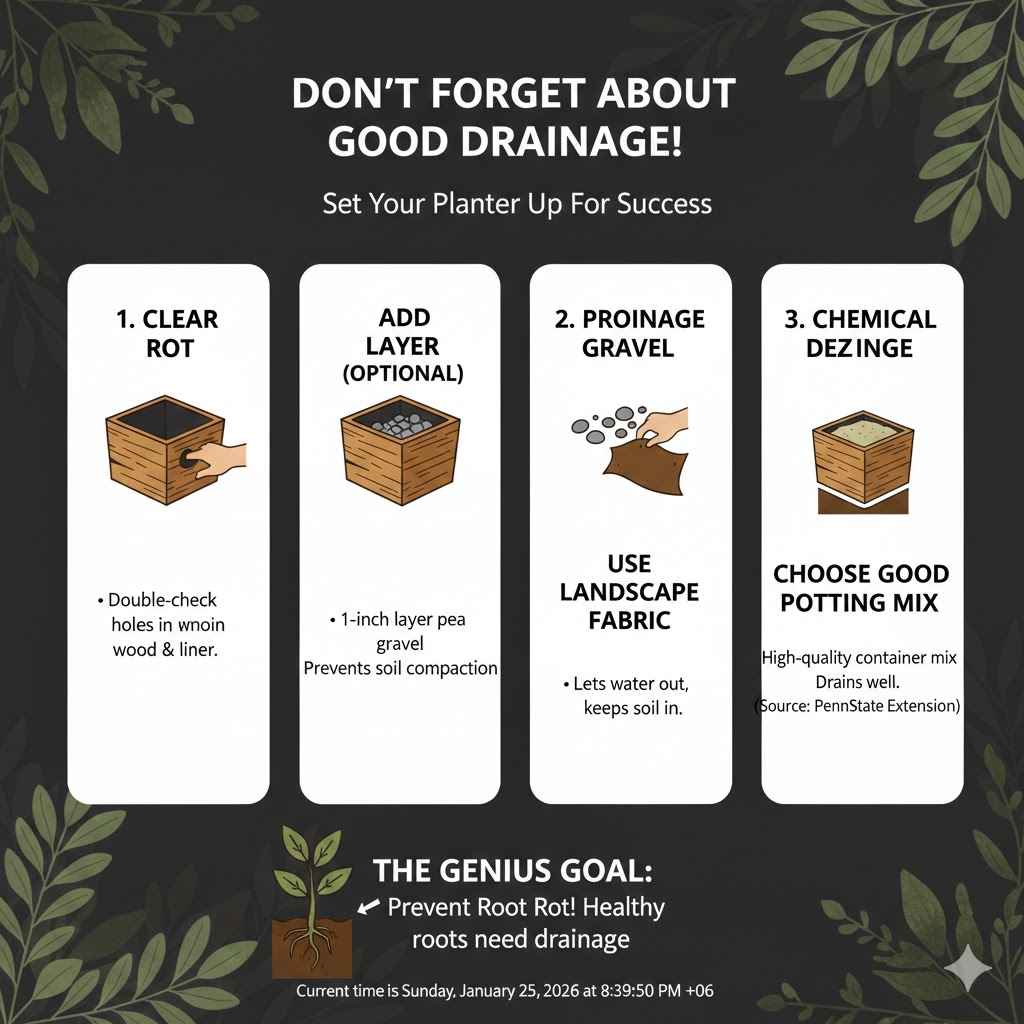
Don’t Forget About Good Drainage!
I’ve mentioned drainage a few times, but it’s so important that it deserves its own section. A waterproof liner is only half the battle. If water sits at the bottom of your planter, it will suffocate your plants’ roots, leading to root rot. Wood rot and root rot are close cousins!
Here’s how to set up your planter for success:
- Clear Drainage Holes: We’ve covered this, but double-check that your holes are open in both the wood and your liner.
- Add a Layer of Gravel (Optional): Placing a one-inch layer of pea gravel or small rocks at the bottom can help prevent soil from compacting and clogging the drainage holes.
- Use Landscape Fabric: A small piece of landscape fabric placed over the drainage holes (before adding soil) is a great trick. It lets water out but keeps the soil in.
- Choose Good Potting Mix: Use a high-quality potting mix designed for containers. These mixes are formulated to drain well, unlike heavy garden soil which can become waterlogged. A study from the PennState Extension explains that good soil structure is vital for healthy container plants.
Frequently Asked Questions (FAQ)
Can I just use paint to waterproof my planter?
Standard paint is not enough to create a truly waterproof barrier. It will eventually peel and flake under constant moisture. For a paint-on solution, you need a specialized product like a liquid rubber sealant or a marine-grade epoxy paint, which are designed for constant water exposure.
Is it safe to grow vegetables in a waterproofed planter?
Yes, as long as you use the right materials. The plastic liner method is perfectly safe, as you’re using inert plastic (like a 6 mil painter’s drop cloth) to separate the soil from the wood. If using a liquid sealant, make sure you choose one that is labeled “non-toxic,” “potable water safe,” or “plant-safe” after it fully cures.
What kind of plastic is best for a liner?
The thicker, the better! A 6 mil polyethylene plastic sheet (often sold as a painter’s drop cloth or vapor barrier) is a great, affordable choice. For maximum durability, especially in a large planter, a flexible EPDM pond liner is the best you can get. Avoid thin, flimsy plastic like kitchen garbage bags, as they tear too easily.
How often do I need to re-waterproof my planter?
If you use a quality liquid rubber sealant, it can last for many years, possibly the entire life of the planter. A plastic liner might need to be replaced every 3-5 years, or whenever you change out the soil and notice it has become brittle or has holes.
Do I need to waterproof the outside of the planter too?
It’s a very good idea! While the inside is the priority, the outside is still exposed to rain and sun. Applying a quality exterior wood stain or sealer will protect the outside from weather damage, prevent fading from UV rays, and keep your planter looking beautiful.
What happens if I forget to poke holes in my liner?
If you forget to create drainage holes in the liner, you will essentially create a bathtub with no drain. Water will pool at the bottom, the soil will become saturated, and your plant’s roots will drown and rot. This is one of the most common and fatal mistakes in container gardening!
Can I use a heavy-duty garbage bag as a liner?
In a pinch, you can, but it’s not the ideal solution. Most garbage bags, even “heavy-duty” ones, are much thinner and more prone to punctures than a proper 6 mil plastic sheet or pond liner. It’s a temporary fix at best, and you may find yourself having to replace it much sooner.
Conclusion: Your Planter is Now Ready for a Long Life!
There you have it! You’ve successfully learned how to waterproof the inside of a wood planter box. Whether you chose the super-quick plastic liner method or the durable liquid sealant option, you’ve just taken the single most important step in protecting your investment and ensuring your planter will be a beautiful home for your plants for many years to come.
This simple project is all about working smarter, not harder. By preventing wood rot before it can even start, you’re saving yourself time, money, and the disappointment of a failing planter. Now comes the best part: filling it with soil and bringing it to life with beautiful flowers, herbs, or vegetables.
Thanks for joining me on this project. Remember, every little skill you learn builds your confidence for the next one. Happy planting!