Install Radiant Floor Heating: Proven, Effortless
Radiant floor heating is surprisingly straightforward to install, even for beginners! Follow these proven steps for a comfortable, energy-efficient home upgrade.
Tired of cold floors? Imagine stepping onto a warm surface every morning, no matter the season. Installing radiant floor heating might sound complex, but it’s a DIY project that’s more achievable than you think. Many homeowners worry about the complexity, but with the right guidance, you can achieve professional results and enjoy cozy comfort. This guide breaks down the process into simple, manageable steps, empowering you to tackle this rewarding home improvement. Let’s get your floors warmed up!
Why Radiant Floor Heating? The Warmth You Deserve
Radiant floor heating systems offer a luxurious and efficient way to warm your home. Unlike forced-air systems that blow hot air around, radiant systems heat objects and people directly from below. This creates a more even, comfortable temperature throughout the room.
Here are some key benefits:
Comfort: Consistent, gentle warmth that eliminates cold spots.
Efficiency: Can be more energy-efficient than traditional heating, especially when paired with a good thermostat.
Aesthetics: Completely invisible, freeing up wall space and allowing for more design flexibility.
Health: Reduces dust and allergens circulated by forced-air systems.
Versatility: Works well under various flooring types, including tile, stone, laminate, and importantly, hardwood.
Getting Started: What You’ll Need for Your Radiant Floor Heating Project
Before we dive into the installation, let’s gather the essential tools and materials. Think of this as your project checklist. Having everything ready will make the installation process much smoother, just like having the right drill bit makes drilling a breeze!
Essential Tools:
Measuring Tape: For accurate layout and cutting.
Utility Knife: For cutting backer board and other materials.
Safety Glasses: Always protect your eyes!
Work Gloves: To protect your hands.
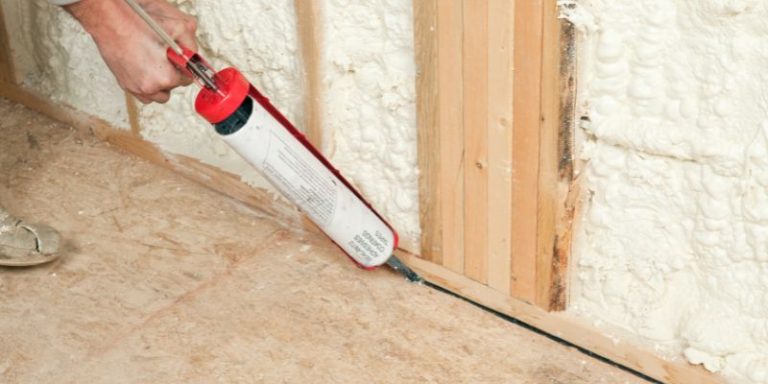
Caulking Gun: For applying sealant.
Wire Strippers/Crimpers: If working with electrical connections for controls.
Screwdrivers/Drill with Screw Bits: For securing components.
Level: To ensure components are installed correctly.
Pencil or Marker: For marking measurements.
Bucket and Sponge: For cleanup.
Key Materials:
Radiant Floor Heating System: This typically includes heating cables or mats and a thermostat. We’ll focus on hydronic (water-based) systems for under hardwood.
Hydronic Tubing (PEX tubing): Flexible plastic tubing that carries heated water.
Manifold: A central hub that distributes hot water to the tubing loops and controls flow.
Backer Board or Underlayment: A stable, insulating layer that protects the subfloor and the heating system.
Fasteners: Clips or staples to secure the tubing.
Insulation Boards (Optional but Recommended): For improved efficiency, especially over unheated spaces.
Adhesive or Mortar: Depending on your chosen installation method.
Piping and Fittings: To connect the manifold to your boiler or heat source.
Thermostat and Sensor: To control the system’s temperature.
Understanding Your Radiant Floor Heating System: Hydronic vs. Electric
While both electric and hydronic systems heat floors, they operate differently. For installation under hardwood, hydronic systems are often preferred for their even heat distribution and compatibility with boiler systems.
Here’s a quick comparison:
| Feature | Electric Radiant Floor Heating | Hydronic Radiant Floor Heating |
| :————- | :—————————————————– | :———————————————————– |
| Heat Source| Electrical resistance wires or mats | Heated water circulated through tubes |
| Installation| Generally simpler, rolls out like a mat or cable | More complex, involves tubing, manifold, and water source |
| Running Cost| Can be higher due to electricity costs | Generally lower, especially with efficient boilers |
| Best For | Smaller areas, renovations, spot heating | Whole-house heating, new construction, renovations with boiler |
| Flooring | Works with most, but check manufacturer guidelines | Excellent for hardwood, tile, concrete, and more |
For this guide, we’re focusing on how to install hydronic radiant floor heating under hardwood, as it’s a popular and effective choice for whole-home comfort.
Step-by-Step: Installing Hydronic Radiant Floor Heating Under Hardwood
Let’s get down to business! Installing hydronic radiant floor heating under hardwood involves several key stages. We’ll break them down into easy-to-follow steps.
Step 1: Planning and Layout
This is crucial for a successful installation. Measure your room accurately and plan where your heating loops will run.
Measure the Room: Determine the square footage and the areas you want to heat.
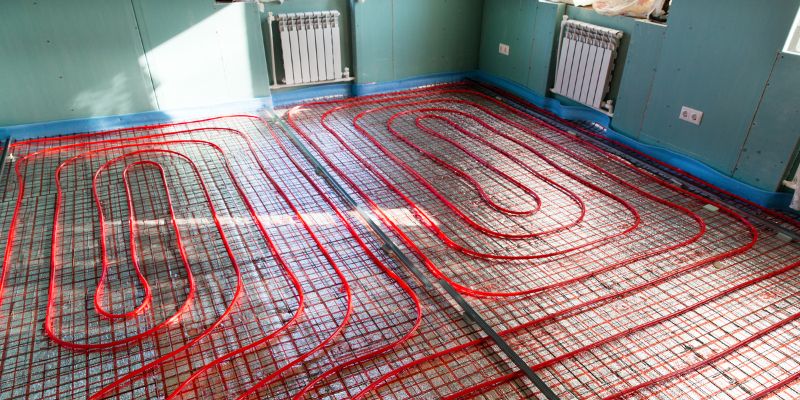
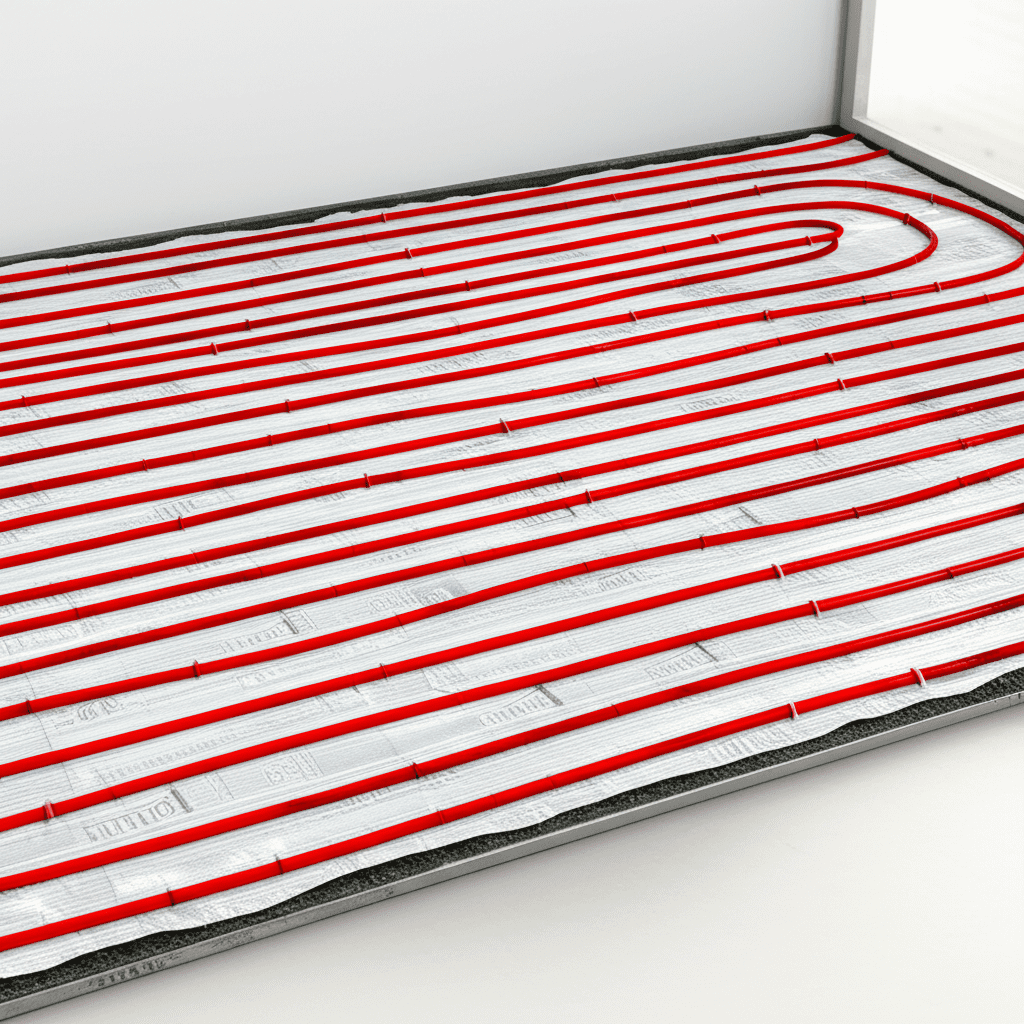
Map Tubing Layout: Decide on the spacing between tubing runs. Closer spacing provides more even heat. A common spacing is 6 to 12 inches on center.
Identify Obstacles: Note doorways, cabinets, and other permanent fixtures where tubing shouldn’t run.
Manifold Location: Choose a convenient, accessible location for the manifold, usually in a utility closet or basement.
Boiler Connection: Plan how the manifold will connect to your existing boiler or heat source. Consult a plumber if you’re unsure about boiler connections.
A good resource for understanding PEX tubing layouts and pressures can be found on the PEX Association website.
Step 2: Preparing the Subfloor
A clean, level subfloor is essential for a good installation.
Clean the Subfloor: Remove any debris, dust, or old adhesives.
Repair Damage: Fix any loose boards or uneven areas.
Install Insulation (Recommended): Lay down rigid foam insulation boards over the subfloor. This directs heat upwards, improving efficiency. Ensure the insulation is rated for underfloor heating systems. Use appropriate adhesive or fasteners to secure the boards.
Step 3: Installing the Manifold
The manifold is the heart of your hydronic system.
Mount the Manifold: Securely mount the manifold to a wall or sturdy frame in your chosen location. Ensure it’s level.
Connect Supply and Return Lines: Connect the supply and return pipes from your boiler to the appropriate ports on the manifold. This step often requires plumbing expertise, so consider hiring a plumber if you’re not comfortable.
Step 4: Laying Out the Tubing
Now comes the fun part – laying the PEX tubing!
Start at the Manifold: Connect the end of your PEX tubing to one of the manifold’s supply ports.
Route the Tubing: Carefully lay the tubing in your planned pattern across the subfloor or insulation. Avoid sharp kinks. PEX tubing is flexible, but it has a minimum bend radius. Refer to the tubing manufacturer’s specifications.
Secure the Tubing: Use specialized PEX clips or staples to secure the tubing to the subfloor or backer board. Ensure the fasteners don’t puncture the tubing. Space fasteners every 12-24 inches along the tubing.
Create Loops: Lay the tubing in a serpentine (back and forth) pattern or a staple-up method (if using joist bays) to create continuous loops.
Return to Manifold: Once a loop is complete, return the end of the PEX tubing to the corresponding return port on the manifold.
Repeat for All Loops: Continue laying and securing tubing for all planned zones.
Important Note on Hardwood Installation: When installing directly over the subfloor, you might use a specialized grooved subfloor or a thin PEX channeling system. Alternatively, the PEX tubing can be embedded in a thin layer of self-leveling underlayment before the hardwood is installed. Always follow the specific recommendations for your chosen hardwood and radiant heating system combination.
Step 5: Pressure Testing the System
This is a critical safety and performance step.
Connect to Water Source: Connect a temporary water source (like a hose with a pressure gauge) to the manifold.
Fill the System: Slowly fill the tubing with water.
Pressurize: Pressurize the system to the manufacturer’s recommended level (typically 6-8 PSI for testing).
Check for Leaks: Inspect every connection point, including manifold connections and any fittings, for leaks. Let the system sit under pressure for at least 24 hours to ensure no slow leaks occur.
A leak in this stage can be a major headache later, so be thorough!
Step 6: Installing the Flooring
Now it’s time to lay your beautiful hardwood.
Follow Flooring Manufacturer Guidelines: Always adhere to the specific installation instructions for your chosen hardwood flooring, especially regarding radiant heat. Some hardwoods are better suited than others.
Subfloor Preparation: Ensure the surface over the PEX tubing is smooth and ready for flooring. If you used a self-leveling underlayment, ensure it’s fully cured.
Install Hardwood: Lay your hardwood planks according to the manufacturer’s instructions, using the appropriate adhesive or fastening methods. Be mindful of the PEX tubing below and avoid driving fasteners into it.
Step 7: Connecting the Thermostat and Controls
This is how you’ll manage your new heating system.
Install Thermostat: Mount the thermostat in a suitable location, away from direct heat sources or drafts.
Connect Sensor: Place the floor sensor in the floor, typically between two tubing runs, as per the thermostat manufacturer’s instructions.
Wire the System: Connect the thermostat, floor sensor, and manifold actuators according to the wiring diagrams provided with your system. This may involve basic electrical wiring. If you’re not comfortable with electrical work, hire an electrician.
You can find excellent wiring guides and safety tips from the Occupational Safety and Health Administration (OSHA).
Step 8: Final System Check and Operation
Turn on Boiler: Once everything is connected and tested, turn on your boiler.
Gradual Heating: Gradually increase the water temperature to the desired setting on your thermostat. Avoid rapid temperature changes, which can stress the flooring and the heating system.
Monitor Performance: Check that the system is heating evenly and that the thermostat is functioning correctly.
Tips for Success: Making Your Radiant Floor Heating Installation Effortless
As your friendly DIY drilling expert, I always say that preparation and the right approach make any job easier. Here are some tips to make your radiant floor heating installation as smooth as possible:
Read All Manuals: Seriously, every component comes with instructions for a reason. Read them thoroughly before you start.
Test, Test, Test: Pressure testing is non-negotiable. It saves you from potential disaster down the line.
Work in Zones: If you have a large area, consider breaking it down into smaller, manageable zones.
Consider Professional Help: While this guide aims for beginner-friendliness, complex plumbing or electrical connections are best left to licensed professionals.
Be Patient: Rushing can lead to mistakes. Take your time, double-check your work, and enjoy the process.
* Use Quality Materials: Investing in good quality PEX tubing, manifolds, and fasteners will pay off in the long run with reliability and efficiency.

Frequently Asked Questions (FAQ)
Is installing radiant floor heating difficult for beginners?
While it requires careful planning and execution, installing hydronic radiant floor heating is achievable for DIYers with basic home improvement skills. Key steps like tubing layout and pressure testing are straightforward with clear instructions. However, plumbing connections to your boiler and electrical wiring for the thermostat may require professional help if you’re not experienced.
Can I install radiant floor heating under existing hardwood floors?
Installing hydronic radiant floor heating under existing hardwood is generally not recommended due to the complexity of accessing the subfloor and potential damage to the existing floor. It’s best installed during a renovation where the hardwood can be removed, or in new construction. For existing floors, electric radiant heating mats might be a more feasible option if installed correctly on top of the subfloor before new flooring goes down.
What is the best way to lay PEX tubing for radiant floor heating?
The most common methods are a serpentine (back-and-forth) pattern or a spiral pattern. For hardwood installations, the tubing is often laid on top of the subfloor (or insulation) and then embedded in a thin layer of self-leveling underlayment before the hardwood is installed. The spacing between tubing runs (e.g., 6-12 inches on center) impacts heat output and evenness.
How do I connect hydronic radiant floor heating to my boiler?
This involves connecting the supply and return pipes from your boiler to the radiant heating manifold. The manifold then distributes the heated water to the PEX tubing loops. This is a plumbing task that often requires specialized fittings and knowledge of your boiler system. If you’re not a confident plumber, it’s highly advisable to hire a licensed professional for this part of the installation.
What type of hardwood flooring is best for radiant heating?
Hardwood species with good thermal conductivity and stability are best. Engineered hardwood is generally more stable and performs very well. Solid hardwood can be used, but it’s crucial to choose species less prone to expansion and contraction, like maple or oak. Always check the flooring manufacturer’s specific guidelines for use with radiant floor heating. Avoid overly thick or dense woods, and ensure the moisture content is appropriate before installation.
How long does it take to install a radiant floor heating system?
The installation time can vary significantly depending on the size of the area, the complexity of the layout, and your experience level. For a single room, it might take a weekend or two. For a whole house, it could take several days or even weeks. The tubing layout and embedding process are often the most time-consuming parts.
Conclusion: Enjoying Your New Warm Floors
You’ve done it! By following these steps, you’ve successfully planned and installed a hydronic radiant floor heating system, ready to be covered with your beautiful hardwood flooring. Remember that proper planning, careful execution, and a commitment to testing are the keys to a comfortable and efficient heating solution.
The warmth that radiates from your floors will transform your living space, making every step a pleasure. This project is a testament to what you can achieve with the right information and a willingness to learn. Enjoy the consistent, luxurious comfort and the knowledge that you’ve enhanced your home with a proven, effortless-feeling system. Happy heating!