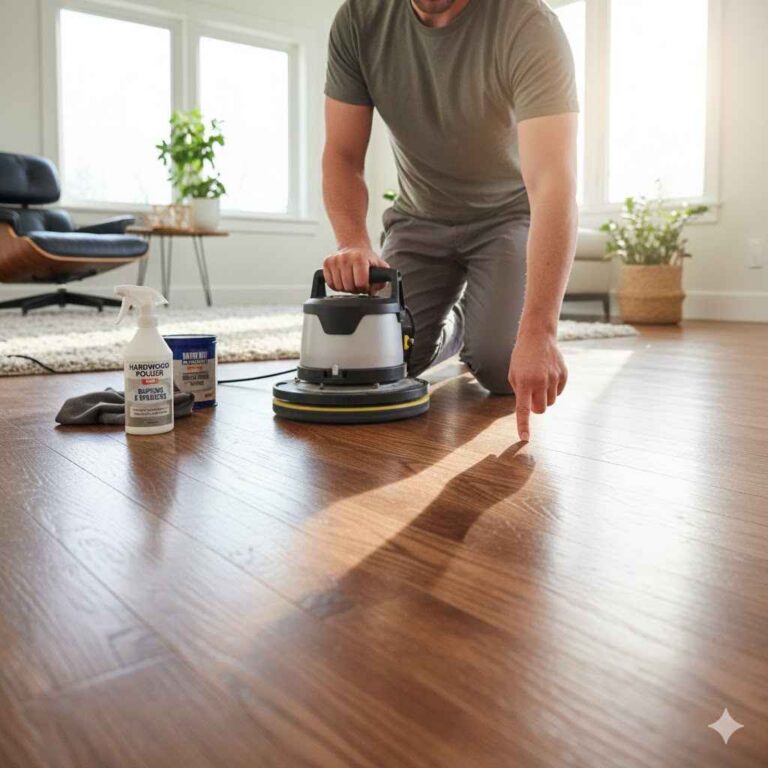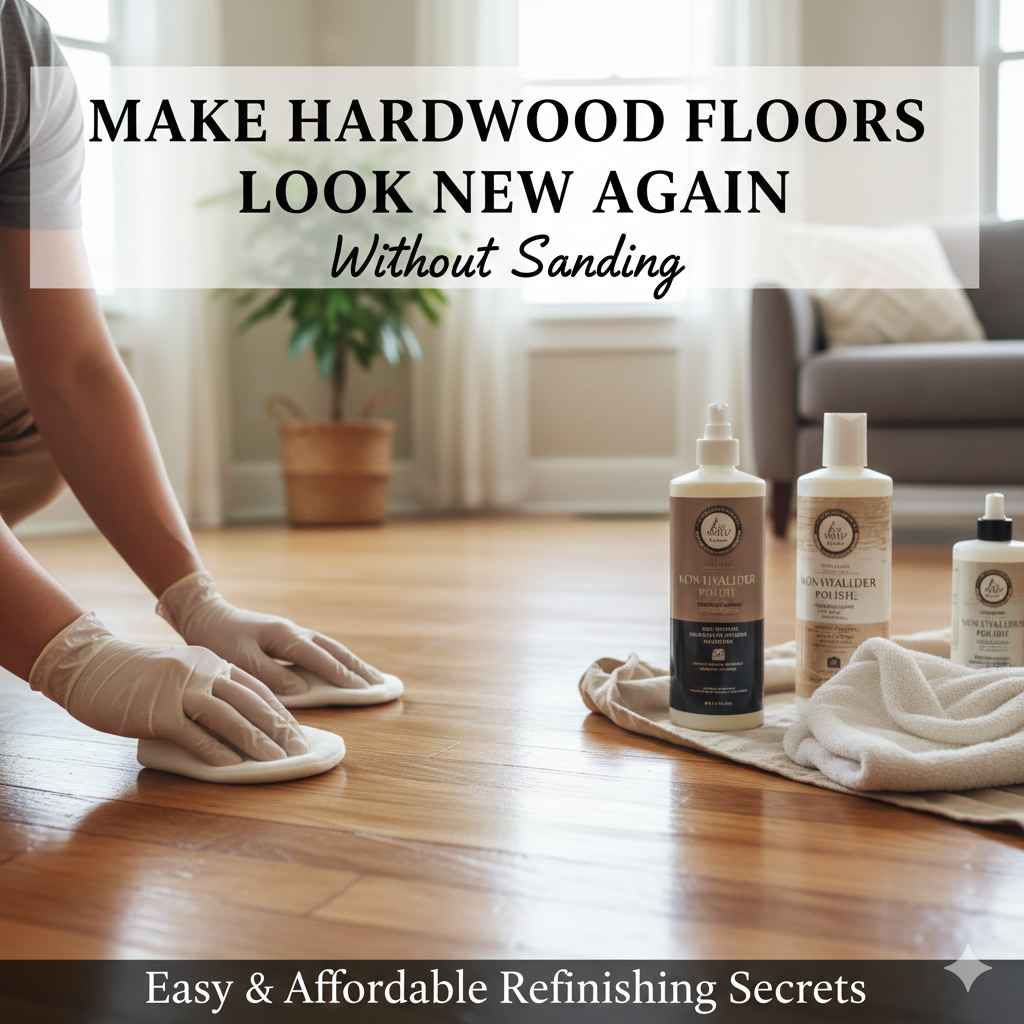
Make Hardwood Floors Look New Without Sanding
Thinking about how to Make Hardwood Floors Look New Without Sanding can seem hard. It might sound like a big task if you’ve never done it before. Don’t worry, many people feel the same way! This guide will make it easy for you. We’ll show you how to refresh your floors, step-by-step. Get ready to discover how to get your hardwood looking beautiful again.
Prepare Your Floor for a Fresh Look
Getting your hardwood floors looking new doesn’t mean you need to sand them. Before you get started, good preparation is key. This initial stage involves cleaning and inspecting your floors. You’ll assess the current condition, and remove any dirt or grime. This process establishes a clean surface for any treatments you plan to apply. It helps you decide what the best course of action is. Proper preparation is essential for achieving the best results and extending the life of your floors.
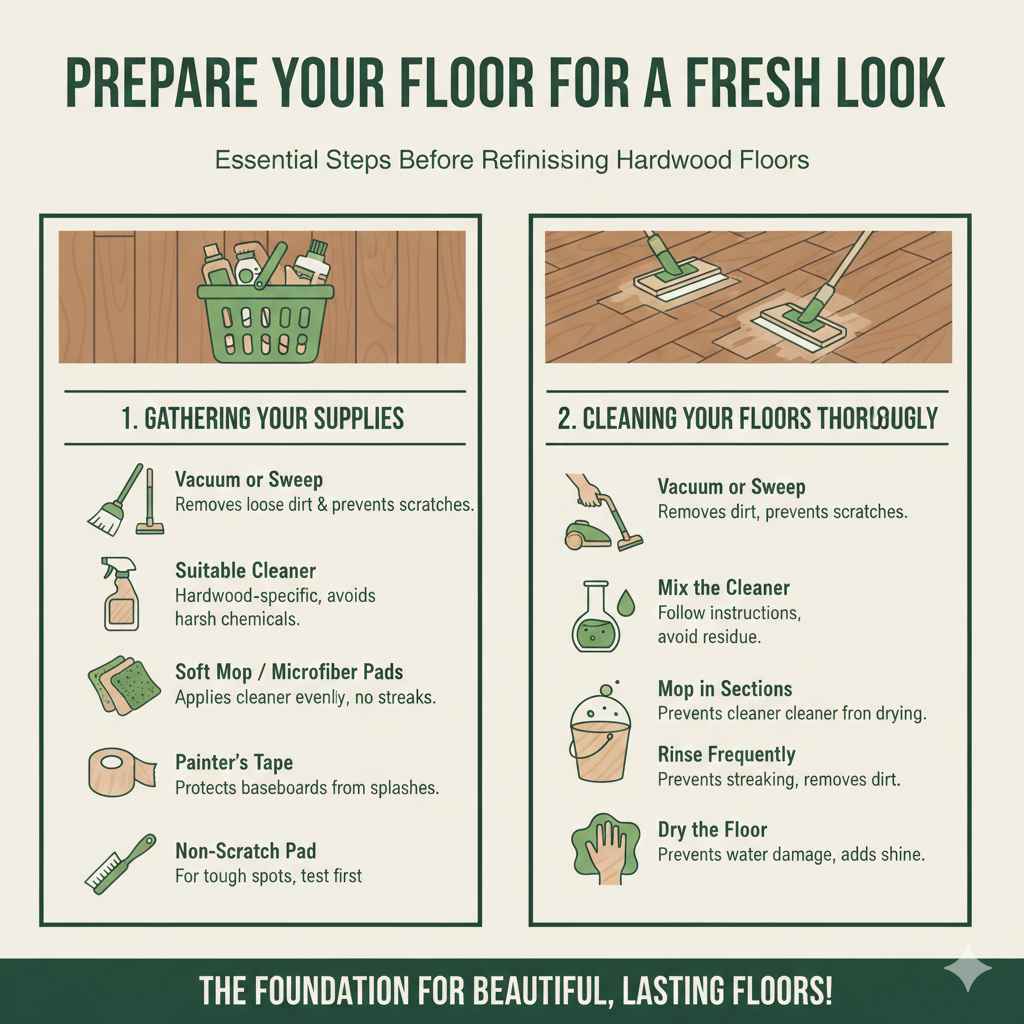
Gathering Your Supplies
You’ll need a few things to get started. Don’t worry, the list isn’t long! You’ll need a vacuum cleaner or broom to remove dust and debris. A good floor cleaner made for hardwood is important. You’ll also need a soft mop or microfiber pads to apply the cleaner. It’s smart to have some painter’s tape to protect baseboards. If you have any stubborn spots, a non-scratch pad or brush can help. Lastly, have a wood floor finish ready, the kind you want to use to refresh the floors. These supplies will make the whole process easier.
Vacuum or Sweep: Before anything, get rid of loose dirt. This step prevents scratches during cleaning. A vacuum with a soft brush attachment is gentle on the wood. A broom works too.
Removing loose particles prevents them from being ground into the finish. Any debris can cause scratches, ruining your refreshed look.
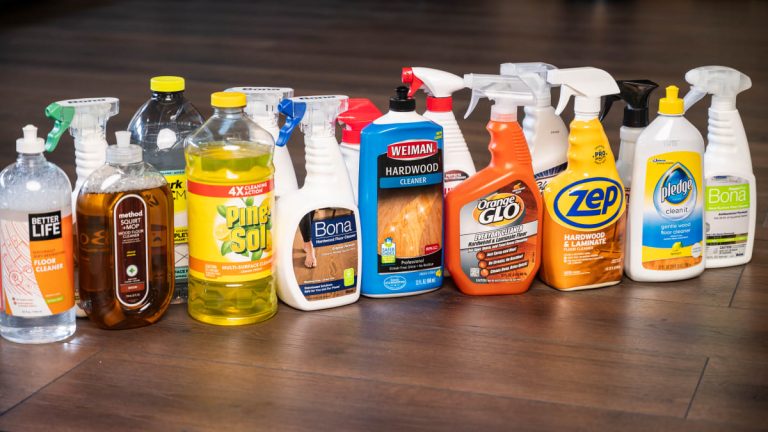
Choose a Suitable Cleaner: Select a cleaner made for hardwood. Avoid harsh chemicals that could damage the finish. Read the product label to see if it is compatible with the finish on your floors.
Different wood floor cleaners are available. Some cleaners are mild, suitable for everyday cleaning, while others are stronger, designed for heavier cleaning tasks. Consider the type and severity of dirt or grime on your floors.
Use a Soft Mop or Microfiber Pads: Soft materials help apply the cleaner evenly. They prevent scratches. Choose a mop that won’t leave streaks. Microfiber pads often work well.
These materials are designed to be gentle on wood. Their soft fibers lift dirt without scratching. Microfiber pads are known for their ability to trap dirt effectively.
Painter’s Tape: Protect baseboards and other areas. Painter’s tape is easy to remove. It won’t leave sticky residue behind. Apply it to areas where the cleaner might splash.
Painter’s tape will protect areas from accidental splashes. This helps maintain the overall look and protects other elements of your home.
Non-Scratch Pad or Brush: For tougher spots, these tools help remove dirt. Make sure the pad or brush is safe for wood floors. Test it in a hidden area first.
These tools are used to lift stubborn dirt. Always test them in an inconspicuous area. This ensures they won’t damage the finish. The right brush or pad can make a big difference.
Cleaning Your Floors Thoroughly
Once you’ve gathered your supplies, it’s time to clean. Begin by vacuuming or sweeping your floors to remove dust and debris. Mix the hardwood floor cleaner with water. Follow the instructions on the cleaner’s label. Then, gently mop your floors. Work in small sections. Make sure you don’t use too much cleaner. Too much can damage the wood. Rinse your mop frequently. This helps prevent streaks and ensures your floors are clean.
Vacuum or Sweep: Before you begin, get rid of loose dirt and debris. This step keeps dirt from scratching the wood.
Vacuuming or sweeping prepares the floors. This helps prevent scratches during the cleaning process. Ensure there are no loose particles on the surface.
Mix the Cleaner: Follow the cleaner instructions. Too much cleaner can leave a residue. Using too little might not clean effectively.
Carefully read the directions on the cleaner. Diluting it correctly is essential for optimal results. It also prevents residue buildup.
Mop in Sections: This method keeps the cleaner from drying. Work on small parts of the floor at a time. This gives you more control over the cleaning process.
Work in small sections for better results. This ensures even cleaning, and the cleaner doesn’t dry before you can wipe it.
Rinse Frequently: Rinse your mop often. This prevents streaking. It also keeps dirt from spreading across your floors.
Rinsing the mop helps remove dirt. It also keeps your floors clean. Use clean water each time for the best results.
Dry the Floor: Use a clean cloth to dry the floor. This step helps prevent water damage. It gives your floors a shine.
Drying the floor removes excess moisture. This keeps the wood from warping. It also helps achieve a consistent finish.
Refreshing the Finish Without Sanding
Once your floors are clean, the next step is refreshing the finish. This is the heart of making your hardwood floors look new without sanding. This process involves applying a new coat of finish, which can be done in several ways. The process is much less challenging than sanding. With careful preparation and execution, you can get great results. There are several finish options you can use.
Selecting the Right Finish
There are many finishes to choose from. You can use polyurethane, which is a durable option. Water-based polyurethane is easy to apply. Oil-based polyurethane is more traditional and offers a rich look. Other options include floor polishes or revitalizers. Each finish offers different levels of protection and shine. Consider the existing finish on your floors. Make sure the new finish is compatible. Check the product’s label for guidance. Also, consider the level of foot traffic in the area.
Water-Based Polyurethane: Dries quickly and has low odor. It is a good choice for people sensitive to strong smells. It’s also often more resistant to yellowing over time.
Water-based polyurethane is a popular choice. It’s user-friendly, and offers great durability. It is perfect for DIY projects.
Oil-Based Polyurethane: Traditional choice. It is known for its rich look and durability. It can take longer to dry. It has a stronger odor.
Oil-based polyurethane provides a warm look. It also offers excellent protection. It’s perfect for high-traffic areas.
Floor Polish or Revitalizer: A quick fix to add shine. It fills in scratches. It does not offer as much protection as polyurethane. It is ideal for light touch-ups.
These products are great for improving the floor’s appearance. They are also easy to apply. They offer a simple way to add shine and protection.
Consider Foot Traffic: High-traffic areas need a durable finish. Pick a finish that can handle wear and tear. Areas with low foot traffic may require a less durable finish.
Consider the type of use that the floor will experience. Choose a finish that fits your needs. This helps ensure your floors look their best for longer.
Compatibility: Always make sure the new finish goes with the current finish. This avoids problems. A test spot is a good idea.
Compatibility between finishes is important. Using the wrong finish can damage the floor. Always read the product instructions.
Applying the Finish
Before applying any finish, read the instructions carefully. Start in a small, hidden area. This helps you get comfortable with the process. Use a foam applicator or microfiber pad. Apply the finish evenly. Do not use too much. Too much can cause drips or bubbles. Make sure to apply the finish along the wood grain. This helps with the look. Let the finish dry completely, according to the label instructions. Add multiple coats for more protection.
Read the Instructions: Follow the directions on the product label. This ensures the best results. The instructions will tell you how to prepare the surface.
Understanding the instructions is key. You’ll also learn the correct application steps. Reading the label will help avoid problems.
Test in a Hidden Area: Do a test application in a small area. This shows how the finish will look. It also lets you check for compatibility.
Always test the finish first. This ensures the finish is a good match. It will also help you to confirm the final result.
Use a Foam Applicator or Microfiber Pad: These tools help you apply the finish smoothly. They also help minimize brush marks.
Applying the finish evenly is important. These tools provide a smooth, consistent finish. They are less likely to leave streaks or brush marks.
Apply Evenly: Do not apply the finish too thick. Too much finish can cause problems. Apply a thin, even coat.
An even application helps avoid drips or bubbles. Thin coats dry and bond more effectively. Applying thin coats ensures a smooth finish.
Let It Dry: Allow the finish to dry. Check the label for the right drying time. Wait before applying the next coat.
Allowing each coat to dry is key. Each coat must dry before another one is added. Drying completely is important for the finish’s durability.
Maintaining Your Refreshed Floors
After your hardwood floors look new again, maintenance is essential. Simple steps will help you preserve the new look. Proper care will also extend the life of your floors. This is the last part of making your hardwood floors look new without sanding. Regular maintenance keeps them looking great. It also prevents the need for more intensive work in the future.
Regular Cleaning Routine
Regular cleaning is a must. Sweep or vacuum your floors frequently. This removes dirt and grit. Use a hardwood floor cleaner that’s right for the finish. Avoid too much water. Too much water can damage the wood. Clean up spills right away to prevent damage. With these simple practices, your floors will always look their best. This helps you protect your investment.
Sweep or Vacuum Often: This step keeps dirt and debris from scratching your floors. Make it a habit. This is an easy way to protect your floors.
Regular sweeping or vacuuming is the first line of defense. It prevents dirt from building up and scratching the finish. It keeps your floors clean.
Use a Suitable Cleaner: Select a cleaner made for hardwood floors. Follow the product instructions. Avoid harsh chemicals that could damage the finish.
Using the right cleaner helps. This is a crucial step in floor maintenance. Always choose the correct cleaner to preserve the finish.
Avoid Excess Water: Water can damage hardwood. When you mop, use a damp mop, not a wet one. Too much water can cause damage.
Excess moisture can harm wood. Use a damp mop to clean the floor. Avoid standing water. Ensure the floor dries quickly.
Clean Spills Immediately: Spills can cause stains. If you clean spills fast, you will protect your floors. Wipe up spills as soon as they happen.
Acting fast is important. Clean spills immediately to avoid damage. This keeps your floors looking their best.
Use Doormats: Place doormats at entryways. These will catch dirt and debris. This keeps dirt from getting on your floors.
Doormats help prevent dirt from being tracked into your home. They protect your floors from getting scratched. This is a very easy step to take.
Protecting Your Floors From Damage
There are steps you can take to keep your floors safe. Use floor protectors under furniture legs. These prevent scratches. Place rugs in high-traffic areas. This adds a layer of protection. Avoid walking on your floors with shoes. Instead, walk with soft-soled slippers. Also, keep your pets’ nails trimmed. These steps will add a layer of protection.
Use Floor Protectors: Place pads under furniture legs. This prevents scratches. Select felt pads or other suitable materials.
Floor protectors are easy to install. They are perfect for furniture legs. They prevent scratches and reduce wear and tear.
Use Rugs in High-Traffic Areas: Rugs offer an extra layer of protection. This will keep floors in good shape. Place rugs in areas with heavy foot traffic.
Rugs are a great idea. They add protection and style. They help keep your floors in great condition.
Avoid Shoes Indoors: Shoes can scratch the floor. Remove your shoes when you enter your home. This helps protect your floors.
Shoes can carry dirt and grit. They can also scratch floors. Keeping shoes off your floors is a simple step.
Trim Pet Nails: Keep your pet’s nails trimmed. Long nails can scratch floors. Regular trimming can make a big difference.
Pet nails can scratch surfaces. Regularly trimming your pet’s nails helps prevent damage. This is a simple step.
Control Sunlight: Direct sunlight can fade hardwood floors. Close the blinds or use curtains. Doing this will protect your floors.
The sun can make colors fade. Protect your floors from sunlight. You can also use window treatments.
| Method | Benefits | Considerations |
|---|---|---|
| Regular Sweeping/Vacuuming | Removes loose dirt and debris, preventing scratches | Requires consistent effort |
| Using Appropriate Cleaners | Effectively cleans the floor, maintains finish | May need to test in an inconspicuous area |
| Placing Rugs in High-Traffic Areas | Provides extra protection against wear and tear | Rugs require regular cleaning |
| Using Floor Protectors | Prevents scratches from furniture legs | Must be replaced as they wear out |
| Controlling Sunlight | Protects against fading and damage from UV rays | May require changing window treatments |
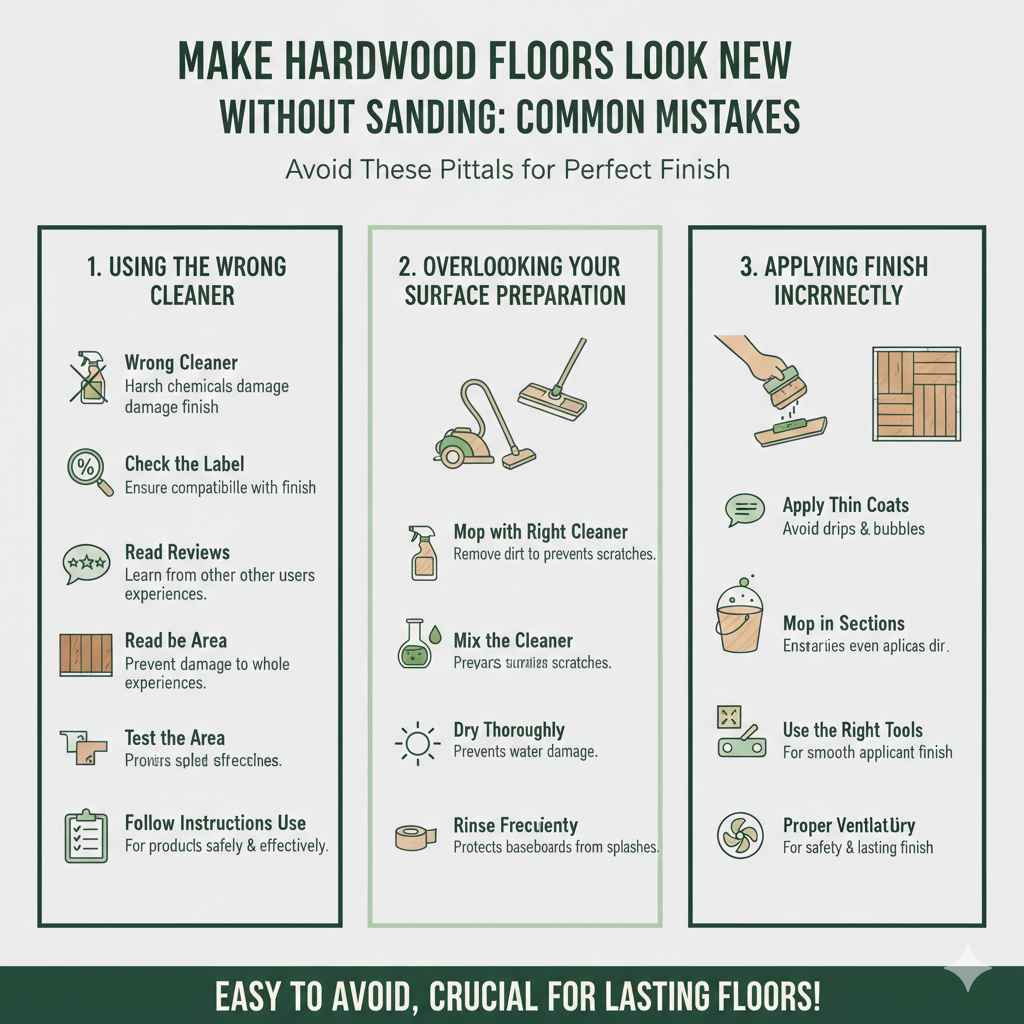
Make Hardwood Floors Look New Without Sanding: Common Mistakes
Even though the process of making hardwood floors look new without sanding is doable, some mistakes can get in the way. Knowing these common errors will help you avoid them. This also guarantees the best results. Being aware of these pitfalls will help you ensure success. It also saves you time and frustration.
Using the Wrong Cleaner
One common mistake is using the wrong cleaner. Regular cleaners and all-purpose cleaners can leave a residue on your floors. They can also dull the finish. Always pick a cleaner specifically made for hardwood floors. Be sure to check the label for the finish. Using the right cleaner will protect your floors. This ensures they look great for years. It’s a key detail.
Wrong Cleaner: Regular cleaners are often too harsh. They may strip the finish. They also leave behind residue.
Choose cleaners designed for hardwood. General-purpose cleaners can cause damage. Always use products made for wood floors.
Check the Label: Make sure the cleaner is safe for your floor’s finish. Some finishes are sensitive. Others can be damaged by certain cleaners.
Always review the product label. This ensures the cleaner is compatible with your floor. It also guarantees good results.
Read Reviews: Search for product reviews before buying. Find out what other people are saying. Understand what they liked and didn’t like.
Other users can share helpful information. This includes details about how well the cleaner works. Also, reviews offer insight into any problems.
Test in an Inconspicuous Area: Try the cleaner on a small part of the floor. This lets you see the results before you clean the whole area.
Testing is a good idea. This lets you make sure the cleaner will not harm your floors. It also ensures the cleaner works.
Follow Instructions: Always follow the instructions on the cleaner. This ensures you use the product safely and effectively. It will also help your floors.
Follow directions carefully to get the best results. Overuse of cleaners may cause damage. Make sure the cleaning process is right.
Overlooking Surface Preparation
Another error is not preparing the floor before you clean. Any dust or dirt will scratch the floor. Always sweep, vacuum, or mop. This prepares the surface. Failure to prep your floors is a big mistake. Taking these steps is essential. Make sure your floors are clean before applying any finish. Prep work is key to getting the best results.
Vacuum or Sweep: Remove loose dirt and debris. This keeps dirt from scratching the wood. This also helps with the cleaning.
Cleaning and vacuuming clears the surface of anything that can cause scratches. This makes the cleaning step easier. It also makes your floors shine.
Mop with the Right Cleaner: Choose the right cleaner. This keeps your floors from damage. This also prepares the surface.
Use the best cleaning product. Use the correct dilution. Following these steps helps clean the floors thoroughly. You’ll also prepare for the finish.
Dry Thoroughly: Let the floor dry completely after cleaning. This is an important step. This prevents water damage.
Allow the floors to dry before you add a finish. This ensures the best results. Also, it prevents problems.
Address Existing Damage: Before you begin, fix scratches and damage. These can get in the way of a good result. You’ll make your floors look better.
Fix any damage. This helps achieve a smooth finish. It also makes your floors look their best. This is a very important step.
Use Painter’s Tape: Protect the baseboards. Use painter’s tape to protect them. This makes it easier to clean.
Applying painter’s tape prevents any accidents. Tape makes sure the baseboards stay in great condition. This also protects other areas.
Applying Finish Incorrectly
Applying the finish is the most important part. One problem is using too much finish. This can lead to drips and bubbles. Work in a well-ventilated space. Make sure you apply thin, even coats. Also, let each coat dry. Follow the instructions on the can. Doing things right makes your floors look great. It is key to getting good results. If you don’t do it right, you can damage your floors.
Apply Thin Coats: Use thin, even coats of finish. This helps avoid drips and bubbles. This keeps the finish smooth.
Apply several thin coats. This offers better protection. It also will make sure the result looks better. Thin coats also dry faster.
Work in Sections: Divide the floor into parts. Work in small sections. This gives you better control. This prevents the finish from drying too quickly.
Divide the floor. This ensures an even application. Work in small sections to keep the work manageable. This can improve the result.
Use the Right Tools: Choose the best applicators. A foam applicator or microfiber pad works well. They help with a smooth finish.
Use the correct tools for a great result. Quality tools help provide an even coating. They make the job easier, too.
Proper Ventilation: Good ventilation keeps the fumes from building up. Open windows and doors. This protects you.
Always ventilate the work area. This keeps the air clean. It is key for safety. It also makes for a better finish.
Let Each Coat Dry: Allow each coat to dry. Follow the instructions. Wait before adding the next coat. The result is better.
Give the finish time to dry completely. This avoids any problems. It will also help the finish last longer.
Frequently Asked Questions
Question: How often should I clean my hardwood floors?
Answer: It’s a good idea to sweep or vacuum your floors at least once a week. If you have pets or a high-traffic area, you might need to clean more often. Spills should be cleaned up right away.
Question: What is the best way to clean up a spill on my hardwood floors?
Answer: Clean spills immediately with a soft cloth. Use a hardwood floor cleaner. Avoid letting any liquid sit on the surface for a long time.
Question: Can I use a steam mop on my hardwood floors?
Answer: It is often best to avoid using steam mops. Steam mops can damage the finish. The heat and moisture may warp the wood. Always refer to your floor’s care instructions.
Question: How do I know if my floors need to be refinished?
Answer: If you have deep scratches or the finish is worn down, it’s time to refresh your floors. You may see dull spots or discoloration. It may be time to do something more than cleaning. You might need to add another coat of finish.
Question: How can I protect my hardwood floors from scratches?
Answer: Use floor protectors under furniture. Add rugs in high-traffic areas. Trim your pets’ nails. Also, remove your shoes indoors to avoid scratches.
Final Thoughts
Now you have the knowledge to Make Hardwood Floors Look New Without Sanding. You’ve learned about preparation, cleaning, finish options, and maintenance. You’ve also explored common mistakes to avoid. Remember that the process is achievable with the right approach. Start by cleaning your floors thoroughly, removing all dust and debris. Select the appropriate finish. Apply the finish carefully, ensuring even coats and proper drying times.
Don’t forget to establish a regular cleaning schedule. Follow the tips for protecting your floors from damage. By following these steps, you can breathe new life into your hardwood floors. Get started and enjoy your revitalized space. Now go on, and create a fresh look for your home!