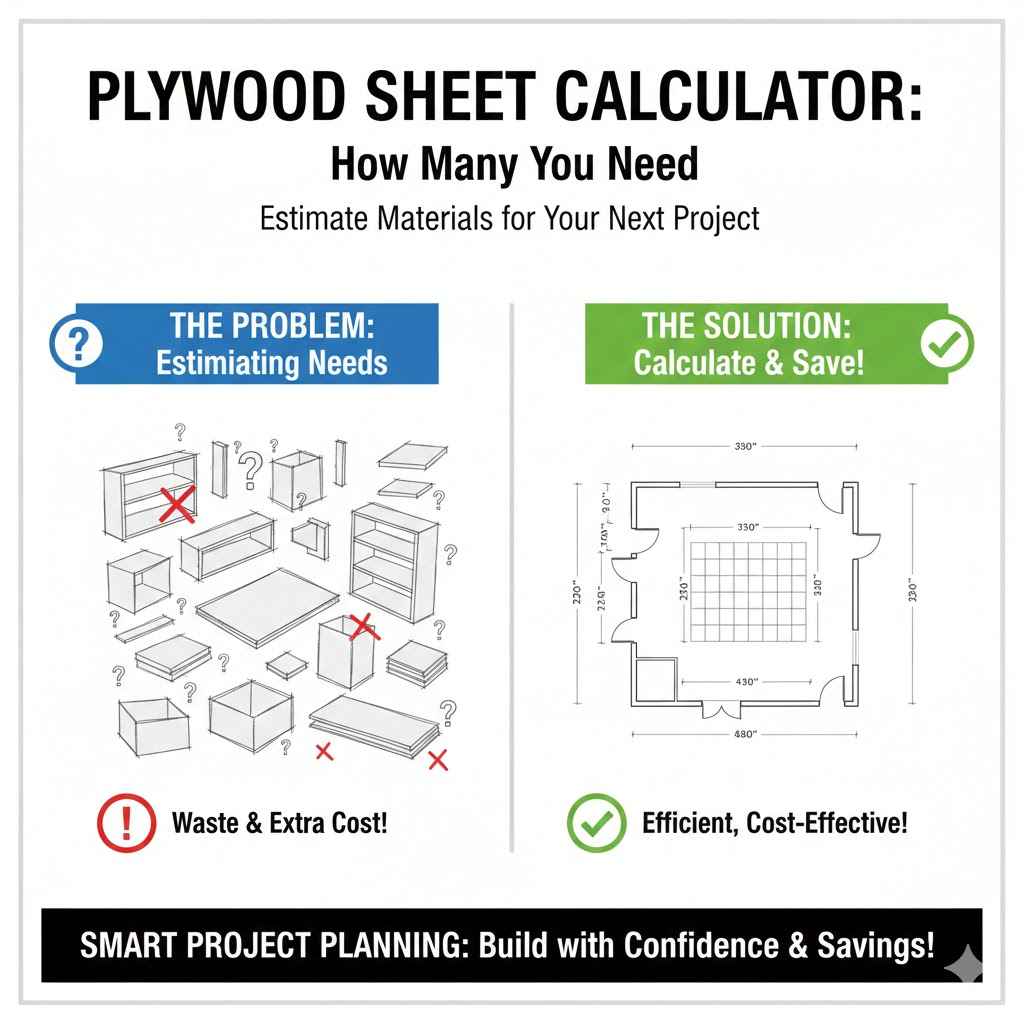
Plywood Sheet Calculator How Many You Need
Figuring out how much plywood you need for a project can seem tricky, especially when you’re just starting out. You might wonder if you’re buying too much or not enough. That’s why a Plywood Sheet Calculator: How Many Do You Need? is so helpful.
It makes this step easy. We’ll walk you through it simply, so you can get your supplies right. Get ready to learn the best way to calculate your needs and get your project moving!
Understanding Plywood Sheet Dimensions and Cuts
Plywood comes in standard sizes, and knowing these is the first step to calculating how much you need. A typical sheet of plywood in many places is 4 feet by 8 feet. This means one sheet covers a rectangular area of 32 square feet.
When you plan your project, you’ll be cutting this large sheet into smaller pieces. The trick is to plan these cuts so you use as much of the sheet as possible. This saves you money and reduces waste.
Thinking about the dimensions and how you’ll cut the wood is key to a smart calculation.
Standard Plywood Sheet Sizes
The most common plywood sheet size you’ll find is 4 feet by 8 feet. This measurement is pretty standard across many regions. It’s important to remember these dimensions because they are the building blocks for all your calculations.
If you’re in a place that uses different standard sizes, you’ll need to adjust your measurements accordingly. Always confirm the exact size of the plywood you plan to buy.
This standard size is easy to handle and transport. It also fits well in most trucks and trailers. Knowing this basic size allows you to start visualizing how your project pieces will fit onto the sheet.
It’s the foundation of any good cutting plan. This predictability makes planning much simpler.
The Concept of Yield
Yield refers to how much usable material you get from a piece of plywood after you make your cuts. When you’re cutting smaller pieces from a larger sheet, there will inevitably be some leftover bits. The goal of efficient planning is to maximize your yield.
This means arranging your cuts so that the leftover pieces are either large enough to be used for other parts of your project or can be combined efficiently. A good cutting layout minimizes wasted material.
Think of it like a puzzle. You want to fit all your required shapes onto the 4×8 sheet with as little empty space as possible. Sometimes, clever arrangement of cuts can turn what would be scrap into useful smaller pieces.
This careful consideration of yield directly impacts how many full sheets you ultimately need to purchase for your project.
Common Cutting Challenges
One common challenge is dealing with pieces that don’t fit neatly together on the plywood sheet. For example, if you need many pieces that are just a little too wide to fit side-by-side, you might end up with long, narrow strips of waste. Another challenge is when your project requires pieces of many different sizes.
Arranging these various shapes to fit perfectly on the standard 4×8 sheet can be complex. You might need to rotate pieces or try different layouts to see what works best.
Sometimes, the grain direction of the plywood is important for strength or appearance. This can limit how you orient certain cuts. If you need a specific grain pattern on a large surface, you might need to use fewer, larger pieces from each sheet, potentially leading to more waste.
Overcoming these challenges often involves careful planning and sometimes accepting a small amount of unavoidable waste.
How to Use a Plywood Sheet Calculator Effectively
Using a plywood sheet calculator takes the guesswork out of buying. These tools are designed to help you input your project’s measurements and get a precise number of sheets. The best calculators consider the standard sheet size and your required cuts to suggest the most efficient way to lay out your pieces.
This means you tell it what you need, and it tells you how many 4×8 sheets to buy. It’s like having a smart assistant for your lumber needs.
When you use a calculator, you’re not just guessing. You’re getting an optimized plan. This saves you time at the store and ensures you have enough material without overspending.
The process is usually straightforward: enter your project dimensions and the sizes of the pieces you need. Then, let the calculator do the hard work of figuring out the best way to cut them from standard plywood sheets.
Inputting Your Project Needs
The first step in using any calculator is providing accurate information about your project. You’ll typically need to enter the overall dimensions of the area you need to cover. For instance, if you’re building a large bookshelf, you might enter the total width, height, and depth.
Some calculators might ask for the dimensions of individual parts, like shelves, sides, and back panels. Be as precise as possible with these numbers.
You’ll also need to consider any specific cutting requirements. For example, do you need large, unbroken panels, or can they be pieced together? Are there any aesthetic considerations, like grain direction, that might affect how you cut?
The more detail you provide the calculator, the more accurate its estimate will be. It’s like giving the calculator a blueprint for your project.
Understanding Calculator Outputs
Once you’ve entered your project details, the calculator will provide an output. This output usually includes the total number of standard 4×8 plywood sheets you will need. Some advanced calculators might even show you a suggested cutting layout, illustrating how your pieces can be arranged on the sheets to minimize waste.
This visual guide can be incredibly helpful when you start making your cuts.
Pay attention to any notes or suggestions the calculator provides. It might indicate areas where waste is unavoidable or suggest alternative cutting patterns. The primary goal is to give you a clear, actionable number of sheets to purchase.
This avoids the common mistake of buying too little and having to make a second trip to the store, or buying too much and having excess material you won’t use.
Optimizing for Waste Reduction
A good calculator doesn’t just count pieces; it tries to optimize how those pieces fit onto the plywood sheets. This optimization is crucial for reducing waste. For example, if you need several long, narrow strips, the calculator will try to arrange them along the length of the 8-foot edge of the plywood.
This way, you use the longest dimension efficiently.
Conversely, if you need many smaller squares or rectangles, the calculator will arrange them in a more dense pattern across the 4×8 area. The aim is always to fit as much of your project as possible onto each sheet. By minimizing the leftover material, you save money and contribute to less wood being thrown away.
This smart approach benefits both your wallet and the environment.
When to Consider a Plywood Sheet Calculator: How Many Do You Need?
You should consider using a Plywood Sheet Calculator: How Many Do You Need? whenever you have a project that involves cutting and using plywood. This is especially true for beginners who might not have a lot of experience planning cuts.
Even experienced DIYers and professionals can benefit from using a calculator to double-check their own estimates or to quickly get a precise figure for larger jobs. It’s a tool that ensures accuracy and efficiency for any project size.
Think of it as a quick check-up for your material list. Whether you’re building simple shelves, a custom cabinet, or even a small shed, knowing the exact number of sheets is vital. This calculator helps you avoid common pitfalls like running out of material mid-project or buying more than you actually need, which can be costly.
It simplifies the planning phase significantly.
For Large-Scale Projects
For big projects like building a deck, a shed, or extensive cabinetry, the number of plywood sheets can add up quickly. A small error in estimation can mean a significant cost difference. A calculator is invaluable here because it can handle the complex arrangements of many different-sized pieces across multiple sheets.
It ensures that you order the right quantity upfront, preventing delays and extra trips to the lumber yard. Imagine building a whole room; the material needs are substantial.
This level of precision is essential for budgeting and project management. When you know exactly how many sheets you need, you can get accurate quotes for materials and labor if you’re hiring help. It also helps in coordinating delivery and storage of the materials, as you’ll have a clear understanding of the volume required.
When You’re New to DIY Projects
If you’re new to woodworking or DIY projects, figuring out plywood needs can feel overwhelming. You might not know how to efficiently plan cuts or account for the waste. This is where a Plywood Sheet Calculator: How Many Do You Need?
truly shines. It demystifies the process by providing a clear, easy-to-understand answer. You simply input your dimensions, and it gives you the number of sheets.
This tool empowers beginners by removing a common barrier to entry. It helps build confidence by ensuring that they have the right materials before they even start cutting. Instead of feeling anxious about buying the wrong amount, they can proceed with the project knowing they are well-prepared.
It’s a fantastic way to learn the ropes and achieve successful project outcomes.
To Minimize Material Waste
Even if you’re an experienced woodworker, aiming to minimize material waste is always a good practice. It’s both economical and environmentally responsible. A calculator can often find more efficient cutting layouts than a person might devise on the fly, especially when dealing with many small parts.
It’s designed to pack those pieces onto the sheet as tightly as possible based on programmed algorithms.
By using a calculator to optimize your cuts, you reduce the amount of wood that ends up as scrap. This directly translates to cost savings on your project. Furthermore, less waste means less material going to landfills, which is a positive step for sustainability.
Every bit of wood saved is a win. Consider a scenario where you need hundreds of small identical pieces for a decorative pattern; a calculator can ensure they fit with minimal leftover.
Example Scenario 1 A Simple Shelf Project
Let’s say you want to build a set of three simple floating shelves for your living room. Each shelf needs to be 3 feet long and 8 inches deep. You’ll also need some support brackets, but for this example, we’re focusing on the shelf material itself.
First, convert all measurements to the same unit. Let’s use feet. Shelf length: 3 feet
Shelf depth: 8 inches = 8/12 feet = 0.67 feet
So, each shelf requires a piece of wood that is 3 feet by 0.67 feet.
A standard 4×8 foot plywood sheet has an area of 32 square feet. On a single 4×8 sheet, you can get multiple pieces. The 8-foot length is ideal for fitting the 3-foot shelves along it.
You can fit two 3-foot shelves side-by-side along the 8-foot length (3 feet + 3 feet = 6 feet, leaving 2 feet of leftover length). The width needed for each shelf is 0.67 feet. The plywood is 4 feet wide.
So, you can cut several shelves across the 4-foot width. If you align the 3-foot length of the shelf with the 8-foot edge of the plywood, and the 0.67-foot depth with the 4-foot width:
Along the 8-foot edge, you can get two 3-foot shelves (3 + 3 = 6 feet). Along the 4-foot width, you can cut the 0.67-foot depth.
If you cut them carefully, you could potentially get around 6 shelves across the 4-foot width (4 feet / 0.67 feet is roughly 5.97). This means one sheet could potentially yield about 2 shelves (along the length) * 6 shelves (across the width) = 12 shelves. Since you only need 3 shelves, one single 4×8 sheet is more than enough.
A good calculator would tell you you only need 1 sheet, and you would have significant leftover material.
Example Scenario 2 Building a Small Cabinet
Imagine you’re building a small cabinet for your garage. The cabinet will be 3 feet tall, 2 feet wide, and 1.5 feet deep. You’ll need pieces for the front, back, two sides, a top, and a bottom.
You might also want a shelf inside.
Let’s break down the pieces needed:
Front: 3 ft x 2 ft (1 piece)
Back: 3 ft x 2 ft (1 piece)
Sides: 3 ft x 1.5 ft (2 pieces)
Top: 2 ft x 1.5 ft (1 piece)
Bottom: 2 ft x 1.5 ft (1 piece)
Shelf: 2 ft x 1.5 ft (1 piece)
Now, let’s see how these might fit on 4×8 sheets. Consider a 4×8 sheet. You can cut the two 3 ft x 2 ft front/back pieces along the 8-foot edge.
For example, place one at 3ft mark and another at the 3ft mark, so you use 6ft of the 8ft length. This leaves 2ft x 4ft of space. For the sides, you need 3 ft x 1.5 ft.
You can orient these along the 4ft width. If you place the 3ft dimension along the 8ft edge:
Place one 3ft x 1.5ft side piece. This uses 3ft of the length and 1.5ft of the width.
Place the second 3ft x 1.5ft side piece next to it, using another 1.5ft of width (1.5 + 1.5 = 3ft width used). This uses up 3ft of the 8ft length and 3ft of the 4ft width. Now, let’s look at the top, bottom, and shelf: 2 ft x 1.5 ft.
You have 5 ft of length remaining on the first sheet (8ft – 3ft). You have 1 ft of width remaining on the first sheet (4ft – 3ft). You can cut the 2ft x 1.5ft pieces.
It’s more efficient to try and fit these together. If you place the 2ft dimension along the remaining 5ft length:
You can fit two 2ft x 1.5ft pieces across the remaining 1ft width. This won’t work as you need 1.5ft width.
Let’s rethink the layout. A calculator might suggest this:
Sheet 1:
– Cut two 3ft x 2ft pieces for front and back. Place them along the 8ft length, taking up 6ft of length and 2ft of width.
This leaves a 2ft x 4ft area and a 6ft x 2ft area. – From the remaining 2ft x 4ft area, you can’t fit the 3ft sides. Let’s try aligning the 3ft height of the sides with the 4ft width.
Sheet 1:
– Cut two 3ft x 2ft pieces (front/back). – Cut two 3ft x 1.5ft pieces (sides). Place the 3ft dimension of the sides along the 4ft width.
This uses 3ft of the 4ft width. You have 1ft left. Place the 2ft dimension of the sides along the 8ft length.
You can fit four 2ft pieces along the 8ft length (2+2+2+2 = 8ft). So, you can cut the two 3ft x 2ft pieces from the first 2ft of the 8ft length. Then, from the remaining 6ft of length and 4ft width, you can cut the sides.
Let’s try a calculator-style layout:
Place the 3ft x 2ft front and back pieces. Align the 3ft side along the 8ft edge. This uses 3ft of the 8ft length.
You can fit two of these side-by-side along the 4ft width (2ft + 2ft = 4ft). So, you use 3ft of length and 4ft of width for these two pieces. This leaves 5ft x 4ft.
Now, for the two 3ft x 1.5ft side pieces. Align the 3ft side along the 8ft edge. You can fit two of these side-by-side along the 4ft width (1.5ft + 1.5ft = 3ft).
This uses 3ft of length and 3ft of width. For the top, bottom, and shelf (2ft x 1.5ft). You have remaining space on Sheet 1: A 5ft x 4ft area and a 3ft x 1ft area.
From the 5ft x 4ft area, you can cut the three 2ft x 1.5ft pieces. You can place two 2ft pieces along the 5ft length (2ft + 2ft = 4ft). This uses 4ft of length and 1.5ft of width.
You can place the third 2ft x 1.5ft piece next to these. A calculator would likely show that 1 sheet is enough for this small cabinet.
Advanced Considerations for Plywood Calculations
While basic calculators are great, sometimes projects require more nuanced planning. This can involve considering specific wood types, edge treatments, or complex joinery that might affect your cutting strategy. Thinking ahead about these details can prevent surprises and ensure you have precisely the right amount of material, and the right type of material, for your job.
It’s about going from knowing “how many” to knowing “how best.”
These advanced considerations help you become a more efficient and resourceful woodworker. They encourage a deeper engagement with the material and the project itself. By mastering these, you elevate your DIY skills and can tackle even more ambitious building tasks with confidence.
Types of Plywood and Their Properties
Different types of plywood are made for different purposes. Common types include construction grade, cabinet grade, and marine grade. Construction grade plywood is usually the most affordable and is suitable for framing, subflooring, and sheathing where appearance isn’t a primary concern.
Cabinet grade plywood has a smoother finish and fewer defects, making it ideal for furniture, cabinets, and decorative projects.
Marine grade plywood is highly resistant to moisture and is used in boat building and other applications where prolonged exposure to water is expected. Each type has different strengths and weaknesses. For example, the thickness and number of plies (layers) can vary, affecting its strength and flexibility.
Knowing these properties helps you choose the right plywood for your project, which can sometimes influence how efficiently it can be cut or how many pieces you might get from a sheet if the material behaves differently during cutting or handling.
Accounting for Saw Kerf
When you cut plywood with a saw, the blade removes a small amount of material. This removed material is called the “saw kerf.” For most DIY projects with standard saws, the kerf is usually about 1/8 inch. While this might seem tiny, it can add up, especially if you’re making many cuts.
If a calculator doesn’t account for saw kerf, you might end up needing an extra piece of plywood if your cuts are very close together.
For example, if you are cutting a piece that is exactly 2 feet long, and your saw blade takes out 1/8 inch, the actual piece you get will be slightly less than 2 feet. If you are making many cuts along the same line or edge, the cumulative effect can be noticeable. Many advanced calculators or cutting optimization software will allow you to input the saw kerf to ensure a more precise material estimate.
Edge Treatments and Joinery
Sometimes, the way you plan to join pieces of plywood affects how you should cut them. For instance, if you’re using a dado or rabbet joint, you might need to trim a small amount from the edge of a piece to create the groove or lip. Similarly, if you plan to apply edge banding to exposed plywood edges, you might want to account for the thickness of the banding when determining the final dimensions of your pieces.
These small adjustments can impact how many pieces fit on a sheet. If you need to trim an inch off the edge of every piece, that extra inch across many pieces can mean less efficient use of your plywood. Considering these details upfront, perhaps by adding a small buffer to your cut list or using a calculator that allows for joint allowances, ensures that your final project dimensions are accurate and you have enough material to accommodate these finishing touches.
Comparing Calculator Methods
There are different types of plywood calculators available. Some are very basic, simply dividing the total area of your project by the area of a plywood sheet. This method is often inaccurate because it doesn’t account for how pieces must be cut from the standard 4×8 rectangle.
Other calculators are more sophisticated, using algorithms to simulate cutting patterns and minimize waste.
When choosing a calculator, look for one that allows you to input the dimensions of individual pieces and offers a visual representation of the cutting layout. These advanced tools provide the most accurate estimates. Comparing the results from a simple area-based calculator versus an optimization-based calculator can highlight the significant difference waste reduction can make.
The latter will almost always recommend fewer sheets.
| Calculator Type | Pros | Cons | Best For |
|---|---|---|---|
| Simple Area Calculator | Quick and easy to use. | Highly inaccurate; doesn’t consider cutting layout or waste. | Rough, non-critical estimates only. |
| Cutting Layout Optimizer | Minimizes waste; provides efficient cutting plans. | May require more detailed input; slightly more complex interface. | Most projects, especially those with many cuts or tight budgets. |
Real-World Application: Furniture Building
A furniture maker is building a set of custom drawers. Each drawer requires a front, back, two sides, and a bottom. Let’s say each drawer front is 18 inches wide by 6 inches tall, and the sides are 16 inches deep by 6 inches tall.
The back would be 18 inches wide by 5.5 inches tall, and the bottom 16 inches wide by 16 inches deep.
A simple area calculation might suggest they need fewer sheets than they actually do. However, an optimization calculator would take the 4×8 sheet and try to fit these varied dimensions. For example, along the 8-foot (96 inches) edge, they might place the 18-inch drawer fronts.
They could fit five 18-inch pieces (18 5 = 90 inches). Along the 4-foot (48 inches) edge, they might fit the 16-inch depth of the sides and bottoms. They could fit two 16-inch pieces (16 2 = 32 inches).
The challenge comes when fitting all the pieces for multiple drawers. A good calculator would consider the 6-inch height, 5.5-inch back height, and 16-inch depth. It would arrange these pieces efficiently, perhaps placing multiple drawer fronts along one 8-foot edge, and then using the remaining space for sides and bottoms, rotating pieces as needed to maximize yield.
For a project with 10 drawers, this optimization becomes crucial. Without it, they might underestimate and need an extra sheet or two, leading to unnecessary costs and waste.
Where to Find and Use Plywood Calculators
Plywood sheet calculators are readily available online, often on the websites of lumber suppliers, home improvement stores, or woodworking communities. These tools are designed to be user-friendly, so you don’t need to be a tech expert to use them. They are a practical resource for anyone undertaking a project that requires plywood, from a small craft to a major construction job.
Finding the right one is simple, and using it will make your material planning much smoother.
Most online calculators work through a web browser, meaning you can access them from your computer, tablet, or even your smartphone. This convenience allows you to plan your material needs right at the project site or while you’re browsing for supplies. Many are free to use, making them an accessible tool for all levels of DIY enthusiasts.
Online Lumber Supplier Websites
Many large lumber yards and home improvement retailers offer free tools on their websites. These often include plywood sheet calculators. They benefit from you buying your materials from them, so they make these tools accessible.
You can usually find these calculators in a “Tools,” “Resources,” or “Project Planning” section of their site. Sometimes, they are integrated into product pages for plywood.
Using these calculators often means you’re directly inputting measurements into a system tied to the products they sell. This can sometimes lead to suggestions for their specific stock. However, the core functionality of calculating sheet needs remains consistent and valuable.
It’s a convenient starting point for your project planning.
Dedicated Woodworking Websites and Forums
There are numerous websites and online forums dedicated to woodworking. These platforms are great resources for finding specialized tools, including advanced plywood calculators. Woodworkers often share their favorite calculators, tips, and custom tools they’ve developed.
These sites may offer calculators that are more sophisticated or tailored to specific types of projects.
Forums can also be a place to ask questions if you’re unsure how to use a calculator or need advice on a particular cutting layout. The community aspect means you can get help from experienced individuals. These communities are passionate about sharing knowledge, making them excellent places to discover the best tools for your needs.
Mobile Apps for DIY Projects
Some developers have created mobile applications specifically for DIY and construction projects. These apps often include measurement tools, unit converters, and, of course, material calculators like those for plywood. The advantage of a mobile app is that it can be used offline and is always accessible on your phone, which is very handy on a job site or when you’re at the lumberyard.
Look for apps in your device’s app store by searching for terms like “woodworking calculator,” “construction planner,” or “DIY materials.” Many of these apps are free, though some may offer premium features for a small fee. They can streamline your planning process by keeping all your project tools in one convenient place.
How to Input Dimensions for Accuracy
Regardless of where you find your calculator, the key to accurate results is precise input. Always double-check your measurements before entering them. Convert all measurements to a single unit (e.g., inches or feet) to avoid errors.
Make sure you are entering the dimensions of the pieces you need, not the overall dimensions of the project, unless the calculator specifically asks for that.
If the calculator asks for dimensions in feet and inches, ensure you enter them correctly. For example, 3 feet 6 inches should be entered as 3.5 feet or as 3′ 6″. Some calculators have specific formatting requirements, so read any instructions carefully.
Entering “0.5” for half an inch when the calculator expects decimal feet will lead to incorrect results. Precision here is paramount.
Frequently Asked Questions
Question: What is the standard size of a plywood sheet
Answer: The most common standard size for a plywood sheet in many regions is 4 feet by 8 feet.
Question: Can I use a simple area calculation for plywood needs
Answer: A simple area calculation is not recommended because it doesn’t account for how pieces must be cut from a rectangular sheet and often leads to inaccurate estimates and wasted material.
Question: How does saw kerf affect plywood calculations
Answer: Saw kerf is the material removed by the saw blade. If not accounted for, it can lead to needing slightly more material than calculated, especially for projects with many cuts.
Question: What information do I need to use a plywood sheet calculator
Answer: You generally need the dimensions of the individual pieces you need to cut from the plywood. Some calculators may also ask for project specifics or allowances for joinery.
Question: Is it better to use an online calculator or a mobile app
Answer: Both online calculators and mobile apps are effective. Online calculators are easily accessible from any computer, while mobile apps offer convenience and offline use on your smartphone.
Summary
Calculating the right amount of plywood is easy with the right tools. Using a Plywood Sheet Calculator: How Many Do You Need? helps you buy the exact number of sheets required for your project.
This saves you money and reduces waste. Input your project’s piece dimensions accurately for the best results. Now you have the knowledge to plan your cuts efficiently and confidently tackle any building task.