Should I Let Pressure Treated Wood Dry: Essential Guide
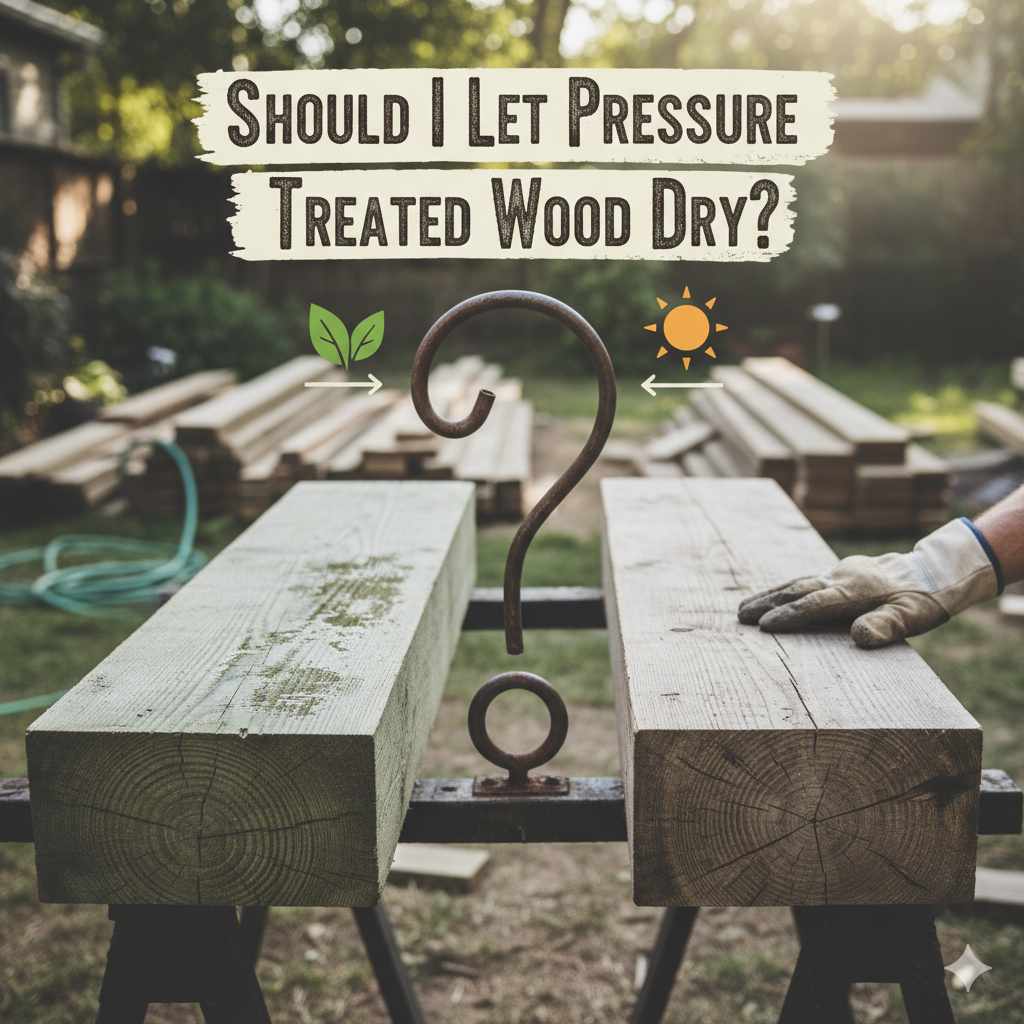
Yes, you should generally let pressure-treated wood dry for a period before painting, staining, or sealing to ensure better adhesion and a longer-lasting finish. However, the exact drying time can vary significantly.
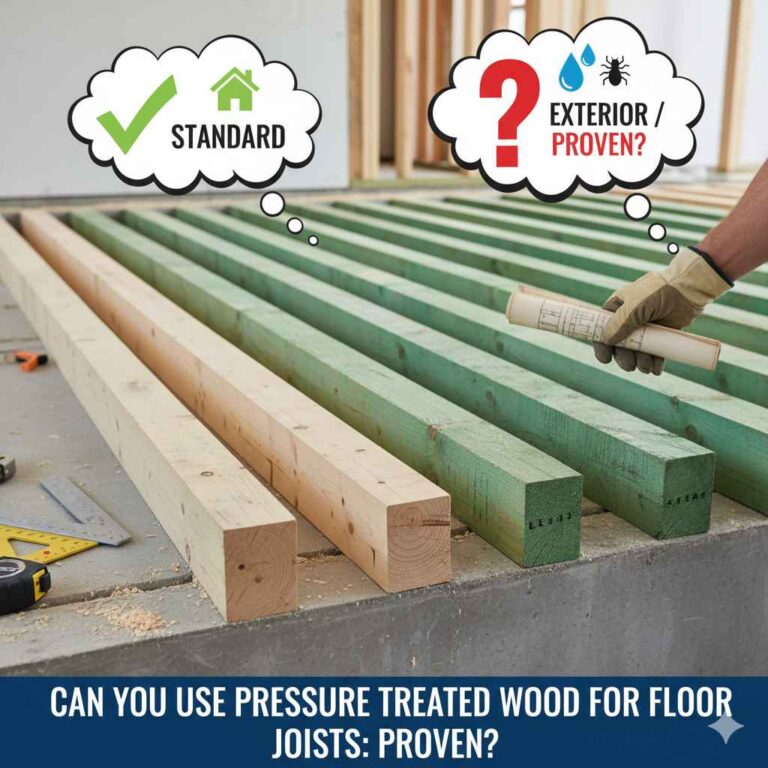
Building with pressure-treated wood is a fantastic way to ensure your projects stand the test of time, especially outdoor structures like decks, fences, and pergolas. But a common question pops up: “Should I let pressure-treated wood dry before I do anything else with it?” It’s a great question, and the answer isn’t always a simple yes or no. When this wood is fresh from the treatment plant, it’s often quite wet from the process. This moisture can affect how well finishes like paint or stain stick to it, and it can even lead to issues down the road. Don’t worry, though! In this guide, I’ll walk you through everything you need to know about drying pressure-treated wood, making your DIY projects smoother and more successful.
Why Does Pressure-Treated Wood Need to Dry?
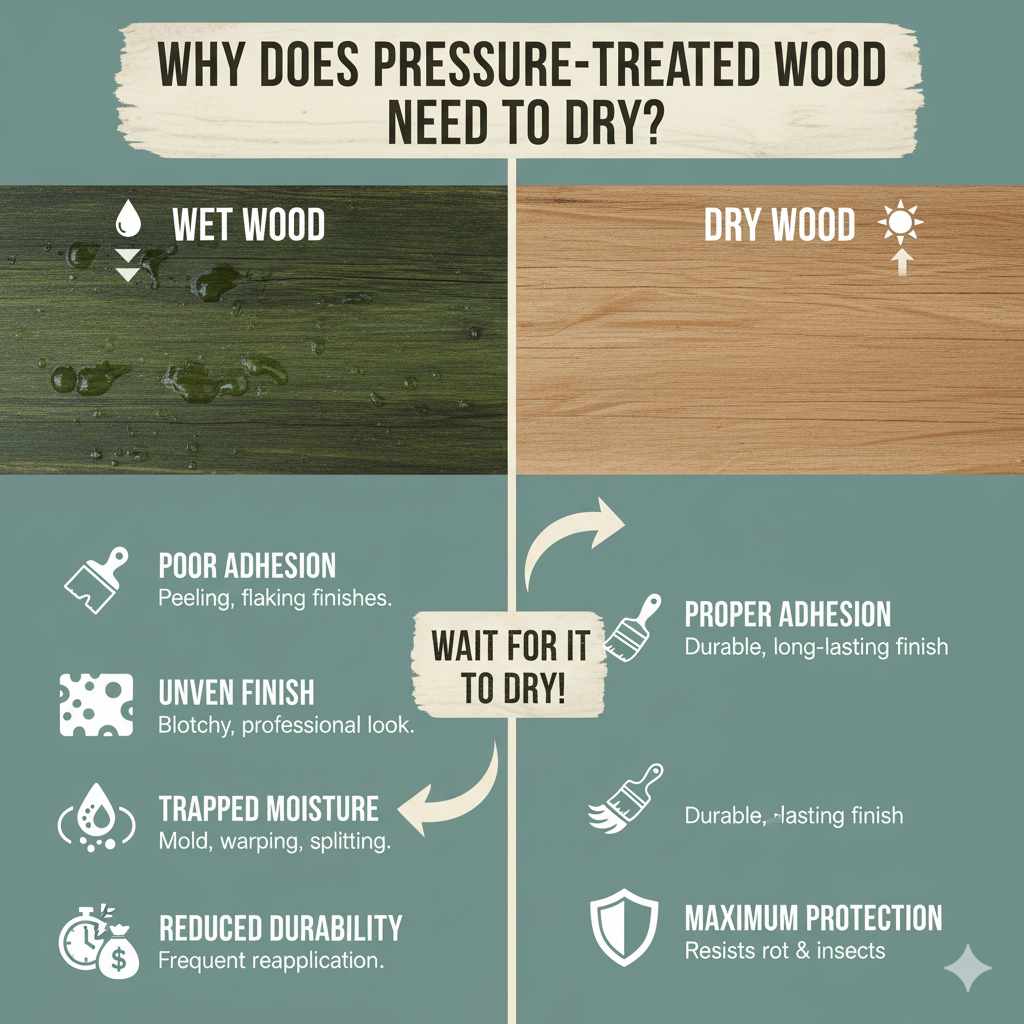
Pressure-treated wood is infused with chemicals under pressure to protect it from rot, decay, and insects. This process, while incredibly beneficial for longevity, saturates the wood with water and treatment solutions. When you try to apply finishes like paint, stain, or sealant to wood that’s still very wet, you’re essentially trying to stick something to a waterlogged surface. This can lead to several problems:
- Poor Adhesion: The finish won’t bond properly with the wet wood fibers, leading to peeling, flaking, or bubbling paint and stain.
- Uneven Finish: The moisture in the wood can cause stains to soak in unevenly, resulting in a blotchy, unprofessional look.
- Trapped Moisture: If you seal wet wood, you can trap moisture inside. This can encourage mold and mildew growth and can even cause the wood to warp or split as it eventually dries.
- Reduced Durability: Finishes applied to wet wood won’t last as long, meaning you’ll have to reapply them more frequently, costing you time and money.
How to Tell if Your Pressure-Treated Wood is Dry Enough
Figuring out if your wood is ready for finishing is key. Here are a few reliable methods:
1. The Water Drop Test
This is one of the simplest and most effective ways to check. Place a few drops of water on the surface of the wood. If the wood is dry enough, the water will bead up and sit on the surface for a few minutes before slowly being absorbed. If the water soaks in almost immediately, or if it doesn’t bead up at all, the wood is still too wet.
2. The Feel and Look Test
While not as precise, this is a good initial indicator. Freshly treated wood often feels heavy and looks darker, sometimes with visible moisture on the surface. As it dries, it will feel lighter and take on a more natural wood color. You might even see a whitish residue called “salt deposits” or “efflorescence” forming on the surface as the wood dries. This is normal and doesn’t affect the wood’s integrity, but it’s a sign the wood is drying out.
3. Moisture Meter
For the most accurate reading, a moisture meter is your best friend. These handy tools are relatively inexpensive and provide a precise percentage of the wood’s moisture content. For most finishes like paint and stain, you’ll want the moisture content to be below 15-17%. Some sources, like the Forest Products Laboratory, provide extensive information on wood moisture content and its implications.
Factors Affecting Drying Time
There’s no single answer for how long pressure-treated wood needs to dry because several factors come into play:
- Wood Species and Density: Denser woods will hold more moisture and take longer to dry than lighter woods.
- Treatment Process: Different treatment plants and processes can leave varying amounts of moisture in the wood.
- Wood Thickness: Thicker boards will naturally take longer to dry than thinner ones.
-
Environmental Conditions: This is a big one!
- Temperature: Warmer temperatures speed up evaporation.
- Humidity: High humidity slows down drying, while low humidity speeds it up.
- Airflow: Good ventilation is crucial. Wood needs air circulating around it to dry effectively.
- Sunlight: Direct sunlight can help dry the wood, but it can also cause it to dry too quickly and potentially warp.
- How the Wood is Stored: If the wood is stacked tightly without airflow, it will dry much slower.
How Long Does Pressure-Treated Wood Typically Need to Dry?
Based on these factors, the drying time can range from a few weeks to several months. Here’s a general guideline:
- For painting: Aim for a moisture content below 15%. This might take anywhere from 2 weeks to 6 months, depending heavily on the environmental conditions and how the wood is stored.
- For staining or sealing: A slightly higher moisture content, around 17-19%, is often acceptable. This might mean it’s ready a bit sooner than for painting, perhaps after 1-4 months.
It’s always better to be patient and let the wood dry thoroughly than to rush the process and deal with finish failure later.
Should I Let Pressure-Treated Wood Dry Before Installing?
This is a common point of confusion. The short answer is: it depends on what you mean by “installing” and what you plan to do afterward.
If you are simply building a deck frame, a fence structure, or other elements that will eventually be covered or won’t receive a direct finish, you can often install pressure-treated wood while it’s still damp. The wood’s inherent protection against decay and insects is the primary benefit here, and it will continue to dry out over time once installed and exposed to the elements. In fact, installing it while slightly damp can sometimes help it settle and shrink evenly before you add any final touches.
However, if your installation plan involves immediately painting, staining, or sealing the wood after you put it up, then the answer leans towards letting it dry first, as discussed above. Trying to finish wet wood, even if it’s installed, will lead to the same adhesion and durability issues.
Installing Wet Wood Considerations:
- Shrinkage and Warping: Wood will shrink as it dries. If you build with very wet wood and then seal it before it has fully dried, you can trap moisture, leading to more significant warping or splitting. If you install it and let it dry naturally, the shrinkage will be more gradual and less likely to cause structural issues, especially if you’ve accounted for it during construction (e.g., leaving small gaps between deck boards).
- Fastener Issues: Nails and screws might loosen slightly as the wood dries and shrinks. This is usually not a major problem for structural integrity but can be noticeable.
- Surface Preparation: If you plan to finish the wood later, you might need to do some light sanding after it has dried to smooth out any raised grain or surface imperfections that occurred during the drying process.
Preparing Pressure-Treated Wood for Finishing: Step-by-Step
Ready to get your project looking its best? Follow these steps to prepare your pressure-treated wood for a beautiful, lasting finish.
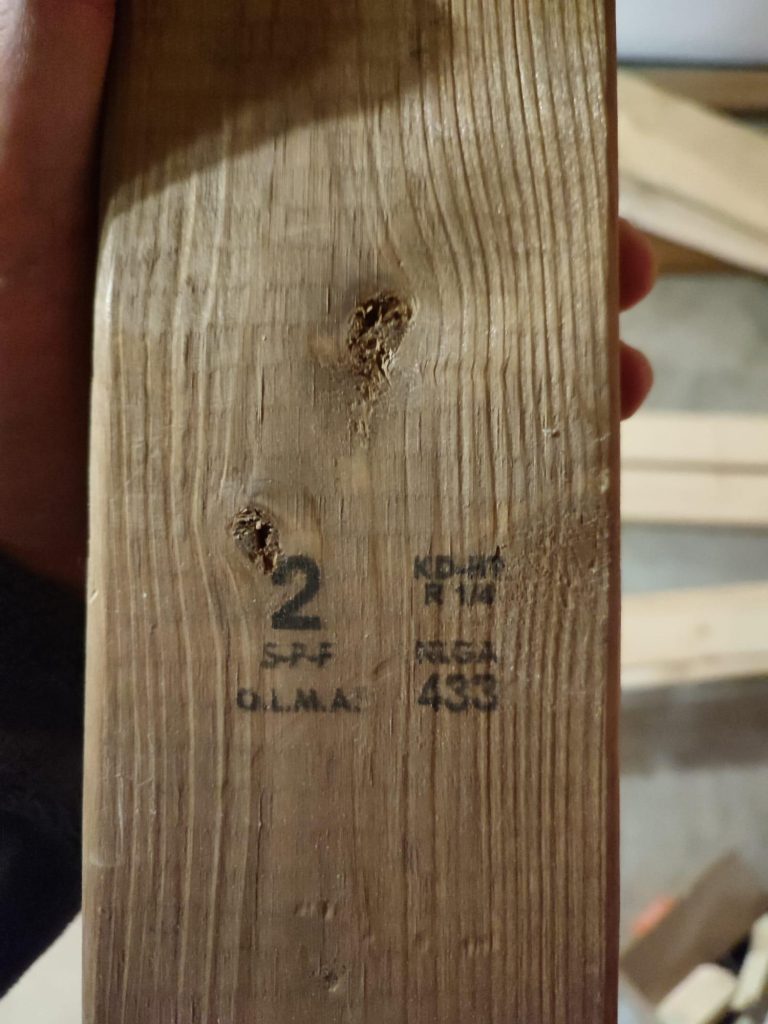
Step 1: Purchase and Initial Inspection
When buying pressure-treated wood, look for lumber that is uniformly green or brown (depending on the treatment type and brand) and feels heavy. Some surface moisture is normal. Check for the treatment retention stamp, which indicates the level of treatment. For residential use, look for stamps indicating .06 or .08 pounds per cubic foot for ground contact, or .04 for above-ground use. You can find more information on wood treatment levels from resources like the U.S. Environmental Protection Agency (EPA).
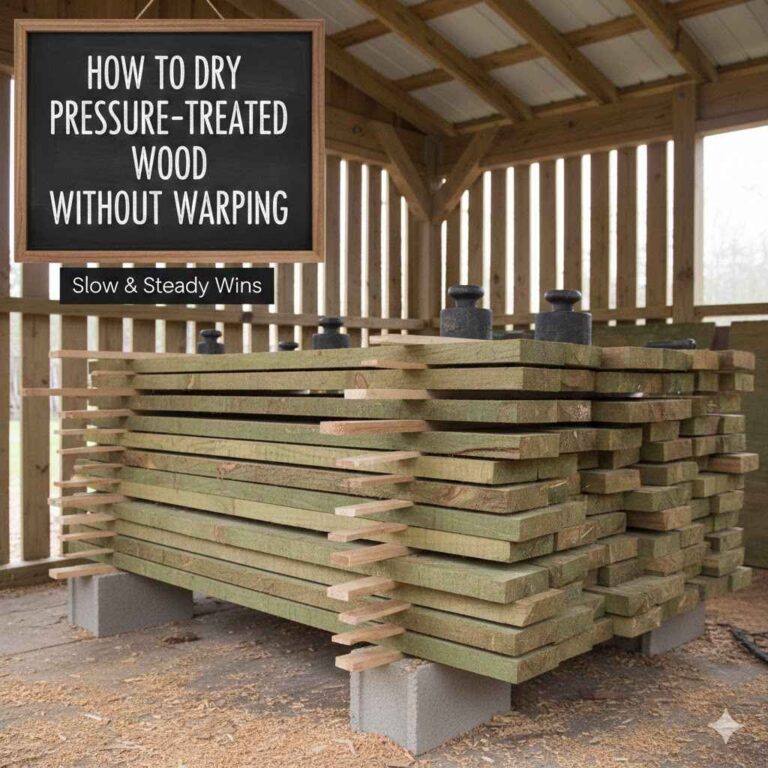
Step 2: Storage for Drying
Once you have your wood, proper storage is crucial for drying. Stack the boards off the ground (using stickers or scraps of wood between layers) in a well-ventilated area. This allows air to circulate freely around all sides of the wood. Avoid storing it in direct, intense sunlight for prolonged periods, as this can lead to rapid, uneven drying and potential warping. A covered, open-sided structure or simply a shaded spot with good airflow is ideal.
Step 3: Monitor Moisture Content
Begin checking the moisture content after a few weeks. Use the water drop test regularly. For more precision, use a moisture meter. Insert the pins of the meter into the wood. If you’re getting readings consistently above 17% for staining or 15% for painting, continue to let it dry.
Step 4: Wait for the Right Conditions
Be patient! The time it takes will vary greatly. In humid climates or during rainy seasons, drying can take much longer. In hot, dry, and breezy conditions, it will be faster. Resist the urge to rush; a well-dried surface is essential for a good finish.
Step 5: Surface Preparation Before Finishing
Once your wood has reached the desired moisture content:
- Clean the Surface: Brush off any dirt, dust, or debris. If there’s any efflorescence (white powdery residue), you can usually wipe it off with a damp cloth or a stiff brush.
- Light Sanding (Optional but Recommended): A light sanding with medium-grit sandpaper (like 100-120 grit) can help open up the wood’s pores, remove any raised grain from drying, and create a smoother surface for your finish to adhere to. Always sand in the direction of the wood grain.
- Wipe Down: After sanding, wipe the surface thoroughly with a clean cloth or tack cloth to remove all dust.
Step 6: Apply Your Finish
Now your pressure-treated wood is ready for its protective and decorative coating. Follow the manufacturer’s instructions for your chosen paint, stain, or sealant. Apply thin, even coats for the best results.
Can I Paint or Stain Pressure-Treated Wood Immediately?
Generally, no, you should not paint or stain pressure-treated wood immediately after purchase. As we’ve discussed, the wood is saturated with water and treatment chemicals. Applying a finish right away will likely result in poor adhesion, peeling, and an uneven appearance. It’s crucial to allow the wood to dry to an acceptable moisture level, typically below 15-17% for most finishes.
The only exception might be if the wood has been sitting in a lumberyard or on your job site for an extended period and you’ve already confirmed it’s dry using a moisture meter or the water drop test. Always test a small, inconspicuous area first if you’re unsure.
What Happens if I Don’t Let Pressure-Treated Wood Dry?
Failing to let pressure-treated wood dry adequately before applying finishes can lead to a cascade of problems:
- Finish Failure: This is the most immediate and noticeable consequence. Paint will peel and chip, and stains will look blotchy and uneven. The finish simply cannot bond properly to a wet surface.
- Trapped Moisture: This is a more insidious problem. When you seal wet wood, you create a barrier that prevents moisture from escaping. This trapped moisture can promote the growth of mold and mildew, leading to discoloration and decay over time, ironically undermining the very purpose of pressure treatment.
- Wood Degradation: The constant presence of moisture, especially when trapped, can cause the wood fibers to break down. This can lead to increased susceptibility to rot, warping, splitting, and a shorter overall lifespan for your project.
- Increased Maintenance: You’ll find yourself having to reapply finishes much more frequently, which is frustrating and costly.
Types of Finishes for Pressure-Treated Wood
Once your pressure-treated wood is dry, you have several options for finishing it, each offering different levels of protection and aesthetics:
1. Stains
Stains are a popular choice for pressure-treated wood because they can enhance the natural wood grain while providing protection. They come in various opacities:
- Transparent Stains: Offer minimal color but excellent UV protection and water repellency. They let the wood’s natural beauty show through.
- Semi-Transparent Stains: Provide more color and hide some imperfections while still allowing some wood grain to be visible. They offer good protection.
- Solid Stains: Look very similar to paint, completely hiding the wood grain. They offer the highest level of protection and are a good option for wood that has a less attractive grain or has been previously painted.
2. Paints
Paint offers the most protection against the elements and a wide range of color choices. However, it completely covers the wood grain and can be prone to peeling or chipping if not applied correctly to a properly prepared and dry surface.
- Exterior Latex Paint: This is the most common choice for outdoor projects. Ensure it’s high-quality and formulated for exterior use.
3. Sealers/Water Repellents
These products are designed to penetrate the wood and provide water repellency, helping to prevent excessive moisture absorption and freeze-thaw damage. They offer less UV protection than stains or paints but can be a good option for maintaining a natural wood look or as a preparatory step before staining.
Important Note: Always ensure the finish you choose is specifically designed for exterior use and is compatible with pressure-treated wood. Some older types of pressure-treated wood (containing CCA – Chromated Copper Arsenate) had specific finishing recommendations due to arsenic content. However, modern treatments (like ACQ, CA, and MCA) are generally safe to finish, but it’s always wise to check the wood manufacturer’s guidelines.
Alternatives to Waiting for Drying
While patience is usually the best approach, there are a few scenarios or methods to consider if you need to move forward more quickly:
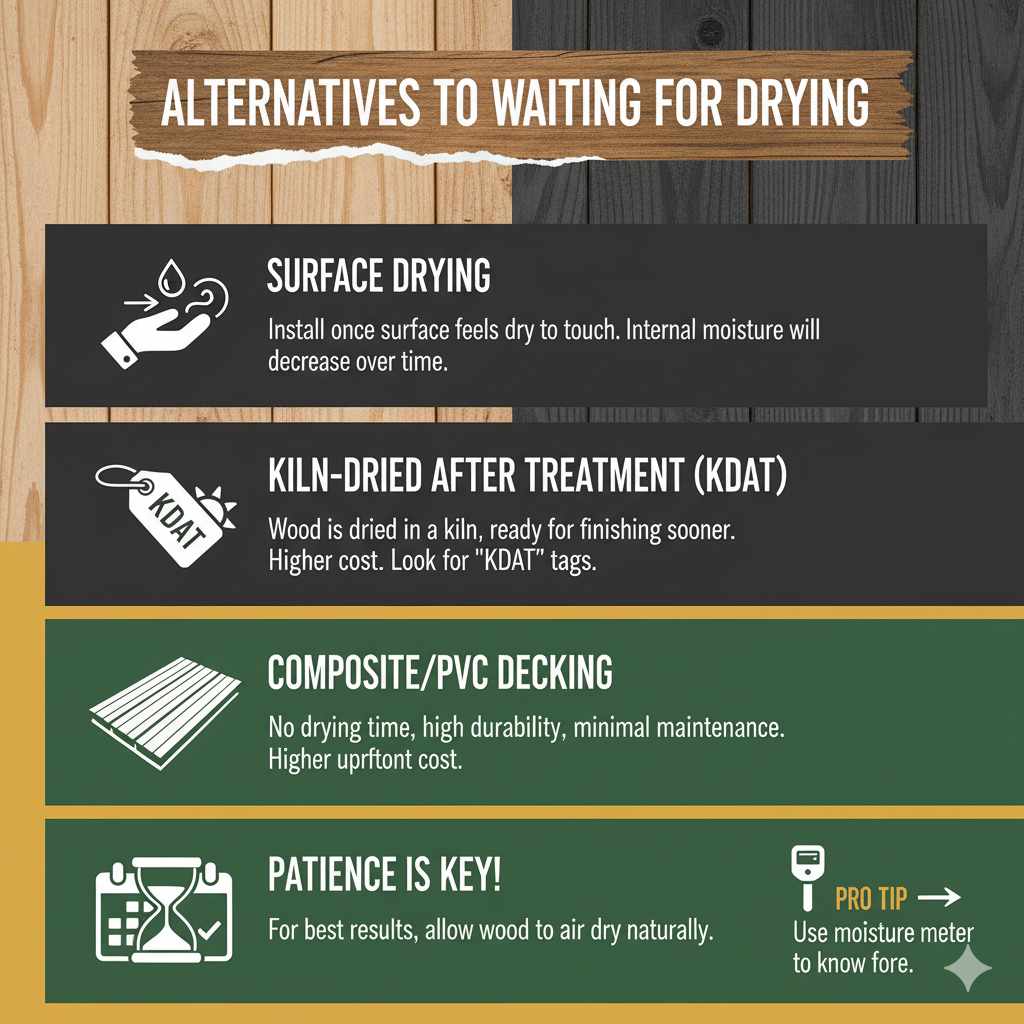
- Surface Drying: If you need to install wood for a project that will be finished later, you can often proceed once the surface feels dry to the touch and the water drop test indicates it’s absorbing water again. The internal moisture will continue to decrease over time.
- Kiln-Dried After Treatment (KDAT): Some pressure-treated wood is further dried in a kiln after the treatment process. This wood is much drier and more stable, often ready for finishing sooner. It usually costs more but can save you significant waiting time. Look for “KDAT” on the lumber tags.
- Consider Composite or PVC Decking: If avoiding drying times and maintenance is a top priority for a deck, for instance, consider materials like composite decking or PVC lumber. These require no drying time and are highly durable, though they come with a higher upfront cost.
FAQ About Drying Pressure-Treated Wood
Q1: How long does pressure-treated wood take to dry?
A1: Drying times vary widely, from a few weeks to several months. Factors include wood species, thickness, temperature, humidity, airflow, and storage conditions. It’s best to test with a moisture meter.
Q2: Can I build with wet pressure-treated wood?
A2: Yes, you can build with wet pressure-treated wood, especially for structural elements that won’t be immediately finished. However, be aware of potential shrinkage and warping as it dries.
Q3: What is the ideal moisture content for painting pressure-treated wood?
A3: For painting, the ideal moisture content is generally below 15%. For staining, it can be slightly higher, around 17-19%.
Q4: How do I test if my pressure-treated wood is dry enough?
A4: You can use the water drop test (water beads up and absorbs slowly) or, more accurately, a moisture meter. Aim for readings below 15-17%.
Q5: Will pressure-treated wood warp if I let it dry?
A5: Wood will shrink and can warp as it dries. Proper stacking with airflow during the drying process, and accounting for shrinkage during installation, can minimize these issues. KDAT (Kiln-Dried After Treatment) wood is more stable.
Q6: Can I use a dehumidifier or fan to speed up drying?
A6: Yes, using fans to increase airflow can significantly speed up the drying process. A dehumidifier can also help in enclosed spaces, but ensure adequate ventilation is still present.
Q7: What is efflorescence on pressure-treated wood?
A7: Efflorescence, also known as salt deposits, is a white, powdery residue that can appear on the surface of pressure-treated wood as it dries. It’s a natural byproduct of the treatment process and is harmless. It can usually be brushed or wiped away.
Conclusion
Deciding whether to let pressure-treated wood dry before your next step is a crucial part of ensuring your DIY projects are not only beautiful but also built to last. While the temptation to start painting, staining, or even completing the build immediately after purchase can be strong, understanding the wood’s moisture content is key. Remember, pressure-treated wood’s primary benefit is its resistance to decay and pests, which is inherent regardless of its current moisture level. However, for finishes to adhere properly and for the longest-lasting results, patience is a virtue. By using simple tests like the water drop method or investing in a moisture meter, and by storing your lumber correctly, you can ensure your wood is ready for its final protective coating. This preparation will save you time, effort, and money in the long run, leading to a more satisfying and durable outcome for your deck, fence, or any other outdoor project. Happy building!