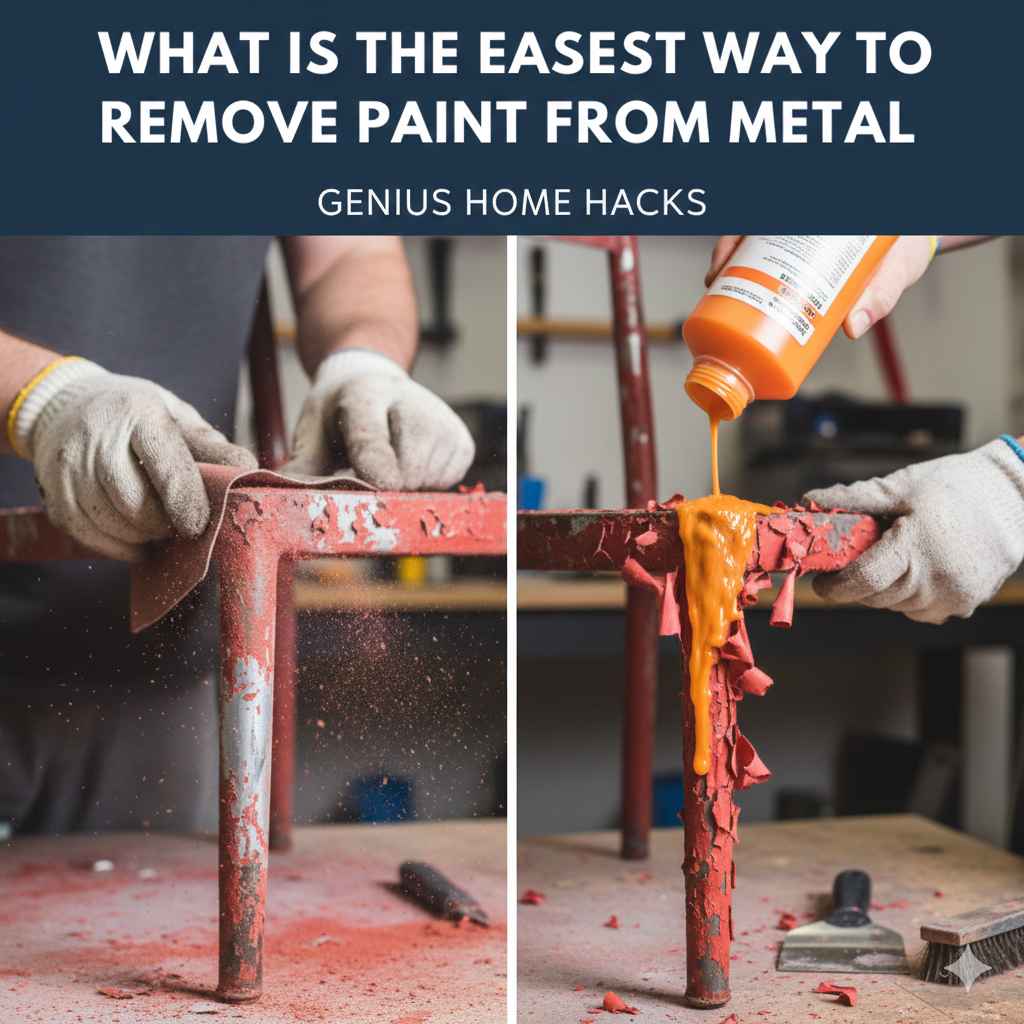
What Is The Easiest Way To Remove Paint From Metal: Genius
The easiest way to remove paint from metal for most DIY projects is by using a chemical paint stripper. This method requires the least physical effort, effectively dissolves multiple layers of paint at once, and works well on intricate shapes where scraping or sanding would be difficult and time-consuming.
Hello there! I’m Md Meraj, and I’m so glad you’re here. Tackling a home project can feel like a big deal, especially when you’re staring at a piece of metal furniture or an old gate covered in cracked, peeling paint. You know it could look beautiful again, but the thought of all that scraping is enough to make anyone sigh. I’ve been there, too!
Removing old paint from metal seems like a tough job, but I promise it doesn’t have to be. You don’t need a workshop full of expensive tools or years of experience. With the right approach and a little guidance, you can get that metal surface clean and ready for a fresh new look. In this guide, I’ll walk you through the simplest, most effective method that will save you time and a whole lot of elbow grease. Let’s get started!
Why Bother Removing Old Paint?
Before we dive into the “how,” let’s talk about the “why.” You might be tempted to just paint over that old layer, but taking the time to strip it down to the bare metal is well worth the effort. Here are a few key reasons:
A Smoother Finish: Painting over chipped, bumpy paint will only give you a new, bumpy finish. Removing the old layers first gives you a perfectly smooth canvas for your new coat of paint to shine.
Better Adhesion: Fresh paint sticks best to clean, bare metal. If you paint over an old, failing layer, your new paint is likely to peel and chip right along with it. Stripping the metal ensures your new paint job will last for years.
Rust Prevention: Old paint can trap moisture against the metal, leading to hidden rust spots. By stripping it all away, you can inspect the metal, treat any existing rust, and apply a proper primer to protect it from future corrosion.
Reveals Detail: For intricate metalwork, like on an old radiator or detailed patio furniture, layers of paint can clog up the beautiful details. Stripping it reveals the original craftsmanship.
Safety First: Your Essential Gear List
Working with any paint removal method means you need to protect yourself. It’s the most important step of any project! Don’t even think about starting until you have your safety gear ready. It’s simple, affordable, and non-negotiable.
Chemical-Resistant Gloves: Standard latex or vinyl gloves won’t do. You need thick, chemical-resistant gloves (usually butyl or nitrile) to protect your skin from paint strippers.
Safety Goggles: Not glasses, but full-seal goggles. You want to prevent any splashes from getting into your eyes. It only takes one stray drop to cause serious harm.
Respirator with Organic Vapor Cartridges: Fumes from chemical strippers are no joke. A simple dust mask is not enough. A respirator will protect your lungs from harmful vapors. Ensure it fits snugly on your face.
Long-Sleeved Shirt and Pants: Cover your skin to protect it from accidental splashes and splatters.
Work in a Well-Ventilated Area: This is the most crucial safety rule. Work outdoors if possible. If you must work indoors (like in a garage), open all windows and doors and use a fan to circulate fresh air.
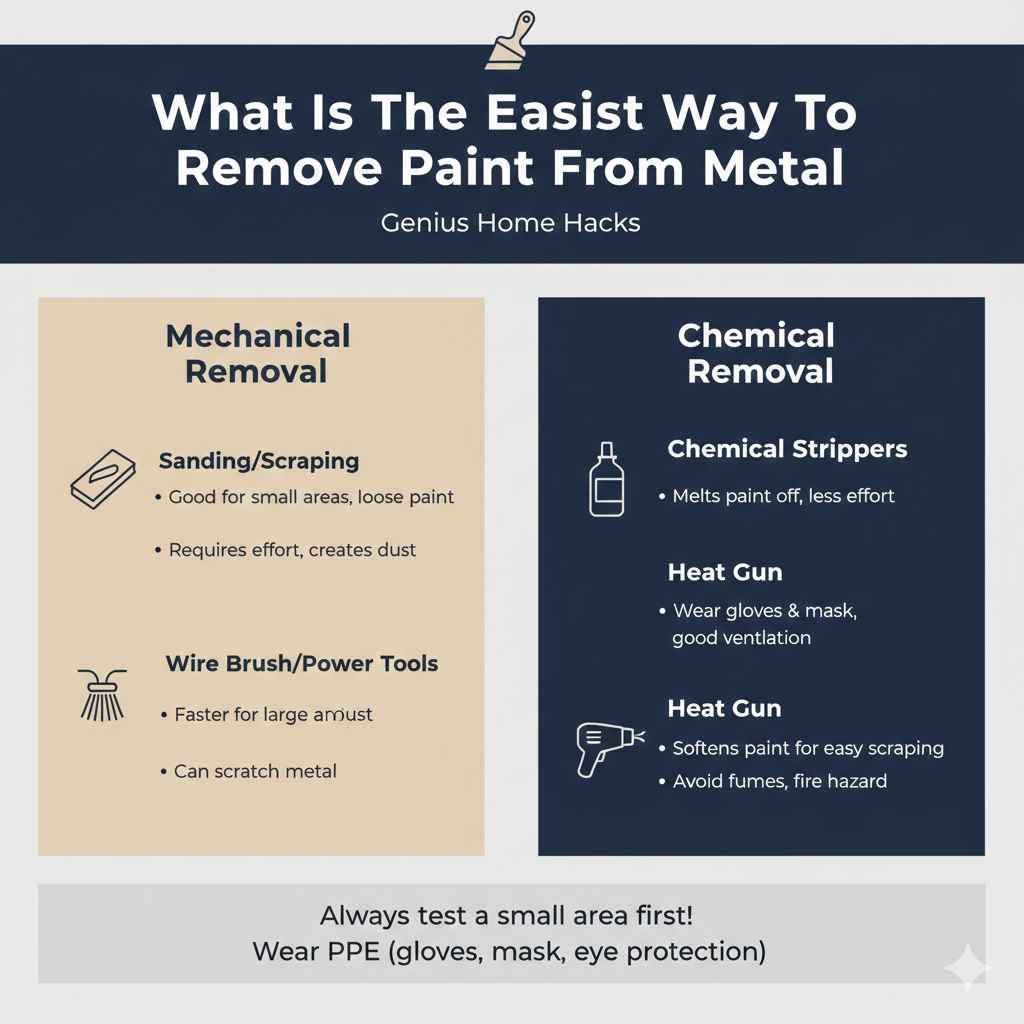
Choosing Your Weapon: The 3 Main Ways to Remove Paint from Metal
There are a few ways to get paint off metal, but they fall into three main categories. We’re focused on finding the easiest way, so let’s see how they stack up.
Method 1: Chemical Paint Strippers (The Easiest & Most Recommended for Beginners)
This is my top recommendation for a reason. Chemical strippers do the hard work for you. You brush on a gel or liquid, wait a bit, and the paint bubbles up, ready to be scraped away with minimal effort. It’s almost like magic!
Pros:
Minimal Physical Effort: You let the chemicals do the heavy lifting. No endless sanding or scraping.
Excellent for Detailed Surfaces: It gets into every nook and cranny of intricate designs where tools can’t reach.
Removes Multiple Layers: It can dissolve several layers of paint at once, saving you tons of time.
Cons:
Harsh Fumes: Requires excellent ventilation and proper safety gear (respirator!).
Messy: The process involves gooey, stripped paint that needs to be cleaned up carefully.
Needs Proper Disposal: You can’t just throw the leftover stripper and paint sludge in the trash. You need to follow local guidelines for hazardous waste disposal. The U.S. Environmental Protection Agency (EPA) has great resources on this.
Method 2: Heat Guns (The Focused Approach)
A heat gun works like a super-powered hairdryer. You heat a small section of the paint until it softens and bubbles, then you quickly scrape it off while it’s soft. This method can be very effective but requires more patience and technique.
Pros:
No Chemical Fumes: A great option if you want to avoid harsh chemicals.
Less Messy: The paint comes off in rubbery sheets rather than a chemical goo.
Cons:
Fire Hazard: You are working with high heat, which poses a fire risk, especially on older pieces. Never use it near flammable materials.
Potential for Toxic Fumes: If you are working with lead-based paint, heating it can release toxic lead fumes into the air, which is extremely dangerous.
Can Damage the Metal: Overheating can warp thin metal or damage special coatings.
Slow Process: You can only work on small sections at a time.
Method 3: Abrasive Methods (The Elbow Grease Approach)
This category includes sanding, wire brushing, and scraping. It’s all about physically grinding the paint off the surface. While it has its place, it’s almost never the easiest way to remove all the paint from a large or detailed object.
Pros:
No Chemicals or Fumes: It’s a purely mechanical process.
Good for Final Prep: Light sanding is excellent for smoothing the metal surface after stripping and before priming.
Cons:
Extremely Labor-Intensive: It takes a huge amount of physical effort and time.
Can Damage the Metal: It’s very easy to scratch or gouge the metal surface with aggressive sanding or wire wheels.
Doesn’t Work Well on Details: Nearly impossible to get into tight corners or intricate patterns.
Creates a Lot of Dust: This dust can contain harmful particles, especially from old paint.
Comparison of Paint Removal Methods
Here’s a simple table to help you visualize the differences and decide which method is right for your project.
| Feature | Chemical Stripper | Heat Gun | Abrasive (Sanding/Scraping) |
|---|---|---|---|
| Ease of Use | Easiest | Moderate | Most Difficult |
| Speed | Fast (including wait time) | Slow to Moderate | Very Slow |
| Best for Details | Excellent | Poor | Very Poor |
| Mess Level | High (Gooey) | Low (Solid pieces) | High (Dust) |
| Safety Concerns | Chemical fumes, skin contact | Fire risk, lead fumes | Dust inhalation, scratches |
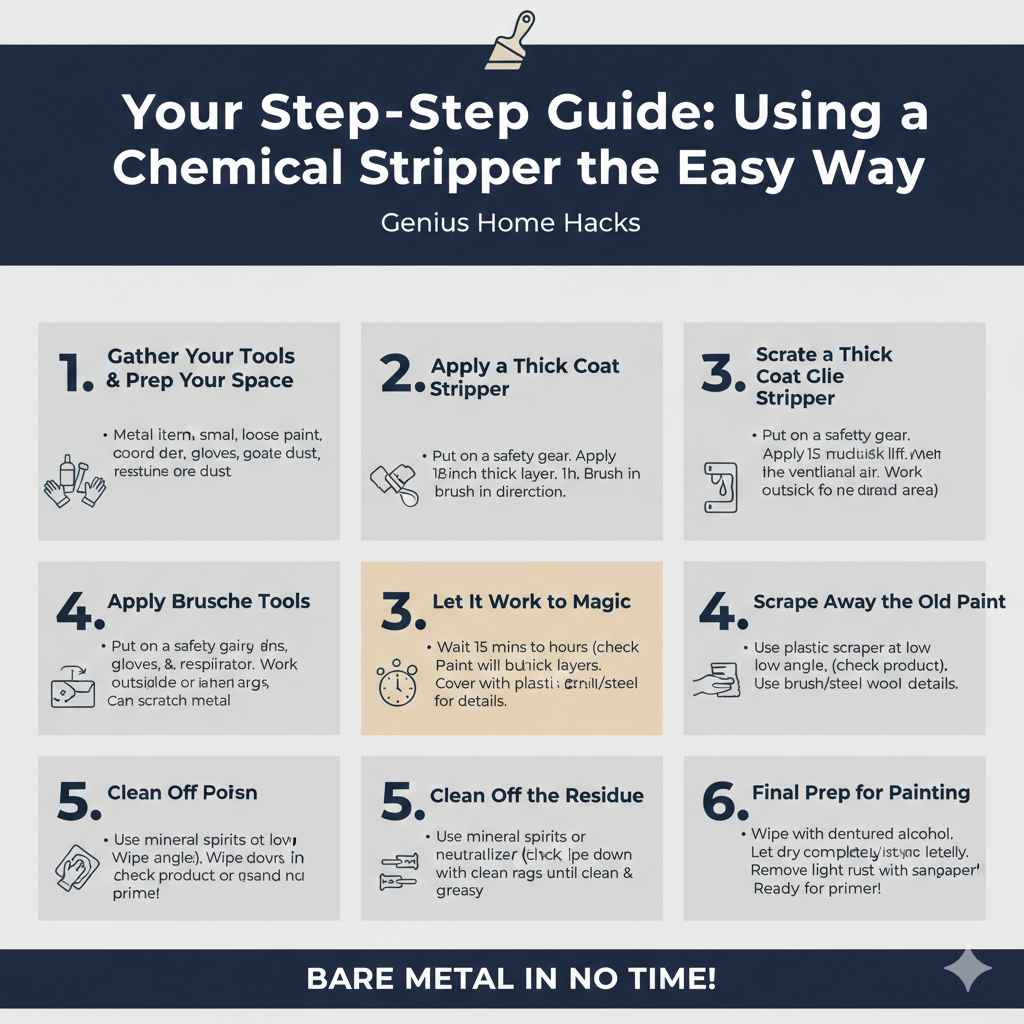
Your Step-by-Step Guide: Using a Chemical Stripper the Easy Way
Alright, you’re convinced! Using a chemical stripper is the path of least resistance. Let’s walk through the process step-by-step. Follow these instructions, and you’ll have bare metal in no time.
Step 1: Gather Your Tools and Prepare Your Workspace
First, get everything you need in one place. There’s nothing worse than having to stop mid-project to find something.
You’ll Need:
The metal item you want to strip
Chemical paint stripper (a thick, gel-like one like Citristrip is great for beginners and vertical surfaces)
A cheap, disposable paintbrush (natural bristles work best)
A plastic or metal scraper (plastic is less likely to scratch the metal)
A stiff-bristled brush or steel wool for detailed areas
A bucket or container for the paint sludge
Mineral spirits or a recommended neutralizer (check the stripper’s instructions)
Clean rags
All your safety gear (gloves, goggles, respirator)
Set up your workspace outside on a tarp or in a very well-ventilated garage. Protect the ground from any drips.
Step 2: Apply a Thick Coat of Stripper
Put on all your safety gear. Open the paint stripper carefully. Using your disposable paintbrush, apply a thick, even layer of the stripper onto the painted surface. Don’t be shy here! A thin coat will just dry out and won’t work. You want a layer that’s about 1/8-inch thick.
Pro Tip: Brush in one direction. Try not to brush back and forth too much, as this can break the chemical barrier and reduce its effectiveness.
Step 3: Let It Work Its Magic
Now comes the easy part: waiting. The stripper needs time to penetrate and lift the paint. The required time can vary from 15 minutes to several hours, or even overnight, depending on the stripper and the number of paint layers.
Read the instructions on the product can for the recommended time. You’ll know it’s working when you see the paint begin to bubble, wrinkle, and lift off the surface. For thick layers, you can cover the item with plastic wrap to keep the stripper from drying out and help it work more effectively.
Step 4: Scrape Away the Old Paint
Once the paint is thoroughly bubbled, it’s time to scrape. Holding your plastic scraper at a low angle, gently push it along the surface. The paint should come off easily in gooey sheets. Scrape all the gunk into your disposable bucket.
For curved surfaces or detailed areas, use a stiff brush, steel wool, or a contoured scraper to get into the crevices. If some stubborn spots of paint remain, you can apply a second, targeted coat of stripper and wait again.
Step 5: Clean Off the Residue
After you’ve scraped off all the paint, there will be a slimy residue left on the metal. You need to clean this off completely. The product instructions will tell you the best solvent to use for this, but it’s often mineral spirits or a specific after-wash.
Dampen a clean rag with the mineral spirits and wipe down the entire metal surface. Keep switching to a clean part of the rag until the metal is completely clean and no longer feels slick or greasy.
Step 6: Final Prep for Painting
Your metal is now paint-free! Before you rush to prime it, give it a final light cleaning. A wipe-down with a rag dampened with denatured alcohol can help remove any remaining oils or fingerprints. Let it dry completely.
If you see any light surface rust (called flash rust), you can easily remove it with some fine-grit sandpaper or steel wool. Now your metal is perfectly clean, bare, and ready for a fresh coat of primer and paint!
Frequently Asked Questions (FAQ)
I get a lot of questions about this process, so I’ve put together some of the most common ones right here.
What is the safest paint remover for metal?
For a safer, more beginner-friendly option, look for a citrus-based or soy-gel stripper. Brands like Citristrip are popular because they have fewer harsh fumes than traditional chemical strippers. However, “safer” does not mean “safe”—you still need to wear gloves, goggles, and work in a well-ventilated area.
Can I use vinegar to remove paint from metal?
Yes, you can, but it’s not very effective. Soaking a small metal object in hot vinegar can soften and loosen a single, thin layer of paint, but it’s very slow and won’t work on multiple layers or tough enamel paints. For most projects, it isn’t a practical solution.
How long does paint stripper take to work on metal?
It depends on the type of stripper and the paint. Some fast-acting strippers can bubble paint in as little as 15-30 minutes. For multiple or tough factory-applied layers, you may need to let it sit for several hours or even overnight.
Will paint stripper damage the metal?
Most chemical paint strippers are designed not to damage common metals like steel, iron, or aluminum. However, it’s always a smart idea to test the stripper on a small, hidden spot first to be sure it doesn’t cause any discoloration or reaction.
Do I have to remove all the paint before repainting metal?
For the best, longest-lasting results, yes. If you paint over old, flaky paint, your new coat will fail quickly. If the existing paint is in perfect condition with no peeling or rust, you can lightly sand it to scuff the surface and then paint over it. But if there’s any sign of failure, it’s best to strip it all off.
What do I do with the leftover paint stripper and gunk?
Do not pour it down the drain or throw it in the regular trash. Paint stripper and the removed paint are considered household hazardous waste. Let the gunk dry out on newspaper in a safe, ventilated area, then place it in a sealed container. Contact your local waste management facility to find out about their hazardous waste collection days or drop-off sites.
You’re Ready to Go!
See? I told you it wasn’t so bad! Stripping paint from metal might look intimidating, but by choosing the easiest method—a good chemical stripper—you’ve turned a mountain of a job into a manageable weekend project.
Remember, the keys to success are patience and safety. Don’t rush the process, and always, always wear your protective gear. By following these simple steps, you’ll be able to restore that old metal piece to its former glory and feel that amazing sense of pride that comes from doing it yourself.
Now you have the knowledge and the confidence to get started. Go grab your tools, put on some music, and transform that tired, painted metal into something you can be proud of. Happy DIYing!