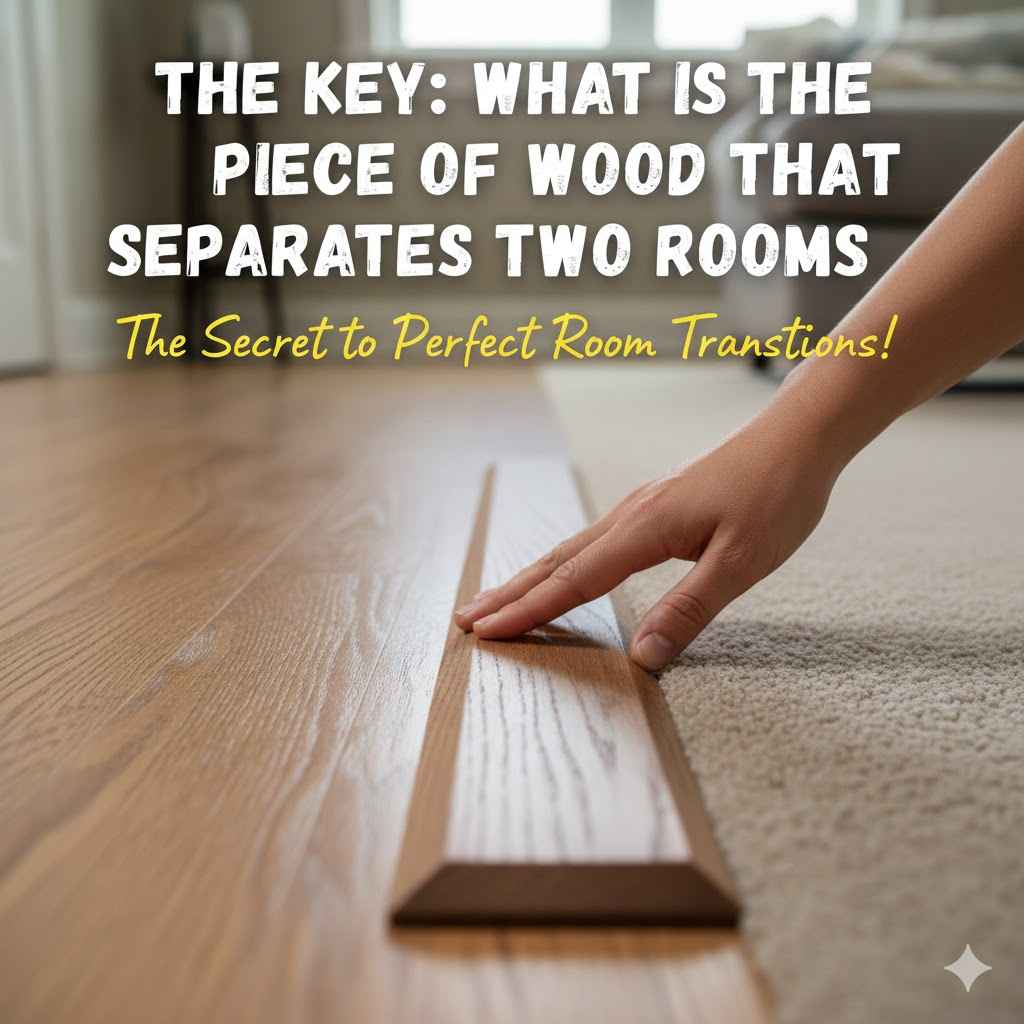
What Is The Piece Of Wood That Separates Two Rooms The Key
The piece of wood that separates two rooms is called a threshold or a transition strip. A threshold is typically a raised strip of wood or stone at the bottom of a doorway, while a transition strip is a flatter piece used to connect different flooring types (like wood to carpet) smoothly and cover any gaps.
Have you ever stood in a doorway, looked down, and wondered, “What is that strip of wood on the floor actually called?” You’re definitely not alone! It’s one of those common home details that many of us see every day but don’t know the name for. This simple piece of wood, metal, or vinyl plays a huge role in giving your home a finished, polished look.
Don’t worry, figuring this out isn’t complicated at all. I’m here to help you understand exactly what it is, why it’s so important, and how you can choose and even install the right one for your home. In this guide, we’ll walk through everything step-by-step, making it easy and clear. Let’s dive in and solve this common household mystery together!
The Simple Answer: It’s Called a Threshold or a Transition Strip
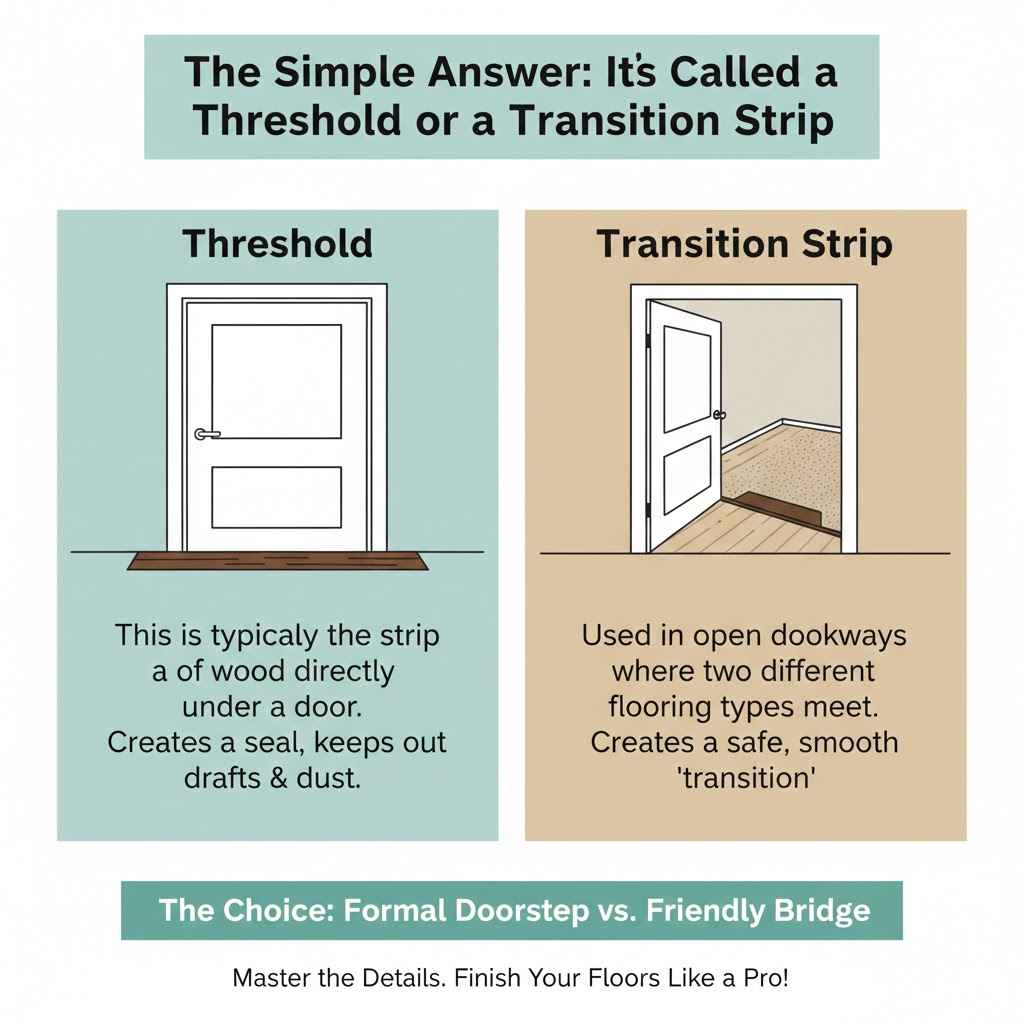
The short answer is that the piece of wood separating two rooms is most often called a threshold or a transition strip. While people sometimes use these terms interchangeably, they do have slightly different meanings. Think of them as cousins who do similar jobs in different locations.
Let’s break it down so it’s crystal clear:
- Threshold: This is typically the strip of wood (or sometimes marble or metal) directly under a door. It sits on the floor and creates a seal when the door is closed. Its main job is to mark the entry to a room and help keep drafts, dust, and light from passing underneath. You’ll almost always find these under exterior doors and often under interior doors like those for bathrooms or bedrooms.
- Transition Strip: This piece is used in open doorways or any place where two different types of flooring meet. Its job is to create a safe and smooth “transition” between the two surfaces. For example, it might bridge the gap between the hardwood in your hallway and the carpet in your living room. It covers the expansion gap flooring needs and prevents you from tripping.
Think of it this way: a threshold is like the formal doorstep to a room, while a transition strip is a friendly bridge connecting two different flooring styles.
Why Is This Little Piece of Wood So Important?
That small strip of material does more than just sit there. It’s a hardworking part of your home’s flooring system. Ignoring it can lead to tripping hazards, damaged floors, and an unfinished look. Here’s why it’s so crucial.
Creates a Finished, Professional Look
Imagine seeing a beautiful new floor installed, but with a raw, ugly gap where it meets the next room. It would look incomplete, right? A transition strip is the finishing touch. It covers the seam between two floors, hiding any rough edges and making the entire installation look clean, intentional, and professionally done.
Protects Your Flooring Edges
Flooring materials, especially laminate, vinyl, and carpet, have vulnerable edges. Without a transition strip, these edges can take a beating from foot traffic.
- For carpet, it prevents the edges from fraying and unraveling over time.
- For laminate and hardwood, it protects the sharp edges from chipping and splintering.
A transition strip acts like a protective bumper for the edges of your flooring, helping it last much longer.
Ensures Safety by Preventing Trips
One of the most important jobs of a transition strip is safety. Different flooring types often have slightly different heights. The difference between a thick tile and a thinner vinyl floor might only be a quarter of an inch, but that’s more than enough to catch a toe and cause a nasty fall. A transition strip, especially a “reducer” type, creates a gentle ramp between the two levels, smoothing out the difference and eliminating a serious tripping hazard.
Helps with Energy Efficiency (Door Thresholds)
For thresholds located under exterior doors, their role goes beyond looks. A well-fitted threshold creates a tight seal at the bottom of the door. According to the U.S. Department of Energy’s ENERGY STAR program, sealing air leaks is a key way to improve your home’s energy efficiency. This seal stops drafts from entering your home, keeping warm air in during the winter and cool air in during the summer. This small detail can actually help lower your energy bills.
Common Types of Thresholds and Transition Strips
There isn’t just one type of strip; there are several designs, each created for a specific situation. Choosing the right one is key to getting a great result. Here’s a look at the most common types you’ll find.
First, let’s see a quick comparison between the two main categories.
| Feature | Door Threshold | Flooring Transition Strip |
|---|---|---|
| Primary Location | Directly under a door (interior or exterior) | In doorways or between rooms where flooring changes |
| Main Purpose | Seals the gap under a door, provides a clear room division | Creates a smooth and safe transition between two floors |
| Typical Shape | Often has a raised or “saddle” profile | Varies (T-shape, ramped, flat) based on flooring types |
Now, let’s explore the different styles of transition strips you’ll encounter:
The T-Molding Strip
As the name suggests, this strip is shaped like the letter “T.” It’s designed to join two hard-surface floors that are at the same height. The top of the “T” covers the gap between the floors, while the vertical stem fits neatly into the gap itself. It’s the perfect choice for connecting hardwood to another hardwood floor, or laminate to tile when both are the same thickness.
The Reducer Strip
A reducer strip is your go-to when you need to connect two floors of different heights. It has a slight ramp shape, creating a smooth transition from a thicker floor down to a thinner one. For example, you would use a reducer to connect a 3/4-inch hardwood floor down to a thin vinyl plank floor. This is essential for preventing trips.
The End Cap (or Square Nose)
An end cap is used to finish the edge of a floor where it meets a vertical surface. Think of it as a picture frame for your flooring. You would use an end cap where your flooring stops against a sliding glass door track, a fireplace hearth, or a tall built-in cabinet. It gives the edge a clean, squared-off look.
The Carpet Gripper (or Z-Bar)
This specialty strip is designed specifically for transitioning from a hard surface (like tile or wood) to carpet. One side of the strip has a row of sharp teeth that “grip” the edge of the carpet. The carpet is stretched over these teeth and the edge is tucked under, creating a secure and neat finish with no frayed edges showing.
The Classic Saddle Threshold
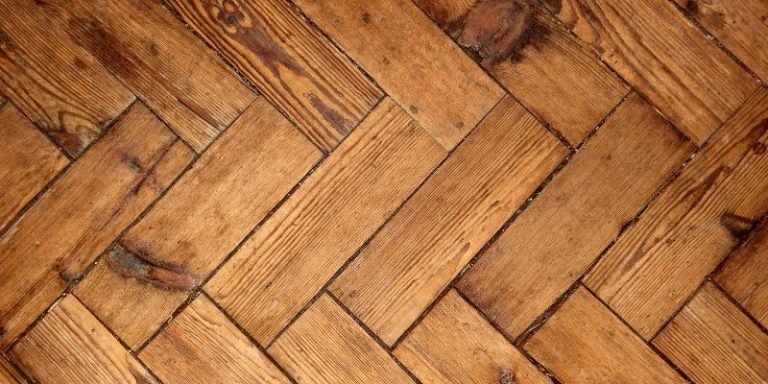
This is what most people picture when they think of a traditional threshold. It’s a symmetrical, gently sloped piece of wood or marble that looks a bit like a saddle. It’s most commonly used in interior doorways to provide a durable and distinct separation between two rooms, especially if both rooms have hardwood floors.
Choosing the Right Material for Your Transition Strip
Once you know the shape you need, the next step is to choose a material. Your choice will depend on your flooring, your style, and the amount of foot traffic the area gets.
| Material | Pros | Cons | Best For |
|---|---|---|---|
| Wood | Beautiful, classic look; can be stained or painted to match; durable. | Can get scratched or dented in high-traffic areas; can be damaged by moisture. | Matching hardwood floors; creating a warm, traditional aesthetic. |
| Metal (Aluminum, Brass) | Extremely durable; resistant to wear and tear; modern, sleek appearance. | Can feel cold to the touch; might not match traditional decor; can be dented. | High-traffic commercial or residential areas; transitions to carpet. |
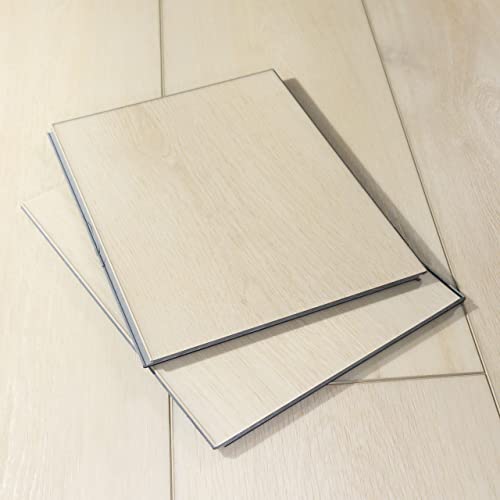
| Vinyl/Laminate | Often available in kits that perfectly match the flooring; affordable; waterproof. | Less durable than wood or metal; can look less premium. | Creating a seamless, color-matched transition with laminate or vinyl plank flooring. |
A Beginner’s Guide to Installing a Transition Strip
Good news! Installing a transition strip is one of the easiest DIY home improvement projects you can tackle. With a few basic tools and a little patience, you can get a professional-looking result in under an hour. Let’s walk through the steps.
Tools and Materials You’ll Need
Before you start, gather your supplies. Having everything ready makes the job go smoothly.
- The transition strip of your choice
- A metal track (if your strip requires it)
- Measuring tape
- Pencil
- Miter saw or a handsaw with a miter box (for precise cuts)
- Drill with bits (if using screws)
- Construction adhesive (like Liquid Nails)
- Caulking gun
- Safety glasses
- Optional: Rubber mallet to gently tap the strip into place
Step-by-Step Installation
Follow these simple steps for a perfect installation. Remember to always prioritize safety!
-
Measure, Measure, Measure!
This is the most important step. Use your measuring tape to measure the exact width of the doorway where the strip will go. Write down the measurement. A good rule of thumb is “measure twice, cut once.” An accurate measurement ensures a snug fit with no ugly gaps. -
Cut the Strip to Size
Put on your safety glasses. Mark your measurement on the transition strip with a pencil. Using a miter saw will give you the cleanest, most accurate 90-degree cut. If you don’t have one, a handsaw and a miter box work great too. Just take your time to ensure the cut is straight. For tips on safe tool usage, resources like the Wood Magazine Safety Guide are incredibly helpful. -
Test the Fit
Before you add any glue or screws, place your freshly cut strip in the doorway. It should fit perfectly from one side of the door jamb to the other. If it’s a bit too long, carefully trim a tiny bit more off. If it’s too short, unfortunately, you’ll need to start over with a new piece. This is why measuring carefully is so important! -
Secure the Strip
There are two common ways to secure a transition strip. Check the instructions that came with yours.- Adhesive Method: This is the easiest for beginners. Apply a zigzag bead of strong construction adhesive to the bottom of the transition strip. Carefully press it into place on the floor. If needed, place a few heavy books or objects on top to hold it down firmly while the adhesive cures (check the label for drying time).
- Track and Snap-in Method: Many T-molding strips come with a metal track. For this method, you cut the metal track to size and screw it directly to the subfloor in the center of the gap. Then, you simply snap the transition strip into the track. A rubber mallet can help you gently tap it into place without damaging the finish.
-
Clean Up and Admire Your Work!
If any adhesive squeezed out from the sides, wipe it away immediately with a damp cloth before it dries. Step back and look at your work. You’ve just added a professional finishing touch to your floor!
Common Mistakes to Avoid
Even simple projects have a few potential pitfalls. Here are a few common mistakes to watch out for to ensure your project is a success.
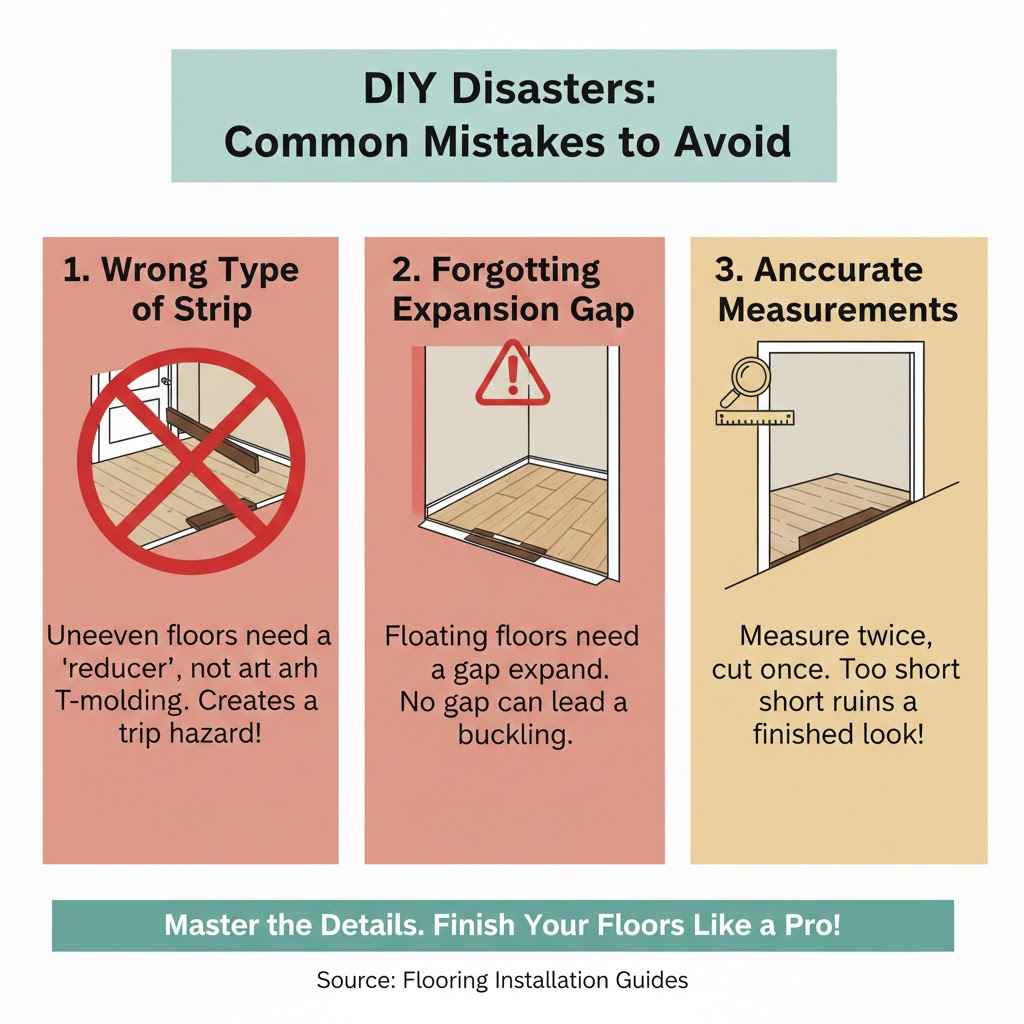
Choosing the Wrong Type of Strip
Don’t just grab the first strip you see. Before buying, check the heights of your two floors. If they are different, you absolutely need a reducer. Using a T-molding on uneven floors will create a rocking, unstable strip that’s a tripping hazard.
Forgetting the Expansion Gap
This is a big one, especially for “floating” floors like laminate and luxury vinyl plank. These floors need to expand and contract with changes in humidity and temperature. The transition strip’s job is to cover this small gap (usually about 1/4-inch), not fill it. Make sure you don’t install the flooring too tight against the wall or the other floor, or it could buckle over time.
Inaccurate Measurements
A strip that is even a tiny bit too short will leave a noticeable gap at the edges, which ruins the clean, finished look. A strip that is too long won’t fit at all. Take your time with the measuring tape to get it just right.
Frequently Asked Questions (FAQ)
What is the difference between a threshold and a transition strip?
A threshold is typically found directly under a door and is often thicker or raised to create a seal. A transition strip is used in any open space to smoothly connect two different flooring materials, often covering a gap between them.
Can I use the same transition strip for carpet and tile?
Yes, but you need a specific type. A “carpet reducer” or a “Z-bar” is designed for this purpose. One side creates a smooth edge for the tile, while the other side has teeth to grip the carpet and tuck it in for a clean finish.
How do I match the color of a wood transition strip to my floor?
You have a few options. Many flooring manufacturers sell transition strips that are perfectly color-matched to their flooring products. Alternatively, you can buy an unfinished wood strip (like oak) and use wood stain to match it to your floor yourself. It’s a good idea to test the stain on a scrap piece first.
Do I need a transition strip in an open archway if the flooring is the same?
If you are using a floating floor like laminate or vinyl plank, yes. Even though the flooring is the same, you need to leave an expansion gap in long runs or large open areas. A T-molding strip is perfect for covering this gap in an archway while maintaining a continuous look.
How much does a transition strip cost?
The cost is very reasonable. Depending on the material and length, you can expect to pay anywhere from $10 to $50 for a standard doorway. Vinyl and simple metal strips are the most affordable, while solid hardwood or specialty metal strips are at the higher end.
What do you call the piece of wood at the bottom of a door frame?
That piece is called the doorsill, which is part of the threshold. The threshold is the entire assembly at the bottom of the doorway that you step over, including the sill.
Is installing a transition strip a hard project for a beginner?
Not at all! This is a fantastic first project for a new DIYer. It requires minimal tools, is very affordable, and gives you a big confidence boost with a great-looking result.
You’ve Got This!
So, the next time someone asks, “what is the piece of wood that separates two rooms?” you’ll know the answer with confidence: it’s a threshold or a transition strip! This small but essential component does so much for our homes—it provides safety, protects our floors, and adds that all-important finishing touch.
Now that you’re armed with this knowledge, you can tackle any flooring transition with ease. Whether you’re repairing an old one or installing a new one, you understand the different types, materials, and steps to get the job done right. With a little bit of measuring and patience, you can easily give your floors a beautiful, professional look all by yourself. Happy building!