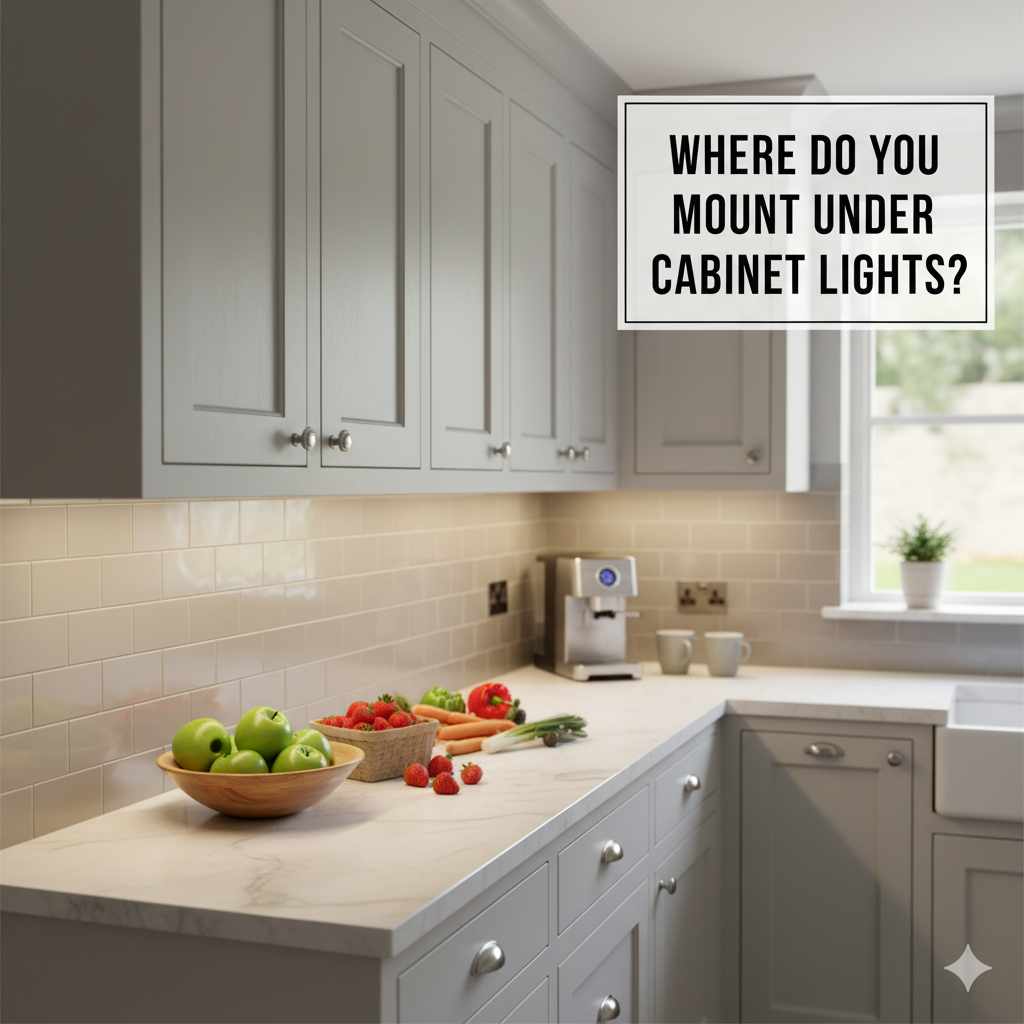
Where Do You Mount Under Cabinet Lights: Essential Guide
Quick Summary: Mount under cabinet lights along the front edge of your cabinets, about 1-2 inches in, to provide the best task lighting and minimize glare. This placement illuminates your countertops effectively without being visually distracting.
Feeling like your kitchen countertops are a bit dim, especially when you’re chopping veggies or reading a recipe? You’re not alone! Under cabinet lighting is a fantastic way to brighten up those workspaces, but figuring out the perfect spot to mount them can feel a little tricky. Don’t worry, it’s easier than you think! With a few simple guidelines, you’ll have beautifully lit countertops in no time. We’ll walk through exactly where to place these lights for maximum effect and minimal hassle, making your kitchen both more functional and more inviting.
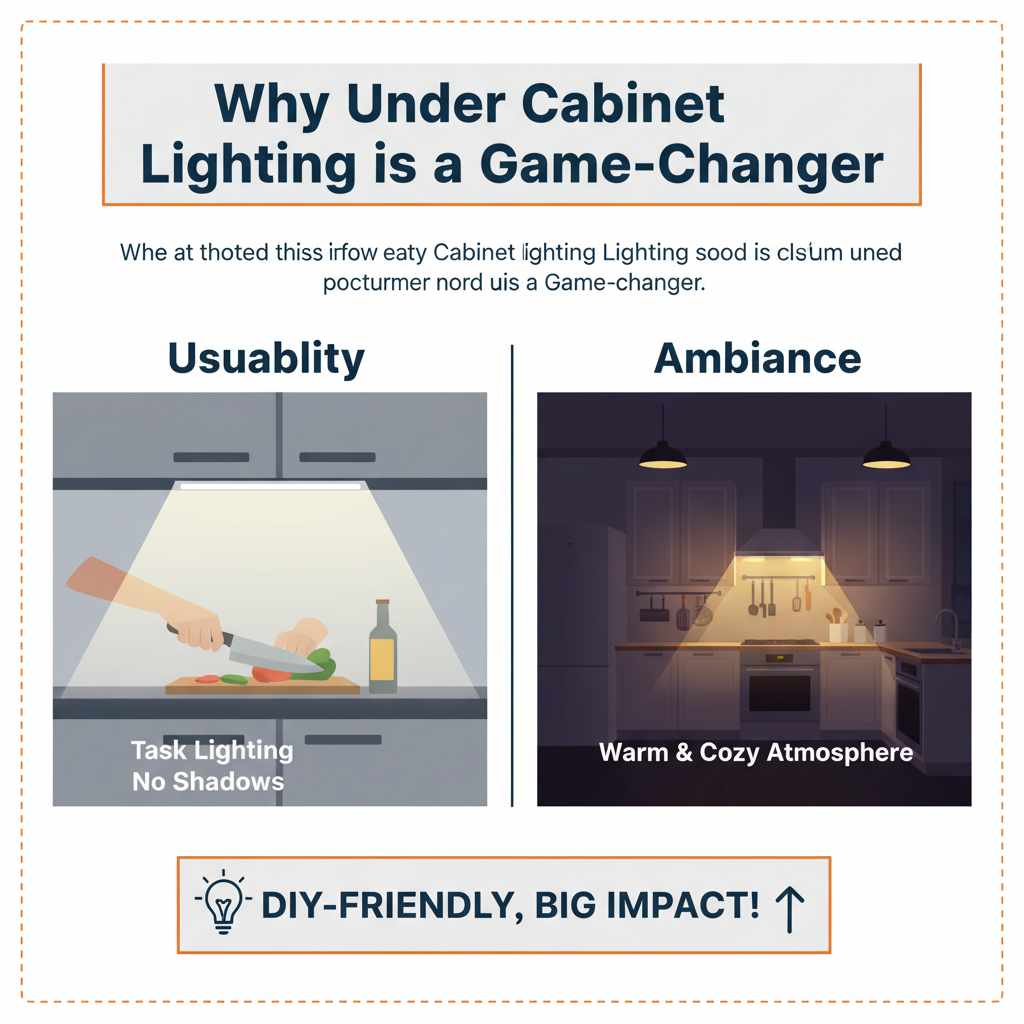
Why Under Cabinet Lighting is a Game-Changer
Under cabinet lights do more than just add a bit of sparkle; they transform your kitchen’s usability. Imagine no more shadows cast by your own body while you’re working! These lights provide direct illumination right where you need it most – on your countertops. This is especially helpful for tasks like food preparation, reading, or even just finding that stray crumb.
Beyond the practical benefits, under cabinet lighting adds a wonderful ambiance to your kitchen. It creates a warm, layered lighting scheme that can make your kitchen feel more sophisticated and cozy. Whether you’re cooking a family meal or entertaining guests, this type of lighting makes a big difference in the overall feel of the space. It’s a relatively simple DIY project that can have a huge impact on your kitchen’s look and feel.
Understanding Different Types of Under Cabinet Lights
Before we dive into mounting, it’s helpful to know the common types of under cabinet lights you’ll encounter. Each has its own characteristics that might influence your mounting decision, though the optimal placement is generally similar.
- LED Strip Lights: These are flexible strips with many small LEDs. They’re great for continuous, even light and can be cut to size. They are often self-adhesive, making installation easier.
- LED Puck Lights: These are individual, round lights that can be mounted with screws or adhesive. They offer more focused light and can be a good choice if you want to highlight specific areas.
- Bar Lights: These are linear fixtures, similar to strip lights but often more rigid and housed in a more substantial casing. They provide a clean look and good light output.
- Wired vs. Wireless: Wired systems offer a cleaner look and consistent power but require more installation effort (and potentially hiring an electrician). Wireless (battery-powered) lights are super easy to install but require battery changes.
For most DIYers, LED strip lights and wireless puck lights are the most accessible and beginner-friendly options. We’ll focus on the best mounting practices for these, which largely apply to other types as well.
The Golden Rule: Where to Mount Under Cabinet Lights
The most crucial factor in deciding where to mount under cabinet lights is to minimize glare and maximize countertop illumination. You want the light to shine down onto your work surface, not directly into your eyes.
Here’s the simple, go-to rule:
Mount the lights along the front edge of the cabinet, recessed about 1 to 2 inches from the very front.
Why this specific spot? Let’s break it down:
- Front Edge: Placing them at the front edge ensures that when you’re standing at your counter, the lights are positioned to shine past you and onto the workspace. If they’re too far back, your body will cast shadows.
- 1-2 Inch Recess: This small setback is key. It hides the light fixture itself from direct view when you’re standing in front of the cabinet. This prevents harsh glare and makes the light source appear softer and more diffused. It also helps protect the light fixture from accidental bumps.
Think of it like this: you want the light to come out from under the cabinet and spill onto the counter, not shine straight down from the very back where it might be blocked or uncomfortable to look at.
Step-by-Step Mounting Guide: Finding the Perfect Spot
Ready to get those lights installed? Here’s how to find that perfect mounting location for your under cabinet lights, step-by-step.
Step 1: Prepare Your Cabinets
First, ensure the underside of your cabinets is clean and dry. If you’re using adhesive-backed lights, any dust or grease will prevent them from sticking properly. A good wipe-down with a degreaser or mild cleaner and then a dry cloth is usually all you need.
Step 2: Measure and Mark Your Recess
Grab a tape measure and a pencil. You’re going to mark the line where the front of your light fixture will sit. As we discussed, this is typically 1 to 2 inches from the absolute front edge of the cabinet. Use your tape measure to mark this distance at several points along the cabinet’s underside. Then, connect these marks with your pencil to create a faint guideline. This line is your target for the front edge of the light fixture.
Tip: If your cabinets have a lip or decorative edge underneath, measure from the underside of that lip. You want the light to be hidden behind it as much as possible.
Step 3: Position Your Lights
Now, take your under cabinet light fixture (whether it’s a strip, puck, or bar). Hold it up to the underside of the cabinet, aligning its front edge with the pencil line you just drew. See how it looks. Does it seem well-hidden? Does it look like it will illuminate the counter effectively?
- For LED Strips: Unroll the strip and position it along your guideline. You might need to trim it to size if it’s too long. Many LED strips have cut marks every few inches.
- For Puck Lights: Decide if you want them spaced evenly or clustered in task areas. Hold each puck light in place along your guideline to visualize the spacing and coverage.
- For Bar Lights: Position the bar light along your guideline, ensuring it’s centered and straight.
Step 4: Test Fit and Adjust
Before you commit with adhesive or screws, turn the lights on (if they’re battery-powered or plugged in). Stand where you’d normally work at the counter. Do you see any direct glare? Is the light covering the area you want? Make any small adjustments needed. Sometimes moving the light just half an inch can make a big difference.
Step 5: Secure the Lights
Once you’re happy with the position, it’s time to secure them.
- Adhesive Strips: Peel off the backing and press the light firmly into place. Hold for about 30 seconds to ensure a good bond.
- Screws (for Puck or Bar Lights): Most fixtures come with small screws. If you’re using screws, you might want to pre-drill tiny pilot holes to make it easier and prevent wood splitting. Be careful not to drill too deep!
- Mounting Clips: Some lights come with clips that you screw into the cabinet, and then the light snaps into the clip.
Safety Note: If you are installing wired lights and are not comfortable with electrical work, it is always best to hire a qualified electrician. For battery-powered lights, ensure batteries are installed correctly according to the manufacturer’s instructions.
Factors to Consider for Optimal Placement
While the “front edge, 1-2 inches in” rule is a great starting point, a few other things can influence your final decision.
Cabinet Depth and Overhang
Deeper cabinets might allow you to recess the lights a bit further back, perhaps 2-3 inches, while still achieving good coverage. Conversely, very shallow cabinets might mean you can only recess them about 1 inch. The goal is always to hide the fixture while still lighting the counter.
Cabinet Style
Some cabinets have decorative trim or a lip underneath. You’ll want to position the lights so they are hidden behind this trim. This often means mounting them flush with the bottom of the trim or slightly behind it. Measure from the underside of the trim to find your 1-2 inch mark.
For example, if your cabinet has a 1-inch lip that hangs down, you might mount the light 1 inch behind the bottom edge of that lip. This effectively places it about 2 inches from the very front of the cabinet’s underside.
Desired Lighting Effect
Are you looking for bright, focused task lighting, or a softer, ambient glow?
- Task Lighting: For bright task lighting, you might place lights closer to the front edge (but still recessed) and ensure they are spaced to cover your main work areas.
- Ambient Lighting: For a softer glow, you can recess them a bit further back, which diffuses the light more. You might also consider dimmer switches for ultimate control.
Wire Management
If you’re using wired lights, think about where the wires will run. You’ll want to mount the lights in a way that allows for neat wire concealment, often running them along the back edge of the cabinet or into a junction box. For battery-powered lights, you’ll still want to tuck away any battery packs or controllers neatly.
Common Mounting Mistakes to Avoid
Even with clear guidelines, it’s easy to make a small mistake. Here are a few common pitfalls to watch out for:
- Mounting Too Far Back: This is the most common mistake. If lights are too far back, your own body will cast shadows on the countertop, defeating the purpose.
- Mounting Too Close to the Front: This leads to direct glare, which is uncomfortable and makes the light source very noticeable and potentially distracting.
- Ignoring Cabinet Structure: Be mindful of any internal cabinet supports, hinges, or electrical wiring that might be in your path. Always check before drilling.
- Not Cleaning the Surface: For adhesive lights, a dirty surface means they won’t stick well and could fall down.
- Over-tightening Screws: This can strip the screw hole or even crack thin cabinet material.
Table: Recommended Mounting Distances by Cabinet Type
Here’s a quick guide to help you visualize the mounting placement:
| Cabinet Type | Recommended Recess from Front Edge (Underside) | Typical Placement Notes |
|---|---|---|
| Standard Cabinet (No Lip) | 1 to 2 inches | Place fixture so its front edge aligns with this mark. |
| Cabinet with a 1-inch Lip/Trim | 1 inch behind the bottom of the lip (approx. 2-3 inches from cabinet front) | Ensure the light is hidden behind the lip. |
| Deep Cabinet (e.g., over a fridge) | 2 to 3 inches | Allows for good coverage without direct view. |
| Shallow Cabinet | 1 inch | Maximizes counter coverage while minimizing glare. |
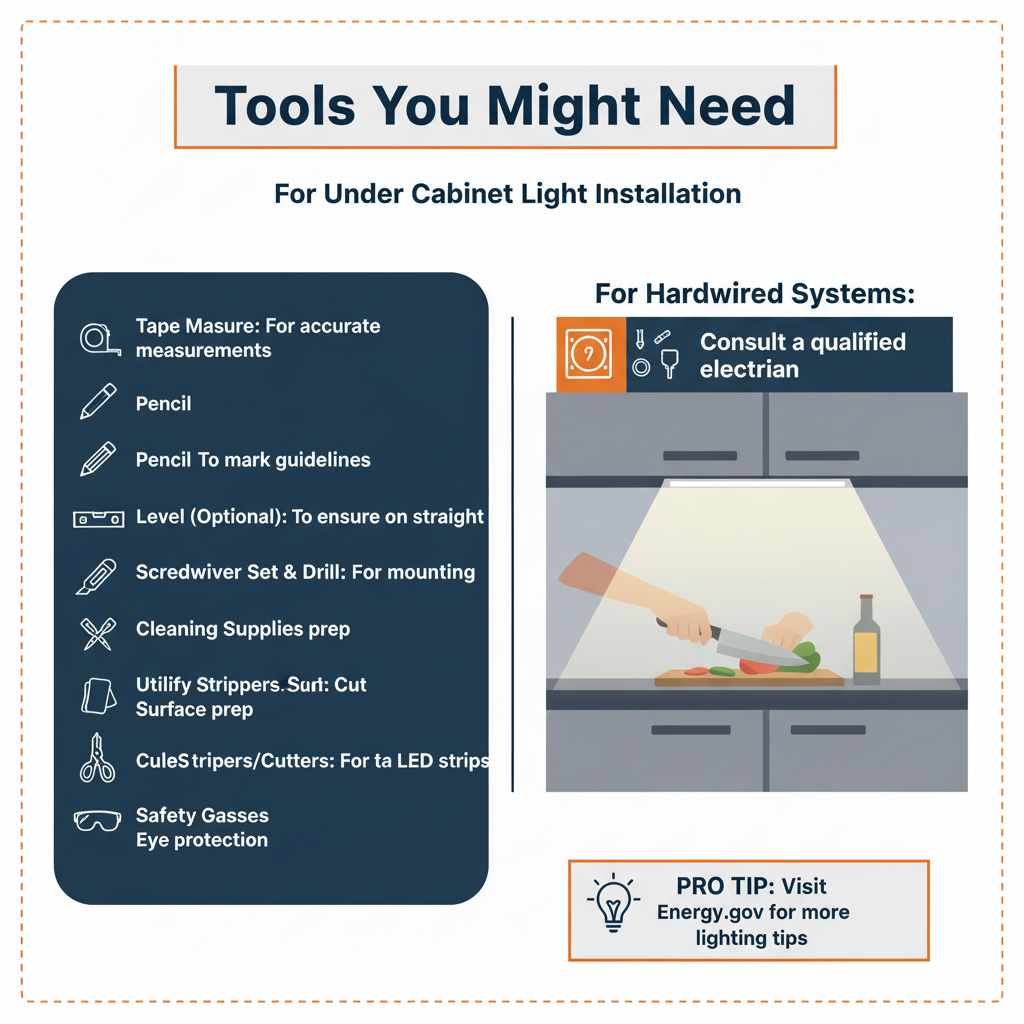
Tools You Might Need
For most under cabinet light installations, you won’t need a huge toolbox. Here are some essentials:
- Tape Measure: For accurate measurements.
- Pencil: To mark your guidelines.
- Level (Optional but Recommended): To ensure your lights are straight, especially for bar lights or multiple puck lights.
- Screwdriver Set: If your lights require screws.
- Drill with Small Drill Bits: For pre-drilling pilot holes if using screws.
- Cleaning Supplies: Mild cleaner, cloth, or degreaser for surface prep.
- Utility Knife or Scissors: To cut LED strips (if applicable) or trim adhesive backing.
- Wire Strippers/Cutters (for wired systems): If you’re doing electrical connections.
- Safety Glasses: Always a good idea when working overhead or drilling.
If you’re installing hardwired lights, you’ll also need to consider junction boxes, wire nuts, and potentially a voltage tester. For these, consulting a qualified electrician is highly recommended. Check out resources like Energy.gov’s home lighting tips for more general lighting advice.
Frequently Asked Questions (FAQ)
Q1: How far in from the front edge should I mount my under cabinet lights?
For most under cabinet lights, mount them about 1 to 2 inches in from the very front edge of the cabinet’s underside. This placement hides the fixture and minimizes glare while effectively lighting your countertops.
Q2: Can I mount under cabinet lights directly on the cabinet frame?
Yes, you can mount them on the bottom surface of the cabinet frame. The key is to recess them from the front edge to avoid glare. Some cabinet styles might also have a lip or trim where you can hide the fixture.
Q3: What’s the difference between mounting LED strips and puck lights?
The mounting location principle is the same: recess them 1-2 inches from the front edge. LED strips are usually self-adhesive and run continuously. Puck lights are individual units that can be screwed or adhered, allowing for more customizable placement and spacing.
Q4: Should I use screws or adhesive for mounting?
Adhesive is great for lightweight LED strips and offers an easy, damage-free installation. For heavier puck or bar lights, screws provide a more secure and permanent hold. Always consider the weight of the fixture and the surface material.
Q5: What if my cabinets have a decorative lip underneath?
If your cabinets have a lip or trim, you’ll want to mount the lights so they are hidden behind this lip. Measure from the underside of the lip to find your 1-2 inch recess point. This usually means mounting them slightly further back from the absolute front of the cabinet.
Q6: How do I ensure the lights are evenly spaced?
For LED strips, they provide continuous light. For puck lights, measure the length of the counter space you want to illuminate. Divide that length by the number of puck lights plus one (to account for space at the ends) to get an approximate spacing distance. Use your tape measure and pencil to mark these points before installation.
Q7: Do I need to hire an electrician to install under cabinet lights?
For battery-powered or plug-in lights, many homeowners can safely install them themselves. If you are installing hardwired lights that connect to your home’s electrical system, it is highly recommended to hire a qualified electrician to ensure safety and compliance with electrical codes.
Conclusion: Light Up Your Kitchen with Confidence!
Figuring out where to mount under cabinet lights doesn’t have to be a puzzle. By following the simple rule of placing them 1 to 2 inches in from the front edge of your cabinets, you’ll achieve that perfect balance of bright, functional task lighting and comfortable, glare-free illumination. Remember to consider your cabinet’s specific style and depth, and always do a test fit before you permanently secure them.
With these guidelines, you’re well-equipped to tackle this DIY project. You’ll not only enhance the usability of your kitchen workspace but also add a beautiful layer of ambiance that can truly transform the heart of your home. So grab your tape measure, get ready to mark those lines, and enjoy the rewarding feeling of a brighter, more inviting kitchen!