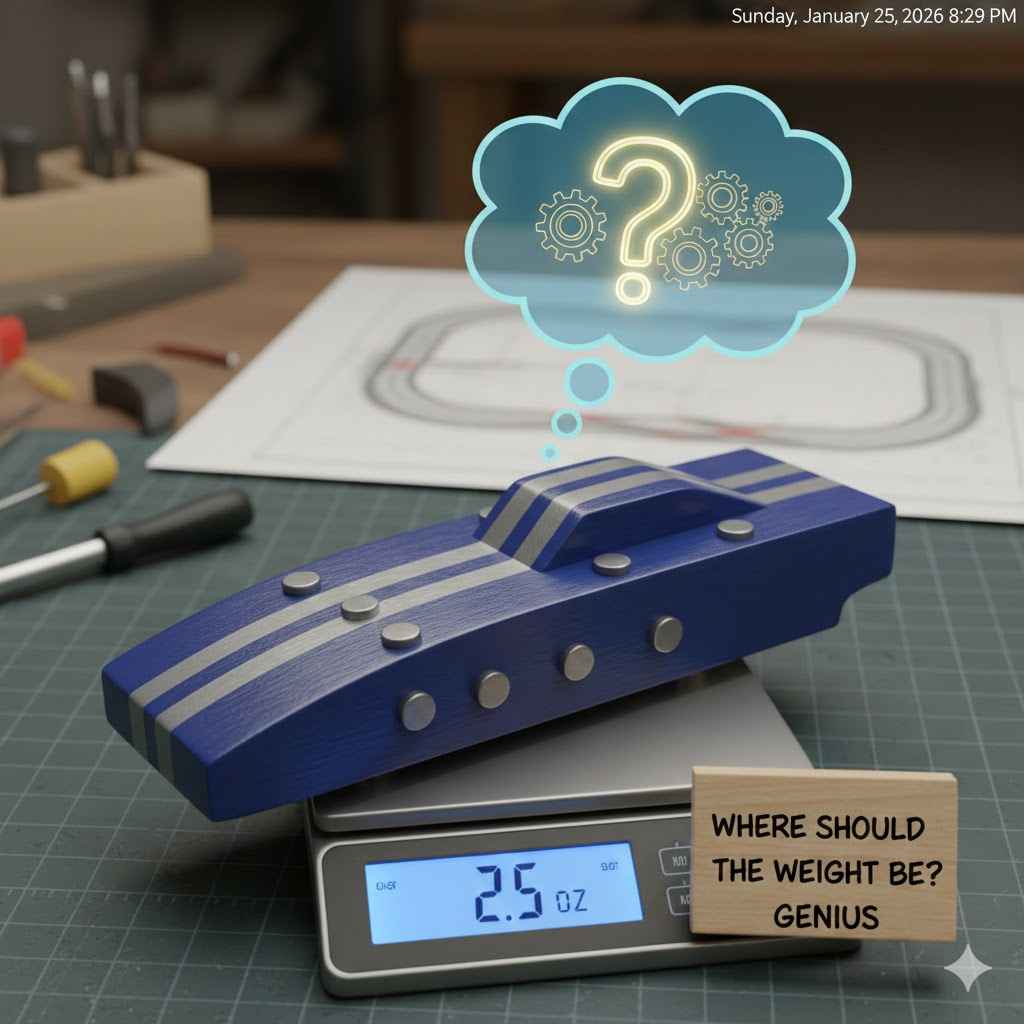
Where Should the Weight Be on a Pinewood Derby Car Genius
For maximum speed, place the weight on your Pinewood Derby car as far back as possible without making it unstable. The ideal spot is typically 3/4 inch to 1 inch directly in front of the rear axle. This placement maximizes the car’s potential energy, giving it a powerful final push down the track.
Hello there! I’m Md Meraj, and I love helping folks like you turn a simple block of wood into something amazing. If you’re building a Pinewood Derby car, you’ve probably heard one word over and over: weight. But where exactly should it go? It feels like a big secret, and getting it wrong can be the difference between a race-winner and a car that just rolls along.
Don’t you worry. This isn’t some complex physics puzzle only engineers can solve. I’m here to break it down into simple, easy steps. We’ll walk through exactly where to put the weight, why it goes there, and how to do it perfectly. By the time we’re done, you’ll feel confident and ready to build a super-fast car.
The Pinewood Derby is a fantastic project that combines creativity, a little bit of science, and a lot of fun. While a cool design and smooth wheels are important, the secret to a truly fast car lies in one key detail: strategic weight placement. Let’s dive into why this matters so much and how you can get it just right.
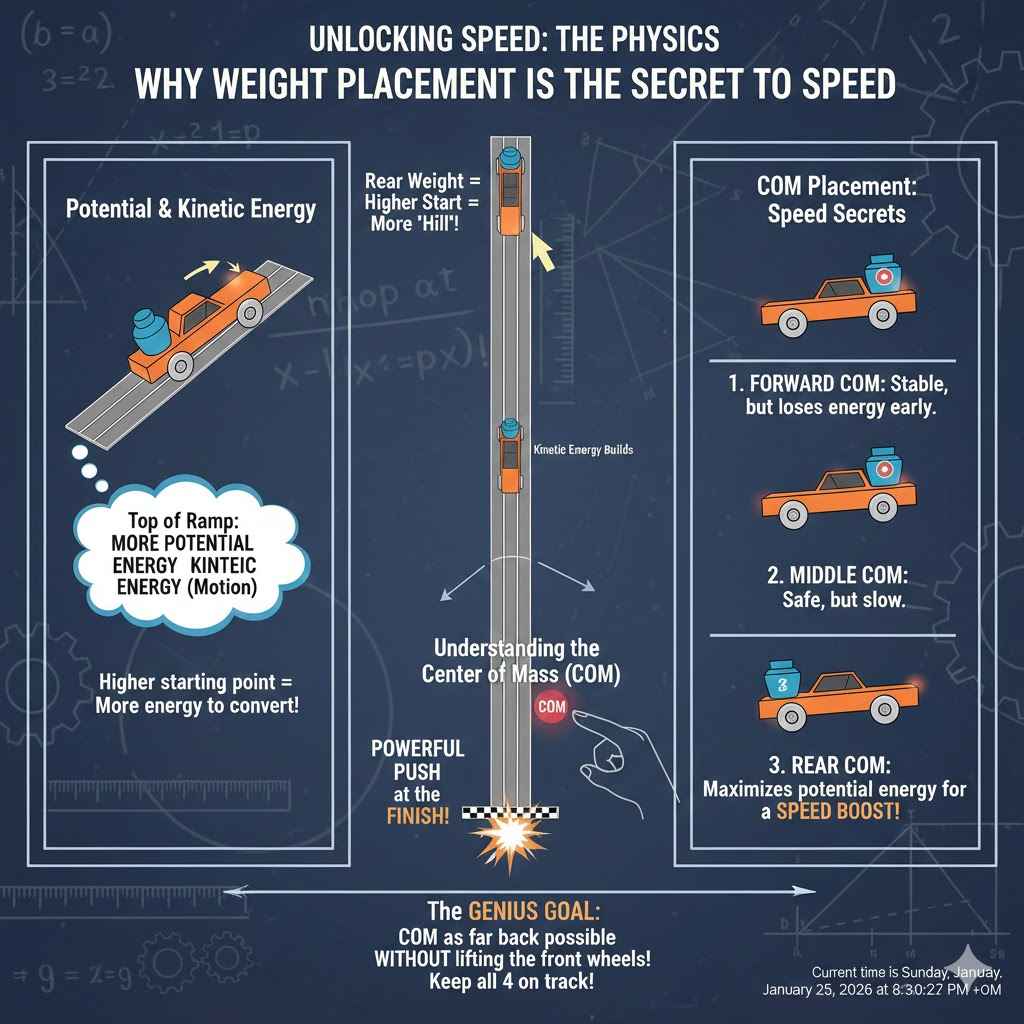
Why Weight Placement is the Secret to Speed
It might seem strange that moving a small weight around can make such a big difference, but it all comes down to simple physics. Think of your Pinewood Derby car at the top of the track. It’s full of stored energy, which scientists call “potential energy.” As the car rolls down the ramp, that stored energy turns into motion, or “kinetic energy.”
Here’s the genius part: the higher the car’s weight is at the starting gate, the more potential energy it has to convert into speed. By placing the weight at the very back of the car, you are effectively keeping its center of mass higher up on the starting ramp for a split second longer. This gives your car a tiny bit more “hill” to go down compared to a car with weight in the front.
Imagine two sledders on a hill. One starts ten feet higher than the other. Who will be going faster at the bottom? The one who started higher, of course! That’s exactly what you’re doing with your Pinewood Derby car. A rear-weighted car gets a more powerful push at the most critical part of the race: the flat section at the end of the track.
Understanding the Center of Mass (COM)
The Center of Mass (or Center of Gravity) is just a simple way of saying the car’s perfect balance point. If you could balance your entire car on the tip of your finger, that spot would be its Center of Mass (COM).
- Forward COM: If the weight is near the front, the COM is forward. The car will be very stable but will lose its energy too early on the track.
- Middle COM: Weight in the middle is a safe but slow option. It’s balanced but doesn’t take advantage of potential energy.
- Rear COM: Placing the weight in the back moves the COM backward. This is the sweet spot for maximizing potential energy and creating a last-second burst of speed.
Our goal is to get that COM as far back as possible without making the car unstable. If it’s too far back, the front wheels can lift off the track, which is a big problem! We want all four wheels on the track for the entire race.
The “Genius” Spot: Finding the Perfect Weight Location
So, where is this magical spot? The most successful Pinewood Derby cars have their weight placed so the final Center of Mass is about 3/4 inch to 1 inch in front of the rear axle.
This is the tested and proven location that gives you the best of both worlds:
- Maximum Potential Energy: It keeps the weight high on the starting ramp for as long as possible.
- Rock-Solid Stability: It’s just far enough forward from the rear axle to keep the front wheels firmly on the track and prevent disastrous “wheelies.”
Think of it like a tightrope walker holding a long pole. The pole helps them balance. Your weight, placed correctly, does the same for your car, keeping it steady while it harnesses every bit of energy for speed.
Step-by-Step Guide to Adding Weight Like a Pro
Ready to get this done? It’s easier than you think. Let’s walk through the process from start to finish. You’ll just need a few simple tools and your weights.
Step 1: Choose the Right Type of Weight
Not all weights are created equal. The best weights are very dense, meaning they pack a lot of weight into a small space. This lets you pinpoint your COM more accurately. The three most common types are tungsten, lead, and steel.
| Weight Type | Pros | Cons |
|---|---|---|
| Tungsten | Extremely dense (1.7x denser than lead), non-toxic, comes in many shapes and sizes. Lets you concentrate weight precisely. | Most expensive option. |
| Lead | Denser than steel, relatively inexpensive, easy to shape and melt (with proper safety gear). | Toxic material. Requires careful handling, gloves, and good ventilation. Not recommended for kids to handle. |
| Steel | Very affordable, readily available (nuts, bolts, fishing weights), non-toxic and safe. | Least dense. You need a lot more space on your car to reach the 5-ounce limit. |
For beginners who want the best performance, I strongly recommend tungsten. It’s safe and its density makes placing the weight exactly where you want it much, much easier. Many hobby stores sell tungsten cylinders, cubes, and even putty designed for Pinewood Derby cars.
Step 2: Prepare Your Car Body
Before you add weight, you need to create a space for it. The best way to do this is by drilling holes in the bottom or back of your car. This keeps the weight hidden and low, which adds to the car’s stability.
Tools You’ll Need:
- A drill (a drill press is great for straight holes, but a handheld drill works fine)
- Drill bits that match the size of your weights (e.g., a 3/8″ bit for 3/8″ tungsten cylinders)
- A ruler or tape measure
- A pencil
- Safety glasses (always!)
Using your ruler, measure from the rear axle slot forward and mark your spots. A good strategy is to drill three or four holes right in that sweet spot—about 1 to 1.5 inches in front of the rear axle. Drilling multiple holes allows you to distribute the weight perfectly and get very close to the 5-ounce maximum.
You can also carve out a larger pocket on the bottom of the car with a wood carving tool or a Dremel. This is great if you are using flatter weights.
Step 3: Drill the Holes Carefully
Safety first! Put on your safety glasses. If you’re using a handheld drill, clamp the car body securely to your workbench so it doesn’t slip.
- Start with your pencil marks.
- Drill slowly and steadily. Don’t push too hard; let the drill bit do the work.
- Be careful not to drill all the way through the top of the car! You can wrap a piece of tape around your drill bit to act as a depth guide.
- Once the holes are drilled, clear out any sawdust.
Step 4: Place and Secure the Weights
Now it’s time to add the weight. Insert your weights into the holes you drilled. They should fit snugly. If they are a little loose, that’s okay—we’re about to fix that.
You need to make sure the weights cannot move or rattle. A rattling weight will rob your car of speed. Use a strong glue or putty to lock them in place.
- Wood Glue or Epoxy: Squirt a small amount into the hole before you insert the weight.
- Tungsten Putty: This is fantastic for fine-tuning. You can press small amounts into the holes to secure the main weights and add that last little bit to reach the 5-ounce limit.
- Wood Putty or Filler: After the glue is dry, you can cover the holes with wood putty for a smooth, seamless finish. Let it dry completely, then sand it flush with the car body.
Step 5: Perform the All-Important Balance Test
This is how you confirm that your weight placement is perfect. You need to find your car’s final Center of Mass.
- Place a thin ruler, a pencil, or a dowel on a flat surface.
- Carefully place your car (with wheels and axles attached) on the ruler, perpendicular to it.
- Slide the car back and forth until you find the point where it balances perfectly without tipping forward or backward.
- Use a pencil to mark this balance point on the side of your car.
That mark is your Center of Mass. Is it about 3/4 inch to 1 inch in front of the rear axle? If so, you’ve done a fantastic job! If it’s too far forward, you may need to drill another hole further back and move some weight. If it’s right on or behind the axle, you risk the car being unstable. It’s better to be a little too far forward than too far back.
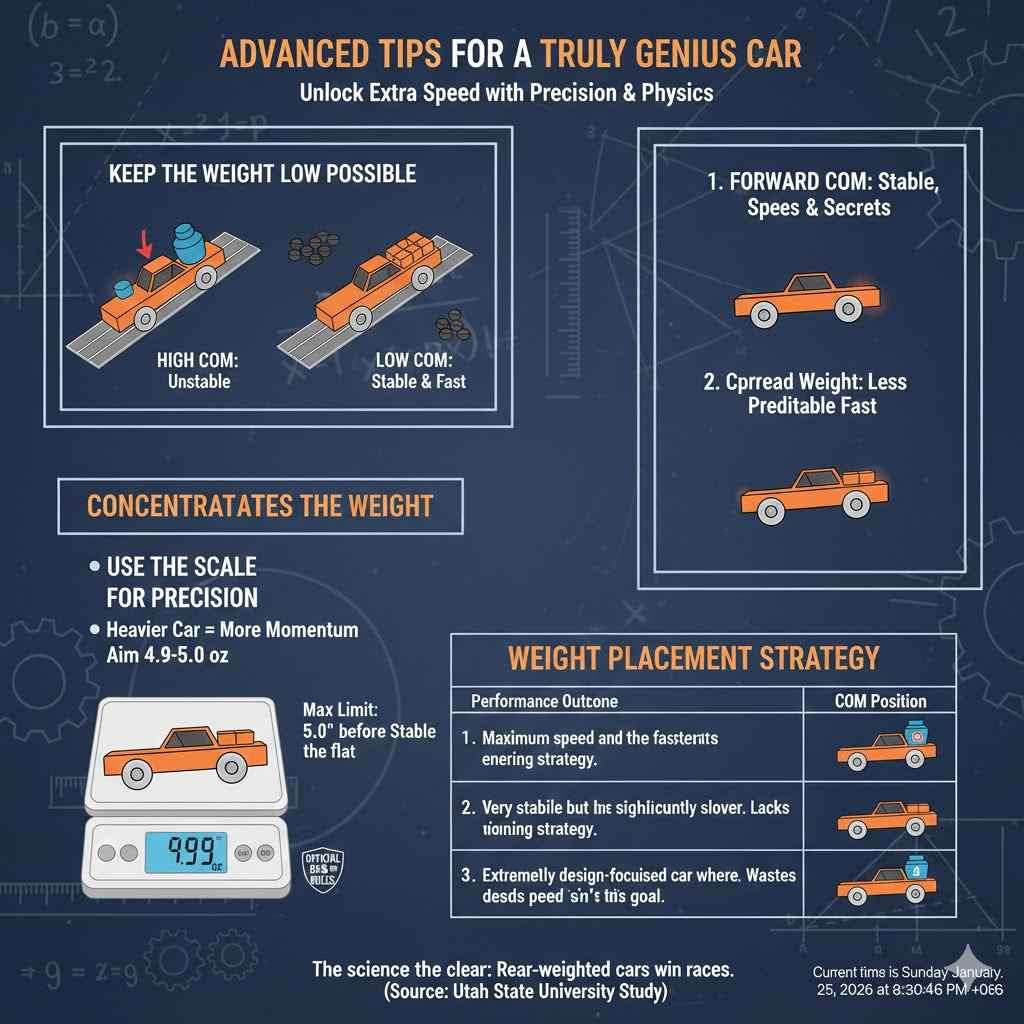
Advanced Tips for a Truly Genius Car
Once you’ve mastered the basics, you can try a few extra tricks to gain an edge. These are simple adjustments that can make a noticeable difference.
Keep the Weight as Low as Possible
Even though you want the Center of Mass far to the back, you also want it to be low to the ground. A low COM makes the car more stable as it goes down the track, especially around any bumps or imperfections. This is another reason drilling pockets into the bottom of the car is a superior method to attaching weights on top.
Concentrate the Weight
Instead of spreading your weight all over the back half of the car, try to keep it concentrated in one specific area. This creates a very predictable and stable balance point. This is where dense tungsten weights really shine, as you can pack almost all your added weight into just a few drilled holes.
Use a Scale for Precision
Most Pinewood Derby races have a maximum weight limit of 5.0 ounces. You want to get as close to this limit as possible without going over. A heavier car has more momentum and will be faster on the flat part of the track. Use a digital kitchen scale or a postal scale to check your weight as you build. Add weight in small increments until you are right at 4.9 or 5.0 ounces. According to official Boy Scouts of America resources, adhering to these rules is crucial for fair competition.
A Simple Table for Weight Placement Strategy
| Placement Location | Performance Outcome | Best For |
|---|---|---|
| Far Back (3/4″ to 1″ before rear axle) | Maximum speed and potential energy. The winning strategy. | Racers looking for the fastest possible car. |
| Middle of the Car | Very stable but significantly slower. Lacks power on the flat. | A purely design-focused car where speed isn’t the primary goal. |
| Front of the Car | Extremely stable but the slowest design. Wastes potential energy. | Not recommended for any car intended for racing. |
As you can see, the science is clear. Pushing that weight to the back is your ticket to the winner’s circle. As a study from Utah State University on Pinewood Derby dynamics confirms, a higher center of mass at the start directly correlates to higher final velocity.
Frequently Asked Questions (FAQ)
What is the best type of weight to use for a Pinewood Derby car?
Tungsten is the best weight to use. It’s much denser than lead or steel, so you can pack more weight into a smaller area. This gives you precise control over your car’s center of mass. It’s also non-toxic and safe to handle.
How close to the 5.0-ounce limit should my car be?
You should get as close to the 5.0-ounce maximum weight as possible without going over. Use a digital scale to weigh your car, aiming for 4.95 to 5.0 ounces. A heavier car builds more momentum, which makes it faster on the flat portion of the track.
Does the shape of the weight matter?
The shape matters for how easily you can fit it into your car. Cylindrical weights are perfect for drilled holes. Flat or square weights work well in recessed pockets on the bottom of the car. The most important thing is the weight’s density, not its shape.
What happens if I put the weight right in the middle?
Placing weight in the middle of the car will make it very stable, but it will be slow. It fails to take advantage of potential energy, meaning it won’t get that powerful final push on the track’s flat section that rear-weighted cars do.
Can my Pinewood Derby car be too heavy?
Yes. Every official Pinewood Derby race has a strict weight limit, which is almost always 5.0 ounces. If your car is even slightly over this limit at the official weigh-in, you will have to drill out some weight before you can race. Always check the official rules for your specific race.
How do I check my car’s balance point at home?
The easiest way is to use a thin object like a ruler or a pencil. Lay the ruler on a flat table and place your fully assembled car on top of it. Slide the car back and forth until it balances perfectly without tipping. That balance point is your Center of Mass.
Is it better to put weight on the top or on the bottom of the car?
It is much better to put the weight on the bottom. Placing the weight low in the car’s body increases its stability and prevents it from wobbling as it speeds down the track. Hiding the weights on the bottom also gives you a clean, smooth top surface for painting and decals.
Conclusion
You’ve done it! The secret to Pinewood Derby speed is no longer a mystery. It all comes down to placing your weight in the right spot: as far back as you can, with the car’s final balance point landing about one inch in front of that rear axle.
By choosing a dense weight like tungsten, carefully drilling your holes, and securing the weight so it never rattles, you are setting your car up for success. Remember to use a scale to get right up to that 5-ounce limit and do the balance test to be sure everything is perfect.
Building a Pinewood Derby car is a wonderful journey. It teaches patience, a little bit of science, and the pride of making something with your own hands. Don’t stress about perfection—just have fun with the process. Now go on, get that weight in place and build a car that’s not only fast but also a memory you’ll cherish for years to come. Happy racing!