Why Do My Hardwood Floors Look Dull After Cleaning: Secret
Your hardwood floors look dull after cleaning likely due to residue left behind by the wrong cleaner, using too much water, or product buildup. All-purpose cleaners, oil soaps, or even vinegar can create a hazy film. The secret to a lasting shine is using a pH-neutral cleaner with a damp microfiber mop and drying immediately.
It’s so frustrating, isn’t it? You spend time and effort carefully cleaning your beautiful hardwood floors, expecting a warm, brilliant shine. Instead, you’re left with a dull, hazy, or even streaky finish. It can make you feel like you did something wrong or wasted your time. Don’t worry, you’re not alone! This is one of the most common problems homeowners face with hardwood.
The good news is that the solution is usually simple. You don’t need expensive equipment or harsh chemicals. In this guide, I’ll walk you through the common mistakes that lead to dull floors and show you the simple, step-by-step secret to restoring that beautiful, warm glow. Let’s get your floors shining again!
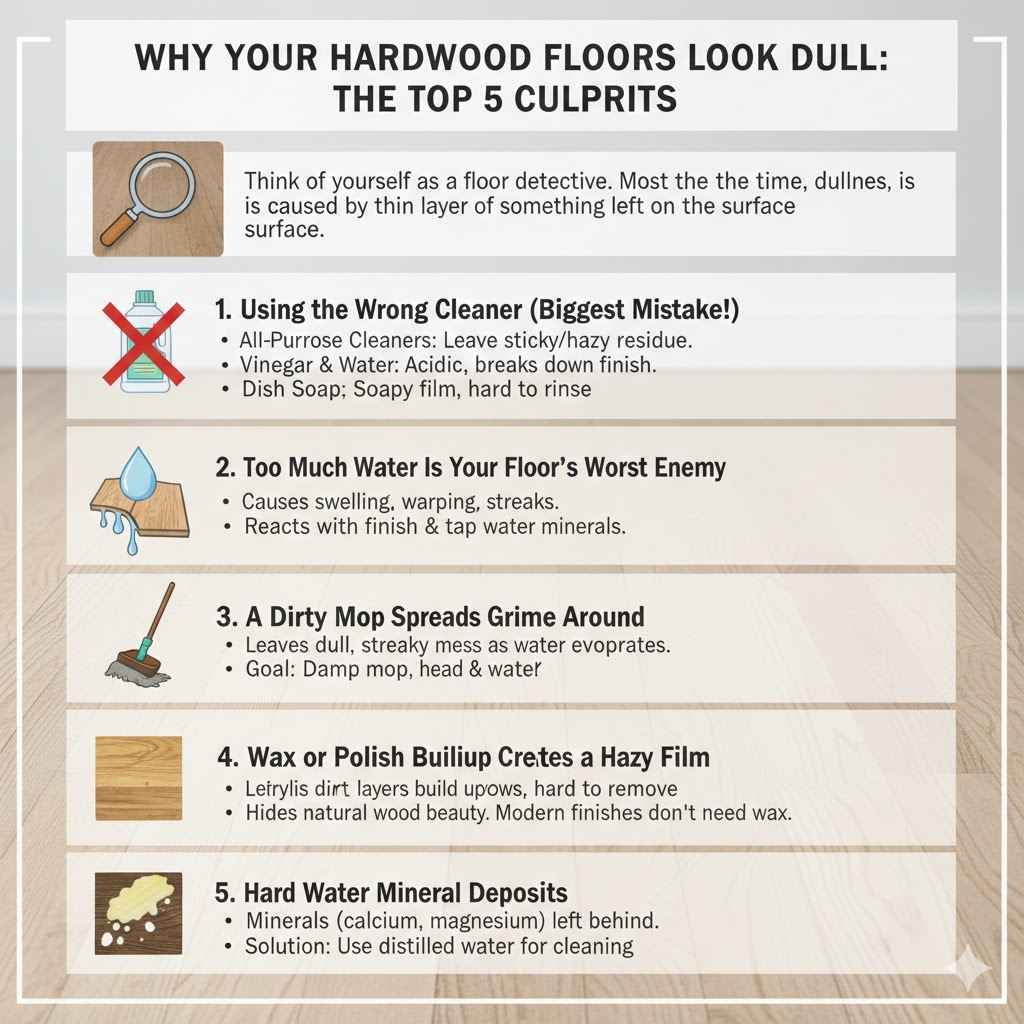
Why Your Hardwood Floors Look Dull: The Top 5 Culprits
Before we can fix the problem, we need to understand what’s causing it. Think of yourself as a floor detective. Most of the time, the dullness is caused by a thin layer of something left on the surface. Here are the most common suspects.
1. Using the Wrong Cleaner (The Biggest Mistake!)
This is, without a doubt, the number one reason for dull floors. Many people grab their go-to all-purpose cleaner, but these products are not made for modern hardwood floor finishes. They often contain ingredients that leave a sticky or hazy residue.
- All-Purpose Cleaners: These often contain detergents that can strip the floor’s finish over time or leave a film that attracts dirt.
- Vinegar and Water: While popular online, vinegar is acidic. Over time, it can break down the polyurethane finish on your floors, making them look dull and susceptible to damage.
- Oil Soaps: These products sound like they should be good for wood, but they can leave an oily residue that builds up, dulls the finish, and attracts more dust and grime.
- Dish Soap: A drop of dish soap might seem harmless, but it’s designed to cut grease and can leave behind a soapy film that’s hard to rinse away completely.
2. Too Much Water Is Your Floor’s Worst Enemy
Wood and water are not friends. When you use a sopping wet mop on your hardwood floors, you’re asking for trouble. Excess water can seep into the seams between the boards, causing them to swell, warp, or cup over time. More immediately, too much water can react with the floor’s finish and minerals in your tap water, leaving behind streaks and a cloudy haze as it dries. The goal is a damp mop, not a wet one.
3. A Dirty Mop Spreads Grime Around
This one seems obvious, but it’s easy to overlook. If you use a dirty mop head or dirty cleaning water, you aren’t actually cleaning the floor. You’re just pushing a thin layer of grime from one spot to another. As the water evaporates, that layer of dirt is left behind, creating a dull, streaky mess. Always start with a clean microfiber mop head and change your cleaning water if it becomes visibly dirty.
4. Wax or Polish Buildup Creates a Hazy Film
Many products promise to “rejuvenate” or “restore” the shine on your hardwood floors. While some can provide a temporary boost, many acrylic polishes or waxes can build up over time. Each new coat adds another layer, and eventually, this buildup becomes cloudy, yellows, and is difficult to remove. It actually hides the natural beauty of your wood floor’s finish. If your floors have a modern polyurethane finish, they do not need waxing.
5. Hard Water Mineral Deposits
If you live in an area with hard water, your tap water contains a high concentration of minerals like calcium and magnesium. When you clean your floors with this water, the water evaporates, but the minerals get left behind. This can create a faint, chalky white film on your floors, making them look dull no matter how well you clean. Using distilled water for your cleaning solution can solve this problem.
The Secret to a Lasting Shine: Your Step-by-Step Cleaning Guide
Alright, now for the fun part! Restoring the shine to your floors is all about using the right tools and the right technique. It’s not complicated, I promise. Follow these steps, and you’ll see a huge difference.
Step 1: Gather the Right Tools and Supplies
Having the right gear makes any job easier. You don’t need anything fancy, just the basics.
- A pH-Neutral Hardwood Floor Cleaner: This is non-negotiable. Look for a product specifically formulated for hardwood floors. These cleaners are designed to clean effectively without leaving residue or damaging the finish. Bona and Zep are popular, reliable brands.
- A Microfiber Mop: A flat-head microfiber mop is your best friend. The microfiber pads are excellent at grabbing dust and dirt without scratching the floor. Get at least two pads—one for cleaning and one for drying.
- A Soft-Bristle Broom or Vacuum: You need a way to remove all the loose dirt and debris first. If using a vacuum, make sure it has a hard floor setting (turn the beater bar off!) or a soft brush attachment to avoid scratching the surface.
- A Spray Bottle: Mixing your cleaning solution in a spray bottle allows you to apply a fine mist directly to the floor, preventing you from using too much liquid.
Step 2: Start with a Clean Slate (Dry Cleaning First)
Never start mopping a dirty floor. If you do, you’ll just turn the dust and grit into a muddy paste that you spread around. Before any water touches your floor, thoroughly sweep or vacuum the entire area. Pay close attention to corners, baseboards, and under furniture where dust bunnies love to hide.
Step 3: Mix Your Cleaner Correctly
Read the instructions on your pH-neutral cleaner. Most concentrates require dilution with water. Don’t “eyeball” it or add extra for more cleaning power—this can lead to residue. If you’re using a ready-to-use formula, simply pour it into your spray bottle. If you have hard water, consider using distilled water for mixing your solution to avoid mineral deposits.
Step 4: The “Damp-Mop” Technique
This is the core of the secret. We are not mopping; we are damp-mopping.
- Lightly mist a small section of the floor (about 4×4 feet) with your cleaning solution. Don’t saturate the floor. It should look like a fine morning dew, not a puddle.
- Wipe the section with your clean, damp microfiber mop pad. Go with the grain of the wood for the best results.
- Your mop pad should be just damp enough to clean but not so wet that it leaves standing water. If you see water beading up or staying on the surface for more than 30 seconds, you’re using too much.
- Continue working in small, manageable sections across the entire room.
Step 5: Dry Immediately for a Streak-Free Finish
Here’s the final touch that makes all the difference. Letting the floor air-dry can lead to water spots and streaks. Instead, after cleaning a section, immediately go over it with your second, completely dry microfiber mop pad. This buffs the floor, picks up any remaining moisture, and leaves a beautiful, streak-free shine.
Dealing with Stubborn Residue: How to Strip Old Buildup
What if you’ve followed the steps above and your floor still looks hazy? You might be dealing with years of buildup from the wrong cleaners or waxes. In this case, you’ll need to do a deeper clean to strip that residue away.
First, identify the problem. If you can scrape a bit of the film off with your fingernail, it’s likely buildup. To remove it, you’ll need a product specifically designed as a hardwood floor deep cleaner or residue remover.
- Choose a Deep Cleaner: Look for products labeled as “deep cleaner” or “polish remover” from trusted brands like Bona or Zep. Read the label to ensure it’s safe for your type of floor finish (most modern floors are polyurethane).
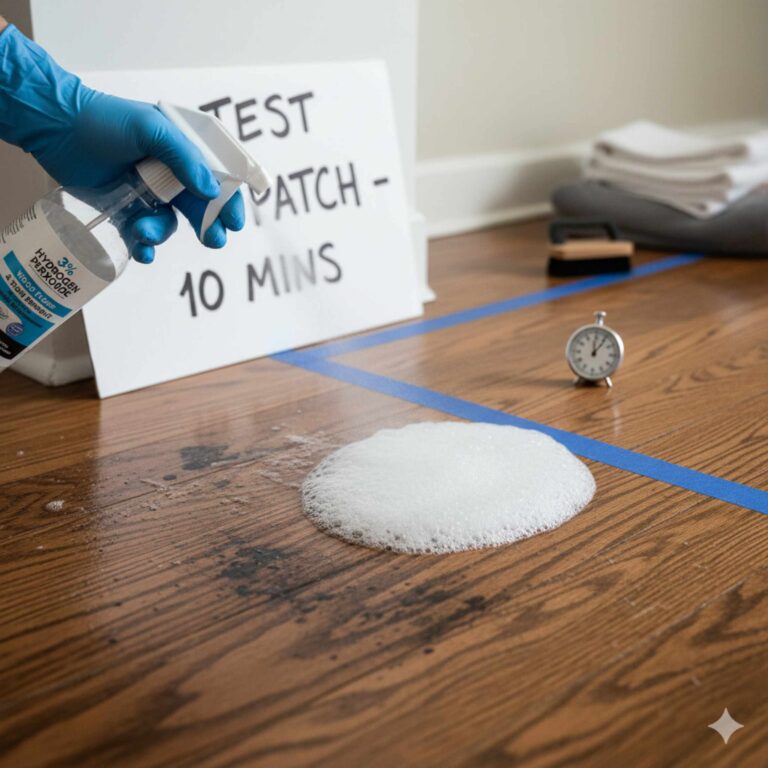
- Test in an Inconspicuous Area: Before you tackle the whole floor, test the product in a small, hidden spot, like inside a closet or under a large piece of furniture. Follow the product instructions and make sure it doesn’t damage the finish.
- Apply and Agitate: Working in small sections, apply the deep cleaner as directed. You may need to gently agitate the area with a soft-bristle brush or the scrubbing strips on a mop pad to help break down the buildup.
- Wipe and Rinse: Use a clean, damp microfiber cloth to wipe away the dissolved residue. You may need to “rinse” the area with a fresh, water-dampened microfiber cloth to remove all traces of the deep cleaner.
- Dry Immediately: As always, dry the section thoroughly with a clean, dry microfiber cloth.
This process can be labor-intensive. If the buildup is severe or you’re not comfortable doing it yourself, it might be time to call a professional floor cleaning service. They have the equipment and expertise to safely strip the floor without damaging it.
Choosing Your Cleaning Arsenal: What to Use and What to Avoid
To make it even clearer, here’s a quick-reference table to help you choose the right products and avoid the ones that cause dullness.
| Product Type | Why It’s Good/Bad for Hardwood | Our Recommendation |
|---|---|---|
| pH-Neutral Hardwood Cleaner | Specifically designed to clean without leaving residue or damaging the finish. Gentle and effective. | Highly Recommended. This is the best choice for regular cleaning. |
| Water and Vinegar | Vinegar is acidic and can slowly etch and dull the floor’s polyurethane finish over time. | Avoid. The long-term risk to your finish isn’t worth it. |
| Oil Soaps | Leave an oily film that builds up, attracts dirt, and makes the floor look hazy and feel slippery. | Avoid. These cause more problems than they solve on modern finishes. |
| Steam Mops | Inject hot steam and moisture deep into the wood grain and seams, which can cause permanent damage, warping, and finish peeling. Many hardwood floor warranties are voided by steam mop use. | Avoid at all costs. The risk of damage is too high. Check out what the National Wood Flooring Association says about them. |
| Waxes or Acrylic Polishes | Create a temporary shine but lead to heavy, cloudy buildup that’s difficult to remove. Not needed for polyurethane finishes. | Avoid. Let the beauty of your floor’s actual finish shine through. |
Preventing Future Dullness: Simple Habits for Shiny Floors
Once you’ve got your floors shining again, keeping them that way is all about good habits. An ounce of prevention is worth a pound of cure!
Daily and Weekly Maintenance Habits
- Use Doormats: Place high-quality doormats at every entrance to your home. This traps the majority of dirt, grit, and moisture before it ever touches your floors.
- Sweep or Vacuum Regularly: Fine grit and dust act like sandpaper, scratching your floor’s finish and making it look dull. A quick sweep or vacuum every couple of days makes a huge difference.
- Clean Spills Immediately: Don’t let spills sit. Wipe them up right away with a soft, dry cloth to prevent water damage or staining.
- Use Furniture Pads: Stick felt pads on the bottom of all furniture legs. This prevents scratches and scuffs when furniture is moved.
- Take Off Your Shoes: If possible, adopt a “no shoes” policy in the house. Shoes track in all sorts of damaging grit and oils.
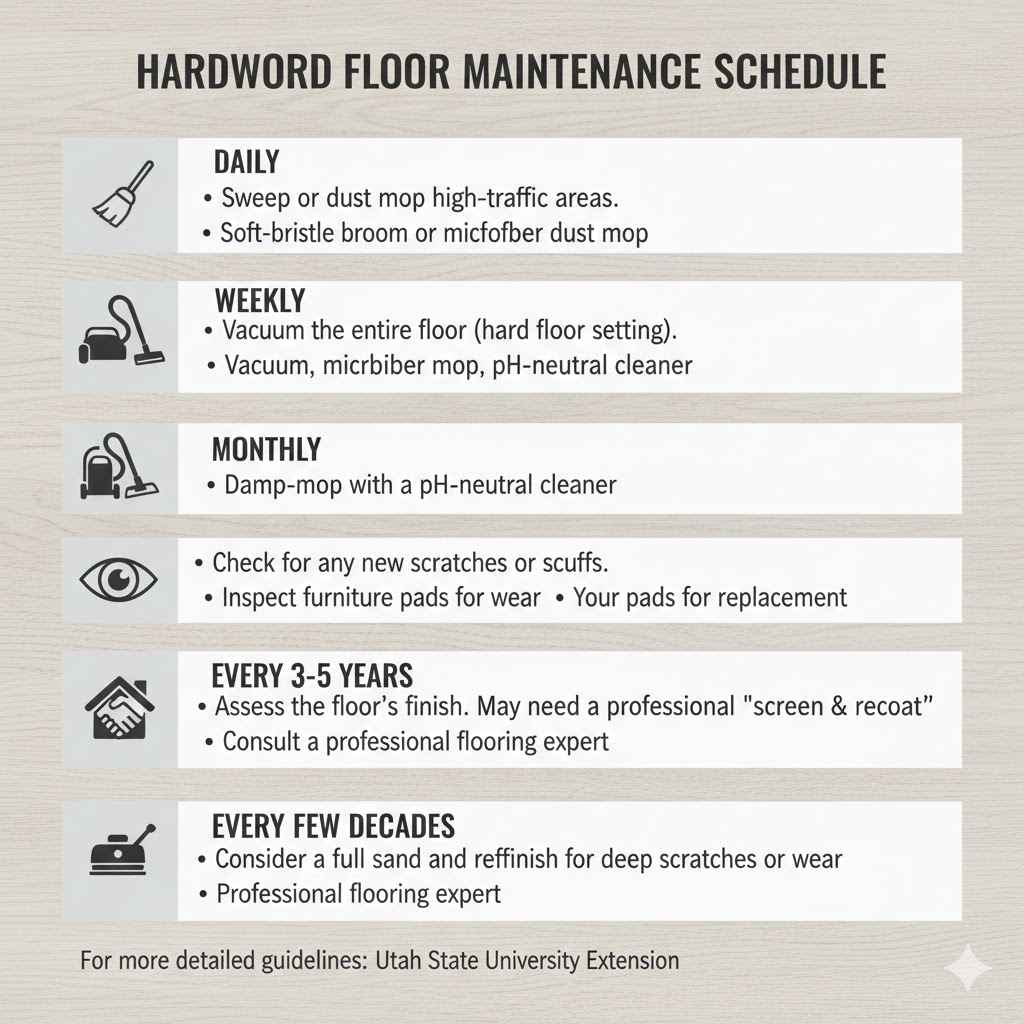
Hardwood Floor Maintenance Schedule
Here’s a simple schedule you can follow to keep your floors in top shape for years to come.
| Frequency | Task | Tools Required |
|---|---|---|
| Daily | Sweep or dust mop high-traffic areas. | Soft-bristle broom or microfiber dust mop. |
| Weekly | Vacuum the entire floor (using the hard floor setting). Damp-mop with a pH-neutral cleaner. | Vacuum, microfiber mop, pH-neutral cleaner. |
| Monthly | Check for any new scratches or scuffs. Inspect furniture pads for wear. | Your eyes! Felt pads for replacement. |
| Every 3-5 Years | Assess the floor’s finish. It may need a professional “screen and recoat” to refresh the top layer of protection. | Consult a professional flooring expert. |
| Every Few Decades | Consider a full sand and refinish if the floor has deep scratches, wear, or damage. | This is a job for a professional. |
For more detailed guidelines on maintaining wood floors, resources like this one from the Utah State University Extension can be very helpful.
Frequently Asked Questions About Hardwood Floor Care
1. Why are my hardwood floors sticky after mopping?
Stickiness is almost always caused by residue. This happens when you use too much cleaner, the wrong type of cleaner (like oil soap or all-purpose sprays), or don’t rinse properly after a deep clean. Switch to a pH-neutral cleaner, use it sparingly, and you should see a big difference.
2. Can I really never use vinegar on my hardwood floors?
It’s best to avoid it. While a highly diluted solution might not cause immediate damage, its acidic nature can wear down the protective polyurethane finish over time. This gradual erosion makes your floor duller and more vulnerable to scratches and water damage. It’s safer to use a product designed for the job.
3. How can I tell what kind of finish my hardwood floor has?
Most modern floors (installed in the last 30-40 years) have a surface finish like polyurethane. An easy test is to find a hidden spot and put a drop of water on it. If the water beads up and stays on the surface, you likely have a polyurethane finish. If it soaks in and darkens the wood, you may have an older, penetrating oil or wax finish, which requires different care.
4. How often should I damp-mop my hardwood floors?
This depends on how much traffic the area gets. For high-traffic areas like kitchens and entryways, once a week is a good rule of thumb. For less-used rooms like bedrooms or a formal dining room, cleaning every two to four weeks is usually sufficient. Always dry-clean (sweep or vacuum) before you mop.
5. Is it better to use a ready-to-use cleaner or a concentrate?
Both can work great! Ready-to-use sprays are very convenient but can be more expensive over time. Concentrates are more economical and allow you to mix up just what you need, but you have to be careful to dilute them correctly according to the instructions. The most important factor is that the product is pH-neutral and made for hardwood.
6. What if I’ve tried everything and my floors are still dull?
If you have properly cleaned the floor and removed all potential residue but it still lacks shine, the issue might be the finish itself. The protective topcoat may be worn down from years of foot traffic. At this point, no amount of cleaning will restore the shine. You may need to look into a professional screen and recoat, which lightly abrades the surface and applies a new topcoat of finish.
Your Path to Beautiful, Shiny Floors
See? I told you it wasn’t so complicated! The secret to getting rid of that dull, hazy look on your hardwood floors isn’t about scrubbing harder—it’s about cleaning smarter. By ditching the harsh, residue-causing chemicals and embracing the simple “damp and dry” method with the right tools, you can bring back that beautiful luster you love.
Remember the key takeaways: always start by removing dust and debris, use a pH-neutral cleaner made for wood, apply it as a fine mist, and always dry the floor immediately with a clean microfiber pad. That’s it. That’s the secret.
Don’t be discouraged if your floors have years of buildup. A little patience and a good deep cleaner can work wonders. You have the knowledge now to not only fix the problem but also to prevent it from ever coming back. Go ahead and give your floors the care they deserve—you’ll be rewarded with a beautiful, warm glow that makes your whole home feel brighter.