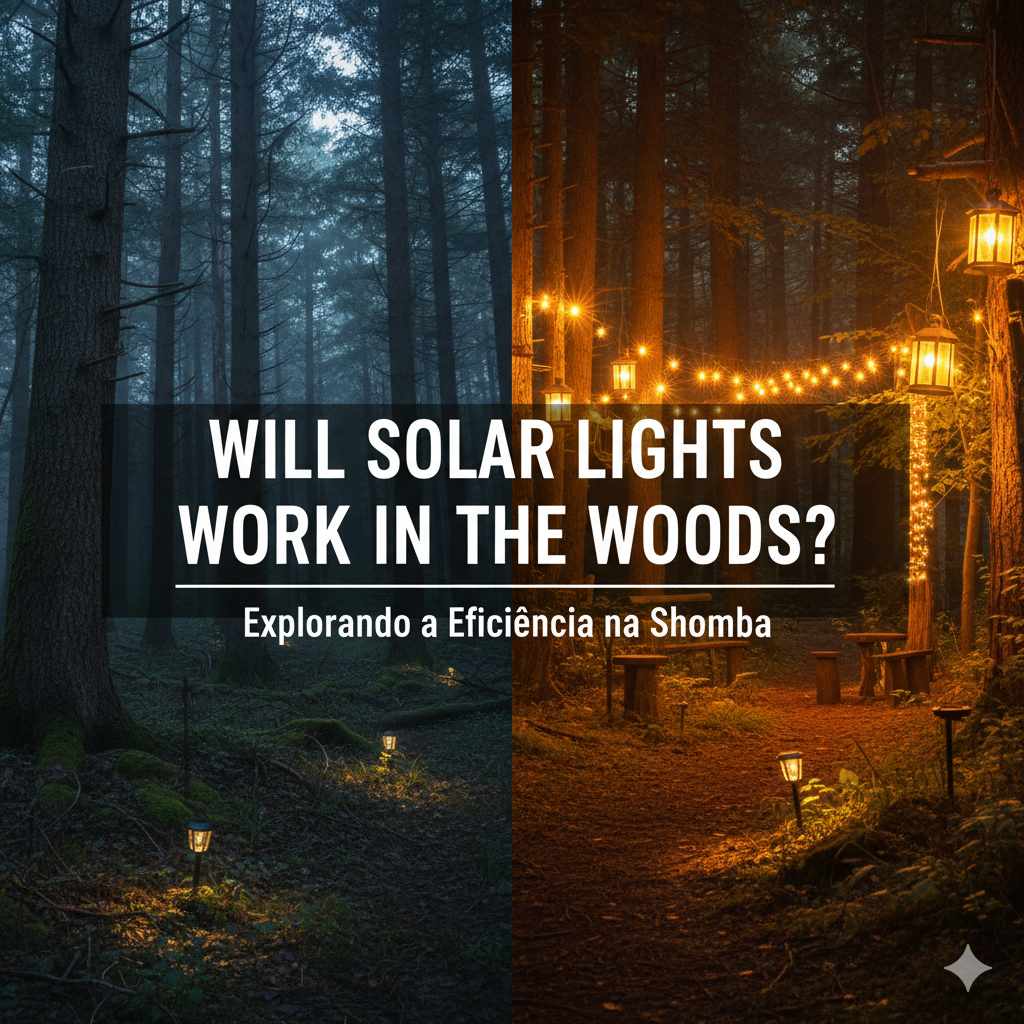
Will Solar Lights Work In The Woods? Essential Guide
Yes, solar lights can work in the woods, but their effectiveness depends heavily on sunlight exposure. For best results, place them in clearings or along sun-dappled paths. This guide will show you how to choose and position them for optimal performance.
Ever dreamt of adding a touch of magic to your wooded backyard or a cozy pathway through the trees? Solar lights seem like the perfect, eco-friendly solution. But a common question pops up: will these sun-powered wonders actually work when surrounded by the shade of towering trees? It’s a valid concern, and one that can leave you feeling a bit stumped. Don’t worry, though! With a little know-how, you can absolutely bring light to your woodland oasis. We’ll walk through exactly what you need to consider to make your solar lights shine, even under a leafy canopy.
Understanding How Solar Lights Work
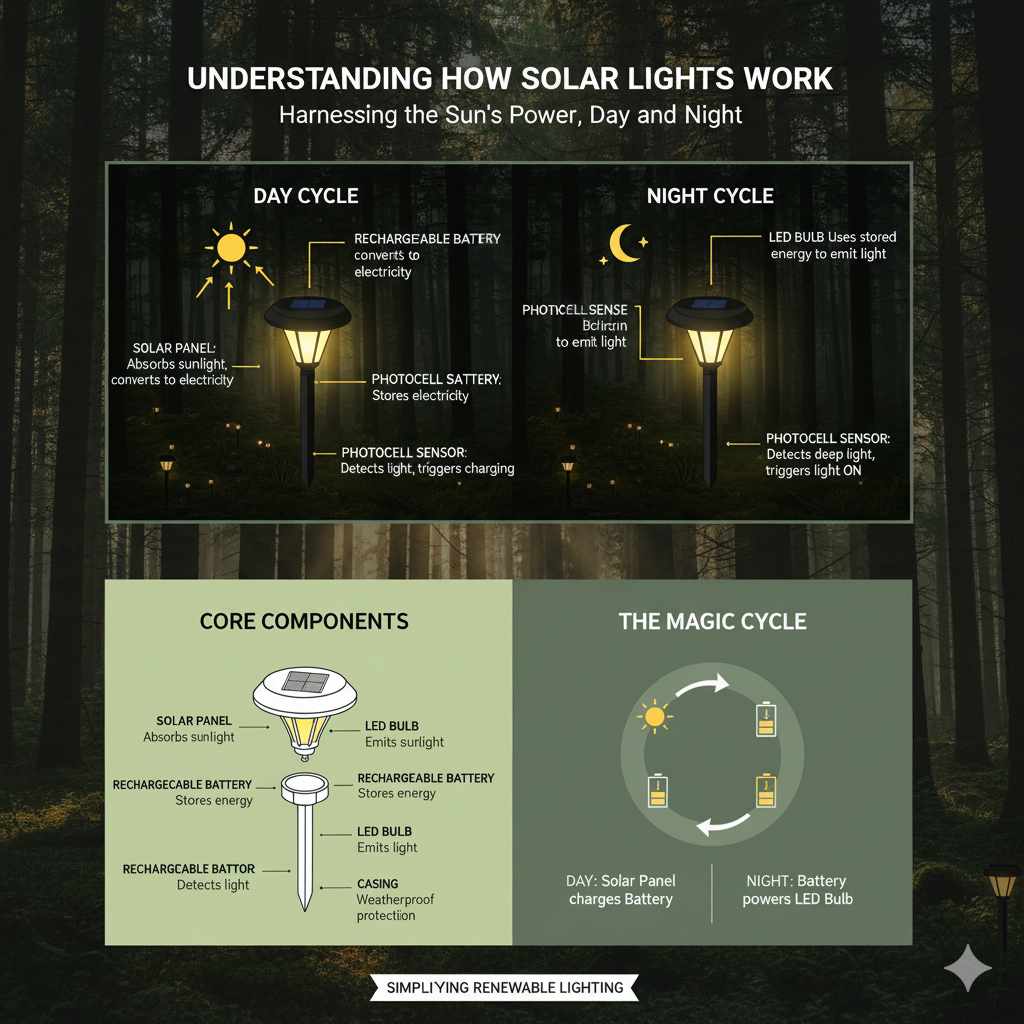
At their heart, solar lights are simple devices designed to harness the power of the sun. They consist of a few key components that work together to capture sunlight, store it, and then use it to power an LED bulb when it gets dark. Understanding these parts is the first step to figuring out if they’ll be a good fit for your wooded area.
The Core Components of a Solar Light
Each solar light unit is typically made up of:
Solar Panel: This is the most crucial part for our woodland scenario. It’s usually a small, dark surface on top of the light. Its job is to absorb sunlight and convert it into electricity. The more direct sunlight it gets, the more electricity it produces.
Rechargeable Battery: The electricity generated by the solar panel is stored in a rechargeable battery, usually an AA or AAA NiMH (Nickel-Metal Hydride) or Lithium-ion type. This stored energy is what powers the light at night.
LED Bulb: This is the light source. LEDs (Light Emitting Diodes) are incredibly energy-efficient, which is why they are perfect for solar lights. They don’t need a lot of power to produce a good amount of light.
Photocell Sensor: This little sensor detects when it’s getting dark. Once it senses low light levels, it signals the light to turn on automatically. It also tells the solar panel to stop charging.
Casing: This protects all the internal components from the weather. Most solar lights are designed to be waterproof or water-resistant.
The magic happens in a cycle: during the day, the solar panel soaks up sunlight, charging the battery. When evening arrives, the photocell tells the battery to release its stored energy to power the LED.
The Big Question: Will Solar Lights Work in the Woods?
The short answer is: it depends on how much sun they can get.
Woods, by their nature, are often shaded. Dense tree canopies block a significant amount of direct sunlight from reaching the ground. Solar panels need direct sunlight to charge effectively. If a solar light is placed under thick foliage where it only receives indirect or dappled light, it simply won’t receive enough energy to charge its battery sufficiently for a full night’s illumination.
However, this doesn’t mean you can’t use solar lights in wooded areas at all! It just requires a bit of strategic thinking and placement.
Factors Affecting Solar Light Performance in Woods
1. Sunlight Exposure: This is the absolute biggest factor.
Direct Sunlight: Solar panels need several hours of direct, unobstructed sunlight each day to charge their batteries fully.
Dappled Light: Light that filters through leaves can provide some charge, but it will be significantly less than direct sun.
Shade: Areas that are consistently in deep shade will not provide enough light for most solar lights to work reliably.
2. Time of Year: The angle of the sun changes throughout the year. In summer, the sun is higher in the sky, and leaves are dense, potentially creating more shade. In winter, the sun is lower, and deciduous trees have lost their leaves, allowing more light to penetrate. This means a spot that works well in winter might not in summer.
3. Type of Solar Light: Not all solar lights are created equal. Some are designed for brighter, longer-lasting illumination and require more charging. Others are meant for subtle accent lighting and can operate on less.
4. Battery Quality and Capacity: The capacity of the rechargeable battery (measured in mAh – milliampere-hours) plays a huge role. A larger capacity battery can store more energy, potentially lasting longer even with less-than-ideal charging.
5. Placement: Where you put the light is critical. A few feet can make all the difference between a light that works and one that doesn’t.
Strategies for Using Solar Lights Effectively in Wooded Areas
Don’t let the trees deter you! With smart placement and the right expectations, you can still enjoy solar lighting in your woodland setting.
1. Maximize Sunlight Exposure
This is your number one priority.
Seek Out Clearings: Look for natural clearings in the woods where sunlight directly hits the ground for at least 4-6 hours a day.
Edge of the Woods: The perimeter of your wooded area, where it meets a more open space, often gets more sun.
Sun-Dappled Paths: If you have a path that gets periods of direct sun throughout the day, even if it’s interspersed with shade, it might be suitable.
Trim Overhanging Branches: If there are specific branches blocking sunlight from a chosen spot, consider carefully trimming them. Always follow safe pruning practices or hire a professional for larger trees.
Consider Height: Sometimes, mounting a solar panel slightly higher can help it catch more rays.
2. Choose the Right Type of Solar Light
Some solar lights are better suited for less-than-ideal conditions than others.
Higher Wattage Panels: Look for lights with larger solar panels. A bigger panel can capture more light, even if it’s not direct.
Lights with Separate Panels: Some higher-quality solar lights come with a separate solar panel that can be positioned remotely, connected to the light fixture by a wire. This allows you to place the panel in the sunniest spot and the light in the desired shaded location.
Motion-Sensor Lights: These lights only turn on when motion is detected and then stay on for a short period. They use less energy and can be a good option for dimly lit areas, as they don’t need to stay on all night.
Accent or Pathway Lights: These typically have lower light output and are designed for subtle illumination. They might perform better with less charging than a powerful floodlight.
3. Manage Your Expectations
It’s important to be realistic.
Shorter Illumination Times: In shaded areas, solar lights may not stay lit for the entire night. They might dim earlier or turn off sooner than lights placed in full sun.
Dimmer Light Output: The brightness of the light might be reduced due to less-than-optimal charging.
Seasonal Performance: Expect performance to vary. Lights will likely work better in winter when trees are bare than in the peak of summer with full foliage.
4. Use External Solar Panels
For a truly reliable solution in heavily shaded woods, consider solar lights that come with a separate, wire-connected solar panel. This allows you to:
Mount the Panel: Place the panel on a nearby sunny post, fence, or even a tree branch that receives direct sunlight for most of the day.
Run the Wire: Route the wire discreetly along the ground, under mulch, or along tree trunks to the light fixture.
Position the Light: Install the light fixture in your desired wooded location, knowing it’s being powered by a well-charged panel.
These systems offer much more flexibility and are often a more successful approach for challenging environments. You can find these types of kits at many home improvement stores or online retailers.
5. Consider Battery Upgrades or Replacements
Over time, rechargeable batteries degrade. If your solar lights aren’t performing as well as they used to, consider replacing the batteries.
Check Battery Type: Most use NiMH AA or AAA rechargeable batteries.
Look for High Capacity: Opt for batteries with the highest mAh rating you can find for longer runtimes.
Ensure Compatibility: Make sure the voltage and physical size are correct for your light.
You can often find replacement batteries specifically for solar lights, or simply purchase high-quality rechargeable AA or AAA batteries.
Where to Place Solar Lights in a Wooded Setting
Deciding where to put your solar lights is key to their success. Think about both aesthetics and functionality.
Ideal Placement Spots
Pathways: Line pathways that get at least some sun. Even a few lights strategically placed can guide your way.
Entrances to Trails: Mark the beginning of a trail or a clearing.
Around Seating Areas: If you have a bench or picnic table in a somewhat open spot, solar lights can create a cozy atmosphere.
Near Water Features: If you have a pond or stream in a clearing, solar lights can add a beautiful reflection.
Against Tree Trunks (Sunny Side): If a tree trunk receives direct sun for a good portion of the day, you might be able to place a light at its base.
Spots to Avoid (or Use with Caution)
Under Dense Evergreens: These trees block sun year-round.
Deepest Parts of the Forest: Areas that rarely see direct sunlight will likely not work.
North-Facing Slopes: These areas receive the least direct sunlight, especially in the Northern Hemisphere.
Areas Prone to Constant Leaf Litter: If leaves consistently pile up on the solar panel, they will block light.
Types of Solar Lights and Their Suitability for Woods
Not all solar lights are designed for the same purpose. Knowing the different types can help you choose the best option for your wooded environment.
Solar Pathway Lights
These are the most common type, typically with a stake to insert into the ground. They offer subtle illumination along walkways.
Pros: Affordable, easy to install, widely available.
Cons: Often have smaller solar panels and batteries, may not last all night in shaded areas.
Woodland Suitability: Best for paths that receive at least some dappled sunlight or are on the edge of the woods. Look for models with larger panels.
Solar Spotlights
These are more powerful and often adjustable, designed to highlight specific features like trees or garden ornaments.
Pros: Brighter light output, can be directed.
Cons: Require more power, larger solar panels needed for effective charging.
Woodland Suitability: Can work if the separate panel is placed in a sunny spot. The light fixture itself can be in a shadier location.
Solar String Lights
These are decorative lights strung together, great for ambiance.
Pros: Excellent for creating atmosphere, flexible placement.
Cons: Performance is entirely dependent on the solar panel’s exposure.
Woodland Suitability: Only viable if the solar panel can be positioned in full sun, and the strings are hung in areas with some light.
Solar Wall Sconces/Post Lights
Designed to be mounted on walls or posts, these offer more substantial lighting.
Pros: Can provide significant light, often more durable.
Cons: Installation can be more involved, rely heavily on panel placement.
Woodland Suitability: Similar to spotlights, best if the panel can be mounted on a sunny structure or pole away from the dense tree cover.
Solar Landscape Lights with Separate Panels
These are often higher-end units where the solar panel is a distinct component connected by a wire to the light fixture.
Pros: Maximum flexibility, allows panel to be placed in the sunniest spot while the light is where you want it.
Cons: More expensive, requires managing wires.
Woodland Suitability: Highly recommended for wooded areas. This is often the most reliable solution.
Here’s a quick comparison table:
| Type of Solar Light | Typical Panel Size | Sunlight Requirement | Woodland Viability | Best Use Case in Woods |
|---|---|---|---|---|
| Pathway Lights | Small | Moderate to High | Limited (needs dappled sun) | Edgy paths, clearings |
| Spotlights | Medium | High | Moderate (if panel is separate) | Highlighting features from sunny spots |
| String Lights | Small to Medium | High | Low (panel must be in sun) | Decorative accents in clearings |
| Wall/Post Lights | Medium to Large | High | Moderate (if panel is separate) | Near structures at woods’ edge |
| Lights with Separate Panels | Large (separate) | High (for panel) | High (most reliable) | Anywhere, with panel in sun |
Installation Tips for Woodland Solar Lights
Proper installation is crucial for maximizing the performance of your solar lights, especially in challenging wooded environments.
Step-by-Step Installation Guide
1. Choose Your Location: Based on sunlight assessment, pick the best spot. Consider where you want the light to be seen and where the sun hits throughout the day.
2. Prepare the Ground: If installing pathway lights, clear away debris, rocks, and roots from the chosen spot. Dig a small hole or use a rubber mallet to gently tap the stake into the ground. Ensure the light is stable.
3. Position the Solar Panel:
Integrated Panels: If the panel is on the light itself, ensure it’s facing the direction that receives the most sun. For many locations in the Northern Hemisphere, this means facing south. Angle it slightly upwards to catch more sun, especially in winter.
Separate Panels: Mount the panel on a post, stake, or structure in a location with unobstructed direct sunlight for at least 6-8 hours daily. Use the included mounting hardware.
4. Connect Components (if applicable): If you have a light with a separate panel, carefully run the connecting wire. Bury it slightly under mulch or soil for a tidy look and to protect it. Ensure the wire isn’t strained.
5. Activate the Light: Most solar lights have an on/off switch or a tab that needs to be removed from the battery compartment. Ensure the switch is in the “ON” position. Many lights also have a “dusk-to-dawn” or “auto” setting.
6. Initial Charge: It’s a good idea to let the solar panel charge for a full day (or two) before expecting the light to work optimally. Remove any protective film from the solar panel.
7. Test: As dusk falls, your light should turn on automatically. If it doesn’t, check the switch, ensure the panel is clean and has had sufficient charge, and that the photocell sensor isn’t obstructed.
Essential Tools and Materials
Solar Lights: The lights themselves.
Rubber Mallet or Hammer: For gently tapping pathway light stakes into the ground.
Small Shovel or Trowel: For preparing the ground and digging shallow trenches for wires.
Screwdriver Set: May be needed for assembling some lights or mounting separate panels.
Wire Strippers/Cutters (Optional): If you need to manage or connect wires for certain systems.
Zip Ties or Landscape Staples: For securing wires neatly.
Safety Glasses: Always a good idea when working outdoors.
Gloves: To protect your hands.
Maintenance for Longevity
Keeping your solar lights working well in the woods involves a little regular care.
Regular Cleaning
Wipe the Solar Panel: Dust, dirt, pollen, and bird droppings can significantly reduce the panel’s efficiency. Gently wipe the panel with a soft, damp cloth regularly (e.g., weekly or bi-weekly). Avoid abrasive cleaners.
Clean the Lens: The light’s lens can also get dirty. Clean it with a soft cloth to ensure maximum light output.
Checking for Damage
Inspect Casing: Look for cracks or damage to the light’s housing.
Check Stakes: Ensure stakes are secure and haven’t become loose or bent.
Examine Wires (if applicable): Look for any signs of damage to wires from lawnmowers, animals, or the elements.
Battery Care
Replace Batteries: As mentioned, rechargeable batteries have a lifespan. Typically, they last 1-3 years depending on usage and quality. Replace them when you notice a significant drop in performance.
Ensure Good Contact: When replacing batteries, make sure the contacts in the battery compartment are clean and making good contact.
Pros and Cons of Using Solar Lights in Woods
Like any home improvement project, there are benefits and drawbacks to consider.
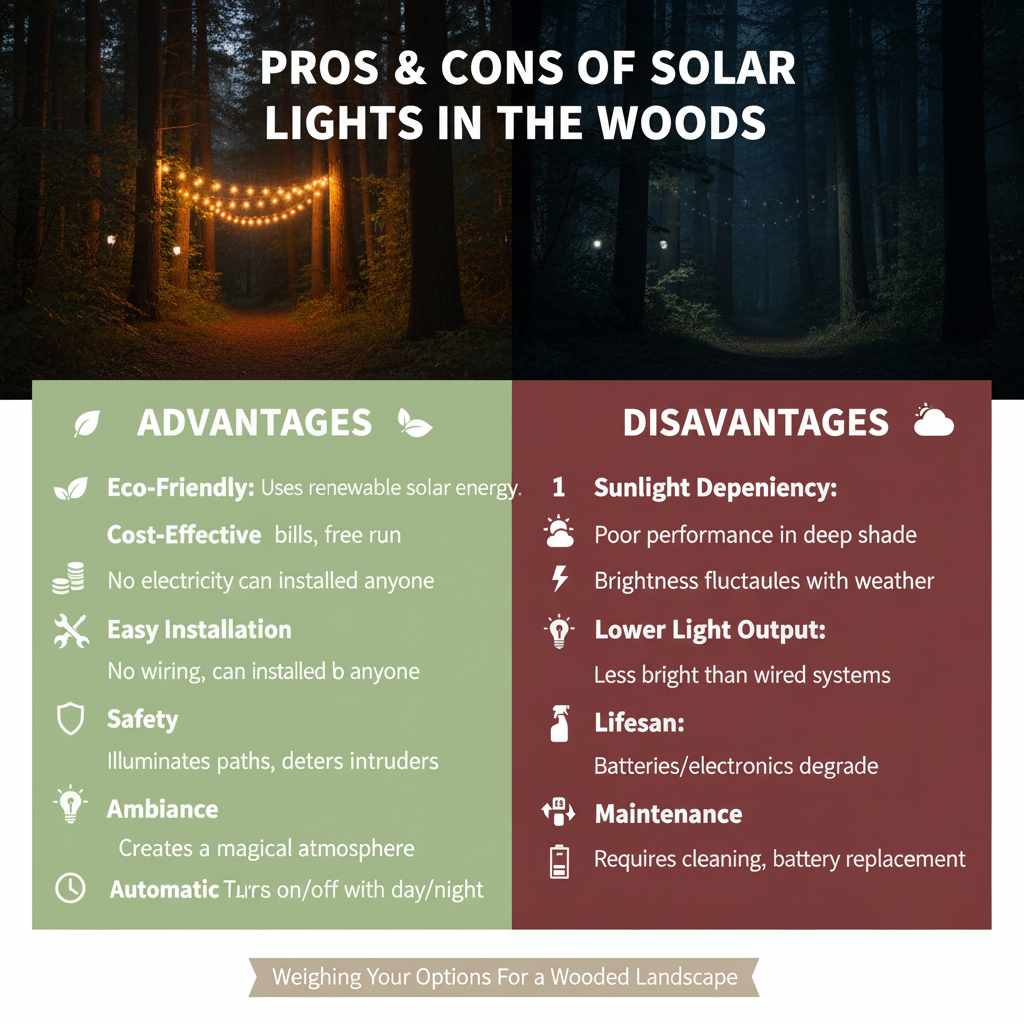
Advantages
Eco-Friendly: They run on renewable solar energy, reducing your carbon footprint.
Cost-Effective: No ongoing electricity costs once purchased.
Easy Installation: Most require no wiring and can be installed by anyone.
Safety: They provide light for navigating paths and can deter potential intruders.
Ambiance: They can create a beautiful, magical atmosphere in a wooded setting.
Automatic Operation: Most turn on and off automatically.
Disadvantages
Sunlight Dependency: Their biggest limitation, especially in shaded areas.
Variable Performance: Brightness and duration can fluctuate based on weather and sunlight.
Lower Light Output: Compared to wired lighting, they are generally less bright.
Lifespan: Batteries and electronics have a limited lifespan.
Maintenance: Requires regular cleaning and eventual battery replacement.
Frequently Asked Questions (FAQ)
Q1: How many hours of sunlight do solar lights need to charge?
A1: For optimal performance, solar lights generally need 6-8 hours of direct sunlight per day. In wooded areas, where direct sunlight is scarce, they may require more time in dappled or indirect light, and even then, they might not fully charge.
Q2: Can I use solar lights in a heavily shaded area of my woods?
A2: It’s challenging. While they might provide some dim light or shorter illumination times, heavily shaded areas usually don’t provide enough energy for reliable, all-night lighting. Lights with separate, remotely placed solar panels are a better option for such spots.
Q3: How do I know if my solar light’s panel is getting enough sun?
A3: Observe the light throughout a sunny day. If it’s bright and stays on for most of the night, it’s likely getting enough sun. If it dims quickly, turns off early, or doesn’t turn on at all, it’s a sign of insufficient charging. Check for shade obstructions.
Q4: What’s the difference between integrated solar panels and separate solar panels?
A4: Integrated panels are built directly into the light fixture. Separate panels are distinct units connected to the light by a wire, allowing you to position the panel in the sunniest spot and the light elsewhere. For wooded areas, separate panels offer much greater flexibility and reliability.
Q5: How long do the rechargeable batteries in solar lights typically last?
A5: The rechargeable batteries (usually NiMH or Lithium-ion) typically last between 1 to 3 years, depending on the quality of the battery, the frequency of charging and discharging, and the overall climate. You may notice dimming or shorter runtimes as they age.
Q6: Can I replace the batteries in my solar lights?
A6: Yes, most solar lights are designed to have their rechargeable batteries replaced. You’ll typically need to open the light fixture to access the battery compartment. Ensure you use the correct type and size of rechargeable battery.
Q7: Will rain or snow affect my solar lights in the woods?
A7: Most solar lights are designed to be weather-resistant or waterproof. Light rain usually won’t be an issue. Heavy snow cover, however, will block the solar panel entirely, preventing charging. You’ll need to clear snow from the panels to allow them to charge. For advice on winterizing outdoor lights, resources like the U.S. Department of Energy offer helpful tips on energy-efficient lighting.
Conclusion
Bringing light to a wooded area with solar power is absolutely achievable, but it requires a thoughtful approach. The key takeaway is that while direct sunlight is ideal, strategic placement, choosing the right type of solar light (especially those with separate panels), and managing your expectations can make them work effectively even under a canopy of trees. By understanding how these lights function and applying the tips in this guide, you can confidently illuminate your woodland paths, accent your natural features, and create a beautiful, inviting atmosphere. So go ahead, embrace the magic of solar light in your own little forest retreat!