10 Durable Staining Cedar Wood Exterior Techniques
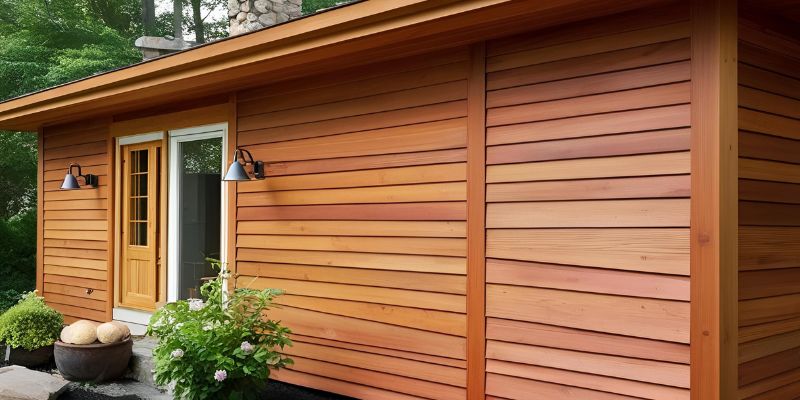
Cedar wood is a top choice for exterior projects like siding, decks, and fences, thanks to its natural beauty, warm reddish-brown tones, and resistance to rot and insects. However, to keep cedar looking great and standing up to the elements sun, rain, and wind staining it properly is key. A durable stain not only enhances cedar’s rich grain but also protects it from weathering, ensuring your outdoor spaces stay stunning for years.
This article explores 10 durable staining techniques for cedar wood exteriors, offering practical steps, expert tips, and insights to help you achieve a long-lasting finish. Each method is designed to maximize protection and charm, whether you’re refreshing a deck or staining new siding. With these techniques, you’ll keep your cedar wood thriving outdoors—let’s dive in!
- Clean Thoroughly Before Staining
Start with a clean cedar surface to ensure the stain sticks well and lasts longer. Dirt, mildew, and old finishes can block stain absorption, leading to peeling or uneven color.
Inspired by professional woodworking prep, this step sets the foundation for durability.
- Wash cedar with a mild soap and water mix using a soft brush or sponge.
- Rinse thoroughly with a garden hose and let it dry completely (24-48 hours).
- For stubborn mildew, use a cedar-safe cleaner or a diluted bleach solution.
- Sand lightly with 80-grit sandpaper to remove greyed wood or rough spots.
- Wipe with a damp cloth to remove dust before staining.
Pro Technique Tip: Test for dryness by splashing water—if it beads, wait longer.
Budget Consideration: Use household soap and skip pricey specialty cleaners.
- Choose a High-Quality Penetrating Stain
Opt for a penetrating oil-based or water-based stain designed for exteriors to ensure durability. These stains soak into cedar, protecting it from moisture and UV rays better than surface coatings.
Drawing from industry standards, this choice boosts long-term performance.
- Pick a stain labeled “exterior” with UV inhibitors and water repellents.
- Go for semi-transparent or solid stains for more coverage and protection.
- Avoid cheap stains—they often lack the additives needed for outdoor durability.
- Test a small area first to check color and absorption on cedar.
- Look for brands with proven longevity, like Cabot or Behr.
Pro Technique Tip: Apply a sample on scrap cedar to see how it weathers over a week.
Budget Consideration: Buy in bulk for larger projects to save per gallon.
- Apply Stain in Thin, Even Coats
Use thin, even coats to build a durable finish that won’t peel or crack over time. Thick layers can trap moisture in cedar, reducing lifespan and causing flaking.
Inspired by expert staining practices, this method ensures deep penetration.
- Use a natural-bristle brush or staining pad for smooth, controlled application.
- Work in small sections, following the wood grain to avoid overlap marks.
- Wipe off excess stain with a clean rag after 10-15 minutes to prevent pooling.
- Apply 1-2 coats, letting each dry fully (check label, usually 4-24 hours).
- Avoid spraying for large areas—brushing penetrates better for durability.
Pro Technique Tip: Back-brush after applying to work stain deeper into cedar.
Budget Consideration: Use an old brush or pad instead of buying new tools.
- Stain on a Cool, Dry Day
Time your staining for cool, dry weather to ensure the stain cures properly and lasts. Heat or humidity can cause uneven drying, while rain can ruin a fresh coat.
Based on outdoor finishing best practices, this technique maximizes adhesion.
- Check the forecast—aim for 50-75°F with low humidity and no rain for 48 hours.
- Avoid direct sunlight, which can dry stain too fast and cause blotching.
- Work in the morning or late afternoon for cooler temps and better control.
- Test cedar’s moisture with a meter (below 15%) or wait after rain.
- Cover nearby plants or surfaces to protect from drips.
Pro Technique Tip: Stain in the shade by working around the sun’s position.
Budget Consideration: Plan ahead to avoid costly re-dos from bad weather.
- Sand Between Coats for Smoothness
Lightly sand between stain coats to smooth the cedar surface and improve durability. This removes raised grain or imperfections, allowing better stain adhesion for a longer-lasting finish.
Inspired by fine woodworking, this step enhances protection and appearance.
- Use 120-grit sandpaper after the first coat dries fully (check stain label).
- Sand lightly by hand, following the grain to avoid scratches.
- Wipe off dust with a tack cloth or damp rag before the next coat.
- Focus on rough spots or areas where cedar fibers lifted after staining.
- Apply a second coat immediately after sanding for best results.
Pro Technique Tip: Sand outdoors with a breeze to keep dust away.
Budget Consideration: Reuse sandpaper from other projects if it’s still sharp.
- Seal Edges and Ends First
Stain the edges and ends of cedar pieces before the main surface to prevent moisture sneaking in. These areas soak up water fast, so sealing them boosts durability.
Drawing from carpentry wisdom, this technique protects cedar’s vulnerable spots.
- Use a small brush to coat cut ends, edges, and joints thoroughly.
- Let stain soak in for 5-10 minutes, then wipe off excess to avoid buildup.
- Work on these areas first, then move to larger surfaces for even drying.
- Double-check knots or cracks—cedar’s natural flaws need extra attention.
- Apply this step to siding, deck boards, or fence posts before assembly.
Pro Technique Tip: Dab extra stain into cracks with a cloth for full coverage.
Budget Consideration: Use leftover stain from other projects for small areas.
- Use a UV-Protective Topcoat
Add a clear UV-protective topcoat over your stain to shield cedar from sun damage, which can fade its warm tones and weaken the wood. This extra layer extends durability outdoors.
Inspired by exterior maintenance pros, this step locks in color and strength.
- Choose a clear exterior topcoat with UV blockers, like polyurethane or spar urethane.
- Apply with a brush or roller after the stain dries fully (24-48 hours).
- Use thin coats, sanding lightly with 220-grit between layers for smoothness.
- Check compatibility with your stain—oil-based topcoats work best with oil stains.
- Reapply every 2-3 years to keep cedar vibrant and protected.
Pro Technique Tip: Test the topcoat on a small cedar piece to ensure no yellowing.
Budget Consideration: Buy a small can for spot use rather than a gallon.
- Avoid Overloading with Stain
Apply just enough stain to penetrate cedar without overloading it, preventing a sticky or uneven finish that wears off quickly. Over-saturation can trap moisture and reduce durability.
Based on staining best practices, this technique ensures a tough, lasting coat.
- Dip your brush or pad lightly, tapping off excess before applying.
- Spread stain thinly, watching for cedar to absorb it within 10-15 minutes.
- Wipe away any unabsorbed stain with a clean rag to avoid a tacky surface.
- Stick to 1-2 coats—more can clog cedar’s pores and weaken protection.
- Work in manageable sections to keep control and consistency.
Pro Technique Tip: Use a timer to track wiping time for even results.
Budget Consideration: Stretch your stain further by avoiding waste.
- Maintain with Regular Re-Staining
Re-stain cedar every 2-3 years to maintain durability and keep it looking fresh. Regular upkeep prevents weathering and extends the life of your exterior finish.
Inspired by long-term wood care, this technique preserves cedar’s beauty.
- Inspect cedar yearly for fading, peeling, or water damage signs.
- Clean with a mild soap solution and rinse before re-staining.
- Sand lightly with 120-grit to remove greyed wood or loose stain.
- Apply a single maintenance coat of the original stain, following the grain.
- Focus on high-wear areas like decks or fences facing sun and rain.
Pro Technique Tip: Match the original stain color and type for seamless touch-ups.
Budget Consideration: Buy stain in bulk upfront to cover future maintenance.
- Prep with a Wood Conditioner
Use a wood conditioner before staining to even out cedar’s porous surface, ensuring a uniform, durable finish. This step prevents blotching and helps stain penetrate consistently.
Drawing from woodworking prep techniques, it’s a game-changer for lasting results.
- Apply a cedar-safe conditioner with a brush or cloth, following product instructions.
- Let it soak in for 10-15 minutes, then wipe off excess with a clean rag.
- Stain within 1-2 hours while the conditioner is still active for best adhesion.
- Focus on knots and grainy areas that soak up stain unevenly.
- Test on a small cedar scrap to confirm the conditioner’s effect.
Pro Technique Tip: Thin the conditioner with water if cedar absorbs too fast.
Budget Consideration: Use a small bottle for spot prep instead of a large jug.
Conclusion
Staining cedar wood exteriors doesn’t have to be a chore—with the right techniques, you can achieve a durable, beautiful finish that stands up to the elements. This article has explored 10 proven methods, from thorough cleaning to regular maintenance, each designed to protect cedar’s natural charm while enhancing its longevity. Whether you’re staining a deck, fence, or siding, these steps ensure your cedar stays vibrant and strong outdoors.