12 Live Edge Wood Projects to Craft
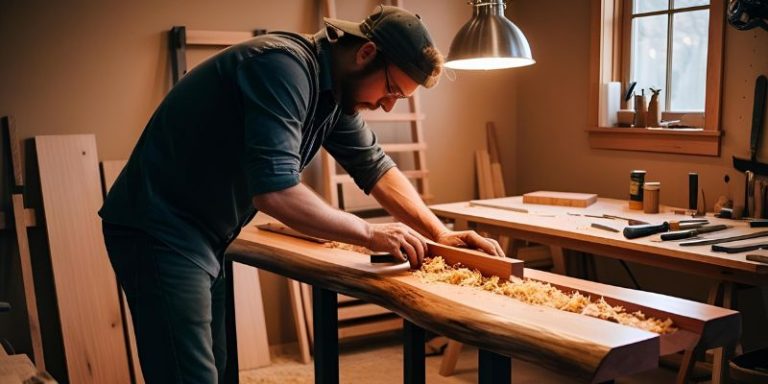
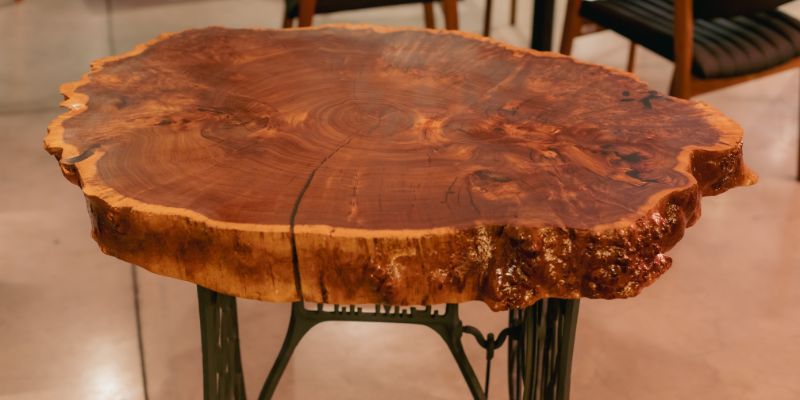
Live edge wood, with its untouched, natural edges and stunning grain, turns any crafting project into a work of art. Each slab tells a story through its unique shape and texture, making it a perfect material for DIY projects that blend rustic charm with organic beauty. Whether you’re using cedar, oak, walnut, or another species, live edge wood invites you to craft something truly special—pieces that bring nature’s warmth into your home or garden.
This article explores 12 live edge wood projects you can craft, offering inspiration, step-by-step tips, and design ideas to create functional and eye-catching items. These projects range from beginner-friendly to slightly more involved, all celebrating the wood’s raw edges and natural character. Grab a live edge slab, some basic tools, and let’s craft something amazing!
Live Edge Wood Coasters: Rustic Drink Bases
Craft live edge wood coasters to add a touch of nature to your tabletops. These small, simple projects highlight the wood’s organic edges while protecting surfaces with rustic flair.
Inspired by lodge and minimalist styles, they’re quick and giftable.
- Cut a thin live edge slab (e.g., cedar or walnut) into 4×4-inch pieces.
- Sand both sides smooth with 120-220 grit sandpaper, keeping edges natural.
- Seal with food-safe mineral oil or polyurethane for durability.
- Burn a small design like a leaf or initial for a personal touch.
- Stack with twine or craft a cedar holder for a complete set of 4-6.
Pro Crafting Tip: Use a band saw for clean cuts if shaping rounds.
Budget Consideration: Source scraps from larger live edge slabs.
Live Edge Wood Key Holder: Entryway Charm
Make a live edge wood key holder to keep your keys organized with rustic style. This small craft uses the wood’s natural edge as a decorative highlight for your entryway.
Drawing from farmhouse and naturalist aesthetics, it’s both useful and charming.
- Cut a live edge slab (e.g., oak) to 12×4 inches, sanding the top smooth.
- Seal with a clear coat to protect and enhance the wood’s grain and scent.
- Attach 3-4 metal hooks along the bottom with screws or glue.
- Mount on the wall with anchors or adhesive strips for easy setup.
- Burn or paint “Keys” or a small arrow for added character.
Pro Crafting Tip: Pre-drill holes for hooks to avoid splitting the wood.
Budget Consideration: Use leftover wood and hooks from other projects.
Live Edge Wood Serving Tray: Natural Hosting
Craft a live edge wood serving tray to bring rustic elegance to your gatherings. The raw edges make it a standout piece for serving snacks, drinks, or breakfast in bed.
Inspired by artisanal and farmhouse designs, this project is functional and beautiful.
- Select a live edge slab (e.g., 1x12x18 inches) like maple or cherry.
- Sand the top smooth with 80-220 grit, sealing with food-safe polyurethane.
- Attach metal or rope handles to the ends with screws or strong adhesive.
- Keep the live edges intact for a rugged, organic look.
- Use on a coffee table or ottoman for a rustic centerpiece.
Pro Crafting Tip: Reinforce handles with wood glue for extra strength.
Budget Consideration: Repurpose a slab from a local woodworker’s offcuts.
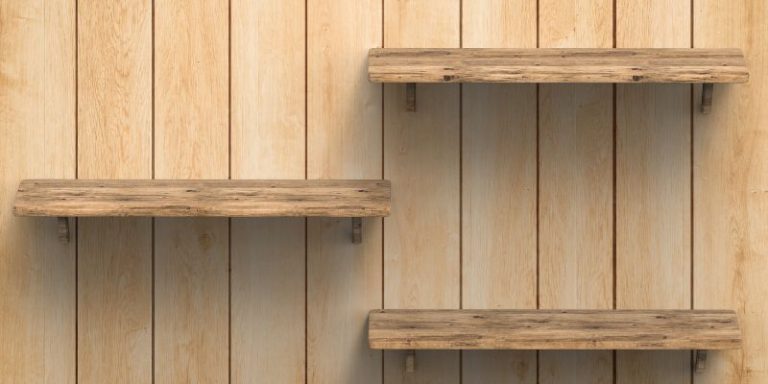
Live Edge Wood Wall Shelf: Organic Display
Build a live edge wood wall shelf to showcase decor or books with natural beauty. Its irregular edges add warmth and texture, making it a craft worth displaying.
Drawing from Scandinavian and rustic styles, this project is simple yet impactful.
- Cut a live edge slab (e.g., walnut) to 12-24 inches long, sanding the top.
- Seal with a clear coat to preserve the wood’s natural tones and edges.
- Attach L-brackets or floating hardware underneath with screws.
- Mount on a wall with anchors, ensuring it’s level and secure.
- Style with plants, photos, or small baskets for a cozy vibe.
Pro Crafting Tip: Use a level during mounting to keep the shelf straight.
Budget Consideration: Opt for smaller slabs or scraps from sawmills.
Live Edge Wood Picture Frame: Rustic Snapshot
Craft a live edge wood picture frame to display photos or art with organic charm. The natural edges frame your memories in a unique, handcrafted way.
Inspired by vintage and country aesthetics, this project adds warmth to walls.
- Cut four live edge strips (e.g., 1×8 inches) from a slab like cedar, mitering corners.
- Sand smooth, seal with a clear coat, and assemble with wood glue and nails.
- Add a glass front and backing for a 4×6 or 5×7 photo, securing with clips.
- Attach twine or a hanger to the back for wall display.
- Prop on a shelf or hang in a gallery-style cluster.
Pro Crafting Tip: Clamp corners while glue dries for tight joints.
Budget Consideration: Use thrift store glass and cedar scraps.
Live Edge Wood Plant Stand: Green Accent
Make a live edge wood plant stand to elevate your potted plants with rustic flair. Its natural edges frame greenery beautifully, perfect for indoor or outdoor spaces.
Drawing from biophilic and modern rustic designs, this craft is quick and stylish.
- Cut a live edge slab (e.g., 1x10x10 inches) like oak, sanding the top smooth.
- Seal with outdoor polyurethane for exterior use or clear coat for indoors.
- Attach three or four short legs (6-8 inches) cut from the same slab with screws.
- Place a small pot or succulent on top for a natural display.
- Use in a corner, on a porch, or by a window for organic charm.
Pro Crafting Tip: Angle legs slightly outward for better stability.
Budget Consideration: Use scrap wood for legs and a small slab.
Live Edge Wood Cutting Board: Kitchen Art
Create a live edge wood cutting board for a rustic kitchen essential that doubles as decor. Its natural edges make it a standout piece for chopping or serving.
Inspired by country and artisanal styles, this project is practical and eye-catching.
- Choose a thin live edge slab (e.g., 1x10x16 inches) like maple or walnut.
- Sand both sides with 120-220 grit, sealing with food-safe mineral oil.
- Maintain the live edge for a unique, organic shape.
- Add a small handle by drilling a hole and threading twine for hanging.
- Use for slicing or serving cheese and bread at gatherings.
Pro Crafting Tip: Rub with beeswax after oiling for extra protection.
Budget Consideration: Source scraps from larger live edge projects.
Live Edge Wood Clock: Rustic Timepiece
Craft a live edge wood clock to blend natural beauty with functionality. Its raw edges make it a unique wall accent that tells time with rustic charm.
Drawing from minimalist and woodland aesthetics, this project is a fun craft.
- Cut a live edge slab (e.g., 12×12 inches) into a round or irregular shape.
- Sand smooth, seal with a clear coat, and drill a center hole for clock hands.
- Attach a battery-powered clock mechanism from a craft store with glue or screws.
- Burn or paint numbers or markers along the edge for readability.
- Hang with a picture hanger or prop on a mantel.
Pro Crafting Tip: Use bold, contrasting clock hands for easy visibility.
Budget Consideration: Buy affordable clock kits online or reuse old ones.
Live Edge Wood Candle Holder: Warm Glow
Make a live edge wood candle holder to bring rustic light to your space. The natural edges enhance the wood’s warmth, perfect for cozy evenings.
Inspired by cabin and lodge designs, this craft is small and simple.
- Cut a live edge block (e.g., 4x4x2 inches) from a slab like cedar.
- Sand smooth, seal with a clear coat, and drill a 1.5-inch hole for a tea light.
- Keep the live edge intact for an organic, handcrafted look.
- Add a burned design like a star or wave around the hole for charm.
- Place on a table or shelf, grouping with other decor for effect.
Pro Crafting Tip: Use a Forstner bit for a clean, precise candle hole.
Budget Consideration: Use cedar scraps and repurpose tea lights.
Live Edge Wood Wall Hook: Rustic Hanger
Craft a live edge wood wall hook to hang coats or bags with natural style. Its raw edge adds rustic warmth to small spaces like entryways or bathrooms.
Drawing from industrial and farmhouse aesthetics, this project is quick and useful.
- Cut a live edge slab (e.g., 6×4 inches) like oak, sanding the top smooth.
- Seal with a clear coat to protect and highlight the wood’s grain.
- Attach a single metal or wooden hook in the center with a screw.
- Mount on the wall with anchors or adhesive for easy installation.
- Burn a small label like “Hang” or an arrow for personality.
Pro Crafting Tip: Pre-drill the hook hole to prevent wood splitting.
Budget Consideration: Use leftover wood and hooks from bulk packs.
Live Edge Wood Trinket Box: Natural Keepsake
Create a live edge wood trinket box to store small treasures with rustic charm. The natural edges make it a unique, handcrafted piece for your dresser or shelf.
Inspired by artisanal and cottage styles, this craft adds warmth and function.
- Cut a live edge slab (e.g., 1x6x8 inches) for the base and sides.
- Sand smooth, seal with a clear coat, and assemble with wood glue and nails.
- Add a hinged lid from another live edge piece for a seamless look.
- Line with felt or fabric for a soft interior, securing with adhesive.
- Use for jewelry, keys, or mementos, placing in a cozy spot.
Pro Crafting Tip: Clamp pieces while glue dries for tight, sturdy joints.
Budget Consideration: Repurpose small slabs and hinges from old projects.
Live Edge Wood Plant Marker: Garden Craft
Craft live edge wood plant markers to label your garden with rustic charm. These small stakes use the wood’s natural edges to add an organic touch to pots or beds.
Drawing from countryside and gardening aesthetics, this project is easy and practical.
- Cut live edge strips (e.g., 6×1 inches) from a slab like cedar or oak.
- Sand smooth, seal with outdoor polyurethane to resist weather.
- Burn or paint plant names (e.g., “Rosemary,” “Basil”) with a fine tip.
- Sharpen one end with a knife or sander to stake into soil.
- Group in a garden or potted arrangement for a natural label set.
Pro Crafting Tip: Use a woodburning tool for crisp, lasting text.
Budget Consideration: Source scraps from live edge slabs and skip extra finishes.
Conclusion
Live edge wood projects offer a fun, creative way to craft unique pieces that showcase nature’s beauty and your DIY skills. This article has explored 12 ideas to craft, from coasters to plant markers, each highlighting the wood’s raw edges and organic charm. Whether you’re crafting for yourself or gifting to others, these projects bring rustic warmth and personality to any space with minimal tools and effort.