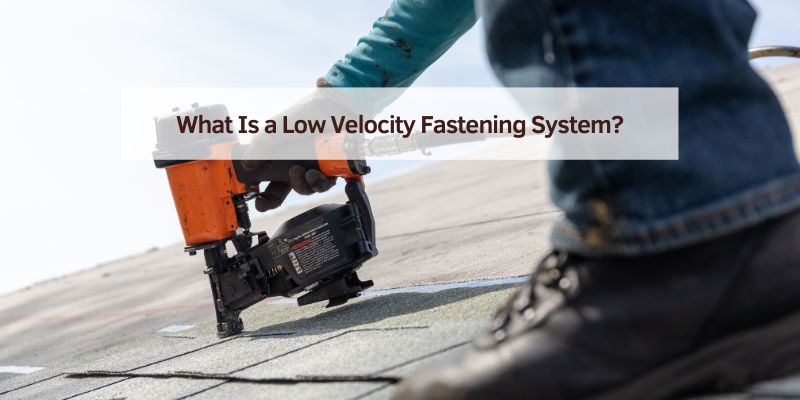
What Is a Low Velocity Fastening System?
Let’s start with the basics. A low-velocity fastening system is a tool that drives fasteners, like pins, studs, or nails—into hard materials like steel, concrete, or wood. Unlike high-speed tools that act like mini-guns, these systems use controlled, slower force to push the fastener in. Think of it like a precise tap instead of a sledgehammer. In automotive work, I’ve used these tools to secure brackets, panels, or even electrical boxes to a car’s frame or a garage’s concrete floor.
The “low velocity” part means the fastener moves at speeds under 300 feet per second. This makes it safer than high-velocity tools, which can shoot fasteners faster and risk ricochets or injury. I remember my first time using a low-velocity tool—it felt powerful but manageable, like driving a car with just the right amount of horsepower.
How Does It Work?
Now, let’s talk about the magic behind it. Most low-velocity fastening systems are powder-actuated tools. They use a small explosive charge, like a .22 caliber cartridge, to create force. When you pull the trigger, the charge ignites, pushing a piston that drives the fastener into the material. It’s like a tiny, controlled explosion. I was nervous the first time I fired one, expecting a loud bang, but it was more of a sharp pop, much quieter than I thought!
Some systems use compressed air or electricity instead of powder, but powder-actuated tools are the most common in automotive shops. They’re great for attaching metal to metal or securing parts to concrete, like when I bolted a lift to my garage floor. The piston design keeps the fastener’s speed low, reducing the chance of it shooting through the material or bouncing back.
Why Use a Low-Velocity Fastening System in Automotive Work?
You might be wondering, “Why not just use a drill or hammer?” Good question! I asked the same thing when I started. Here’s why these tools shine in automotive projects:
- Speed: They’re fast. I can drive a pin into steel in seconds, way quicker than drilling and screwing.
- Strength: The fasteners create super-strong bonds. I used one to attach a steel bracket to my car’s chassis, and it’s rock-solid.
- Versatility: They work on tough materials like steel and concrete, which are common in automotive settings. I’ve used them for everything from securing tool racks to mounting car parts.
- Precision: The low velocity means better control. I don’t worry about cracking materials or missing my mark.
- Safety: Compared to high-velocity tools, these are less likely to cause injury. I feel confident using them even in tight spaces.
I once helped a friend set up his garage for auto repairs. We used a low-velocity tool to fasten metal tracks to the concrete floor for a storage system. It took us half the time it would’ve with traditional methods, and the results were sturdy as heck.
Types of Low-Velocity Fastening Systems
Not all low-velocity fastening systems are the same. I’ve tried a few, and each has its own vibe. Here’s what you’ll find:
- Powder-Actuated Tools: These are the heavy hitters. They use .22 or .27 caliber charges and are perfect for steel and concrete. I own a Hilti DX 351, which is a beast for automotive shop setups.
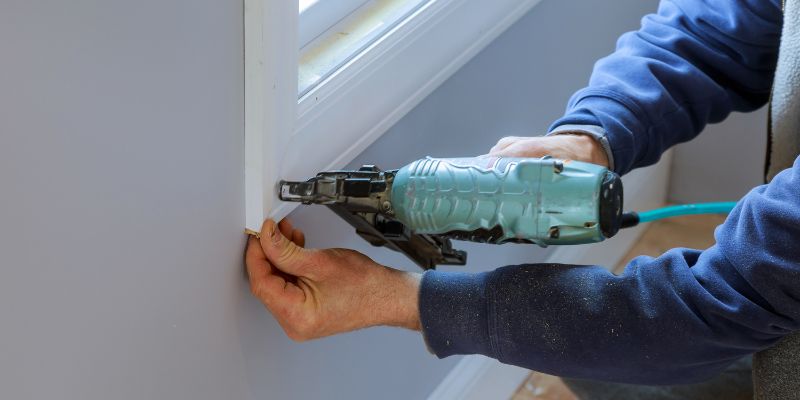
- Pneumatic Tools: These run on compressed air. They’re lighter and quieter but need an air compressor. I borrowed one for a small job and loved how easy it was to handle.
- Battery-Powered Tools: These are newer and use electricity. They’re portable but less common for heavy-duty automotive tasks. I haven’t used one much, but they’re great for lighter jobs.
- Single-Shot vs. Semi-Automatic: Single-shot tools fire one fastener at a time, while semi-automatic ones let you load multiple fasteners. I prefer single-shot for precision, but semi-automatic is faster for big projects.
Each type has its place. For automotive work, powder-actuated tools are the go-to because cars and garages often involve steel and concrete.
Common Automotive Applications
Let’s get practical. Where do these tools fit in your automotive world? I’ve used them in tons of ways, and here are some common uses:
- Mounting Brackets: Attaching steel brackets to a car’s frame or chassis is a breeze. I used one to secure a custom exhaust bracket, and it held up under heavy vibration.
- Securing Shop Equipment: Need to bolt a lift, workbench, or tool rack to a concrete floor? This is your tool. I fastened my hydraulic lift in under an hour.
- Installing Panels: For custom builds, like adding interior panels or soundproofing, these tools drive pins into metal frames quickly. I helped a buddy install sound-deadening panels in his van conversion.
- Anchoring Storage: In my garage, I used a low-velocity tool to attach metal tracks for shelving. It’s perfect for organizing tools and parts.
- Electrical Work: Securing conduit or electrical boxes to steel or concrete is common in shop setups. I used one to mount a breaker box for my shop’s lighting.
These tools are like a Swiss Army knife for automotive projects. They handle tasks that would otherwise need multiple tools and hours of work.
Safety First: Tips for Using These Tools
I can’t stress this enough—safety is huge with these tools. They use explosives or high pressure, so you’ve got to be careful. I learned this the hard way when I fired a pin without wearing safety glasses. Luckily, no harm done, but I never skip safety gear now. Here’s what I do:
- Wear Protective Gear: Safety glasses, gloves, and ear protection are a must. I keep a pair of clear goggles in my toolbox.
- Check the Tool: Inspect it for damage before using. I once found a cracked barrel and swapped it out to avoid trouble.
- Use the Right Fastener: Match the pin or stud to the material. I used a short pin for thin steel once, and it didn’t hold—lesson learned.
- Follow the Manual: Each tool has specific instructions. I read my Hilti’s manual cover to cover before firing it.
- Get Training: Some states require a license for powder-actuated tools. I took a quick certification course at a local hardware store, and it was worth it.
- Clear the Area: Make sure no one’s nearby when you fire. I always shout a quick “heads up” before pulling the trigger.
Safety isn’t just about you—it’s about everyone around you. Take it seriously, and you’ll be fine.
Cost of Low-Velocity Fastening Systems in the USA
Let’s talk money. I know you’re wondering how much this will set you back. Costs vary depending on the tool, brand, and accessories. Here’s what I’ve found in 2025:
- Tools: Entry-level powder-actuated tools cost $100–$300. I got a basic Ramset for $150, and it’s great for small jobs. High-end models, like Hilti or DeWalt, run $400–$800. My Hilti DX 351 was $600 but worth it for heavy use. Pneumatic tools are $200–$500, and battery-powered ones start at $300.
- Fasteners: Pins and studs cost $0.10–$0.50 each, depending on size and material. I buy 100-packs of .300 head pins for about $15. Specialty fasteners, like threaded studs, can hit $1 each.
- Power Loads: .22 or .27 caliber cartridges come in packs of 100 for $10–$20. I use green (level 3) loads for most jobs, costing $12 per pack.
- Accessories: Safety gear, like glasses and gloves, is $10–$50. A carrying case or cleaning kit runs $20–$100. I spent $30 on a cleaning kit, and it keeps my tools in top shape.
- Total Cost: For a starter setup (tool, fasteners, loads, and gear), expect $200–$500. I spent $300 to get started and added more fasteners as needed. For pro use, you might invest $800–$1,200.
Prices are higher in big cities like New York or LA, but you can save by shopping online at places like Amazon or Home Depot. I snagged a discount on fasteners by buying in bulk. Here’s a quick cost breakdown:
| Item | Cost Range | Details |
|---|---|---|
| Powder-Actuated Tool | $100–$800 | Basic models for DIY; high-end for pros. |
| Pneumatic Tool | $200–$500 | Needs a compressor; lighter and quieter. |
| Fasteners (100-pack) | $10–$50 | Pins, studs; price varies by size/material. |
| Power Loads (100-pack) | $10–$20 | .22/.27 caliber; color-coded for power level. |
| Safety Gear | $10–$50 | Glasses, gloves, ear protection. |
| Accessories | $20–$100 | Glasses, gloves, and ear protection. |
Pros and Cons of Low-Velocity Fastening Systems
Like any tool, these have ups and downs. I’ve weighed them over the years of use, and here’s my take:
Pros:
- Fast and efficient for tough materials.
- Strong, reliable fastening for automotive parts.
- Safer than high-velocity tools.
- Versatile for shop and vehicle projects.
- Minimal setup compared to drilling.
Cons:
- Powder-actuated tools need training or licensing.
- Ongoing costs for fasteners and loads.
- Not ideal for soft materials like wood alone.
- Can be noisy, even with low velocity.
- The upfront cost is higher than basic tools.
For automotive work, the pros outweigh the cons, especially if you’re tackling steel or concrete often.
Choosing the Right Tool for Your Needs
Picking the right tool can feel overwhelming. I spent weeks researching before buying mine. Here’s how to decide:
- Project Type: For heavy-duty tasks like mounting lifts or chassis brackets, go powder-actuated. For lighter jobs, like attaching trim, try pneumatic or battery-powered.
- Budget: Start with a $100–$200 tool if you’re a DIYer. Pros might want a $400+ model for durability. I started cheap and upgraded later.
- Brand: Hilti, Ramset, and DeWalt are top-notch. I trust Hilti for pro work, but use Ramset for budget jobs.
- Frequency of Use: If you’re using it weekly, invest in a semi-automatic model. For occasional use, a single-shot is fine.
- Material: Check what you’re fastening. Steel and concrete need powder-actuated; lighter materials might work with pneumatic.
I recommend renting a tool first to test it. I rented a Ramset for $30 a day before buying, and it helped me choose.
Maintenance and Care Tips
To keep your tool running smoothly, you need to maintain it. I learned this after my first tool jammed because I skipped cleaning. Here’s what I do:
- Clean After Use: Remove powder residue with a cleaning kit. I spend 5 minutes cleaning my Hilti after every job.
- Lubricate: Add a drop of oil to moving parts monthly. I use the oil that came with my tool.
- Store Properly: Keep it in a dry, cool place. I store mine in a hard case to avoid dust and moisture.
- Inspect Regularly: Check for wear or cracks. I found a loose screw once and tightened it before it caused trouble.
- Replace Parts: Swap out worn pistons or barrels. I replaced my Ramset’s piston for $20, and it’s like new.
Good maintenance saves money and keeps your tool safe. I set a reminder to check mine every month.
My Personal Experience: A Game-Changer in My Shop
When I first got into automotive repair, I relied on drills and screws for everything. Then a friend introduced me to a low-velocity fastening system. I borrowed his Ramset to secure a workbench to my garage floor, and I was hooked. It was so fast and strong! Since then, I’ve used these tools for countless projects—mounting car lifts, attaching chassis brackets, even setting up shelving. My Hilti DX 351 is my go-to now, but I still pull out my old Ramset for smaller jobs.
One time, I helped a buddy build a custom truck bed. We used a powder-actuated tool to fasten steel supports to the frame. It took us half a day, and the result was bulletproof. The only hiccup was when I used the wrong power load, and the pin didn’t sink fully. After switching to a stronger load, it was smooth sailing. These tools have saved me hours and made my work stronger and safer.
Alternatives to Low-Velocity Fastening Systems
Sometimes, a low-velocity tool isn’t the best fit. I’ve tried other methods, and here’s how they stack up:
- Drills and Screws: Great for wood or thin metal but slow for steel or concrete. I use them for light tasks but switch to fastening systems for heavy jobs.
- Adhesives: Strong for some applications, like bonding panels, but not as reliable for structural work. I tried glue for a bracket once, and it failed under stress.
- Welding: Super-strong but needs skill and equipment. I weld for big projects but use fastening systems for quick fixes.
- High-Velocity Tools: Faster but riskier. I avoid them in tight spaces or with brittle materials.
For most automotive tasks, low-velocity tools strike the perfect balance of speed, strength, and safety.
Where to Buy in the USA
Ready to get one? I’ve shopped around, and here are my go-to spots:
- Home Depot/Lowe’s: Great for entry-level tools and fasteners. I bought my Ramset at Home Depot for $150.
- Amazon: Tons of options and deals. I got a 100-pack of pins for $12 online.
- Specialty Stores: Places like Fastenal or Grainger have pro-grade tools. I bought my Hilti from Fastenal.
- Rental Centers: Try before you buy. I rented from Sunbelt Rentals for $30 a day.
- Used Market: eBay or Craigslist can have deals, but check for damage. I snagged a used DeWalt for $200, and it’s solid.
Compare prices and read reviews. I always check customer feedback to avoid duds.
Conclusion
So, what’s the deal with a low-velocity fastening system? It’s a powerful, safe, and versatile tool that’s perfect for automotive work, from securing car parts to setting up your shop. I’ve gone from a skeptical newbie to a huge fan, using these tools to make my projects faster and stronger. Whether you’re bolting brackets to a chassis or anchoring a lift to concrete, a low-velocity fastening system gets the job done with precision and ease.
Sure, it comes with a learning curve and some costs, but the time and effort you save make it worth every penny. If you’re ready to level up your automotive game, grab one of these tools, follow safety rules, and start fastening like a pro. I’m rooting for you to tackle your next project with confidence—now go make something awesome!
FAQs
What is a low-velocity fastening system used for?
It drives pins or studs into hard materials like steel or concrete. In automotive work, I use it to secure brackets, panels, or shop equipment.
Is it safe to use a low-velocity fastening system?
Yes, if you follow safety rules. I always wear glasses and gloves, check the tool, and clear the area before firing.
How much does a low-velocity fastening system cost?
A basic tool costs $100–$300, with pro models up to $800. Fasteners and loads are $10–$50 per 100. I spent $300 on my starter setup.
Do I need a license to use one?
Some states require training or a license for powder-actuated tools. I took a short course to be safe and legal.
Can I use it on wood?
It’s best for steel or concrete, but you can use it on wood with the right fasteners. I’ve done it for shop setups but prefer screws for wood alone.
What’s the difference between low and high velocity tools?
Low-velocity tools drive fasteners under 300 feet per second, making them safer and more precise. High velocity is faster but riskier. I stick with low velocity for control.