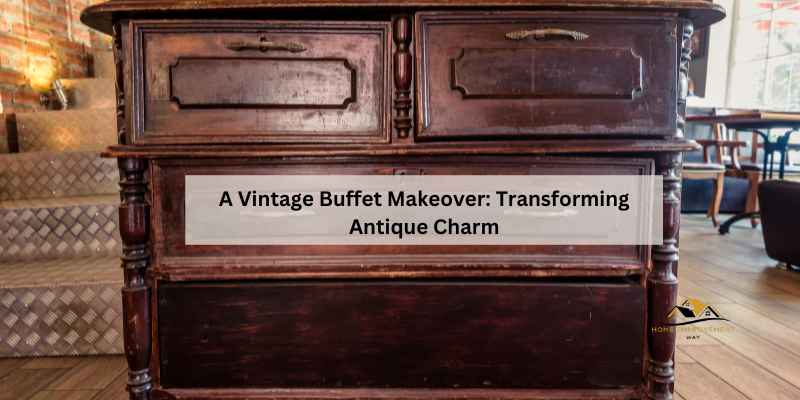
A Vintage Buffet Makeover: Transforming Antique Charm
Revive a vintage buffet with a chic makeover by refinishing, repainting, and updating its hardware. Explore step-by-step tutorials for a DIY project to transform your antique piece into a stylish and charming furniture item.
Learn how to clean, repair, prime, paint, and finish your buffet to give it a new life while preserving its classic appeal. Discover tips and tricks for setting up a visually pleasing buffet table with varying heights, clear organization, and strategic layouts for a stunning display.
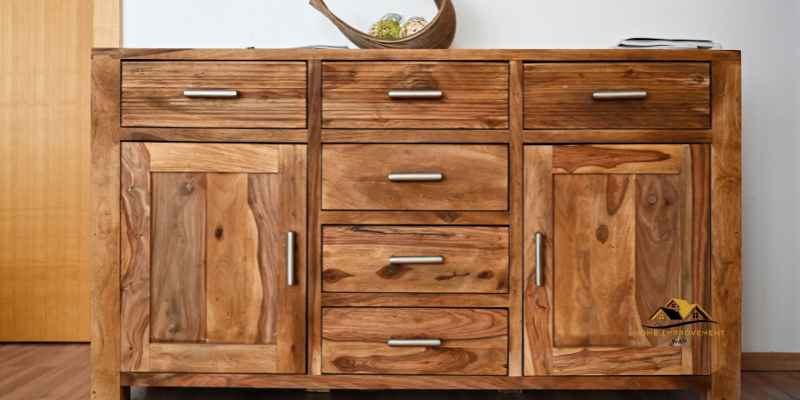
Elevate your dining room decor with a beautifully refurbished vintage buffet that adds character and elegance to your space.
Why Transform A Vintage Buffet
Transforming a vintage buffet allows you to breathe new life into a timeless piece of furniture. Whether it’s a family heirloom or a flea market find, giving a vintage buffet a makeover can revitalize its beauty and functionality. It provides an opportunity to unleash your creativity, personalize your space, and contribute to sustainable living by repurposing existing furniture. With a touch of creativity and the right techniques, you can transform a vintage buffet into a stunning focal point for any room in your home.
Antique Charm
Vintage buffets exude an antique charm that adds character to any space. The time-worn patina and unique craftsmanship of a vintage buffet evoke a sense of nostalgia and history. By transforming a vintage buffet, you can preserve its authentic appeal while enhancing its aesthetic to suit your personal style and decor preferences.
Making A Statement
A vintage buffet makeover provides the opportunity to make a bold statement in your home. Whether you opt for a distressed shabby chic look or a modern elegant finish, the transformed buffet can become a conversation piece that reflects your individuality. Its versatility allows it to serve as a functional storage solution while also enhancing the overall ambiance of the room.
Choosing The Right Buffet
When embarking on a vintage buffet makeover project, the first crucial step is selecting the perfect buffet that aligns with your style and functional needs. Let’s delve into the key aspects to consider when choosing the right buffet.
Styles And Materials
Styles: Vintage buffets come in various styles such as traditional, mid-century modern, rustic, or French provincial. Each style offers a unique aesthetic appeal, so choose one that complements your existing decor.
Materials: Consider the materials used in the buffet construction, such as wood, metal, or a combination of both. Opt for high-quality materials that ensure durability and enhance the vintage charm of the piece.
Size And Functionality
Size: Measure the available space in your dining room or kitchen to determine the ideal size for the buffet. Ensure it fits comfortably in the designated area without overwhelming the room.
Functionality: Evaluate the storage needs you have, whether you require ample drawer space, shelving for display items, or a combination of both. Choose a buffet that offers the right balance of storage and display options.
Prepping The Buffet

Transform your vintage buffet with a stunning makeover, reviving its charm and elegance. Discover antique buffet makeover ideas and DIY tips, from repainting with chalk paint to reviving old hardware. Get inspired by vintage buffet transformations and learn how to make a buffet table look exceptional with strategic layouts and varying heights.
Removing Hardware
Start by carefully removing all the hardware from the vintage buffet.
Cleaning And Sanding
Thoroughly clean the buffet to remove any dirt or grime. Next, sand the surface to create a smooth base for painting.
Making Repairs
Inspect the buffet for any damages and make necessary repairs such as filling in cracks or fixing loose joints.
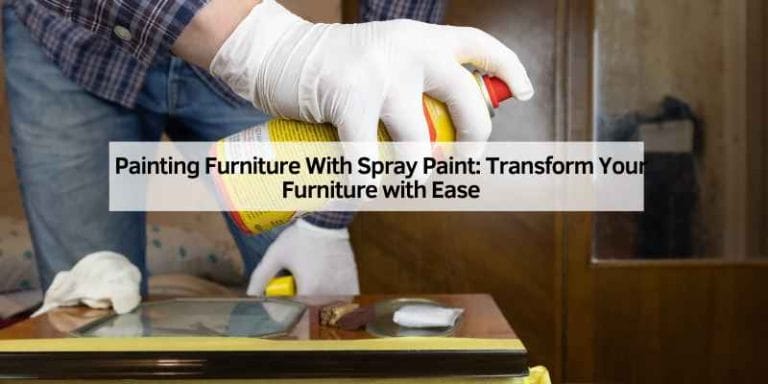
Painting The Buffet
When it comes to giving an antique buffet a new lease on life, painting it can be a transformative and cost-effective solution. A vintage buffet makeover through painting allows for creativity and personalization, turning a dated piece into a stunning focal point in any room. Here are some essential tips and techniques for painting a vintage buffet to achieve a beautiful and durable finish.
Choosing The Right Paint
Before diving into the painting process, it’s crucial to select the right type of paint for the vintage buffet. Chalk paint is a popular choice for its matte finish and ease of application. It adheres well to various surfaces and requires minimal preparation, making it ideal for a DIY project. Acrylic or latex paint can also be used, offering a wide range of color options and a durable finish when properly sealed. Consider the desired look and the buffet’s intended use when selecting the paint type and color.
Priming And Painting Techniques
Priming the buffet is essential, especially if the original finish is dark or if the wood has a tendency to bleed through paint. A quality primer ensures better adhesion and prevents stains from seeping through the new paint. After priming, it’s time to apply the paint using the chosen method, whether it’s with a brush, roller, or sprayer. Ensure even coverage, and consider using multiple thin coats for a smooth and professional result. Sanding between coats can help achieve a flawless finish and promote paint adhesion.
Additionally, sealing the painted buffet with a protective topcoat is crucial for long-lasting durability. A clear polyurethane or furniture wax can provide a protective layer and enhance the paint’s longevity, especially in high-traffic areas. Choose a topcoat that suits the paint type used and follow the manufacturer’s instructions for proper application.
Staining And Finishing The Top
Transforming a vintage buffet with a stunning stain and finish for a chic makeover. Reviving the charm of the piece with expert refinishing techniques in this furniture flip. A step-by-step tutorial on enhancing the buffet’s appeal through careful restoration.
When it comes to vintage furniture makeovers, staining and finishing the top is an essential step that can take your piece from drab to fab. In this section, we will cover sanding and staining techniques, as well as applying a protective finish to ensure your newly stained top stays looking beautiful for years to come.
Sanding and Staining Techniques
Before staining the top, it’s essential to sand it down to remove any existing finish or imperfections. Start with a coarse-grit sandpaper and work your way up to a finer grit to achieve a smooth surface. Be sure to remove all dust and debris before moving on to staining.
When it comes to staining, there are many options to choose from, including oil-based, water-based, and gel stains. Each type has its pros and cons, so be sure to do your research before selecting one that best suits your project.
Apply the stain in thin coats, using a brush or cloth, and wipe away any excess. Allow the stain to dry completely before applying a protective finish.
Applying a Protective Finish
Once your stain has dried, it’s crucial to apply a protective finish to prevent damage and maintain its beauty. There are many options to choose from, including polyurethane, varnish, and wax.
Polyurethane is a popular choice for its durability and ease of application. It comes in a variety of finishes, from matte to high gloss, and can be applied with a brush or sprayer.
Varnish is another protective finish that provides a hard, durable surface. It’s available in both water-based and oil-based formulas and can be applied with a brush or sprayer.
Wax is a natural and traditional protective finish that provides a soft, subtle shine. It’s applied with a soft cloth and should be reapplied periodically to maintain its protective properties.
In conclusion, staining and finishing the top is a crucial step in any vintage furniture makeover. By following these sanding and staining techniques and applying a protective finish, you can transform your piece into a beautiful and functional addition to any space.
Hardware And Accessories
When giving a vintage buffet a makeover, attention to hardware and accessories can make a significant impact on the overall aesthetic. From selecting new hardware to adding decorative accessories, these elements play a crucial role in transforming the piece into a stunning focal point in any space.
Choosing New Hardware
When it comes to selecting new hardware for a vintage buffet, it’s essential to consider the style and design of the piece. Choosing hardware that complements the overall theme and color scheme can elevate the visual appeal. Opt for handles, knobs, or pulls that align with the desired aesthetic, whether it’s a sleek modern look or a more traditional vintage vibe.
Adding Decorative Accessories
Enhancing the visual appeal of a vintage buffet can be achieved by adding decorative accessories. Incorporating elements such as ornate drawer liners, stylish drawer pulls, or decorative trims can infuse character and charm into the piece. Additionally, incorporating complementary accessories like antique-style key tassels or vintage-inspired embellishments can further enhance the overall look and feel of the buffet.
Setting Up And Styling The Buffet
Setting up and styling a vintage buffet can elevate the entire look of your space, adding a touch of elegance and charm. Whether you are hosting a dinner party or simply updating your home decor, the way you set up and style your buffet can make a significant impact.
Tips For Setting A Buffet Table
- 1. Vary the height of your display items for visual interest.
- 2. Use table runners or decorative cloths to add texture and color.
- 3. Group similar items together for a cohesive look.
Choosing Complementary Decor
When styling your vintage buffet, it’s essential to choose decor pieces that complement the overall aesthetic. Consider incorporating:
- 1. Vintage glassware or china for a classic touch.
- 2. Fresh flowers or greenery to add a pop of color.
- 3. Candle holders or lanterns for a warm ambiance.
Frequently Asked Questions
How Do I Update An Antique Buffet?
To update an antique buffet, first, remove hardware and clean the piece thoroughly. Apply a primer coat to prevent bleed-through. Use quality paint and brushes for a fresh look. Optionally, add decorative elements like new hardware or drawer liners for a personalized touch.
How To Make A Buffet Table Look Nice?
To make a buffet table look nice, vary the height of dishes, use strategic layouts, and create an Instagram-worthy backdrop. Identify dishes, offer support, and position utensils strategically for an appealing look. Additionally, consider varying the heights of serving platters and using decorative elements for a stylish touch.
How Do You Dress Up A Buffet?
To dress up a buffet, vary serving platter heights, use pedestal pieces, tiered plate holders, and decorative items for a visually appealing display.
What Color To Paint A Sideboard?
When painting a sideboard, consider neutral colors like white, gray, or navy for a classic look. Alternatively, go bold with a pop of color like teal or mustard for a modern touch. Ensure the color complements your decor and personal style.
Conclusion
The vintage buffet makeover showcased the power of creativity and resourcefulness. The transformation not only breathed new life into the piece but also reflected the owner’s personal style. The step-by-step tutorial and tips provided valuable insights for anyone looking to undertake a similar project.
The success of this makeover is a testament to the timeless appeal of vintage furniture and the endless possibilities for reinvention.