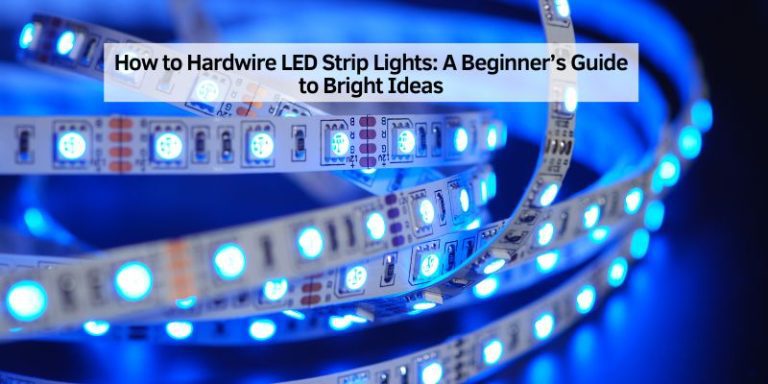
Are LED Strip Lights Good for Under Kitchen Cabinets? Essential Guide
Quick Summary: Yes, LED strip lights are excellent for under kitchen cabinets! They offer beautiful task lighting, enhance ambiance, are energy-efficient, and easy to install for a DIY-friendly upgrade that transforms your kitchen’s look and functionality without breaking the bank.
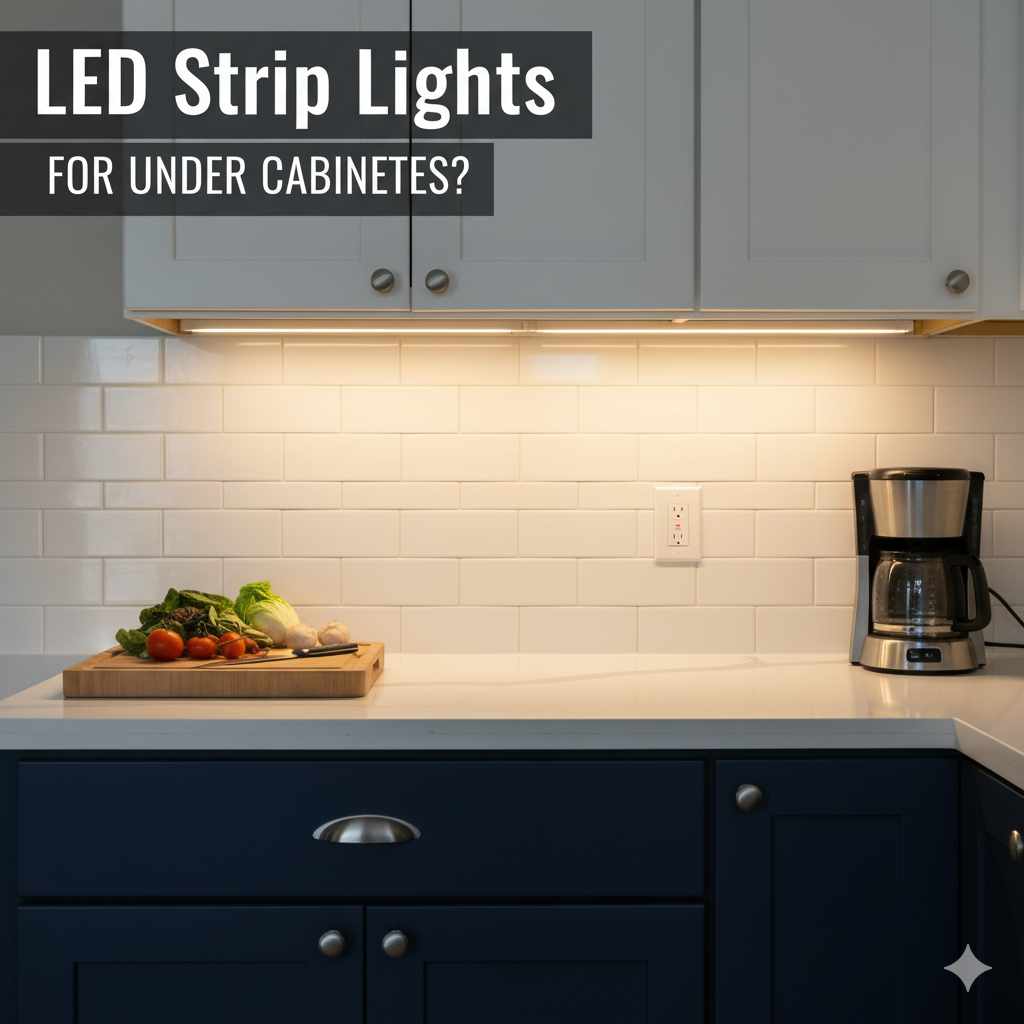
Hey there, DIY enthusiasts and home improvers! Are you looking to give your kitchen a little sparkle and make your countertops shine brighter? Maybe you’ve noticed those dark corners under your cabinets and wondered if there’s a simple, affordable way to fix that. You’re in the right place! Many homeowners find themselves asking, “Are LED strip lights good for under kitchen cabinets?” The answer is a resounding yes, and I’m here to walk you through exactly why and how you can do it yourself. We’ll cover everything from choosing the right lights to getting them installed smoothly, so you can feel confident and proud of your beautiful, well-lit kitchen.
Why LED Strip Lights Shine Under Kitchen Cabinets
Let’s talk about why these flexible lights have become so popular for kitchens. They’re not just a pretty addition; they bring real benefits to your cooking space. Think of it as giving your kitchen a professional makeover without the hefty price tag or the hassle of calling in contractors. We’ll explore the advantages that make them a top choice for many homeowners.
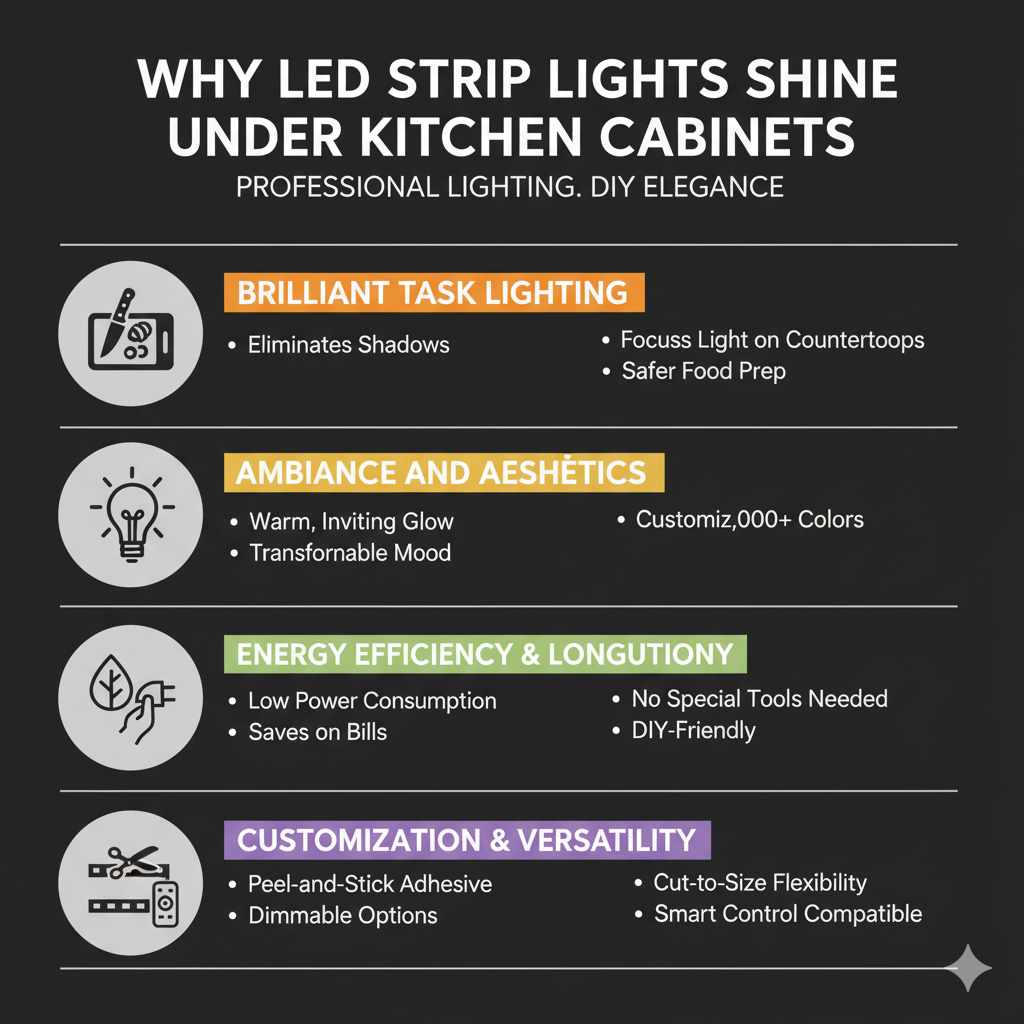
Brilliant Task Lighting
One of the biggest advantages of under-cabinet LED strips is the practical lighting they provide. When you’re chopping vegetables, measuring ingredients, or trying to read a recipe, good lighting is crucial. Standard overhead lights often cast shadows that can make these tasks tricky. LED strips direct light exactly where you need it – right onto your countertops. This focused illumination makes food prep safer and more enjoyable. No more squinting or moving around to avoid shadows!
Ambiance and Aesthetics
Beyond just function, LED strip lights add a wonderful ambiance to your kitchen. They create a warm, inviting glow that can transform the mood of your space. Whether you’re cooking a family dinner or entertaining friends, the subtle under-cabinet lighting adds a touch of elegance. You can often choose from different color temperatures (warm white, cool white, etc.) and even colors to match your style or holiday decorations.
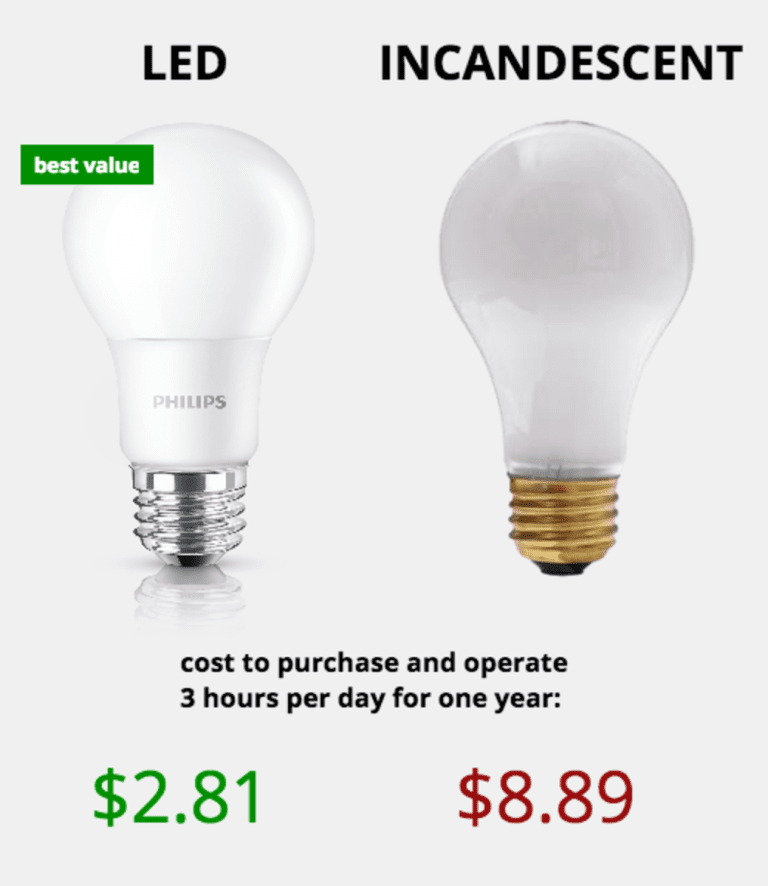
Energy Efficiency and Longevity
LEDs are incredibly energy-efficient, which is great for your electricity bill and the environment. They use significantly less power than older lighting technologies. Plus, they last a very long time – often tens of thousands of hours. This means you won’t be constantly replacing bulbs or strips, saving you money and the hassle of maintenance over the years. It’s a smart, long-term investment for your home.
Easy Installation
The DIY-friendly nature of LED strip lights is a huge plus. Most kits come with adhesive backing, making installation as simple as peeling and sticking. You usually don’t need any special tools or electrical knowledge, which is perfect for beginners. We’ll get into the installation steps soon, but rest assured, it’s a project many homeowners can tackle with confidence.
Customization and Versatility
LED strip lights come in various lengths and can often be cut to size, allowing you to perfectly fit them under any cabinet. You can also find options with dimmers, remote controls, or even smart features that let you control them with your phone. This versatility means you can tailor the lighting to your exact needs and preferences.
Types of LED Strip Lights for Under Cabinets
When you start looking for LED strip lights, you’ll notice there are a few different types. Understanding these will help you pick the best fit for your kitchen. It’s not complicated, and knowing these options will make your shopping trip much smoother.
1. LED Strip Kits
These are the most common and beginner-friendly option. Kits typically include:
- The LED strip(s)
- A power adapter
- A remote control (often with dimmer and color options)
- Connectors and mounting clips
They are designed to be plug-and-play, making them ideal for straightforward installations.
2. Smart LED Strips
These are a step up, offering Wi-Fi or Bluetooth connectivity. You can control them via a smartphone app or voice commands with smart home assistants like Alexa or Google Assistant. This allows for more advanced customization, scheduling, and integration with other smart home devices. While slightly more complex to set up initially, they offer a lot of convenience.
3. Color Changing (RGB) vs. Single Color
- Single Color: These strips emit a single, fixed color, usually in a warm white or cool white. They are great for consistent task lighting and a classic look.
- RGB (Red, Green, Blue): These strips can produce a wide spectrum of colors, including various shades of white. You can change the color using a remote or app, allowing you to set different moods for different occasions.
For under-cabinet lighting, a warm white or neutral white is often preferred for functional lighting, but RGB offers fun customization.
4. Waterproof vs. Non-Waterproof
Most kitchen environments are fine with non-waterproof (IP20 rated) strips. However, if your kitchen is particularly humid or you plan to install them near a sink where splashes are more likely, consider waterproof (IP65 or higher) strips. These usually have a silicone coating.
What You’ll Need: A Simple Tool & Material List
Gathering your supplies before you start is key to a smooth DIY project. Don’t worry, you likely won’t need a workshop full of tools for this! Here’s a basic list to get you ready:
Essential Materials:
- LED strip light kit (choose based on your needs: length, color, features)
- Measuring tape
- Scissors (for cutting the strip if needed, only cut at designated marks)
- Cleaning supplies (rubbing alcohol and a clean cloth)
- Pencil (for marking placement)
Optional, But Helpful Tools:
- Wire strippers (if you need to connect wires manually, though most kits are plug-and-play)
- Drill (for hiding wires, if necessary)
- Small screwdriver (for some mounting clips)
- Level (to ensure straight placement)
- Wire staples or cable clips (to tidy up wires)
Remember to always check the specific instructions that come with your LED strip kit, as some may have slightly different components or recommendations.
Step-by-Step Guide: Installing LED Strip Lights Under Your Cabinets
Let’s get down to business! Installing LED strip lights under your kitchen cabinets is a rewarding project that you can absolutely do yourself. Follow these simple steps, and you’ll have beautiful new lighting in no time.
Step 1: Plan Your Layout and Measure
Before you peel any backing, figure out exactly where you want the lights. Measure the length of each cabinet section you want to illuminate. Most LED strips can be cut to size, but only at specific marked points (usually indicated by a scissor icon). Plan where the power cord will run to the outlet and how you’ll conceal any excess wire.
Step 2: Clean the Cabinet Surface
This is a crucial step for the adhesive to stick properly. Use rubbing alcohol and a clean cloth to thoroughly wipe down the underside of your cabinets where the strips will go. Make sure the surface is dry and free of dust, grease, or any other residue. A clean surface ensures your lights stay put!
Step 3: Cut the LED Strips (If Necessary)
If your cabinet length isn’t a perfect match for the strip, you’ll need to cut it. Find the designated cutting marks on the strip (often small copper pads or scissor symbols). Use sharp scissors to make a clean cut. Be precise; you can’t reattach cut pieces without special connectors.
Step 4: Peel and Stick the LED Strips
Carefully peel off the backing from the adhesive tape on the LED strip. Start at one end and press the strip firmly onto the cleaned cabinet surface. Work your way along, applying even pressure. For curved corners, you might need to use the provided connectors or bend the strip gently if it’s designed for it. Some kits come with small mounting clips that you can screw in for extra security, especially if the adhesive doesn’t feel strong enough.
Step 5: Connect the Power and Test
Connect the LED strip to its power adapter and plug it into a nearby outlet. Before you tidy up wires, turn on the lights using the remote or switch. Check that all sections are lit and that the colors (if applicable) are correct. This is your chance to fix any issues while everything is still accessible.
Step 6: Tidy Up the Wires
This is where you make it look professional! Use cable clips, wire staples, or raceways to neatly secure and hide the power cord and any connecting wires. You can often run wires along the back of cabinets or use small drilled holes (if you’re comfortable with that) to pass wires through to the next section or to the power outlet. The goal is to make the wiring as invisible as possible.
Step 7: Final Touches
Once everything is connected and tidied up, do one last test. Admire your work! You’ve successfully installed under-cabinet LED lighting. Enjoy the new look and improved functionality of your kitchen.
Pros and Cons of Under-Cabinet LED Strip Lights
Like any home improvement project, there are always things to consider. Let’s break down the good and the not-so-good so you can make an informed decision.
Pros:
- Enhanced Visibility: Excellent for task lighting, reducing shadows on countertops.
- Aesthetic Appeal: Adds a modern, sophisticated look and warm ambiance.
- Energy Efficient: Uses less electricity than traditional lighting.
- Long Lifespan: LEDs last for many years, reducing maintenance.
- DIY Friendly: Most installations are simple and require minimal tools.
- Customizable: Available in various lengths, colors, and brightness levels.
- Affordable: Relatively inexpensive for the impact they provide.
Cons:
- Adhesive Durability: Adhesive backing might fail over time, especially in humid or hot areas. (Can be reinforced with clips).
- Wire Management: Hiding wires neatly can sometimes be challenging.
- Color Consistency: Cheaper or older strips might have slight color variations between batches.
- Heat: While LEDs produce less heat than incandescent bulbs, some can still get warm, especially if not properly ventilated.
- Finding the Right Color Temperature: Choosing between warm white, cool white, or daylight can be a matter of personal preference.
Choosing the Right Color Temperature
The “color temperature” of your LED lights affects the mood and appearance of your kitchen. It’s measured in Kelvin (K). Here’s a quick guide:
| Color Temperature (Kelvin) | Description | Best For |
|---|---|---|
| 2700K – 3000K | Warm White (Similar to incandescent bulbs) | Creating a cozy, inviting atmosphere. Good for general ambiance. |
| 3500K – 4000K | Neutral White / Bright White | A good balance for task lighting and general use. Makes colors appear more natural. |
| 4500K – 6500K | Cool White / Daylight | Mimics natural daylight. Excellent for task areas where high visibility is needed (like food prep zones), but can feel stark for some. |
For under kitchen cabinets, a 3000K to 4000K range is often ideal, providing good visibility without being too harsh. If you want to be able to change the mood, consider RGBW (Red, Green, Blue, White) strips, which give you both colored light and dedicated white light options.
Safety Tips for Installation
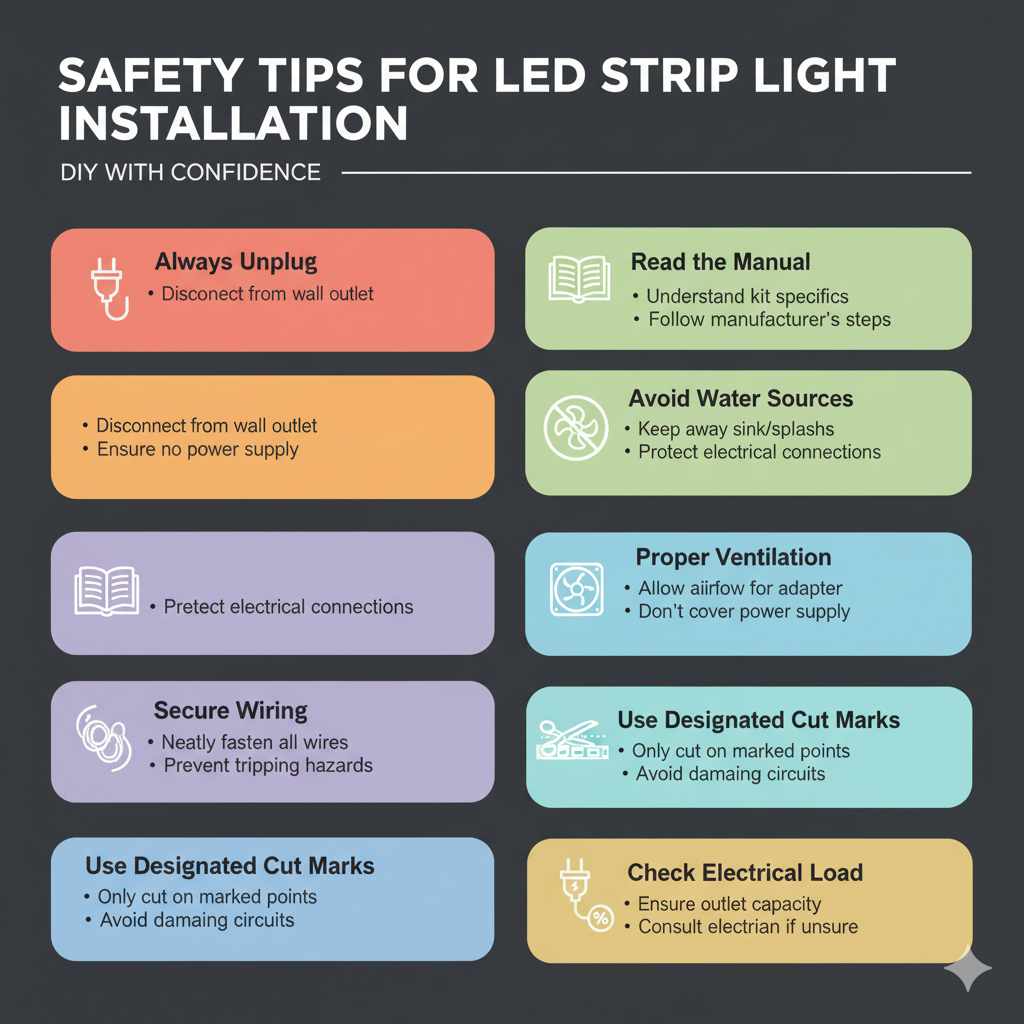
Safety is always my top priority when tackling DIY projects, and this one is no different. While LED strip lights are generally safe for DIY installation, a few precautions will ensure everything goes smoothly and safely.
- Always Unplug: Before you start cutting, sticking, or connecting anything, make sure the power adapter is unplugged from the wall outlet.
- Read the Manual: Every kit is slightly different. Take a few minutes to read the manufacturer’s instructions carefully.
- Avoid Water Sources: While some strips are waterproof, it’s best to keep electrical connections away from direct water sources like the sink basin.
- Proper Ventilation: Ensure the power adapter has some airflow around it. Don’t cover it with insulating material.
- Secure Wiring: Make sure all wires are neatly secured and not hanging where they can be tripped over or pulled.
- Use Designated Cut Marks: Never cut the LED strip anywhere other than the marked points. Cutting elsewhere will damage the circuit.
- Check Electrical Load: Ensure your outlet can handle the combined load of your new lights and other appliances plugged into the same circuit. For most small LED strip installations, this is rarely an issue, but it’s good practice to be aware. If you’re unsure about your home’s electrical capacity, consult a qualified electrician. You can learn more about basic electrical safety from resources like the U.S. Consumer Product Safety Commission (CPSC).
Frequently Asked Questions (FAQ)
Are LED strip lights bright enough for kitchen tasks?
Yes, when chosen correctly! Look for strips with a higher lumen output per foot and a color temperature (like neutral or cool white) that enhances visibility. They are designed to provide excellent task lighting directly onto your countertops.
How long do LED strip lights last under kitchen cabinets?
LEDs are very durable and energy-efficient. Most high-quality LED strips can last anywhere from 25,000 to 50,000 hours or more. This means if you use them for about 3-4 hours a day, they can last for 15-20 years!
Can I install LED strip lights myself without drilling?
Absolutely! Most LED strip kits come with strong adhesive backing. If you ensure the cabinet surface is clean and properly prepared, the adhesive should hold them securely. For added peace of mind, many kits also include small mounting clips that can be screwed in without major drilling.
How do I hide the wires from LED strip lights?
You can hide wires by running them along the back edge of cabinets, using adhesive cable clips to secure them neatly, or routing them through small pre-drilled holes (if you’re comfortable with that). Many kits also come with wire covers or raceways for a cleaner look.
What is the difference between LED strip lights and LED puck lights for under cabinets?
LED strip lights are long, flexible, and provide continuous lines of light, ideal for covering larger areas and creating a seamless glow. Puck lights are individual, circular lights that offer more focused beams of light and are often installed in specific spots. Strips are generally easier for full-cabinet coverage and DIY installation.
Do LED strip lights get hot?
LEDs produce very little heat compared to older lighting technologies. While they can get slightly warm to the touch, they are generally safe for installation under cabinets and won’t damage the wood or pose a fire hazard when installed correctly. Ensure there’s some air circulation around the power supply.
Conclusion
So, to wrap it all up, are LED strip lights good for under kitchen cabinets? Without a doubt, they are a fantastic choice! They offer a brilliant combination of functionality, style, and energy efficiency that’s hard to beat. For a beginner-friendly DIY project, they provide an incredible transformation, making your kitchen brighter, more inviting, and more enjoyable to work in. From enhancing task lighting for all your culinary adventures to adding that perfect ambiance for evening relaxation, these lights deliver. You can easily customize them to fit your space and your aesthetic, all while saving energy and money in the long run. With a little planning and the simple steps we’ve covered, you can confidently install them yourself and enjoy a beautifully lit kitchen for years to come. Happy lighting!