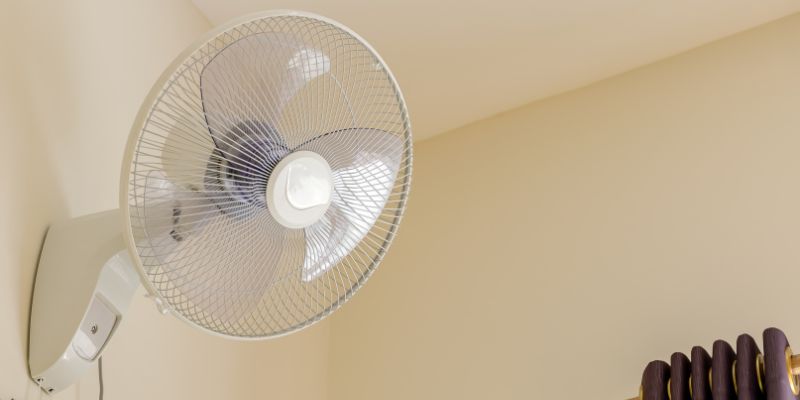
How to Mount a Wall Fan: A Step-by-Step Guide for Homeowners
Mounting a wall fan means bolting a bracket into a stud, or a drywall anchor rated for the fan’s weight plus a 15% safety margin, not just any screw. Undersized anchors are the top reason wall fans work loose or fall, and drywall anchor types range from about 20 pounds to 150 pounds or more depending on type. This guide covers picking the mounting spot, matching the anchor to your wall, and the full 6-step install.
Quick Answer
Mount a wall fan 7 to 9 feet up, into a wall stud whenever possible. On drywall without a stud, use a toggle bolt or heavy-duty anchor rated above the fan’s weight plus about 15 percent margin — plastic anchors alone (rated near 20 lbs) are not enough for most oscillating wall fans.
Why Choose a Wall Fan?
I love wall fans because they’re practical and stylish. Unlike floor fans, they don’t take up precious space, which is a game-changer in smaller rooms. They also provide focused airflow, perfect for kitchens, bedrooms, or even garages. Plus, wall-mounted fans are great for keeping air moving without cluttering your floor. I’ve found they’re especially handy in my workshop, where I need cooling but don’t want a fan in the way.
Another perk? They’re often more energy-efficient than air conditioners. If you’re looking to cut down on energy bills while staying comfortable, a wall fan is a smart pick. And don’t worry about the installation—it’s easier than you might think!
Picking the Perfect Wall Fan
Before you start drilling holes, you need the right fan. I learned this the hard way when I bought a fan that was too big for my space. Here’s what to consider:
- Size: Measure your room. A small fan works for a bedroom, but a larger one is better for open spaces like a living room.
- Mounting Type: Some fans come with a mounting bracket, while others need a separate kit. Check what’s included.
- Features: Look for oscillation, speed settings, or a remote control. I love my oscillating fan because it spreads air evenly.
- Power Source: Most wall fans plug into an outlet, but some are hardwired. I prefer plug-in models for easier setup.
- Noise Level: Check reviews for noise. A quiet fan is a must for bedrooms.
Pro tip: Choose a fan with a sturdy build. Cheap ones can wobble or make annoying noises over time.
Tools and Materials You’ll Need
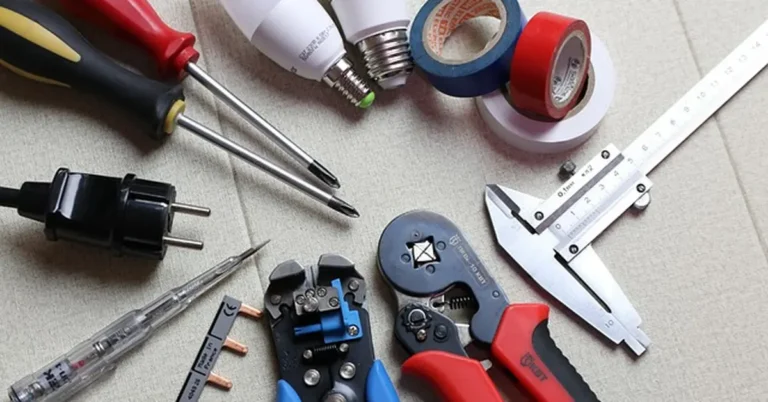
I always gather my tools before starting any project—it saves so much time. For wall fan installation, here’s what I use:
| Item | Purpose |
|---|---|
| Drill | To make holes for mounting screws |
| Screwdriver | To secure the mounting bracket |
| Stud Finder | To locate wall studs for a secure mount |
| Level | To ensure the fan is straight |
| Measuring Tape | To mark the exact mounting spot |
| Pencil | To mark drill points |
| Mounting Hardware | Screws, anchors, or bolts (usually included) |
| Ladder or Step Stool | To reach the mounting area safely |
| Wire Strippers (if hardwired) | For electrical connections |
Double-check that your fan’s mounting hardware matches your wall type—drywall, concrete, or wood. If your kit doesn’t include anchors, grab some from the hardware store.
How Much Weight Can a Drywall Anchor Hold for a Wall Fan?
It depends on the anchor type. Plastic wing anchors are rated for about 20 pounds, sleeve-type molly bolts for 25-50 pounds, and metal toggle bolts for 100-150 pounds or more — heavy-duty toggles can exceed 200 pounds. Weigh your fan (or check the manual) and pick an anchor rated well above that number, since oscillation adds repeated stress a static weight rating doesn’t fully capture.
📊 Drywall anchor capacity varies enormously by type — from around 20 lbs for basic plastic anchors up to 150-200+ lbs for heavy-duty toggle bolts — which is why “just use an anchor” isn’t specific enough advice for a fan that runs unattended for hours. Source: Family Handyman, drywall anchor weight testing
Best Wall Fan Mounting Anchor Pick

TOGGLER SNAPTOGGLE Heavy-Duty Drywall Anchors (20-Pack) – $19.99
A metal toggle-bolt style anchor rated well above the 20-lb plastic-anchor floor this guide flags — the safer pick when mounting into drywall with no stud behind it.
- Best for: mounting a wall fan on drywall with no stud available
- Why we picked it: permanent metal toggle stays in the wall if the fan is ever removed, unlike plastic wings
- Main drawback: requires a slightly larger drilled hole than a basic plastic anchor
Compare more wall anchor options
 Option 1 ALBO 25-Piece Wall Anchor Kit – $13.99
|
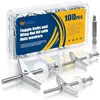 Option 2 weideer 100-Pc Toggle Bolt Kit – $9.99
|
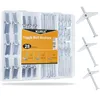 Option 3 KURUI Hollow Wall Toggle Anchors – $9.99
|
As an Amazon Associate we earn from qualifying purchases.
Choosing the Right Spot
Picking the right spot is crucial. I made the mistake of mounting a fan too close to a doorway once, and it was a hassle to move. Here’s what I consider now:
- Height: Mount the fan about 7–9 feet off the ground for the best airflow. Too low, and it might not cool effectively.
- Clearance: Ensure there’s enough space around the fan for it to oscillate. I keep at least 2 feet of clear space.
- Power Access: If it’s a plug-in fan, make sure an outlet is nearby. For hardwired fans, check for existing wiring — see our ceiling fan wiring guide for what that connection generally looks like.
- Wall Strength: Always mount into a stud or use heavy-duty anchors. I use a stud finder to avoid weak spots.
Avoid placing the fan near curtains or furniture—it can block airflow or create a safety hazard.
Safety Precautions
Let’s talk safety precautions because no one wants an accident. I’ve been there, rushing into a project, only to realize I skipped a key step. Here’s what I do to stay safe:
- Turn off the power if you’re dealing with electrical wiring. Flip the breaker to be sure.
- Use a sturdy ladder. I always have someone hold it for me if I’m reaching high.
- Wear safety glasses when drilling to protect your eyes from dust.
- Double-check the fan’s weight against your wall’s capacity. A weak mount can cause the fan to fall.
- Keep kids and pets away from the work area. My dog almost tripped me once while I was carrying tools!
Safety first—it makes the whole process stress-free.
Step-by-Step Wall Fan Installation
Now, let’s get to the fun part—actually mounting the fan! I’ll break it down into simple steps based on my own experience.
Step 1: Mark the Mounting Spot
Grab your measuring tape and pencil. I measure about 7 feet up from the floor and mark the spot. Use a stud finder to locate a stud—this is where you’ll attach the mounting bracket. If you can’t find a stud, plan to use drywall anchors. Hold the bracket against the wall and mark the screw holes with your pencil. I use a level to make sure everything’s straight.
Step 2: Drill Holes
Get your drill ready. I use a bit that matches the size of the screws or anchors. Carefully drill where you marked the holes. If you’re going into drywall, insert anchors now. I tap them gently with a hammer to make sure they’re flush with the wall.
Step 3: Attach the Mounting Bracket
Line up the mounting bracket with the holes. I screw it in using a screwdriver or drill, making sure it’s tight. Give it a gentle tug to confirm it’s secure. A wobbly bracket means trouble later.
“A wobbly bracket always means trouble later — I give every bracket a firm tug test right after installing it, before the fan ever goes on, so a loose mount shows up while it’s still a two-minute fix.”
Step 4: Connect the Wiring (If Hardwired)
If your fan is hardwired, this step is a bit trickier. I always turn off the power first. Follow the fan’s manual to connect the wires—usually, you’ll match black to black, white to white, and green to ground. Use wire nuts to secure them. If you’re not comfortable with wiring, call an electrician. I’ve done this a few times, but I still double-check my connections.
Step 5: Attach the Fan to the Bracket
Most fans slide or snap onto the mounting bracket. I carefully lift the fan and hook it onto the bracket, following the manual’s instructions. Make sure it clicks into place. If it feels loose, check the manual—some fans need an extra screw to lock it in.
Step 6: Test the Fan
Plug in the fan or turn the power back on. I always test it at this point to make sure it works. Turn it on, check the oscillation, and listen for weird noises. If something’s off, double-check the bracket and connections.
Troubleshooting Common Issues
Sometimes, things don’t go perfectly. Here are issues I’ve run into and how I fixed them:
- Fan Wobbles: This usually means the bracket isn’t secure. Tighten the screws or use stronger anchors.
- No Power: For plug-in fans, check the outlet. For hardwired, recheck your wiring connections.
- Loud Noise: This could be a loose blade or a cheap fan. Tighten any screws on the fan itself.
If the fan still doesn’t work, check the manual or contact the manufacturer. I’ve had to do this once, and they were super helpful.
Maintaining Your Wall Fan
Once your fan is up, a little maintenance goes a long way. I clean mine every few months to keep it running smoothly. Here’s what I do:
- Dust the blades with a damp cloth. Dust buildup can slow the fan down.
- Check the screws on the mounting bracket every year to ensure they’re tight.
- Lubricate the motor if the manual recommends it. I use a light machine oil for this.
- Store the fan properly if you take it down for the season. I wrap mine in a cloth to keep it dust-free.
Benefits of a Wall Fan in Different Rooms
I’ve installed wall fans in a few spots around my house, and each room benefits differently:
- Kitchen: Keeps air moving while cooking. I mounted one near my stove to stay cool during summer meals.
- Bedroom: A quiet fan helps me sleep better. I love the gentle breeze at night.
- Garage: Perfect for hot days when I’m working on projects. It keeps the air fresh.
- Living Room: An oscillating fan cools the whole family during movie nights.
No matter the room, a wall fan adds comfort without taking up space — and if you’d rather compare it against a ceiling-mounted option first, see our general fan mounting guide. For hub-level browsing of every fan and lighting fixture project on the site, visit our Lighting & Ceiling Fan section.
Frequently Asked Questions
How high should I mount my wall fan?
I recommend mounting it 7–9 feet off the ground. This height gives you the best airflow without obstructing your space. Use a measuring tape and level to get it just right.
Can I install a wall fan on drywall?
Yes, but you need to be careful. I always try to mount into a stud for strength. If that’s not possible, use heavy-duty drywall anchors rated above the fan’s weight to support it.
How much weight can a drywall anchor hold for a wall fan?
It depends on the type: plastic wing anchors handle about 20 pounds, sleeve-type molly bolts 25-50 pounds, and metal toggle bolts 100-150 pounds or more. Check your fan’s actual weight and pick an anchor rated well above it.
Do I need an electrician to install a wall fan?
For plug-in fans, no electrician is needed—just mount and plug it in. For hardwired fans, I suggest hiring an electrician if you’re not comfortable with wiring. Safety first!
How do I clean a wall-mounted fan?
I unplug the fan and wipe the blades with a damp cloth. For stubborn dust, I use a mild all-purpose cleaner on a cloth, never spraying it directly onto the motor housing.
Can a wall fan be used outdoors?
Some wall fans are designed for outdoor use, but not all. I check the product specs for weather resistance before mounting one outside. Always keep it sheltered from rain.
What if my wall fan is noisy?
A noisy fan usually means loose screws or a cheap model. I tighten all the screws and check the blades. If it’s still loud, it might be time to replace it.
How long does it take to mount a wall fan?
For me, it takes about 30–45 minutes. If you’re new to this, give yourself an hour to take it slow and get it right.
Conclusion
Mounting a wall fan is one of those home projects that feels so rewarding. I remember the first time I installed one—it transformed my stuffy garage into a comfy workspace. By picking the right fan, matching your anchor to your wall type, and following these steps, you can enjoy cool, fresh air in no time. Whether you’re cooling a bedroom or a workshop, a wall-mounted fan is a game-changer.
Sponsored / affiliate links. As an Amazon Associate I earn from qualifying purchases. I may earn additional commission from eligible campaigns.