Best Adhesive to Glue Vinyl to Wood Securely
Picking the Best Adhesive to Glue Vinyl to Wood Securely can feel a bit tricky, especially when you’re just starting out with DIY projects. You want your vinyl to stick well and stay that way, right? It’s totally normal to wonder which glue will work best.
Don’t worry, this guide will make it super simple. We’ll walk through the easiest ways to get your vinyl and wood together for good. Ready to see how easy it can be?
Choosing the Best Adhesive to Glue Vinyl to Wood
Finding the Best Adhesive to Glue Vinyl to Wood Securely is key for any project where you need a strong, lasting bond. This is a common question because vinyl and wood have different surfaces and properties. Vinyl is often smooth and flexible, while wood can be porous and textured.
A glue that works for one might not work for the other. Getting this right means your project won’t fall apart later. We’ll explore different types of adhesives and what makes them suitable for this specific job.
Understanding Vinyl and Wood Surfaces
Vinyl, whether it’s craft vinyl or a thicker sheet, usually has a non-porous, plastic-like surface. This means it doesn’t soak up glue easily. Adhesives need to be able to form a strong physical bond or chemical bond with this smooth material.
Wood, on the other hand, is a natural material. It’s porous, meaning it has tiny holes that glue can soak into. This porosity helps glue grip the wood.
However, wood can also expand and contract with changes in humidity and temperature, which can put stress on the bond.
Key Surface Considerations
- Vinyl Surface Smoothness: The slick nature of vinyl requires an adhesive that can grip it firmly without needing to penetrate.
- Wood Porosity and Texture: The open structure of wood allows for good adhesion, but rougher textures might require a thicker glue to fill gaps.
- Flexibility Needs: If either the vinyl or the wood will bend or flex, the adhesive needs to remain flexible too, or the bond will crack.
- Environmental Factors: Exposure to moisture, heat, or direct sunlight can affect the bond. Choose a glue resistant to these conditions if needed.
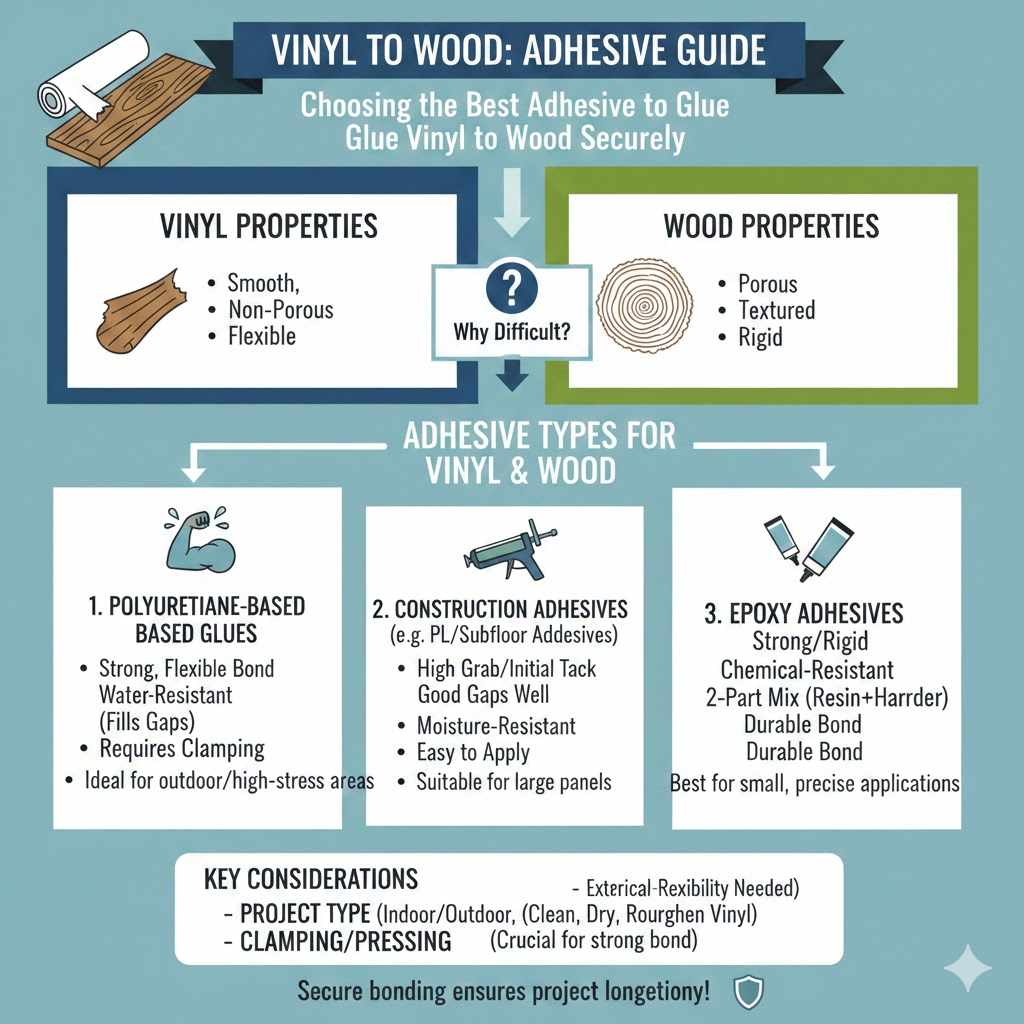
Types of Adhesives for Vinyl to Wood Bonding
There are several types of glues that can work well for sticking vinyl to wood. Each has its own strengths and is better suited for different situations. We will look at some of the most popular and effective options.
1. Cyanoacrylate Adhesives (Super Glue)
Cyanoacrylate, commonly known as super glue, is a fast-acting adhesive. It forms a very strong bond quickly. It works by reacting with moisture on the surfaces to harden.
For vinyl and wood, super glue can be effective if applied thinly and carefully. It’s best for small projects or areas that won’t experience much movement. However, it can become brittle over time and may not withstand impact well.
Some formulations are more flexible than others.
- Pros: Bonds very quickly, creates a strong initial hold, good for precise applications.
- Quick Bonding Speed: Super glue sets in seconds, making it ideal for projects where you need immediate results. This speed is a major advantage for busy crafters.
- High Initial Strength: The bond formed by cyanoacrylate is exceptionally strong right after application. This means you can handle the piece sooner without worry of it coming apart.
- Precision Application: Many super glues come with fine tips, allowing for exact placement and minimal mess. This is useful for detailed work or when you want to avoid excess glue showing.
- Cons: Can be brittle, may not be flexible, fumes can be strong, not ideal for large areas.
- Brittleness: Once cured, super glue can be quite rigid. If the bonded area is bent or stressed, the glue line might crack or shatter.
- Lack of Flexibility: Unlike some other adhesives, super glue doesn’t offer much give. This makes it unsuitable for projects that involve bending or movement.
- Fume Irritation: The vapors released during curing can be strong and irritating to the eyes and respiratory system. Good ventilation is important.
2. Construction Adhesives
Construction adhesives are designed for heavy-duty bonding. They are typically thick, strong, and durable. Many are waterproof and can handle temperature changes well.
These glues are great for larger projects or when you need a bond that will last. They often have a longer set time but create a very strong, permanent bond. They can fill small gaps, which is helpful for uneven surfaces.
- Pros: Extremely strong and durable, waterproof, good for large areas, can fill gaps.
- Exceptional Strength and Durability: Construction adhesives are built to withstand significant stress and time. They form bonds that can last for decades, making them suitable for structural applications.
- Waterproof Properties: Many construction glues are resistant to water and moisture. This makes them a reliable choice for projects that might be exposed to damp conditions or outdoor elements.
- Gap Filling Capability: The thicker nature of construction adhesives allows them to fill small imperfections and gaps between surfaces. This ensures a more complete and secure bond, even on slightly uneven wood.
- Cons: Longer drying time, can be messy, may require clamps for a good bond.
- Extended Drying Time: Unlike faster glues, construction adhesives can take several hours or even a day to fully cure. This requires patience and planning for your project timeline.
- Potential Messiness: Due to their thick consistency, these adhesives can be more challenging to apply neatly. Care must be taken to avoid excess glue oozing out.
- Need for Clamping: To ensure maximum contact and a strong bond while the adhesive cures, applying pressure with clamps is often recommended.
3. Silicone Adhesives and Sealants
Silicone adhesives are known for their flexibility and waterproof properties. They remain flexible even after they cure, which is excellent for materials that might expand or contract.
They form a strong, rubbery bond that can absorb shock and vibration. This makes them a good choice if your project might be moved or subject to any impact. They also provide a good seal against moisture.
- Pros: Very flexible, waterproof, good for vibration absorption, good for outdoor use.
- High Flexibility: Silicone adhesives remain pliable after curing. This quality is invaluable for bonding materials that experience movement, expansion, or contraction, preventing the bond from failing.
- Excellent Waterproofing: They create a watertight seal, making them ideal for items exposed to moisture or used in bathrooms and kitchens. This protection is crucial for longevity.
- Vibration Dampening: The rubbery nature of cured silicone helps to absorb vibrations and shocks. This can be useful for items that might be handled frequently or placed in noisy environments.
- Cons: Can take a long time to cure, may not be suitable for all types of vinyl, can be difficult to paint over.
- Slow Curing Process: Silicone adhesives typically require a significant amount of time, often 24 hours or more, to fully cure and reach maximum strength.
- Compatibility Issues: Not all vinyl types are compatible with silicone. Some silicones may not adhere well to certain plasticizers or finishes found on vinyl.
- Painting Challenges: Once cured, silicone can be difficult to paint over. It often requires special primers or paints, and even then, adhesion might be poor.
4. Fabric Glues with Vinyl Compatibility
Some fabric glues are formulated to work on a variety of materials, including plastics like vinyl, and porous surfaces like wood. These glues are often flexible.
They are a good option if you need a bond that can withstand some bending or movement. They are generally easy to use and clean up. Always check the product label to ensure it states compatibility with both vinyl and wood.
- Pros: Flexible bond, easy to use, good for craft projects, often non-toxic.
- Flexible Bonding: Many fabric glues are designed to remain pliable after drying. This is beneficial for crafts where the materials might bend or shift slightly.
- User-Friendly Application: These glues are typically designed for ease of use, with simple application methods and often easy cleanup with water.
- Craft Project Suitability: They are a popular choice for various crafting applications due to their reliable performance on mixed materials.
- Cons: May not be as strong as construction adhesives, might require clamping, durability can vary.
- Moderate Strength: While good for crafts, fabric glues may not offer the extreme strength required for heavy-duty or structural applications.
- Potential Need for Clamping: For optimal adhesion, especially on smooth surfaces, applying gentle pressure or clamping might be necessary during the drying period.
- Variable Durability: The long-term durability of fabric glues can differ between brands and formulations, so selecting a quality product is important.
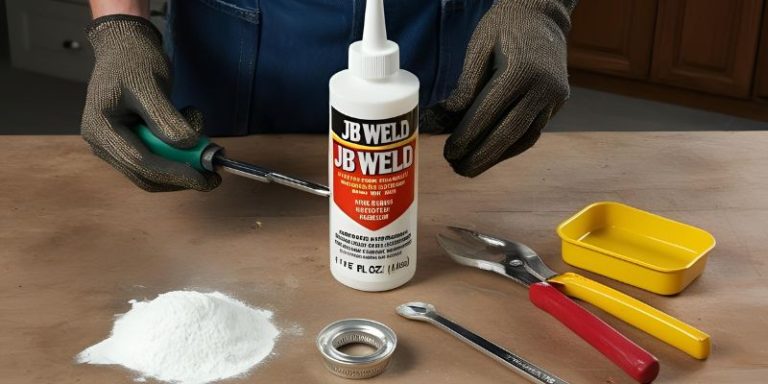
5. Epoxy Adhesives
Epoxy adhesives are a two-part system that you mix together. Once mixed, they create a very strong, rigid, and durable bond. They are excellent for strong permanent bonds.
Epoxies are waterproof and resistant to chemicals and temperature changes. They fill gaps well and adhere to a wide range of materials, including vinyl and wood. They are a top choice for demanding projects.
- Pros: Extremely strong, durable, waterproof, chemical resistant, fills gaps.
- Unmatched Strength: Epoxy creates one of the strongest adhesive bonds available. It is ideal for applications where the joint will be under significant stress or bear weight.
- High Durability: The cured epoxy is resistant to wear, impact, and harsh conditions. This ensures a long-lasting bond that can withstand the test of time and use.
- Versatile Resistance: Epoxies offer excellent resistance to water, chemicals, and temperature fluctuations, making them suitable for almost any environment.
- Cons: Requires mixing, has a limited working time, can be messy if not careful.
- Mixing Requirement: Epoxy involves combining two separate components (resin and hardener). This process must be done accurately to achieve the correct curing and strength.
- Limited Working Time: Once mixed, epoxy begins to cure quickly. You have a specific window of time to apply it before it becomes too thick to use effectively.
- Potential for Mess: If not applied carefully, the viscous nature of epoxy can lead to drips and spills, which can be difficult to clean once cured.
Best Adhesive to Glue Vinyl to Wood Securely Based on Project Type
The Best Adhesive to Glue Vinyl to Wood Securely often depends on what you’re making. A decorative sign might need something different than a functional piece that will be handled often. Let’s break it down.
1. Decorative Projects (Signs, Wall Art)
For items that mainly hang on a wall or sit on a shelf, the bond doesn’t need to withstand heavy stress. However, you want it to look neat and stay put.
- Recommended Adhesives:
- Craft Glues or Fabric Glues: These are easy to use, often non-toxic, and provide a decent hold for lighter applications. They are good for adhering vinyl lettering or small vinyl decals to wooden signs.
- Silicone Adhesive: If the project might be exposed to moisture or temperature changes, silicone offers good protection and remains flexible. It’s great for outdoor signs.
- Explanation: For decorative pieces, aesthetics are important. Glues that spread thinly and don’t leave large visible marks are preferred. Flexibility is a plus if the wood has any natural warping.
2. Functional Items (Handles, Furniture Accents)
When the vinyl is applied to a functional item, like a drawer pull with a vinyl inlay or a wooden tool handle with vinyl grip accents, the bond needs to be robust.
- Recommended Adhesives:
- Epoxy Adhesive: This is often the top choice for functional items. It provides an incredibly strong and permanent bond that can withstand significant force, friction, and general wear and tear.
- Construction Adhesive: For larger areas or items that will be handled frequently, a good construction adhesive offers excellent durability and a strong grip.
- Explanation: These items face more stress. The adhesive must be strong enough to prevent the vinyl from peeling or coming off with use. Waterproofing and resistance to abrasion are also important considerations.
3. Outdoor or Wet Environments
Projects intended for outdoor use or areas with high humidity, like garden markers or bathroom decor, require adhesives that can handle moisture and temperature shifts.
- Recommended Adhesives:
- Silicone Adhesive: Its waterproof nature and flexibility make it ideal for outdoor applications. It seals well against moisture and can handle the expansion and contraction of wood.
- Epoxy Adhesive: A high-quality, waterproof epoxy will also perform exceptionally well in wet or outdoor conditions, offering extreme durability.
- Explanation: Moisture is the enemy of many glues. Choosing an adhesive that repels water and maintains its strength in changing weather is crucial for longevity.
4. Projects Requiring Flexibility
If the vinyl or wood might bend, flex, or experience vibrations, the adhesive needs to be able to move with it.
- Recommended Adhesives:
- Silicone Adhesive: This is the champion of flexibility. It forms a rubbery bond that can stretch and bend without breaking.
- Flexible Fabric Glues: Some fabric glues are designed to stay pliable, making them a good choice for crafts that need a bit of give.
- Explanation: Rigid glues will crack if the materials they bond are constantly flexing. Flexible adhesives allow for movement, ensuring the bond remains intact over time.
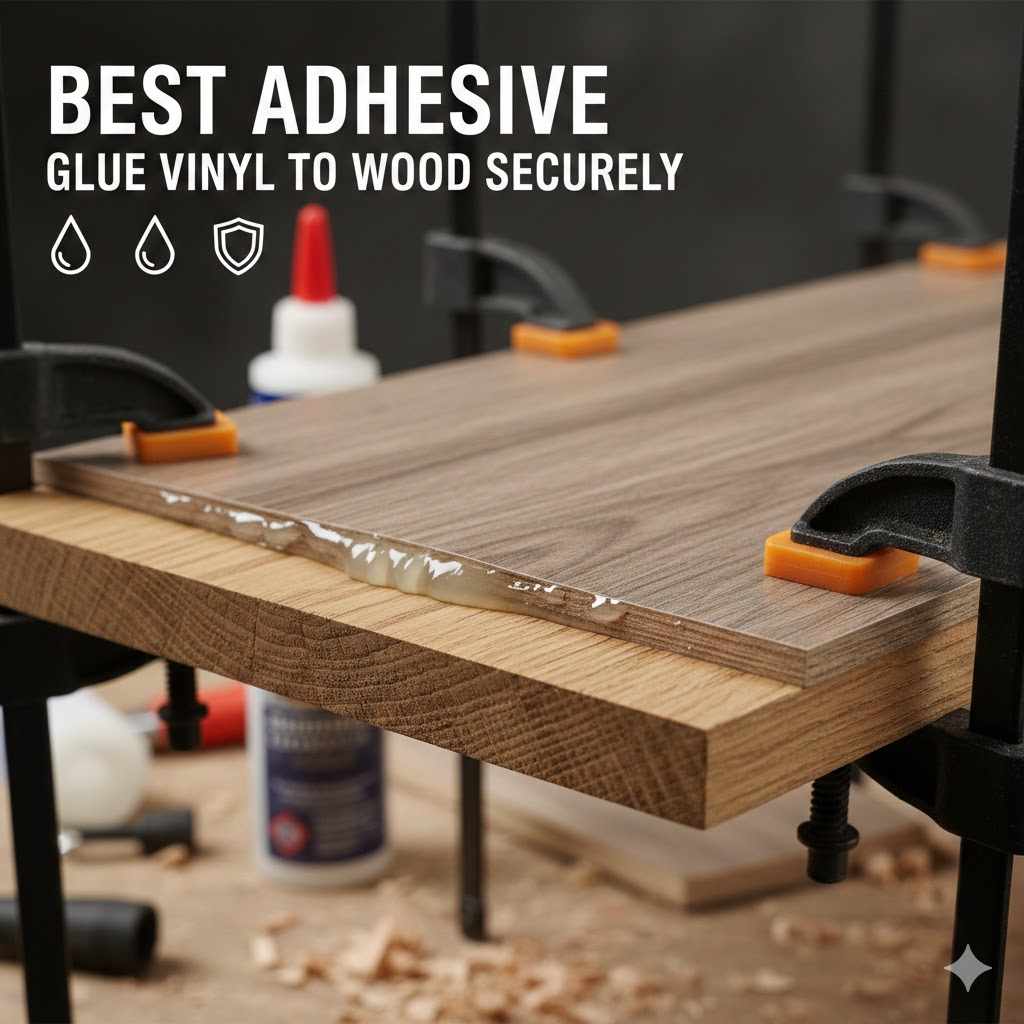
How to Prepare Surfaces for the Best Bond
Proper surface preparation is just as important as choosing the right glue. This step ensures that the adhesive can create the strongest possible bond.
1. Cleaning Wood Surfaces
Wood should be clean and free from dust, dirt, oil, and old finishes.
- Dust and Debris Removal: Use a soft brush or a dry cloth to wipe away any loose dust. For more stubborn dirt, a slightly damp cloth can be used, but ensure the wood dries completely before applying adhesive.
- Degreasing: If the wood has any oily residue, use a mild cleaner or rubbing alcohol to wipe it down. Again, allow it to air dry thoroughly.
- Sanding (Optional): For a very smooth finish, lightly sanding the wood can create a better surface for the glue to adhere to, especially if using a stronger adhesive like epoxy.
2. Cleaning Vinyl Surfaces
Vinyl surfaces need to be clean and free from any residue that might prevent adhesion.
- Wipe Down: Use a mild soap and water solution or rubbing alcohol to clean the vinyl. This removes fingerprints, oils, and any manufacturing residues.
- Ensure Dryness: After cleaning, make sure the vinyl surface is completely dry. Any moisture can interfere with the bonding process, especially for fast-acting glues.
- Avoid Softeners: Do not use household cleaners that contain oils or softeners, as these can leave a film that hinders adhesion.
3. Roughening Surfaces (If Necessary)
Sometimes, creating a slightly rougher surface can help the adhesive grip better.
- For Wood: Lightly sanding the wood with fine-grit sandpaper (e.g., 150-220 grit) can provide a slightly textured surface for the glue to grab onto. This is particularly useful for very dense hardwoods.
- For Vinyl: While vinyl is usually smooth, some thicker or specialized vinyl might benefit from very light scuffing with fine sandpaper. However, be cautious not to damage the vinyl’s surface. For most craft vinyl, a clean surface is sufficient.
Application Techniques for a Stronger Bond
How you apply the adhesive makes a big difference in how well it holds. Here are some tips for getting a secure bond.
1. Apply Thin, Even Layers
It’s tempting to use a lot of glue, but less is often more.
- Spread Uniformly: Use a spatula, toothpick, or applicator brush to spread a thin, even layer of adhesive onto one of the surfaces. Avoid thick globs.
- Cover the Area: Ensure the adhesive covers the entire area where the vinyl and wood will meet. This prevents gaps where moisture or air can enter.
- Excess Glue: Wipe away any excess glue that squeezes out immediately with a damp cloth or solvent, depending on the adhesive type.
2. Pressing and Clamping
Applying even pressure is crucial for the glue to make full contact with both surfaces.
- Firm Pressure: Once the surfaces are joined, press them together firmly.
- Use Clamps: For glues that need time to set, using clamps or weights is highly recommended. This ensures constant pressure, forcing the adhesive into all the tiny pores and creating a solid bond. Check the adhesive’s recommended clamping time.
3. Curing Time is Key
Don’t rush the process! Allowing the adhesive to cure fully is vital for maximum strength.
- Follow Manufacturer Instructions: Always check the product packaging for the specific curing time. Some glues need hours, while others may take a full 24 hours or more to reach their strongest point.
- Avoid Stressing: Until the glue is fully cured, avoid putting any stress on the bond. Don’t move, use, or clean the item in a way that might pull the pieces apart.
Real-Life Examples and Scenarios
Seeing how others have used different adhesives can be very helpful. Here are a few examples.
Example 1: Wooden Coasters with Vinyl Inlay
Sarah wanted to make custom wooden coasters with her Cricut. She cut out a pattern from adhesive vinyl and wanted to inlay it into a routed groove on the wood coasters. She needed a strong, waterproof bond.
- Preparation: Sarah sanded her wooden coasters smooth. She then cleaned the routed grooves with rubbing alcohol. The vinyl pieces were also cleaned.
- Adhesive Choice: She chose a clear, waterproof epoxy resin.
- Application: Sarah mixed the two-part epoxy carefully. She used a small brush to apply a thin layer of epoxy into the groove first, then pressed the vinyl into it. She wiped away any excess immediately.
- Result: After curing for 24 hours, the vinyl inlay was perfectly flush with the wood, and the coasters were completely waterproof.
Example 2: Vinyl Decal on a Wooden Sign for a Garden
John was making a wooden sign for his garden. He wanted to add a vinyl quote to it. The sign would be exposed to rain and sun.
- Preparation: John made sure the wood was sealed with an outdoor sealant. He wiped down the sealed surface with a damp cloth and let it dry fully.
- Adhesive Choice: He opted for a high-quality, outdoor-rated silicone adhesive, as it offered flexibility and waterproofing.
- Application: John applied a thin bead of silicone adhesive around the edges of the vinyl quote and a few lines in the middle. He then carefully positioned the vinyl onto the sign and pressed down firmly. He let it cure in a well-ventilated area for 48 hours.
- Result: The vinyl quote stuck securely, and the silicone provided a waterproof seal that protected the bond from the elements.
Scenario 1: Applying Vinyl Stripes to a Wooden Tabletop
Imagine you are decorating a wooden coffee table with vinyl stripes for a modern look. The table will be used daily, and drinks will be placed on it.
- Surface Prep: Clean the tabletop thoroughly to remove any dust or grease. Lightly sand if it has a very slick finish. Ensure it’s completely dry.
- Vinyl Prep: Clean the back of the vinyl stripes to ensure no dust or oils interfere with adhesion.
- Adhesive Application: A construction adhesive or a strong, flexible epoxy would be good choices here. Apply a thin, even layer to the wood where the stripes will go.
- Bonding: Carefully lay the vinyl stripes onto the adhesive. Use a scraper or roller to press them down firmly, ensuring full contact. Clamping might be tricky here, so applying significant hand pressure and weighting the stripes down as they cure might be necessary.
- Curing: Allow ample curing time as per the adhesive instructions, likely 24 hours or more, before using the table.
Scenario 2: Adding Vinyl Trim to Wooden Picture Frames
You’re crafting wooden picture frames and want to add a decorative vinyl trim around the edges. These frames will be handled, but not subjected to harsh conditions.
- Surface Prep: Ensure the wooden frames are smooth and clean. Wipe them down with a dry cloth.
- Vinyl Prep: Clean the back of the vinyl trim material.
- Adhesive Application: A good quality fabric glue that specifies vinyl compatibility, or a clear super glue for smaller sections, could work well. Apply a thin, even coat to the wood frame edges.
- Bonding: Gently press the vinyl trim onto the adhesive. For areas with curves, ensure you’re holding it in place until it starts to set.
- Curing: Allow the glue to cure fully, usually a few hours for fabric glue or minutes for super glue, before handling the frames extensively.
Tips for Success and Troubleshooting
Even with the right glue, things can sometimes go wrong. Here are some tips to help you achieve a perfect result.
- Test Small Areas: Before applying any adhesive to your main project, test it on scrap pieces of vinyl and wood. This helps you see how it bonds and how long it takes to dry.
- Ventilation: When using glues with strong fumes, like cyanoacrylates or some epoxies, ensure you are in a well-ventilated area or wear a mask.
- Temperature Matters: Most adhesives work best within a specific temperature range. Avoid applying glue in extreme cold or heat, as this can affect the curing process.
- Troubleshooting Peeling Vinyl: If vinyl starts peeling, it usually means the adhesive didn’t bond well. This could be due to poor surface preparation, using the wrong type of glue, or not allowing enough curing time.
- Dealing with Gaps: If there are small gaps between the vinyl and wood, choose an adhesive that can fill them, like epoxy or construction adhesive.
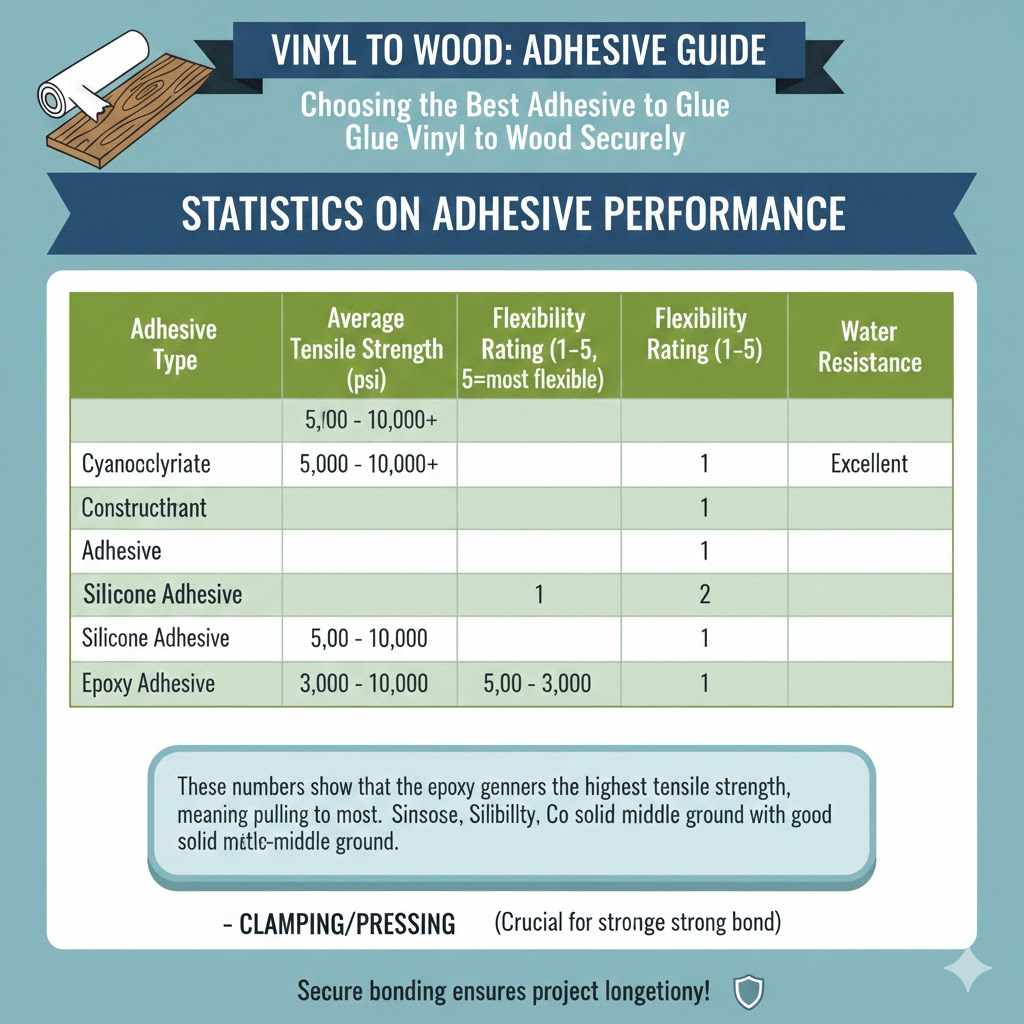
Statistics on Adhesive Performance
Understanding performance can help in choosing the best option.
| Adhesive Type | Average Tensile Strength (psi) | Flexibility Rating (1-5, 5=most flexible) | Water Resistance |
|---|---|---|---|
| Cyanoacrylate | 2,000 – 3,000 | 1 | Fair |
| Construction Adhesive | 300 – 700 | 3 | Excellent |
| Silicone Adhesive | 200 – 400 | 5 | Excellent |
| Epoxy Adhesive | 5,000 – 10,000+ | 1 | Excellent |
These numbers show that epoxy generally offers the highest tensile strength, meaning it resists pulling apart the most. Silicone shines in flexibility, making it good for materials that move. Construction adhesives offer a solid middle ground with good strength and water resistance.
Frequently Asked Questions
Question: Can I use hot glue to attach vinyl to wood?
Answer: While hot glue can be a quick option, it is generally not recommended for a secure, long-lasting bond between vinyl and wood. Hot glue can become brittle as it cools and may not adhere well to the smooth surface of vinyl. It’s also not very durable for items that will be handled frequently or exposed to moisture.
Question: Will regular craft glue work for vinyl on wood?
Answer: Some general craft glues might work for very light-duty applications, like adhering small vinyl shapes to wood for indoor decoration. However, for a truly secure bond that will last, especially if the item will be used or exposed to any stress, it’s best to use adhesives specifically designed for stronger bonding.
Question: How do I know if my wood surface is ready for adhesive?
Answer: Your wood surface should be clean, dry, and free of dust, oil, or any loose debris. If the wood has a very smooth or sealed finish, light sanding can improve adhesion. Always ensure the wood is completely dry before applying any glue.
Question: What is the best adhesive if my project will be outdoors?
Answer: For outdoor projects, you need an adhesive that is waterproof and can withstand temperature changes and UV exposure. Silicone adhesives and waterproof epoxy adhesives are excellent choices for outdoor applications.
Question: How long does it take for epoxy to cure on vinyl and wood?
Answer: The curing time for epoxy varies by brand and formulation, but most two-part epoxies require at least 24 hours to reach their full strength. Some may take up to 72 hours for complete hardening. Always check the manufacturer’s instructions for the specific product you are using.
Conclusion
Choosing the Best Adhesive to Glue Vinyl to Wood Securely is achievable when you consider your project’s needs. Clean surfaces and the right glue type—like flexible silicone for outdoors or strong epoxy for high-use items—ensure a lasting bond. Proper application and patient curing are your final steps to success.
Your projects will look great and hold up well.