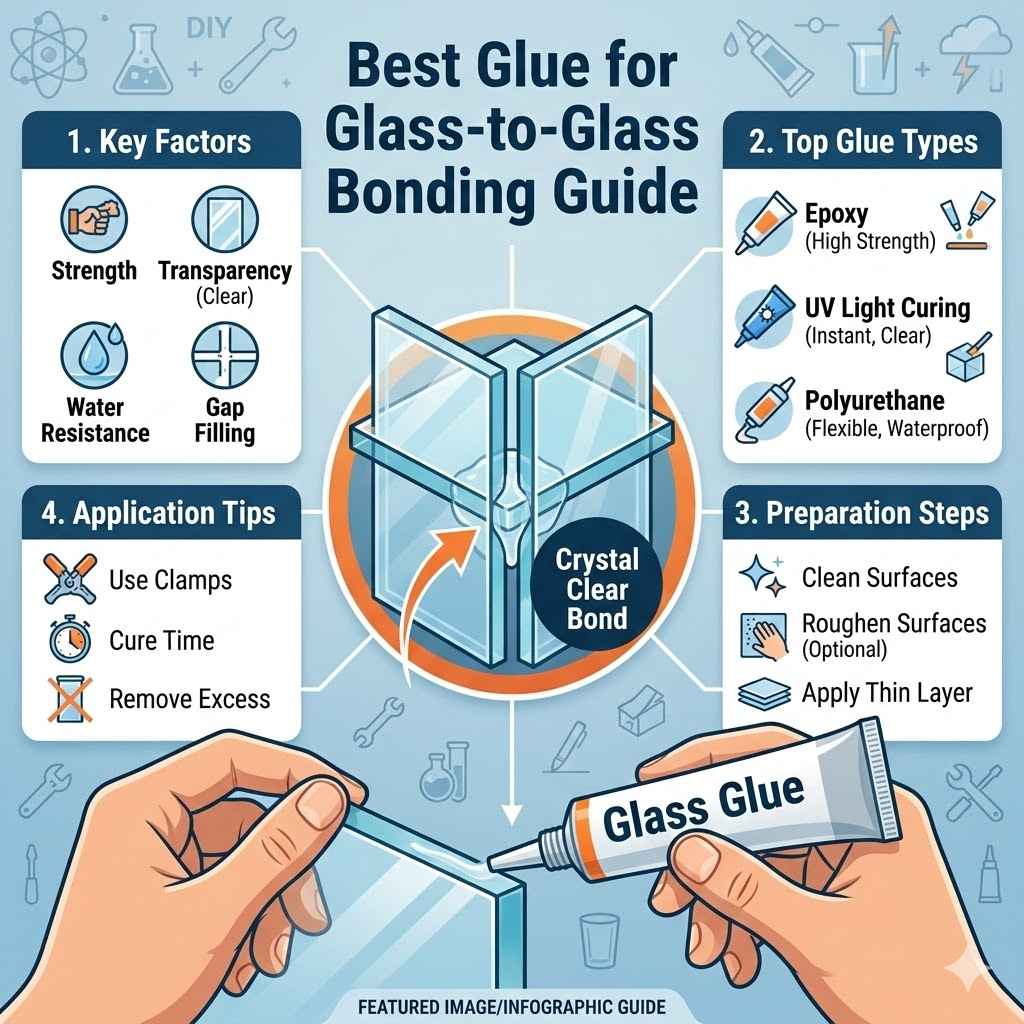
Best Glue for Glass-to-Glass Bonding Guide
Picking the Best Glue for Glass-to-Glass Bonding can feel tricky, especially if you’re new to DIY projects. Sometimes, glass parts can just fall off, or you might have a broken glass item that needs fixing. It’s easy to feel unsure about which glue will actually work and hold strong.
Don’t worry, though! This guide will show you a simple way to choose the right glue. We’ll go over everything you need to know to get your glass pieces stuck together securely.
Choosing the Best Glue for Glass-to-Glass Bonding
Selecting the right adhesive is the most important step when you need to join two pieces of glass. Glass can be a challenging material to bond because it’s non-porous and can be brittle. A successful bond relies on an adhesive that can create a strong, clear, and durable connection without damaging the glass itself.
This section will explore the different types of glues available and what makes them suitable for glass applications. We’ll help you understand the properties of each to make an informed choice for your specific needs.
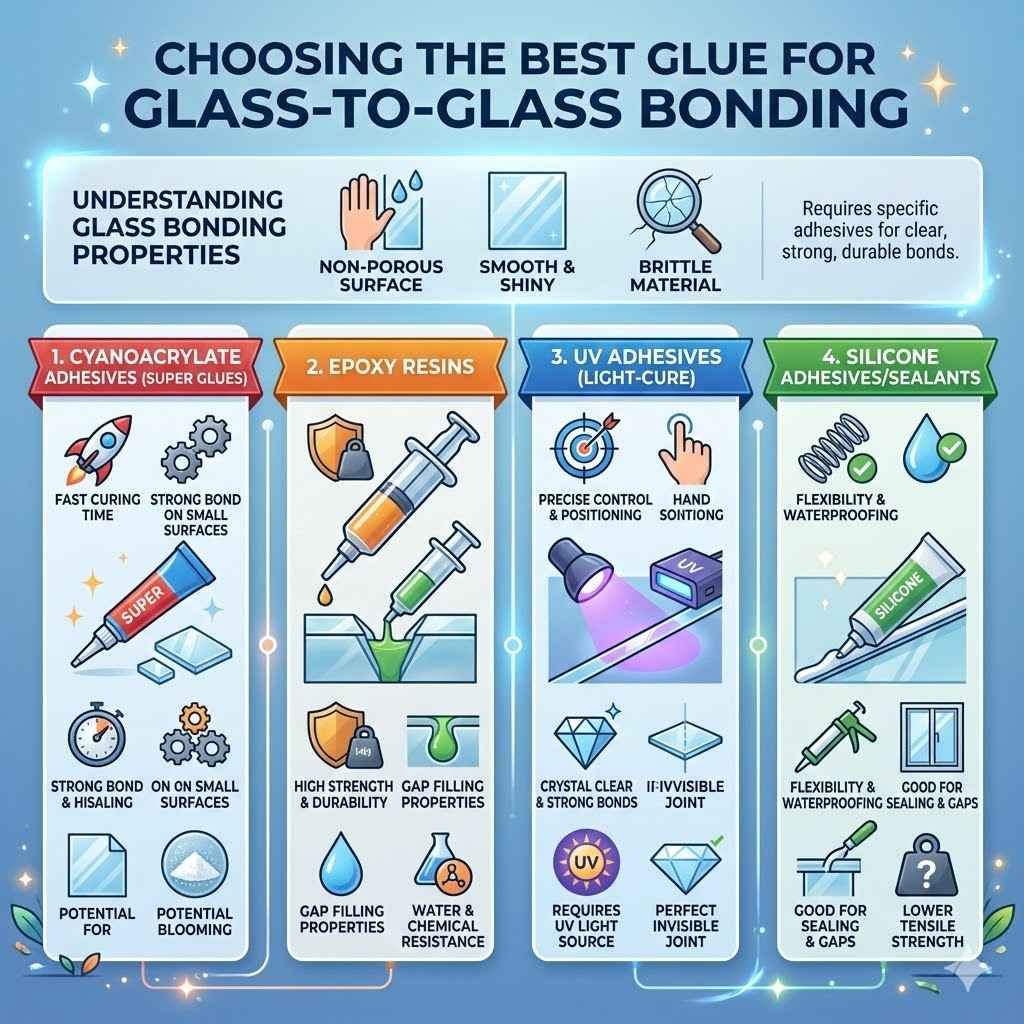
Understanding Glass Bonding Properties
Glass is smooth, shiny, and doesn’t soak up liquids like wood or fabric. This means most glues will just sit on the surface and won’t create a strong hold unless they are specifically designed for non-porous materials. Also, glass can break easily if too much pressure is applied or if the glue makes it weak in certain spots.
Getting a clear bond is often desired so the repair looks nice. Durability is key, meaning the glue should last a long time and withstand everyday use and environmental changes like temperature.
- Clear Adhesion: For many glass projects, you want the glue to be invisible once it dries. This is especially true for decorative items, art pieces, or repairs where the appearance matters. Some glues might dry cloudy or yellow over time, which can ruin the look of your project. We will look at glues that are known for their crystal-clear finish.
- Strength and Durability: A good glue will create a bond that is strong enough to hold the glass pieces together without them separating under normal stress. Durability means the bond won’t break down due to moisture, temperature changes, or UV light exposure. This ensures your repaired item lasts for a long time.
- Ease of Use: Some glues require special tools or complicated mixing. For beginners, it’s best to find glues that are easy to apply directly from a tube or applicator. Simple application means fewer mistakes and a more successful repair.
Types of Adhesives for Glass
There are several main types of glues that work well for joining glass to glass. Each has its own advantages and might be better suited for different kinds of repairs or projects. Understanding these options is crucial to finding the Best Glue for Glass-to-Glass Bonding.
We will go into detail about what makes each type effective and in what situations you might use them.
Cyanoacrylate Adhesives (Super Glues)
Cyanoacrylate adhesives, commonly known as super glues, are fast-acting adhesives that form strong bonds on many materials, including glass. They work by reacting with moisture in the air and on the surface of the materials to polymerize and harden. This process creates a rigid bond very quickly, often within seconds.
They are excellent for small, quick repairs where precise alignment is needed. However, super glues can become brittle over time and are not ideal for areas that will experience a lot of flexing or impact. They also often cure with a white residue, known as “blooming,” which can be unsightly on clear glass.
- Fast Curing Time: Super glues set extremely fast, which is great for holding pieces in place while other adhesives cure or for temporary fixes. This speed means you don’t need to clamp the glass for extended periods.
- Strong Bond on Small Surfaces: They provide excellent tensile strength, meaning they are good at holding things together when pulled apart in a straight line. However, their shear strength, which is resistance to sliding forces, can be less impressive.
- Potential for Blooming: A common issue with cyanoacrylates is “blooming” or “frosting,” where a white powdery residue forms around the bond line. This happens when excess adhesive vaporizes and reacts with moisture on the surface. It can be minimized by using the glue sparingly and ensuring good ventilation.
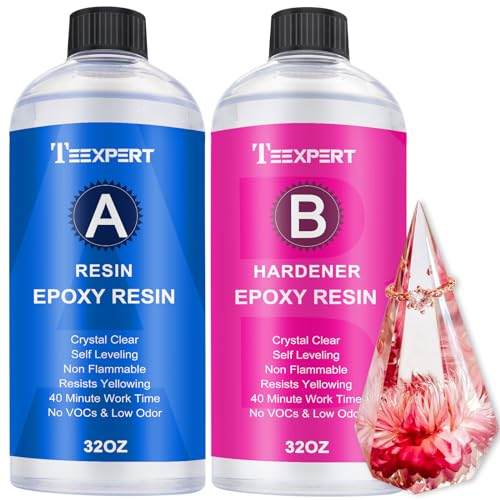
Epoxy Resins
Epoxy resins are a two-part adhesive system, typically consisting of a resin and a hardener. When mixed, these two components react chemically to form a very strong and durable bond. Epoxies are known for their excellent strength, water resistance, and ability to fill small gaps.
They are ideal for structural repairs and for bonding glass to other materials. Many epoxies dry clear, making them suitable for visible repairs. The curing time for epoxies can vary from a few minutes to several hours, depending on the product.
- High Strength and Durability: Epoxies create exceptionally strong bonds that are resistant to impact, chemicals, and temperature changes. This makes them suitable for projects that will be handled often or exposed to harsh conditions.
- Gap Filling Properties: Unlike some glues that require a perfect fit, epoxies can fill small gaps between glass pieces. This is beneficial if the edges are not perfectly smooth or if there are slight imperfections.
- Water and Chemical Resistance: Once fully cured, epoxies offer excellent protection against moisture and many common household chemicals. This is important for items that might be washed or come into contact with spills.
UV Adhesives (Light-Cure Adhesives)
UV adhesives are a special type of liquid adhesive that hardens when exposed to ultraviolet (UV) light. They are often used in professional settings for glass bonding because they offer a fast, clear, and strong cure. The adhesive remains liquid until it is exposed to UV light, allowing for precise positioning of the glass pieces before curing.
This control makes them excellent for intricate projects and where a completely invisible bond is desired. You typically need a UV light source, like a blacklight or a specialized UV lamp, to cure these adhesives.
- Precise Control and Positioning: The ability to position the glass perfectly before curing is a major advantage. The adhesive won’t start to harden until you shine the UV light on it, giving you ample time to make adjustments.
- Crystal Clear and Strong Bonds: UV adhesives typically cure to a perfectly clear, glass-like finish, making them ideal for aesthetic applications. They also form very strong and durable bonds when properly cured.
- Requires UV Light Source: The main requirement for using UV adhesives is access to a suitable UV light source. Without it, the adhesive will not cure, or it will cure very slowly and incompletely.
Silicone Adhesives/Sealants
Silicone adhesives and sealants are flexible and waterproof, making them a good choice for glass applications where some movement or flexibility is needed. They are commonly used for sealing aquariums, windows, and other applications where moisture resistance is important. Silicones cure by reacting with moisture in the air.
While they provide a good seal, their bonding strength might not be as high as epoxies or some UV adhesives. They also come in various colors, including clear, so you can choose one that suits your needs.
- Flexibility and Waterproofing: Silicones remain flexible even after curing, which can be beneficial if the bonded glass is subject to vibration or slight movement. Their waterproof nature is excellent for wet environments.
- Good for Sealing and Gaps: They are excellent at creating waterproof seals and filling larger gaps. This makes them useful for projects like building terrariums or repairing leaky glass containers.
- Lower Tensile Strength: Compared to epoxies or UV adhesives, silicones generally have lower tensile and shear strength. This means they might not be the best choice for load-bearing glass applications.
Factors to Consider for Glass-to-Glass Bonding
Beyond the type of glue, several other factors play a role in achieving a successful and long-lasting bond between glass pieces. Thinking about these elements beforehand can prevent common problems and ensure your project turns out great. We will explore these important considerations to help you select the most appropriate adhesive and technique for your specific situation.
Surface Preparation is Key
This is arguably the most critical step in glass bonding. The surfaces of the glass must be perfectly clean and free of any oils, dirt, dust, or old adhesive residues. Even a tiny bit of contamination can weaken the bond significantly or prevent it from forming at all.
Proper preparation ensures that the adhesive can make direct contact with the glass, allowing it to create a strong chemical or mechanical bond.
- Cleaning the Glass: Use a glass cleaner or isopropyl alcohol (rubbing alcohol) to thoroughly clean the areas where the glue will be applied. For stubborn residues, you might need a scraper or a specialized glass cleaner.
- Drying Completely: After cleaning, ensure the glass is completely dry. Any residual moisture can interfere with the curing process of some adhesives, especially cyanoacrylates.
- Avoiding Fingerprints: Once the glass is clean, try not to touch the bonding surfaces with your bare fingers. Oils from your skin can act as a contaminant. Use gloves or hold the glass by its edges.
Bonding Surface Area and Weight Bearing
The amount of surface area that comes into contact between the two glass pieces directly impacts the strength of the bond. A larger contact area distributes stress more evenly, leading to a stronger overall bond. Also, consider the weight of the object or how much stress the bonded glass will have to endure.
For heavy items or those under stress, you will need a stronger adhesive and potentially a larger bonding surface.
- Maximizing Contact: Design your project or repair to maximize the surface area where the two glass pieces meet. Overlapping edges or using a design that allows for a wider glue line can significantly increase bond strength.
- Weight Considerations: If the bonded glass will be supporting weight, choose an adhesive known for its high structural strength, such as epoxy or a strong UV adhesive. Test the bond in a non-critical way if possible before relying on it for heavy loads.
- Stress Distribution: Think about how the stress will be applied to the bond. Glues have different strengths in tension (pulling apart) versus shear (sliding). Select a glue that excels in the type of stress your project will experience.
Environmental Factors
The conditions where the glass will be used or stored can affect the longevity and strength of the bond. Factors like temperature, humidity, and exposure to sunlight or chemicals need to be considered when selecting an adhesive. Some glues perform better in certain environments than others.
For instance, if the glass will be exposed to water, you need a waterproof adhesive.
- Temperature Fluctuations: If the glass will experience significant temperature changes, choose an adhesive that remains stable across a wide temperature range. Extreme heat or cold can cause some glues to soften or become brittle.
- Moisture Exposure: For applications like aquariums or outdoor glass art, selecting a waterproof or water-resistant adhesive is essential. Many silicone-based adhesives and some epoxies offer excellent moisture protection.
- UV Light Exposure: Some adhesives can degrade or discolor when exposed to UV light from the sun over time. If your project will be in direct sunlight, opt for a UV-resistant adhesive or consider how to protect the bond from direct exposure.
Aesthetic Considerations (Clarity and Finish)
For many glass projects, the appearance of the bond is just as important as its strength. You’ll want an adhesive that dries clear and doesn’t yellow or become cloudy over time. The smoothness of the cured adhesive also matters for a professional look.
- Clarity of Finish: Many glass projects require a completely invisible bond. Cyanoacrylates can sometimes bloom, and some other adhesives may dry opaque or colored. UV adhesives and certain clear epoxies are excellent choices for a glass-like finish.
- Minimizing Visible Glue Lines: Applying the adhesive precisely and using a product that cures thinly can help minimize the visibility of the glue line. Wiping away excess adhesive carefully before it cures is also important.
- Long-Term Appearance: Consider how the adhesive will look after months or years. Some glues can discolor or become cloudy due to age or environmental exposure. Choosing a high-quality, stable adhesive will ensure the bond remains aesthetically pleasing.
Step-by-Step Guide to Bonding Glass
Now that you know about different glues and what to look for, let’s walk through the process of actually bonding glass. Following these steps will help you achieve a strong, clean, and lasting connection. Remember, patience and careful preparation are key to success in any glass repair or crafting project.
Preparation Steps
This phase is all about getting your materials ready and ensuring the glass is in perfect condition for bonding. Skipping these steps is a common reason for bond failure, so don’t rush them.
- Gather Your Supplies: Make sure you have your chosen adhesive, the glass pieces to be bonded, a cleaning agent (like isopropyl alcohol or glass cleaner), lint-free cloths or paper towels, gloves, and any necessary clamps or weights. If using a UV adhesive, have your UV light source ready.
- Clean Both Glass Surfaces: Thoroughly clean the edges or surfaces of both glass pieces that will be joined. Use a lint-free cloth dampened with isopropyl alcohol or glass cleaner. Ensure you wipe away any dust, grease, or old adhesive. Let the surfaces air dry completely or gently wipe them dry with a clean, dry lint-free cloth. Avoid touching the cleaned areas with your fingers.
- Test Fit the Pieces: Carefully place the glass pieces together to ensure they fit as intended. This allows you to visualize the bonding area and confirm alignment before applying the adhesive. Make any necessary adjustments to how the pieces will fit together now, rather than trying to fix it after the glue is applied.
Applying the Adhesive
This is where you apply the chosen glue. The technique will vary slightly depending on the type of adhesive you are using.
- Apply Adhesive Sparingly: Apply a thin, even layer of adhesive to one of the glass surfaces. For most glues, less is more. Too much glue can squeeze out, creating a mess and potentially weakening the bond if it prevents full contact. If using a two-part epoxy, mix the components thoroughly according to the manufacturer’s instructions on a disposable surface before applying.
- Join the Glass Pieces: Carefully align the glass pieces and press them together. Apply gentle, even pressure to ensure good contact across the entire bonding surface. Avoid sliding the pieces against each other once they are in contact, as this can disrupt the initial bond formation.
- Secure the Bond: Use clamps, tape, or weights to hold the glass pieces firmly in place while the adhesive cures. Ensure the clamps are not too tight, as this can cause the glass to crack or push all the adhesive out. For UV adhesives, position the pieces and then use the UV light source to cure the adhesive according to the product’s instructions.
Curing and Finishing
Once the pieces are joined, you need to let the adhesive cure properly. This is a critical stage for achieving maximum bond strength.
- Allow Full Cure Time: Let the adhesive cure for the full duration recommended by the manufacturer. This can range from minutes for super glues to 24 hours or more for some epoxies. Do not handle or stress the bonded item until it has fully cured.
- Remove Excess Adhesive (If Necessary): If there is any excess adhesive that squeezed out, you can carefully remove it once it has partially cured or is fully cured, depending on the adhesive type. A sharp craft knife or razor blade can often be used to trim away hardened excess glue. Be very careful not to scratch the glass.
- Inspect the Bond: Once cured, inspect the bond for strength and appearance. It should be clear and strong, with no gaps or signs of weakness. If the bond is not satisfactory, you may need to carefully try to remove the pieces and start again, ensuring thorough cleaning and correct application.
Real-Life Examples and Scenarios
Seeing how others have successfully bonded glass can be inspiring and informative. Here are a few examples that illustrate the practical application of choosing the right adhesive for glass-to-glass bonding.
Example 1: Repairing a Broken Glass Vase
Sarah had a beautiful glass vase that got knocked over, breaking off a decorative glass handle. The break was clean but required a strong bond that wouldn’t be visible. She decided to use a clear, fast-setting cyanoacrylate glue designed for glass.
- Sarah first cleaned the broken edges of the vase and the handle with isopropyl alcohol.
- She then applied a very small amount of cyanoacrylate glue to the edge of the vase.
- She carefully pressed the handle into place, holding it for about 30 seconds until it felt secure.
- The glue dried clear and set quickly, holding the handle firmly. She let it cure for 24 hours before handling the vase, and the repair was nearly invisible. This showed how a suitable super glue can work well for clean breaks.
Example 2: Building a Glass Terrarium
Mark was building a custom glass terrarium for his plants. He needed to join several large glass panels together to create a watertight enclosure. He chose a high-quality, clear silicone sealant specifically designed for aquariums and terrariums.
- Mark cleaned the edges of all the glass panels thoroughly.
- He applied a continuous bead of silicone sealant along the edges where the panels would meet.
- He carefully pressed the glass panels together, ensuring a tight seal. He used masking tape to hold them in place while the silicone cured.
- The silicone created a flexible, watertight bond that allowed for slight movement and expansion. It dried to a clear, durable seal, perfect for a terrarium environment. This highlighted silicone’s strength in sealing and flexibility for wet applications.
Scenario 1: Attaching a Small Glass Embellishment to a Mirror
You want to add a small, decorative glass gem to a mirror for an artistic touch. The gem is lightweight and the mirror surface needs to remain pristine.
For this, a clear, acid-free adhesive like a strong craft glue or a specific glass adhesive designed for embellishments would be ideal. Ensure the adhesive dries crystal clear to maintain the mirror’s look. Apply a tiny dot of glue to the gem and press it onto the mirror’s surface.
Allow it to cure fully before moving the mirror.
Scenario 2: Repairing a Cracked Glass Tabletop
A small crack has appeared on the edge of your glass coffee table. You need a strong, durable, and clear repair that can withstand daily use and occasional cleaning.
In this case, a two-part epoxy specifically formulated for glass would be the best option. The epoxy will fill the crack, providing structural integrity and a strong bond. Clean the crack thoroughly.
Then, carefully mix and apply the epoxy, ensuring it fills the crack completely. Clamp the area gently if possible, or use tape to hold it. Allow it to cure fully for maximum strength.
Common Mistakes to Avoid
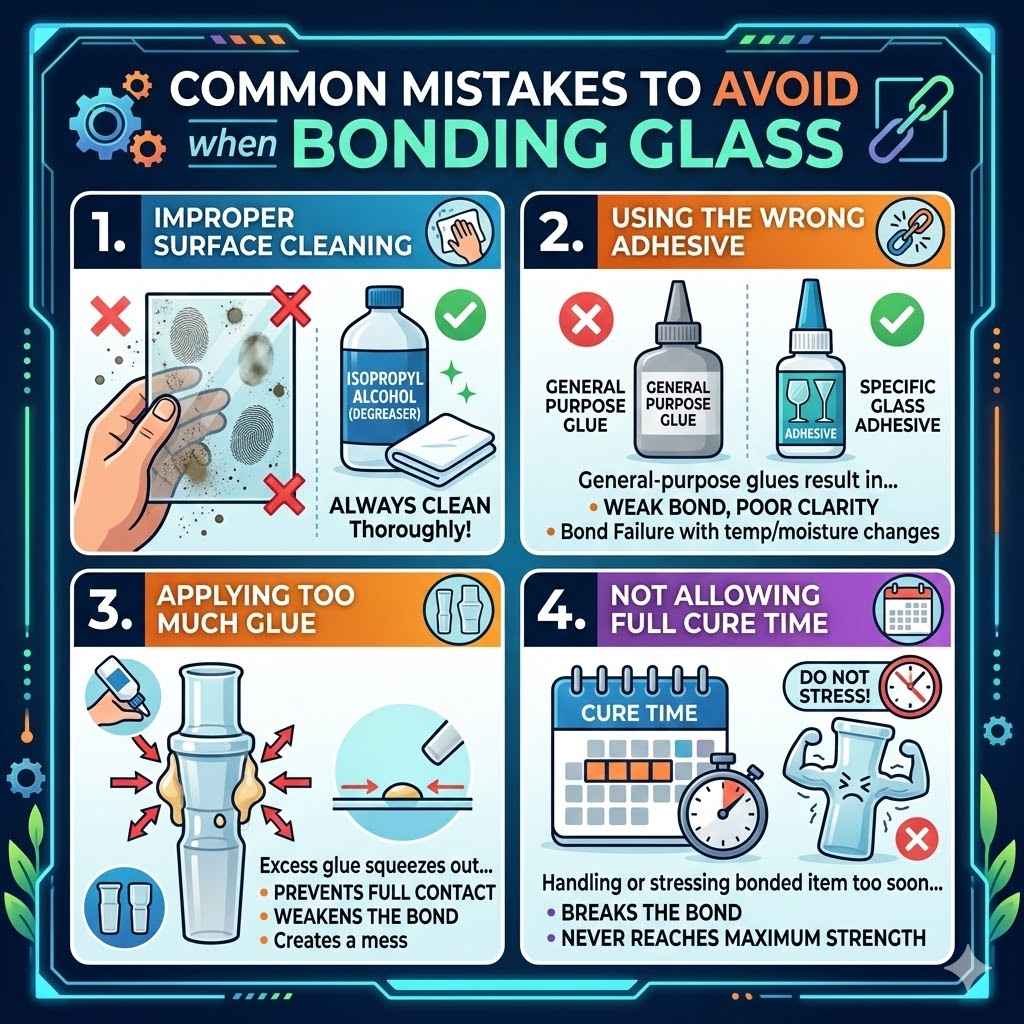
Even with the best intentions, some common mistakes can lead to a weak or failed bond when working with glass. Being aware of these pitfalls can help you prevent them.
- Improper Surface Cleaning: Failing to clean the glass surfaces thoroughly is the most common mistake. Any oil, dust, or residue will prevent the adhesive from bonding properly. Always clean with a degreaser like isopropyl alcohol.
- Using the Wrong Adhesive: Not all glues are created equal. Using a general-purpose glue not designed for glass can result in a weak bond, poor clarity, or the bond failing over time, especially with temperature or moisture changes.
- Applying Too Much Glue: It might seem like more glue means a stronger bond, but it’s often the opposite. Excess glue can squeeze out, create a mess, and prevent the glass pieces from coming into full contact, weakening the overall bond.
- Not Allowing Full Cure Time: Impatience is a killer of good glue bonds. Most adhesives require a specific amount of time to cure fully and reach their maximum strength. Handling or stressing the bonded item too soon can break the bond before it’s ready.
Frequently Asked Questions
Question: What is the strongest glue for glass-to-glass bonding?
Answer: For maximum strength, two-part epoxy adhesives or high-quality UV adhesives are generally considered the strongest options for glass-to-glass bonding. These create very durable and structural bonds.
Question: Can super glue be used for glass?
Answer: Yes, super glue (cyanoacrylate) can be used for glass, especially for small, quick repairs with clean breaks. However, it can sometimes leave a white residue and may not be as durable or flexible as other options for larger or more stressed bonds.
Question: How do I make the glue bond invisible on glass?
Answer: To make the bond invisible, choose adhesives that are specifically formulated to dry crystal clear. UV adhesives and many clear epoxy resins are excellent choices. Apply the adhesive sparingly and neatly to minimize visible glue lines.
Question: Will the glue hold if the glass is exposed to water?
Answer: For water exposure, silicone adhesives/sealants or waterproof epoxy resins are the best choices. Ensure the product states it is waterproof or water-resistant for reliable performance in wet conditions.
Question: How long does it take for glass glue to fully cure?
Answer: Cure times vary greatly by adhesive type. Super glues can set in seconds, while epoxies might take 24-72 hours for a full cure. Always check the product packaging for specific cure times.
Summary
Finding the Best Glue for Glass-to-Glass Bonding means choosing an adhesive suited to your project’s needs for strength, clarity, and environment. From fast-setting super glues for quick fixes to durable epoxies and clear UV adhesives for structural or aesthetic repairs, the right choice is out there. Proper surface preparation is key.
Follow the steps carefully and allow ample cure time for a secure, lasting bond that looks great.