What Grit Sandpaper for Drywall Before Painting
Many people wonder, What Grit Sandpaper for Drywall Before Painting? It can seem tricky when you’re new to DIY projects. You want a smooth finish, but choosing the wrong sandpaper can cause more work. Don’t worry!
This guide will walk you through it step-by-step, making it easy to get that perfect surface for painting. We’ll show you exactly what you need.
Choosing Drywall Sandpaper Grit
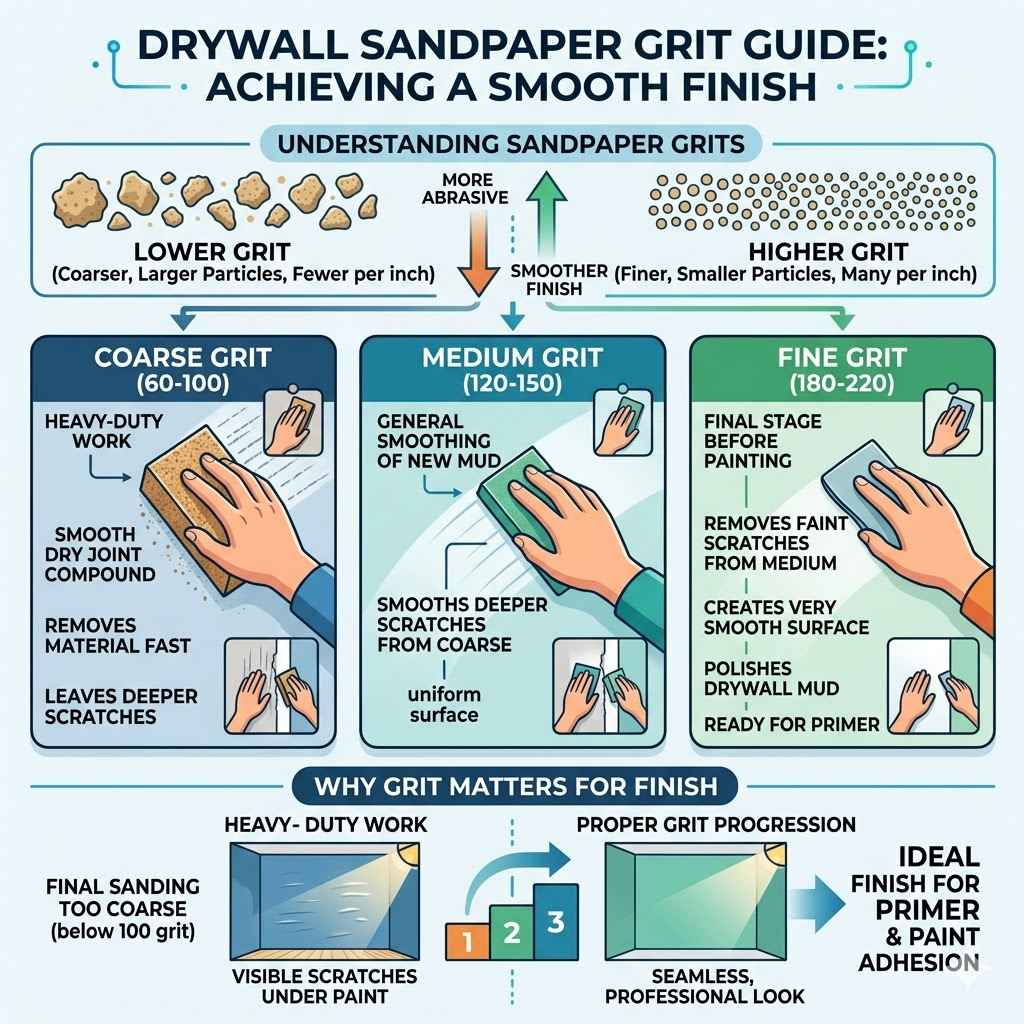
Selecting the right sandpaper is key to a smooth drywall finish before painting. The grit number tells you how coarse or fine the sandpaper is. Lower grit numbers mean coarser sandpaper with larger abrasive particles.
Higher grit numbers mean finer sandpaper with smaller particles. For drywall, you usually need a range of grits to go from rougher spots to a super smooth finish. This process ensures that primer and paint will adhere well and look their best.
Understanding Sandpaper Grits
Sandpaper grit is measured by the number of abrasive particles per square inch. A lower number, like 60 or 80 grit, has fewer, larger particles. These are great for removing significant material quickly.
They can smooth out rough patches or take down high spots. However, they leave deeper scratches that need to be removed by finer grits. Higher grit numbers, like 150 or 220, have many tiny particles.
These particles create much finer scratches, making surfaces smoother. The goal is to use progressively finer grits to erase the scratches left by the previous, coarser grit.
Coarse Grit (60-100): This is for initial heavy-duty work. Think about smoothing out joint compound that has dried unevenly or removing old, loose paint. It’s aggressive and removes material fast. You won’t want to paint over a surface just sanded with 60 grit; it would look terrible. This grit is about getting the biggest imperfections down to a manageable level. It’s like the rough shaping stage of a sculpture.
Medium Grit (120-150): Once the heavy lifting is done with coarse grit, you move to medium grit. This sandpaper smooths out the deeper scratches left by the coarser paper. It’s also good for general smoothing of new drywall mud. This is where you start to see a more uniform surface. The goal is to make the wall feel much smoother to the touch.
Fine Grit (180-220): This is typically the final stage for drywall before painting. Fine grit sandpaper creates a very smooth surface, ready for primer. It removes any faint scratches left by the medium grit and polishes the drywall mud. A surface sanded with 220 grit will feel almost like glass. This is the ideal finish for paint to adhere to evenly.
Why Grit Matters for Drywall Finish
The reason grit selection is so important for drywall before painting is directly tied to how paint looks and sticks. If you use sandpaper that is too coarse, say below 100 grit, for your final sanding, you’ll leave visible scratches. These scratches will show up like bumps or lines under the paint, especially when light hits them.
It’s like trying to wear a bumpy sweater to a formal event; it just doesn’t look right. On the other hand, using sandpaper that is too fine too early can sometimes burnish the drywall compound, making it hard for primer and paint to stick. The ideal progression ensures a clean slate for your paint job.
Imagine you’re trying to get a perfect shine on a car. You wouldn’t start with a very rough scrub brush; you’d use progressively finer polishes. Drywall sanding works the same way.
Each grit level refines the surface and removes the imperfections left by the previous one. This layered approach is the secret to that professional, seamless look you want for your walls.
Best Sandpaper Grit for Drywall
When you’re preparing drywall for painting, the common question is What Grit Sandpaper for Drywall Before Painting?. For most standard drywall finishing jobs, a combination of medium and fine grit sandpaper is ideal. You typically start with a medium grit to smooth out the bulk of the joint compound and remove any major imperfections.
Then, you move to a fine grit to achieve that super smooth surface that paint adheres to beautifully. Using the right grits prevents headaches and ensures a professional-looking result without much fuss.
The Ideal Grit Combination
For most DIYers and professional painters, the sweet spot for drywall sanding before painting lies within the 120 to 220 grit range. You generally won’t need anything coarser than 120 grit for finishing, unless there’s a significant issue with the drywall mud application. Starting with 120 or 150 grit is usually sufficient to smooth out dried joint compound and feather edges.
This step removes the bulk of rough spots and the deeper scratches left from taping or initial mudding. After this, you transition to a finer grit, typically 180 or 220 grit, to get the surface perfectly smooth.
Step 1: Medium Grit (120-150): Begin sanding with 150 grit sandpaper. This is effective for removing minor imperfections and smoothing out the joint compound after it has fully dried. It’s not so coarse that it creates deep gouges, but it’s aggressive enough to level out ridges and bumps. Use this grit to work over the areas where you applied joint compound, feathering the edges into the surrounding drywall.
Step 2: Fine Grit (180-220): Once you’ve achieved a reasonably smooth surface with the 150 grit, switch to 220 grit sandpaper. This is your final smoothing stage. It removes any faint scratches left by the 150 grit and creates a velvety smooth finish. This is the surface that primer and paint will love. Ensure you sand in a consistent direction to avoid swirl marks.
When to Use Coarser Grits
There are specific situations where you might need to start with a coarser grit than 120. If you have very uneven joint compound application, significant bumps, or ridges that need to be leveled down substantially, you might begin with an 80 or 100 grit sandpaper. These grits are much more aggressive and can quickly remove thicker layers of dried mud.
However, it’s crucial to remember that these coarser grits leave behind deeper scratches. You will absolutely need to follow up with at least one, and preferably two, finer grit sanding stages (e.g., 150 grit, then 220 grit) to remove all traces of the coarser grit’s marks. Failing to do so will result in a rough-looking painted surface.
A practical example: Imagine a patch of drywall where the joint compound dried extremely rough, like dried oatmeal. Trying to smooth that with only 220 grit would be very difficult and time-consuming. In this case, starting with 80 or 100 grit to knock down the worst of the roughness makes sense.
After that, you would move to 150 grit to remove the 80/100 grit scratches, and then finally 220 grit to finish the job.
Sanding Tools and Techniques
The type of sandpaper you use also matters. Sandpaper comes in sheets, which can be used with sanding blocks, or as discs for power sanders. For most home DIYers, using sanding sponges or sanding blocks with sandpaper sheets is very effective and controllable.
Sanding sponges are flexible and conform to slight curves, while sanding blocks provide a flat surface for even pressure. For larger areas, pole sanders attached to extension poles are excellent for reaching ceilings and high walls without strain. When using power sanders, such as orbital or drywall sanders, it’s easy to remove too much material quickly, so a lighter touch and careful movement are required.
Sanding Blocks: These are hand-held blocks, often made of rubber, foam, or wood, onto which you attach sandpaper sheets. They are excellent for getting even pressure across small to medium areas. They help prevent you from creating dips or uneven spots that a flexible hand can sometimes do. Always wrap the sandpaper around the block so the grit side is exposed for sanding.
Sanding Sponges: These are flexible sponges with abrasive grit on one or more sides. They are great for sanding curved areas, corners, and small patches. Their flexibility allows them to get into nooks and crannies that rigid blocks might miss. They also offer a comfortable grip for extended sanding sessions.
Pole Sanders: For large walls and ceilings, a pole sander is a lifesaver. It’s essentially a flat sanding head attached to a long pole. This allows you to stand upright and reach high areas without a ladder or excessive bending. Many pole sanders have swiveling heads, which makes them easier to maneuver. They are highly efficient for covering large surfaces quickly.
The Drywall Sanding Process
Once you know your grits, the process itself is quite straightforward. It involves sanding in stages, making sure each stage removes the imperfections of the one before it. This systematic approach ensures you achieve a smooth, paint-ready surface without missing spots or creating new problems.
The key is patience and a light touch, especially as you move to finer grits. You want to enhance the surface, not damage it.
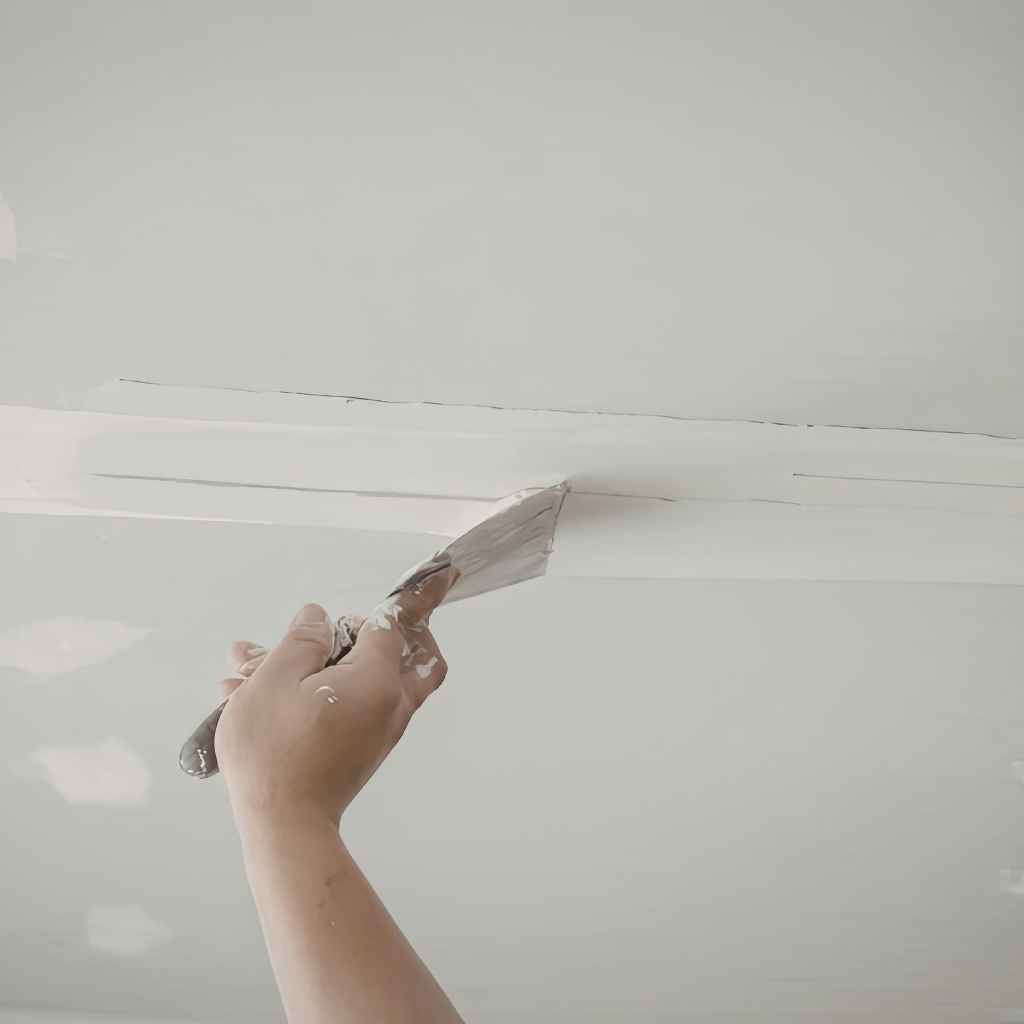
Pre-Sanding Preparation
Before you even pick up sandpaper, there are a few things to do. First, make sure the joint compound is completely dry. This usually takes at least 24 hours, but can be longer depending on humidity and thickness.
Then, protect your surroundings. Lay down drop cloths to catch dust and tape off any trim or fixtures you don’t want sanded. It’s also a good idea to wear a dust mask and safety glasses.
Drywall dust is very fine and can irritate your lungs and eyes. Opening windows for ventilation is also recommended, as long as it doesn’t create too much cross-breeze that blows dust everywhere.
You’ll also want to have your sanding tools ready. This includes your chosen sandpaper grits (150 and 220 are common), sanding blocks or sponges, and a shop vacuum with a brush attachment to clean up dust. Having a good utility light or flashlight handy can help you spot any missed high spots or rough areas as you work.
Sanding Technique for Smoothness
When you begin sanding with your medium grit (e.g., 150), use light, even pressure and sand in a circular motion or with long, sweeping strokes. Don’t press too hard, as this can create dips. Feather the edges of the joint compound so they blend seamlessly with the drywall paper.
After sanding an area, wipe it down with a slightly damp cloth or use a vacuum to remove dust. Inspect the surface under good light. You’re looking to eliminate any ridges or bumps and create a smooth transition from the compound to the wall.
Once you’re satisfied with the medium grit sanding, switch to your fine grit (e.g., 220). Use the same gentle pressure and strokes. This stage is about refining the surface and removing any faint scratches left by the coarser grit.
Again, after sanding, clean off the dust thoroughly. The surface should now feel very smooth to the touch, almost like silk. This is the ideal finish for painting.
A common mistake is to sand too aggressively or to skip a grit. If you skip the fine grit sanding, you might have a surface that feels okay but has very subtle scratches that will show under paint. If you sand too hard, you can wear down the drywall paper or create divots in the joint compound, which then need to be fixed with more compound and resanded.
Dust Control and Cleanup
Drywall dust is notoriously fine and gets everywhere. Effective dust control is crucial. Many sandpaper products are designed to work with dust extraction systems.
If you’re using a pole sander or power sander, connect it to a shop vacuum. This will capture a significant amount of the dust as it’s produced. For hand sanding, wipe down surfaces frequently with a shop vacuum or a slightly damp cloth.
After sanding is complete, vacuum the entire room thoroughly, including walls, floors, furniture, and fixtures.
Consider using a high-quality dust mask, like an N95 respirator, to protect your lungs. Even with dust control measures, some dust will escape. A wet-dry vacuum is essential for cleaning up the fine dust from floors and surfaces.
You might also want to wipe down walls and surfaces with a damp cloth after vacuuming to catch any remaining dust particles before painting. Some people even find it helpful to use tack cloths, which are slightly sticky cloths designed to pick up fine dust, just before priming.
Special Considerations for Drywall Sanding
While the general rules for What Grit Sandpaper for Drywall Before Painting? apply broadly, there are a few special cases to keep in mind. These can include dealing with different types of drywall finishes, repairs, or specific environmental conditions.
Understanding these nuances can save you time and frustration, ensuring a better final outcome for your painting project.
Repairing Holes and Cracks
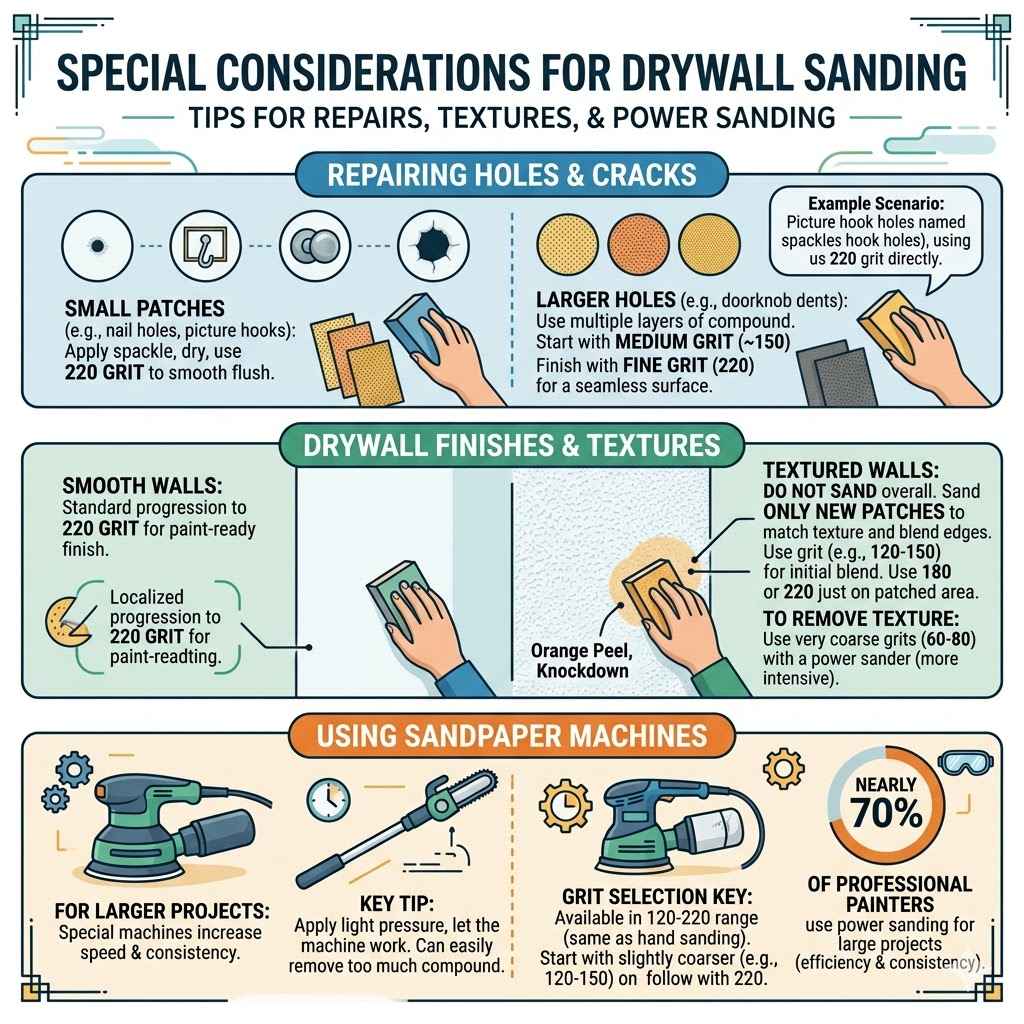
When repairing small holes or cracks with drywall mud, the sanding process is similar but often involves smaller areas. For tiny nail pops or hairline cracks, you might only need to touch up with a bit of compound and then sand smooth with 220 grit sandpaper. For larger holes, you’ll apply multiple layers of joint compound, allowing each to dry completely.
After the final layer is dry and smooth, you’ll start sanding with a medium grit (around 150) to level the patch and blend it into the existing wall. Then, you’ll finish with 220 grit for a seamless, paint-ready surface.
A scenario: You notice a small hole left by a picture hook. You fill it with a bit of spackle or joint compound. Once dry, this doesn’t require much sanding.
You can often use 220 grit sandpaper directly to smooth it flush with the wall. If the repair is a bit larger, perhaps due to a doorknob dent, you might use 150 grit first to level it out, then follow with 220 grit. The goal is always to make the repair invisible under the paint.
Drywall Finishes and Textures
If your drywall has a texture, like a knockdown or orange peel finish, the sanding approach changes. You generally do NOT sand textured walls with fine-grit sandpaper before painting, as you would risk removing the texture itself. Instead, sanding is usually limited to areas where you’ve applied new joint compound for repairs or to smooth out tape lines.
For these specific areas on a textured wall, you’ll want to use a grit that matches the surrounding texture’s roughness, typically in the 120-150 range for initial leveling and then perhaps 180 or 220 just on the patched area to ensure smoothness, blending it carefully. The goal is to repair the smooth areas without disrupting the overall texture.
If you are painting over an old texture and want to smooth it out entirely, you would use a much coarser grit, like 60 or 80, with a power sander, followed by progressively finer grits to achieve a completely smooth wall. This is a much more intensive process and often requires a lot of dust control. For most repaints, you are working with existing texture, so sanding is very localized to repair patches.
Using Sandpaper Machines
For larger projects or professional jobs, specialized drywall sanding machines are used. These include random orbital sanders, drywall sanders with long poles, and even dustless sanding systems that attach directly to vacuums. These machines can speed up the process considerably but require a careful touch.
They can easily remove too much drywall compound if you’re not experienced. Always start with a lighter pressure and let the machine do the work. For these machines, grit selection is still key, with discs or sheets available in the same ranges (120-220) as hand sanding.
A key statistic: According to industry surveys, nearly 70% of professional painters use power sanding equipment for drywall finishing on larger projects to improve efficiency and consistency. This highlights the importance of understanding how these tools work, including the appropriate sandpaper grits to use with them. When using a power sander, it’s often recommended to use a slightly coarser grit than you might think initially, for instance, starting with 120 or 150 grit on a drywall sander, and then following up with 220 grit.
This is because power sanders can remove material much faster than hand sanding.
Frequently Asked Questions
Question: What is the best grit of sandpaper for a smooth drywall finish
Answer: For a super smooth drywall finish before painting, the best grit of sandpaper is typically 220 grit. You’ll often use a coarser grit like 150 grit first to smooth out the joint compound, and then finish with 220 grit to get that perfectly smooth surface.
Question: Can I use sandpaper that is too coarse on drywall
Answer: Yes, using sandpaper that is too coarse, like 60 or 80 grit, for your final sanding can leave deep scratches that will show under the paint. While coarse grits are good for initial leveling, you must always follow up with finer grits to remove those scratches.
Question: How often should I change my sandpaper
Answer: You should change your sandpaper when it starts to clog up with dust or debris, or when it no longer feels like it’s cutting effectively. Using dull or clogged sandpaper makes sanding harder and can lead to an uneven finish.
Question: Do I need to sand after applying primer
Answer: Generally, you don’t need to sand after applying primer unless you notice any raised grain or dust nibs on the surface. If you do sand after priming, use a very fine grit, like 220 or higher, with a light touch.
Question: How important is dust control when sanding drywall
Answer: Dust control is extremely important when sanding drywall. Drywall dust is very fine and can be a respiratory irritant. Using dust masks, opening windows, and vacuuming up dust regularly helps keep the area clean and safe.
Summary
Choosing the right grit sandpaper for drywall before painting is simple. Use 150 grit for initial smoothing and 220 grit for the final touch. This two-step process creates a smooth, paint-ready surface.
Always control dust and work with a light touch for the best results. You’ve got this!