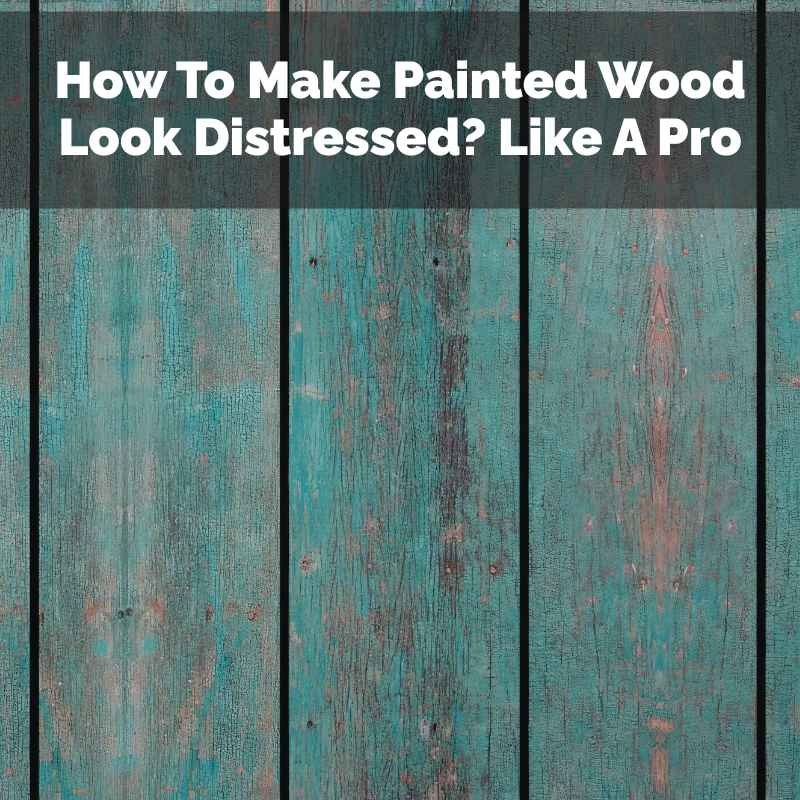
How To Make Painted Wood Look Distressed? Like A Pro
Making painted wood look distressed like a pro involves using specific techniques to mimic natural wear and tear. Key methods include sanding, using wax or petroleum jelly as a resist, employing the “dry brush” or “chippy paint” look, and layering colors. Understanding how real wood ages helps create believable effects for a charming, antique appearance.
Understanding the Distressed Look
What does “distressed” really mean when we talk about wood? It means making something look old. Not just worn out, but like it has a story.
Think about furniture that’s been in a family for generations. It might have nicks, scuffs, and paint that’s worn away in places where people touched it most. This is the kind of look we aim for.
It’s about creating visual interest. Smooth, perfect surfaces can sometimes feel too new. A distressed finish adds character.
It gives a piece a cozy, lived-in feel. This look fits well with many home styles, like farmhouse, coastal, or shabby chic. It makes new items feel like timeless treasures.
The goal is authenticity. We want it to look like real aging happened naturally. This involves understanding how paint wears off.
It also means knowing where wear typically occurs. If you just slap some paint on and sand it randomly, it often looks forced. We want to avoid that.
Why Do People Love Distressed Wood?
Many people are drawn to the distressed look for its charm. It brings a sense of history and warmth to a room. New furniture can sometimes feel cold or stark.
A distressed finish makes it feel more welcoming. It’s like bringing a piece of the past into your home.
It also hides imperfections. If you’re working on a piece of wood that isn’t perfect, a distressed finish can be forgiving. Minor dents or scratches can actually add to the character.
This makes it a great choice for DIY projects. You don’t need to be a master woodworker to get a great result.
Plus, it’s a fantastic way to personalize your decor. You can create a look that is uniquely yours. You control how much distress you add and where.
This allows for a lot of creativity. It’s a way to make your home reflect your personal style.
My First Distressing Disaster
I remember trying this for the first time years ago. I’d bought a cheap pine dresser and wanted to give it a rustic, farmhouse feel. I’d seen all these amazing transformations online.
I got some white chalk paint, thinking that would be easy. Then, I grabbed my sander and went to town. I sanded everywhere.
I sanded edges, flat surfaces, corners – you name it.
When I was done, it looked… bad. It wasn’t charmingly aged. It looked like I’d attacked it with sandpaper.
The paint was patchy and uneven. The “worn” spots looked like I’d just scrubbed the paint off with steel wool. It was dull and sad.
I felt so discouraged. I thought maybe I just wasn’t cut out for this kind of thing. It taught me that there’s definitely a method to the madness.
Key Techniques for an Authentic Distressed Finish
There are several tried-and-true methods to achieve a convincing distressed look. Each has its own charm and works best for different effects. We’ll go through the most popular ones.
They are all pretty simple to learn. The key is practice and observing real aged items.
Think about how things actually age. Doors get scuffed at the bottom. Chair arms get worn from hands.
Edges of tables get bumped. Paint peels where moisture gets under it or where it’s flexed a lot. We try to mimic these natural wear patterns.
It’s not just about sanding. We can use things to prevent paint from sticking. We can use special painting techniques.
We can even layer colors to create depth. Let’s break down these methods so you can choose what works best for your project.
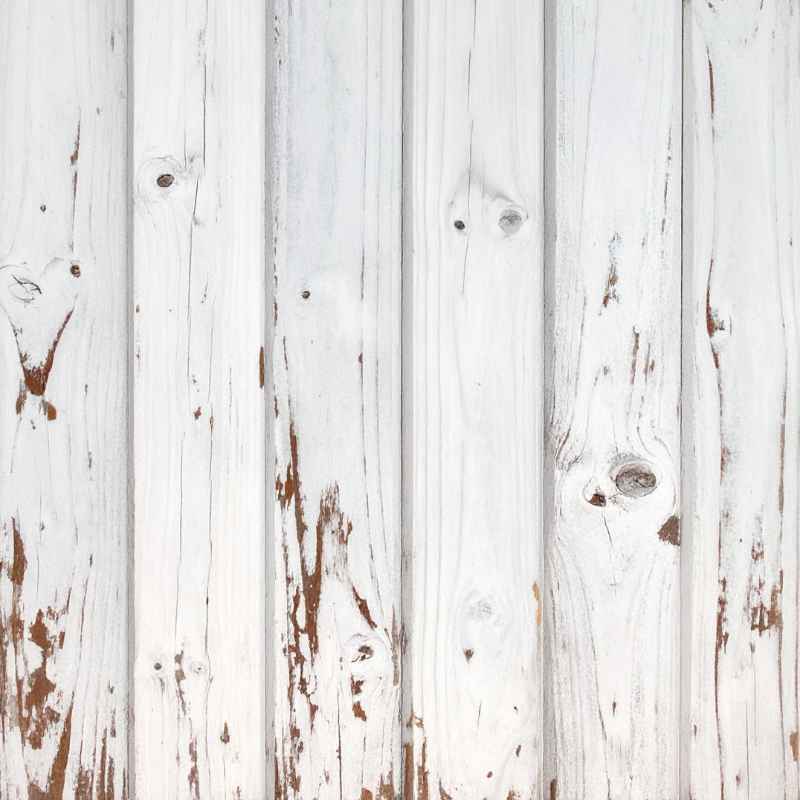
1. The Sanding Method (and How to Do It Right)
Sanding is the most basic way to distress. But there’s a right way and a wrong way. The wrong way, as I learned, makes it look like a mess.
The right way creates subtle, believable wear.
First, start with your base coat of paint. Let it dry completely. Then, you can lightly sand.
Focus on areas where wear would naturally occur. This includes edges, corners, and raised details. If it’s a flat surface, sand very lightly in a few spots.
It should look like the paint has just thinned out there.
You can use different grits of sandpaper. A medium grit (like 120) is good for initial wear. A finer grit (like 220) is useful for smoothing.
Always sand in the direction of the wood grain. This is crucial for realism. After sanding, wipe away the dust with a damp cloth.
For a more pronounced effect, you can use a rasp or a file. These tools can create small nicks and gouges. Use them sparingly.
They add character like real damage would. Remember, less is often more. You can always add more sanding, but you can’t take it away easily.
Sanding Tips for a Natural Look
Focus Areas: Sand edges, corners, and any raised details first.
Direction: Always sand with the wood grain.
Pressure: Use light, even pressure. You can add more if needed.
Subtlety: It should look like paint is thinning, not gone.
Dust: Wipe away dust with a damp cloth to see the effect.
2. The Wax or Petroleum Jelly Resist Method
This is a favorite for a reason. It’s super easy and creates fantastic peeling paint effects. You apply a layer of wax or petroleum jelly (like Vaseline) to certain spots.
Then you paint over it. When the top coat is dry, you rub those spots. The paint will come off easily, revealing the color underneath.
Here’s how it works: Apply a layer of furniture wax or petroleum jelly to the areas you want to distress. You can use a brush or a cloth. You can even put it on thicker in some spots.
Then, paint your top color over the entire piece. Once the top coat is dry, take a damp cloth and rub the waxed areas. The paint will lift away smoothly.
This method is great for edges and corners. You can also dab it onto flat surfaces to create random patches of wear. It looks like the paint has just flaked off.
It’s less about sanding and more about controlling where the paint can adhere. This gives a softer, more organic feel than just sanding.
I used this on a bedside table once. I wanted a soft blue over a creamy white. I put wax on all the edges and then a few random spots on the sides.
It looked so good when I rubbed the paint away. It gave it that old, well-loved look without much effort.
Wax/Jelly Resist Steps
Step 1: Apply wax or petroleum jelly to areas you want to distress. Use a brush or cloth.
Step 2: Let the wax/jelly dry or set for a bit.
Step 3: Paint your top coat over the entire piece. Let it dry fully.
Step 4: Rub the waxed areas with a damp cloth. The paint will come off.
Step 5: Wipe away any residue. You can lightly sand for extra texture.
3. The Dry Brush Technique
The dry brush technique is perfect for adding subtle wear. It also works great for creating a “chippy” paint look. This is when it looks like flakes of paint have come off.
It’s a simple method that adds a lot of depth.
You need very little paint on your brush for this. Dip your brush into the paint. Then, wipe almost all of it off on a paper towel or a rag.
You want just a tiny bit of paint left on the bristles. Then, lightly brush it over the surface of your piece.
The paint will only catch on the raised areas. It won’t fill in the low spots. This creates a streaky, textured look.
It mimics paint that is worn thin. It looks like the color has faded or been rubbed off over time.
This is excellent for highlighting wood grain. It can also make new hardware look old. For a chippy look, you often do this over a base coat.
Then, you might add a second color lightly. Or, you can distress the dry-brushed layer itself. It gives a very realistic feel.
I used this on picture frames. I painted them black. Then, I used a very dry brush with a little bit of dark brown paint.
I lightly brushed over the black. It looked like the wood underneath was peeking through. It added a lot of character instantly.
Dry Brush Method Quick Guide
Brush Prep: Load brush with paint, then wipe off 90% onto a paper towel.
Application: Lightly skim the brush over the surface.
Effect: Paint only sticks to raised areas, creating texture.
Use On: Edges, details, hardware, or over other colors.
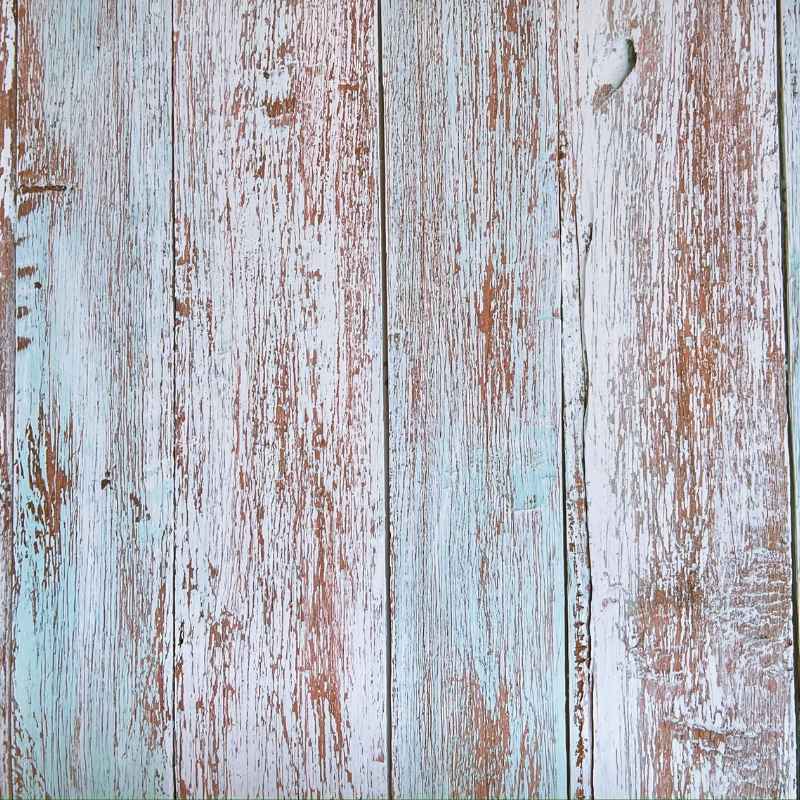
4. Layering Colors for Depth
Truly convincing distressed finishes often involve multiple layers of paint. This mimics how furniture might have been repainted over the years. Each layer adds a new color.
Then, you distress through these layers to reveal what’s underneath.
Start with your base color. Let it dry. Then, apply your next color.
This might be your main color. Let that dry. Now, you can start distressing.
You can sand through the top layer to show the base color. You can use the wax resist method between layers.
This creates a richer look. It’s not just one color wearing off. It looks like different paint jobs are showing through.
This adds a lot of visual depth. It makes the piece look much older and more complex.
For instance, you might start with a dark brown base. Then, add a layer of creamy white. Finally, distress through the white to reveal the brown.
This gives a classic farmhouse look. You can add even more layers for more depth.
When layering, think about what colors would naturally appear over time. A barn red might have been painted over with white. Or a dark wood stain might show through chipped blue paint.
Layering Color Example
Base Coat: Dark Brown
Second Coat: Creamy White
Distressing: Sand through white to reveal brown in worn areas.
Optional Third Coat: A light gray, then distress to show white and brown.
5. Using Glazes for an Aged Patina
Paint glazes are a liquid mixed with paint. They can be used to add an aged look. They settle into the low spots of the wood or texture.
This makes details pop. It also softens the overall look. It can make painted surfaces look like stained wood.
You can buy pre-made glazes. Or you can make your own. A common DIY glaze is one part paint to two parts glaze medium.
You can also use watered-down paint for a similar effect, though it’s less durable.
Apply the glaze over your dried paint finish. Then, wipe it off with a rag. The glaze will stick in the recesses and low points.
This creates shadows. It makes the surface look older. It can make a flat paint job look more dimensional and richer.
This is great after you’ve done some distressing. The glaze can tie everything together. It can also be used over stained wood to give it an antique look.
It’s a finishing touch that really makes a difference. It’s like adding a thin layer of dust or grime that’s settled over years.
I once glazed a cabinet door that I had painted a sage green. After glazing and wiping, the green looked deeper. The details around the door frame stood out more.
It looked like it had been sitting in an old country kitchen for decades. It was amazing how much difference it made.
Glazing Basics
What it is: A liquid that adds depth and an aged patina.
How it works: Settles into low spots, highlights texture.
Application: Apply over dried paint, then wipe off.
Result: Softer, richer, more antique appearance.
6. The “Chippy” Paint Look
This is a specific kind of distressed look. It mimics paint that has cracked and flaked off in pieces. It’s very popular for a vintage feel.
It looks like the piece has seen many layers of paint and lots of wear.
One way to achieve this is with a special product called chippy medium or crackle medium. You paint a base coat. Let it dry.
Then you apply the chippy medium. Once that’s slightly tacky, you paint your top coat over it. As the top coat dries, it cracks and flakes.
Another popular method for a chippy look is using hairspray. Yes, hairspray! You paint your base coat.
Let it dry. Then, spray a section with hairspray. While the hairspray is still wet, paint your second color over it.
As the second color dries, the hairspray allows it to lift and chip.
You can also achieve a chippy look by using chalk paint. Chalk paint is very porous. It tends to adhere lightly.
If you sand it in certain ways or use the wax resist, you can get a chippy effect. It often chips more easily than other types of paint.
The key to a good chippy look is not overdoing it. You want it to look natural, not like you’ve deliberately made it fall apart. Focus on areas where wear would happen.
Small chips are often more believable than large flakes.
Chippy Paint Techniques
Chippy Medium: Apply between paint layers for controlled cracking.
Hairspray: Use as a resist between paint layers for a natural chip.
Chalk Paint: Naturally creates a softer finish that can chip easily.
Focus: Mimic natural wear where paint would lift.
Real-World Context: Where Wear Happens
To make your distressed finish believable, you need to think like time. Where does wear and tear happen naturally on furniture and wood items? Observing real old items is your best guide.
Edges and Corners: These are the first to get bumped. Whether by furniture movers, vacuum cleaners, or just people brushing past, edges take a beating. Sand them first and perhaps a bit more aggressively.
Around Knobs and Pulls: Hands constantly touch these areas. Paint will wear away from constant gripping and turning. If your piece has hardware, pay attention to the areas around it.
Chair Arms and Rungs: People rest their arms on chair arms. They might kick chair rungs. These spots get a lot of direct contact.
They are prime areas for wear.
Table Edges and Tops: Dining tables and coffee tables see a lot of action. Edges get bumped. The tops can get scratched or worn where items are placed and moved.
If you’re distressing a table, focus on the main edges and perhaps a few spots on the surface that look like they’ve had items sliding on them.
Drawer Fronts and Cabinet Doors: The areas where you open and close them will show wear. The edges of drawer fronts, especially. Also, the lower parts of cabinet doors that might get kicked or bumped by feet.
Feet and Legs: Furniture legs, especially the front ones, can get scuffed by vacuum cleaners or children’s toys. The very bottom edges can get worn from being dragged or bumped.
Look at old doors in historic homes. Notice how the paint is worn away near the handle. Or check out an antique chair.
See where the arms are smooth from years of use. These real-world examples are your best teachers for creating an authentic look.
Tools and Materials You’ll Need
You don’t need a huge collection of fancy tools. Most of these items are readily available at hardware stores or craft shops. Having the right supplies makes the process much smoother.
Paint: Chalk paint, latex paint, or acrylic paint all work well. Chalk paint is great for a matte finish and easy distressing. Latex is durable.
Acrylics are versatile.
Sandpaper: Get a few different grits. Around 120 for initial distressing and 220 for smoothing. Sanding sponges are also great as they can get into curves.
Wax or Petroleum Jelly: For the resist method.
Brushes: Good quality synthetic brushes for painting. An old brush you don’t mind ruining can be good for dry brushing.
Rags and Cloths: For wiping, applying glaze, and cleaning up dust. Lint-free cloths are best.
Chippy/Crackle Medium (Optional): If you want a specific flaky look.
Glaze (Optional): For adding depth and an antique patina.
Gloves: Protect your hands from paint and chemicals.
Protective Coverings: Drop cloths for your work area.
A Well-Ventilated Space: Always important when painting.
Essential Supplies Checklist
- Paint (chalk, latex, acrylic)
- Sandpaper (120 and 220 grit)
- Wax or petroleum jelly
- Paint brushes (various sizes)
- Lint-free rags
- Drop cloth
- Gloves
- Optional: Glaze, crackle medium
Prepping Your Piece for Distress
Before you even think about distressing, proper prep work is key. Just like any painting project, good prep leads to a better, longer-lasting finish. Don’t skip these steps!
Clean the Surface: Wash the piece thoroughly with a degreaser or mild soap and water. Remove all dirt, grease, and grime. Old wax or polish needs to go.
A clean surface ensures paint adheres properly.
Light Sanding (for adhesion): Even if you’re painting over a glossy finish, a light scuff sand with 220-grit sandpaper helps the paint stick. You’re not trying to remove the old finish, just create a bit of “tooth” for the new paint.
Repair Any Damage: Fill any large holes or cracks with wood filler. Let it dry and sand it smooth. This ensures your distressed look is intentional, not just covering up existing damage.
Prime if Necessary: If you’re painting over a dark or stained surface with a light color, a primer is a good idea. It helps block the old color and ensures your new color is true.
Dust Removal: After any sanding, wipe the surface down with a tack cloth or a slightly damp cloth to remove all dust. Dust will ruin your paint job.
Once your piece is clean, dry, and smooth, it’s ready for paint. The distressing happens after your paint layers are dry.
My Experience with a Hauled-In Dresser
About a year ago, a friend was clearing out their attic. They had an old, solid wood dresser. It was painted a sort of dull brown, but it was chipped and peeling in places already.
It looked sad and neglected. They were going to toss it. I said, “Hold on!
I’ll take it.”
When I got it home, I was surprised by how sturdy it was. The wood itself was beautiful. But the paint job was awful.
It was cracking in a way that looked accidental. It was also dusty and grimy. I decided to give it a new life with a distressed finish.
I used the layering method.
First, I cleaned it really well. Then, I gave it a coat of dark gray chalk paint. I let that dry.
Next, I applied a layer of creamy white chalk paint. This is where the fun began. I used a sanding block on all the edges and corners.
I paid special attention to the drawer fronts where hands would touch.
I also used the wax resist method on some random spots on the sides. I put wax on, then painted over it with white. When the white was dry, I rubbed those areas.
The white paint came right off, showing the dark gray underneath. It looked like the white paint had chipped away.
Finally, I used a glaze over the whole thing. It settled into the worn spots and the wood grain. The dresser went from looking like junk to looking like a true antique.
It was one of my favorite transformations. It proved that even pieces that look beyond repair can be brought back with the right techniques.
What This Means for Your Projects
Knowing these techniques gives you power! You can take a new piece of furniture and make it look vintage. You can refresh an old piece that has seen better days.
You can even add subtle distressing to trim or doors in your home.
For New Items: If you buy a new piece that feels too “perfect,” you can easily add character. It’s like giving it instant history. This can save you money compared to buying expensive antique-look furniture.
For Old Items: Don’t throw out that old chair! With a bit of paint and some distressing, you can make it a focal point in your room. It’s a sustainable way to update your decor.
When It’s Normal: Distressing is normal when it looks like natural wear. It happens on edges, corners, and high-touch areas. It’s also normal when it mimics peeling or chipped paint that has aged over time.
When to Worry: You should worry if your distressing looks fake or too uniform. If you’ve sanded every edge exactly the same, it screams “DIY” in a bad way. Also, if the paint is just peeling off in large, uneven chunks that don’t look natural, it might need a better sealant or primer.
Simple Checks: Run your hand over the distressed areas. Does it feel like actual wear, or just rough sanding? Look at the piece from a distance.
Does it have depth and character, or does it look patchy and unfinished?
Quick Tips for Success
Here are some final thoughts and tips to help you nail that distressed look every time. These are the little things that make a big difference.
Work in Good Light: You need to see what you’re doing. Good lighting helps you judge how much paint you’re removing and where.
Start Small: If you’re new to this, try on a small project first. An old picture frame, a small stool, or a wooden box. This helps you get a feel for the techniques without the pressure of a large piece.
Layer, Layer, Layer: Even if you only use two colors, layering makes it look more realistic. It’s rarely just one coat of paint that wears away.
Follow the Grain: Always sand and brush in the direction of the wood grain. This is a simple rule that adds a lot of realism.
Don’t Be Afraid to Make Mistakes: The best way to learn is by doing. If a spot doesn’t look right, you can often fix it. You can paint over it and try again.
Or you can sand it back and start that section over.
Use a Top Coat: Once you’re happy with your distressed finish, seal it with a clear top coat. A water-based polyurethane or a furniture wax will protect your hard work and give it a nice finish. This is especially important for high-use items like tables or dressers.
Observe Real Items: Keep your eyes open for old furniture in antique shops, flea markets, or even just on the street. Notice how the paint has worn away. This visual reference is invaluable.
Pro Tips Recap
Light: Work in a well-lit area.
Practice: Start with small projects.
Layers: Build depth with multiple paint colors.
Grain: Always work with the wood grain.
Mistakes: They are learning opportunities.
Seal: Protect your finish with a top coat.
Frequently Asked Questions About Distressed Wood
What kind of paint is best for distressing?
Chalk paint is very popular for distressing because it adheres well to many surfaces and creates a matte finish that is easy to sand. Latex and acrylic paints also work. The key is often in the application technique and the prep work, not just the paint type.
How do I make my distressed finish look natural and not forced?
The best way to achieve a natural look is to observe real aged items. Focus distressing on areas where wear would actually occur – edges, corners, and high-touch spots. Avoid uniform sanding.
Subtle, varied wear is more believable than harsh, repetitive patterns.
Can I distress laminate or veneer furniture?
Yes, but you need to be careful. Laminate and veneer are thin. You can easily sand through them.
It’s best to use the wax or petroleum jelly resist method, or the dry brush technique. Light sanding is possible, but avoid aggressive sanding that could damage the surface.
What is the difference between distressing and aging furniture?
Distressing is an intentional process of making new furniture look old. Aging is what happens naturally over time. When we talk about distressing furniture, we are trying to mimic the signs of natural aging.
The goal is to replicate the look of age, wear, and use.
How do I distress a piece that already has some chips and cracks?
That’s a great starting point! Clean the piece well. You can enhance existing chips by lightly sanding the edges to smooth them out.
You can also use these areas as a guide for where to add more distress. Glazing over these areas can make them look more authentic.
Should I distress before or after applying a top coat?
You should always distress before applying your final top coat or sealant. The distressing process involves removing paint. If you seal the piece first, you won’t be able to remove the paint effectively.
The top coat goes on last to protect your finished distressed look.
What if I don’t like how much I’ve distressed a piece?
Don’t worry! Most paint finishes can be repainted. If you’ve sanded too much, you can simply apply another coat of paint over the distressed areas and start again.
For some finishes, like chalk paint, you can sometimes lightly sand away over-distressed areas and reapply a bit of paint.
Conclusion
Creating a distressed wood look is a rewarding process. It adds character and a sense of history to your furniture and decor. By understanding the different techniques – from simple sanding to layering colors and using resists – you can achieve beautiful, authentic results.
Remember to observe real aged items for inspiration, work patiently, and don’t be afraid to experiment. Your projects will soon have that charming, lived-in look you’ve always admired.