How To Paint Wood Furniture With Spray Paint Like A Pro
Have you ever looked at a piece of wooden furniture and thought, “This could be amazing with a new color?” Maybe it’s a sturdy old dresser, a chipped coffee table, or even those dining chairs that have seen better days. You want to give it a fresh look, but the idea of using a brush and roller feels like a huge, messy project. That’s where spray paint comes in.
It seems like a quick fix, right? But if you’ve ever ended up with drips, uneven patches, or a finish that just looks… well, spray-painted, you know it’s not always as simple as it looks. It can be frustrating when your DIY dreams don’t quite match the reality.
This guide is here to help you nail that professional spray paint finish on wood furniture, turning your potential headaches into a beautiful success story.
Painting wood furniture with spray paint can yield a smooth, durable finish when done correctly. Key steps include thorough surface preparation, choosing the right spray paint, applying thin, even coats with proper technique, and allowing adequate drying time between layers. This method is ideal for achieving a professional look on various wood pieces.
Understanding Spray Paint for Wood Furniture
Spray paint is a fantastic tool for furniture projects. It can cover large areas quickly. It also gets into nooks and crannies that brushes might miss.
The result can be a super smooth finish, almost like it came from a factory. But not all spray paints are made the same. For wood furniture, you need a paint that sticks well.
It should also be tough enough to handle daily use. Some paints are better for metal, others for plastic. Finding the right type for wood is the first big step.
When we talk about painting wood, we often think of latex or oil-based paints. These use brushes and rollers. They give a thick coat.
Spray paint is different. It’s a liquid paint mixed with a solvent. When you spray it, the solvent evaporates quickly.
This leaves a thin, even layer of paint behind. This process is called atomization. It’s what helps create that smooth look.
The solvent helps the paint flow. It also helps it spread out evenly on the surface.
You’ll find spray paints in many finishes. There’s matte, satin, semi-gloss, and high-gloss. Matte is very flat.
Satin has a slight shine. Semi-gloss is shinier. High-gloss is very shiny and reflects light.
The finish you choose affects the look. It also affects how easy it is to clean. Glossier finishes are usually easier to wipe down.
They also tend to show imperfections more. So, think about where the furniture will go. Think about how you’ll use it.
This helps you pick the best finish.
Another important factor is paint durability. Wood furniture takes a lot of wear and tear. Drinks get spilled.
Things get set down. Kids might even climb on it. You need a paint that can stand up to this.
Look for spray paints that are labeled as “enamel” or “tough.” Some brands offer specific lines for furniture or cabinets. These are often formulated to be more durable. They might also have better adhesion to wood surfaces.
This means they won’t chip or scratch as easily.
It’s also worth noting that some spray paints are “all-in-one.” They might include primer and sealant. This can save you a step. However, for the best results on wood, especially if it’s a tricky surface, using a separate primer is often recommended.
A good primer helps the paint stick. It also covers up old colors or stains. It can even help block wood knots from bleeding through the new paint.
We’ll talk more about primers later. But knowing these options exist is helpful.
The environmental factors also matter. Are you painting outdoors? Indoors?
Good ventilation is key with spray paint. The solvents can create strong fumes. So, choose your location wisely.
Working in a well-ventilated garage or outdoors on a calm day is best. This protects you. It also helps the paint dry properly.
Humidity and temperature play a role. Too much humidity can make the paint dry slowly. It can also cause a cloudy finish.
Too hot or too cold can also cause problems. We’ll dive into this more when we talk about technique.
The Crucial First Step: Surface Preparation
This is hands down the most important part of the whole process. If you skip this, your spray-painted furniture will likely look amateurish and won’t last. Think of it like building a house.
You wouldn’t start putting up walls without a solid foundation, right? The same applies here. A smooth, clean, and properly prepped surface is your foundation for a beautiful spray paint finish.
This step might seem tedious, but trust me, it’s where the magic really begins. It separates the “okay” paint jobs from the “wow” ones.
First, you need to clean the furniture thoroughly. Dust, dirt, grease, and old wax can all prevent the new paint from sticking. For most furniture, a good wipe-down with a damp cloth is a start.
But for tougher grime, you might need a mild soap or a cleaner specifically designed for wood. A product like TSP (trisodium phosphate) substitute can be very effective. Just follow the instructions carefully.
Always rinse the surface well after cleaning. You don’t want any soap residue left behind. Let the piece dry completely before moving on.
This can take a few hours, depending on the humidity.
Next comes sanding. This is where you create a surface the new paint can really grip onto. You’re not trying to strip the old finish off unless it’s peeling or in very bad shape.
You just need to “scuff it up.” Use fine-grit sandpaper. Something like 150 or 220 grit is usually perfect. Sand in the direction of the wood grain.
This helps create tiny scratches that the primer and paint will cling to. If the furniture has a very glossy or slick finish, you might even need to start with a slightly coarser grit, like 120, but always finish with a finer grit to smooth it out.
After sanding, you must remove all the dust. This is called deglossing and cleaning. A tack cloth is your best friend here.
A tack cloth is a sticky fabric that grabs even the tiniest dust particles. Gently wipe down the entire piece. Pay attention to corners and crevices.
You might need to use a brush or vacuum cleaner attachment to get into tight spots first, then go over it with the tack cloth. You want the surface to be perfectly smooth and dust-free. If you can still see or feel dust, wipe it down again.
Any dust left will show up in your final paint job.
If there are any imperfections like scratches, dents, or gouges, this is the time to fix them. Small scratches can often be sanded out. Deeper dents or holes can be filled with wood filler or putty.
Apply the filler according to the product directions. Let it dry completely. Then, sand it smooth so it’s flush with the surrounding wood surface.
Again, wipe away all the sanding dust. This ensures a perfectly smooth canvas for painting.
Finally, before you even think about spray painting, you should apply a primer. I know I said it was optional, but for wood, it’s almost always necessary. A good quality primer designed for wood will help the paint adhere better.
It also helps to block stains from coming through, especially if you’re painting a light color over dark wood. It creates a uniform surface for the paint. Use a spray primer if possible, as it’s easier to get an even coat.
Apply one or two thin coats, letting each one dry thoroughly. Sand lightly with very fine-grit sandpaper (320 or higher) after the primer dries. Then, wipe it down with a tack cloth one last time.
This smooth, primed surface is what you want before you even pick up your color spray can.
I learned this the hard way on a beautiful antique oak dresser. I thought I could skip the primer because the wood was already sealed. I just sanded and went straight to my pretty teal spray paint.
Big mistake. Within a week, I started seeing dark splotches appear. It was the tannins from the oak bleeding through the paint.
It looked terrible, and I had to sand the whole thing down again and start over with a good quality stain-blocking primer. That was a lesson I never forgot. Surface prep and primer are non-negotiable for a lasting, beautiful finish.
Surface Prep Checklist
- Clean: Remove all dirt, grease, and wax. Use soap and water or a wood cleaner.
- Rinse: Make sure no cleaning residue remains. Let it dry completely.
- Sand: Use 150-220 grit sandpaper to scuff the surface. Sand with the grain.
- Dust Off: Use a tack cloth to remove all sanding dust.
- Fill/Fix: Repair any dents or scratches with wood filler. Sand smooth.
- Prime: Apply 1-2 thin coats of spray primer. Let dry.
- Light Sand (Primer): Lightly sand primer with 320+ grit. Tack cloth again.
Choosing the Right Spray Paint and Tools
Picking the right spray paint is like choosing the right ingredients for a recipe. You need the ones that are meant for the job. For wood furniture, you have a few excellent options.
Many people love acrylic enamel spray paints. These are water-based but dry very hard. They have less odor than traditional oil-based paints.
They also clean up easily with soap and water. Another great choice is oil-based enamel spray paint. These dry super hard and are very durable.
However, they have stronger fumes and require mineral spirits for cleanup.
Look for paints that are specifically labeled for “wood,” “furniture,” or “all surfaces.” Brands like Rust-Oleum and Krylon offer excellent lines. Their Painter’s Touch 2X Ultra Cover line is popular. It often includes primer, which can be a time-saver.
However, as mentioned, a separate primer often gives better results, especially on tricky wood. For a really high-end, durable finish, consider automotive spray paints or specialized furniture lacquers. These are more expensive and can be harder to find, but they offer superior toughness and a smooth finish.
The finish you want is also key. For most furniture, a satin or semi-gloss finish is a good balance. They offer a bit of sheen.
They are also easier to clean than a flat matte finish. A high-gloss finish can look very modern and sleek. But it will highlight every tiny imperfection.
So, consider the style of the furniture and your home decor. You can even mix finishes, like a satin body with glossier legs.
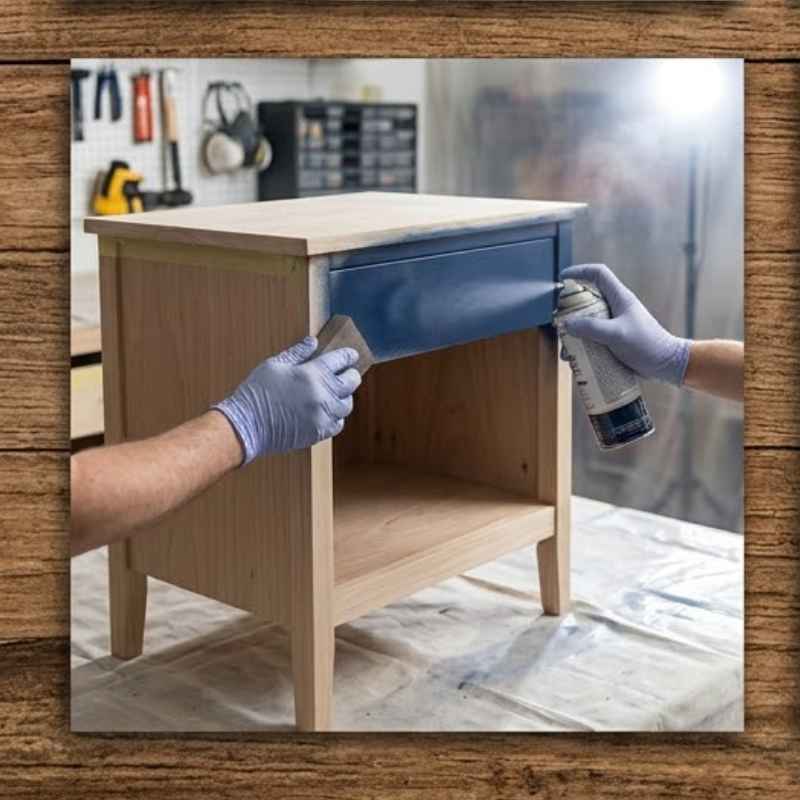
Now, let’s talk tools. You need more than just the spray cans. A good respirator mask is essential.
Spray paint fumes can be harmful. A proper mask will protect your lungs. Look for one with organic vapor cartridges.
Gloves are also a good idea. They keep your hands clean. And they prevent oils from your skin from getting on the furniture before you paint.
Safety glasses are a must. They protect your eyes from stray mist. A drop cloth or old newspapers are needed to protect your work area.
You don’t want paint on your floor or lawn.
Consider an “ergonomic spray handle” or “spray trigger.” These clip onto the top of the can. They give you a trigger to pull instead of pressing the nozzle directly. This can make a huge difference.
It reduces finger fatigue. It also helps you apply paint more smoothly and evenly. They can really help you avoid those shaky starts and stops that lead to drips.
You can find them at most hardware stores for just a few dollars.
Also, have some paper towels or clean rags handy. You might need them to wipe away drips or clean the spray nozzle if it clogs. Having a piece of cardboard or scrap wood nearby is also smart.
You can use this to test your spray pattern before you hit the furniture. This helps you get a feel for the distance and pressure. It ensures you’re getting a good, even mist.
I once tried to save money by not buying a spray handle. My hand cramped up halfway through painting a large hutch. I ended up with a few ugly drips because my hand was shaking.
Lesson learned! That little plastic trigger is a game-changer. It’s worth every penny for the control and comfort it provides.
It really helps you treat that spray can like a pro tool, not just a quick fix.
Essential Tools for Spray Painting Furniture
- Spray Paint: Choose acrylic enamel or oil-based enamel for wood.
- Primer: A good quality spray primer designed for wood.
- Respirator Mask: With organic vapor cartridges for fume protection.
- Gloves: To protect your hands and prevent oils from touching the surface.
- Safety Glasses: To shield your eyes from paint mist.
- Drop Cloth: To protect your work area from overspray.
- Ergonomic Spray Handle: Highly recommended for comfort and control.
- Tack Cloths: For final dust removal before painting.
- Fine-Grit Sandpaper: (150-320 grit) for surface prep and between coats.
- Rags/Paper Towels: For cleaning nozzles and wiping drips.
- Scrap Cardboard/Wood: For testing spray patterns.
Mastering the Spray Painting Technique
This is where you put all your preparation into action. The way you hold the can, the distance, the speed – it all matters. Spray painting isn’t just about pointing and spraying.
It’s a controlled art. The goal is to lay down thin, even coats of paint. This builds up the color and durability over time.
Trying to cover everything in one thick coat is a recipe for disaster. You’ll get drips, runs, and an uneven texture.
First, shake the can thoroughly. You need to do this for at least one to two minutes. Listen for the rattle of the mixing ball inside.
This ensures the paint and propellant are well mixed. If the ball isn’t rattling, shake it more. A poorly mixed can will spray unevenly.
It might even clog.
Now, test your spray. Hold the can about 6-8 inches away from your scrap cardboard. Press the trigger down fully.
Sweep across the cardboard in a smooth, steady motion. Release the trigger before you stop moving the can. This prevents splatters at the start and end of your stroke.
Keep the can moving at a consistent speed. The spray should create a light, even mist. If the spray is sputtering, you might need to shake the can more or it might be clogging.
When you move to your furniture, maintain that same distance and speed. Start spraying before you reach the edge of the piece. Sweep across the surface.
Continue spraying past the edge before you stop pressing the trigger. This ensures an even edge and avoids dark spots. Work in a systematic pattern.
Go back and forth, slightly overlapping each stroke. Aim to overlap by about 30-50%. This helps avoid gaps and ensures full coverage.
Hold the can upright as much as possible. Tilting it too much can cause the paint to pool in the nozzle. This can lead to sputtering or drips.
If you’re painting a large, flat surface like a tabletop, you might want to work in sections. Paint one section, then move to the next. Try to keep a wet edge so the paint blends smoothly from one section to the next.
Apply paint in thin coats. It’s much better to apply three or four thin coats than one thick one. Thin coats dry faster.
They are less likely to run or drip. They also build up to a smoother, more durable finish. After each coat, let it dry for the time recommended on the can.
This is crucial. If you try to apply a second coat too soon, the solvents in the fresh paint can melt the previous layer. This can cause runs and an uneven finish.
When you notice a slight run or drip starting, stop immediately. Don’t try to keep spraying over it. Let the paint dry partially.
Then, very carefully, you can try to smooth it out with a fine-grit sandpaper (320 or higher). Wipe away the dust with a tack cloth. Then, reapply a very light coat of spray paint to that spot.
It’s better to have a tiny imperfection you fix than a large, obvious run.
Clean the spray nozzle after each use. Turn the can upside down. Spray for a few seconds until only clear propellant comes out.
This prevents the paint from drying in the nozzle and clogging it for your next use. If the nozzle does clog, you can try soaking it in mineral spirits (for oil-based paint) or water (for water-based paint). Sometimes, you might just need to replace the nozzle, or even the can.
I remember painting a set of four chairs once. I got impatient and tried to do them all in one afternoon. I applied the second coat too soon on the first chair.
It started to sag. Then I got nervous and sprayed too close on the next chair. It came out looking streaky.
It took me a whole extra day to sand those bad spots and reapply thin coats properly. Patience is truly a virtue with spray paint. Those thin, even coats are your secret weapon.
Spray Painting Technique Dos and Don’ts
- DO: Shake the can well for 1-2 minutes.
- DON’T: Skip shaking the can.
- DO: Test spray on cardboard first.
- DON’T: Spray directly onto the furniture without testing.
- DO: Hold the can 6-8 inches away from the surface.
- DON’T: Hold the can too close or too far.
- DO: Move the can in a smooth, consistent motion.
- DON’T: Start and stop spraying on the furniture.
- DO: Apply thin, even coats, overlapping each stroke by 30-50%.
- DON’T: Try to cover everything in one thick coat.
- DO: Let each coat dry completely before applying the next.
- DON’T: Rush the drying time.
- DO: Clean the nozzle after each use.
- DON’T: Leave the nozzle dirty, risking clogs.
Drying, Curing, and Adding a Topcoat
Once you’ve applied your final coat of spray paint, the job isn’t quite done. There’s a difference between “dry to the touch” and “fully cured.” Dry to the touch means you can carefully handle the piece without getting paint on your fingers. Fully cured means the paint has hardened completely.
This takes much longer, sometimes several days or even weeks, depending on the paint type and conditions.
Always follow the drying times recommended on the spray paint can. For most spray paints, this is about 15-30 minutes between coats for recoating. However, to be fully dry and ready for light handling, it might take 1-2 hours.
For full cure, it can be 24 hours to several days. During the curing process, the paint is still vulnerable. Be gentle with the furniture.
Avoid placing heavy objects on it or sliding it around.
If you’re painting a piece that will see a lot of heavy use, like a dining table or a desk, a topcoat is highly recommended. A clear topcoat, also known as a sealer or varnish, adds an extra layer of protection. It makes the paint more durable.
It helps prevent chips, scratches, and wear. It also adds a consistent sheen to the final finish.
You can buy clear spray sealers. Look for ones that are compatible with your paint. Acrylic or polyurethane clear coats are good choices.
Apply the clear coat just like you applied the paint. Use thin, even coats. Let each coat dry fully before applying the next.
Usually, two to three thin coats of clear sealer are enough.
When applying a clear topcoat, especially a high-gloss one, be extra careful. It can make any imperfections in the paint job more visible. If you want a very smooth, professional look, you can lightly sand the paint between coats of clear sealer.
Use a very fine-grit sandpaper (400 or even 600 grit). Then, wipe it down with a tack cloth. This will make the surface incredibly smooth.
It allows the clear coat to build up a beautiful, glass-like finish.
I once painted an old wooden toy chest for my niece. I used a bright red spray paint. It looked great!
But I didn’t add a topcoat because I thought the paint was tough enough. Within a few months, I noticed scuff marks and scratches from her toys. I wish I had taken the extra step to apply a clear spray sealer.
It would have saved the paint job and made it last much longer. Now, I always add a clear coat, especially for items that will get a lot of handling.
Remember that humidity and temperature can affect drying and curing times. If it’s very humid, your paint will take longer to dry. If it’s cold, it might not cure properly.
Try to paint in a climate-controlled environment if possible. Or choose a day with mild, dry weather. Proper drying and curing are essential for the longevity and durability of your spray-painted furniture.
Don’t rush this critical phase!
Real-World Contexts and Scenarios
Let’s think about where and how you might use spray paint on wood furniture. It’s perfect for smaller items or pieces with intricate details. Think about those old wooden chairs that have a complex design.
A brush would struggle to get into all the nooks and crannies. Spray paint, however, coats them evenly with ease. You can transform a whole set of chairs from dated to dazzling in an afternoon.
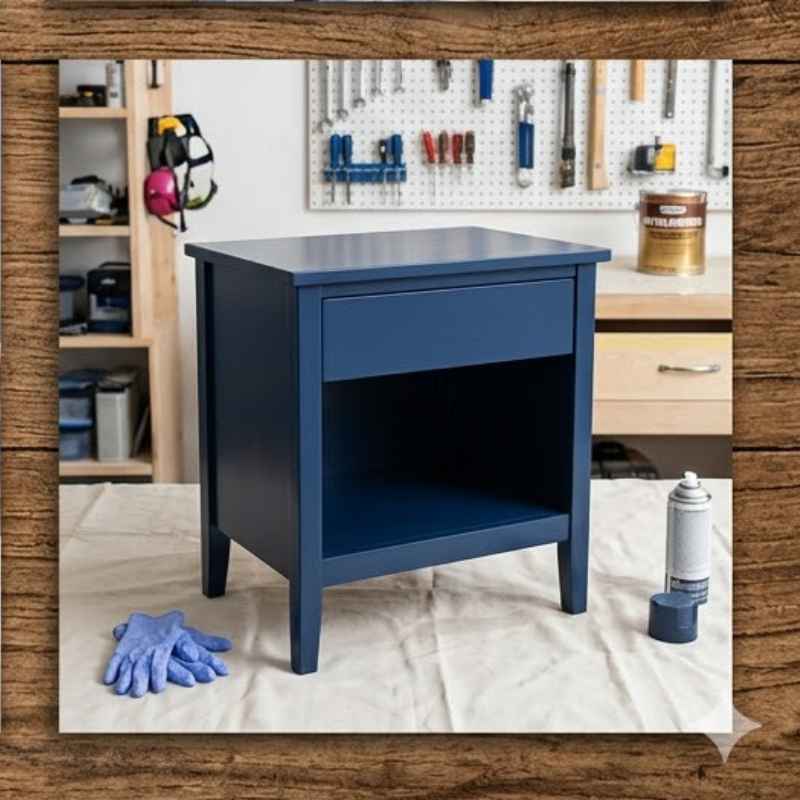
Consider a wooden dresser or a side table. If the wood finish is worn or you’re tired of the color, spray paint offers a quick update. You can go from a dark wood stain to a bright, bold color, or a sophisticated neutral.
The key is the prep work. Make sure you’ve sanded and primed. This ensures the paint adheres well to the often-smooth surface of furniture like dressers.
What about a wooden headboard? These can be tricky to paint with a brush, especially if they have raised panels or decorative carvings. Spray paint can highlight these details beautifully.
It provides a uniform color that emphasizes the design of the piece. Just remember to mask off any areas you don’t want painted, like hardware or fabric inserts.
Even simple wooden items can get a makeover. A plain wooden shelf unit, a garden bench made of wood, or even an old wooden picture frame can be revived with spray paint. The possibilities are vast.
The important thing is to match the paint type and technique to the furniture’s material and intended use.
In U.S. homes, wood furniture is everywhere. From modern Scandinavian designs to traditional farmhouse styles, wood plays a starring role.
Spray paint offers a way to update these pieces without a huge investment in new furniture. It’s an accessible DIY method. It empowers homeowners to personalize their spaces.
Whether it’s a vintage find from a flea market or a mass-produced piece that needs a color boost, spray paint is a powerful tool.
The environment matters, too. If you’re painting outdoors, choose a calm day. Wind can blow dust and debris onto your wet paint.
It can also cause uneven spray patterns. If you’re painting indoors, ensure extreme ventilation. Open windows and use fans.
Consider working on a drop cloth in a garage or spare room. This protects your space. It also allows you to control the environment better.
User behavior is also a factor. A child’s toy box needs a very durable finish. A decorative accent table that’s rarely touched can get away with a less robust paint job.
Always consider how the furniture will be used. This helps you decide whether a primer, multiple paint coats, and a clear topcoat are necessary. For high-traffic items, don’t skimp on these steps.
They are the difference between a finish that lasts and one that quickly shows wear.
When Is Spray Paint the Right Choice?
Spray paint shines when you need a smooth, uniform finish on complex shapes. If your furniture has lots of curves, carvings, or spindles, spray paint is often easier than brushes. It can reach all those tricky spots without much effort.
This saves you time and frustration. It helps you achieve a professional look without needing advanced painting skills.
It’s also a great choice for smaller furniture items. Think about stools, side tables, decorative boxes, or even picture frames. These pieces are easy to handle.
You can paint them in a well-ventilated area without much fuss. The speed of spray painting makes quick work of these smaller projects. You can transform them in a single afternoon.
Spray paint is excellent for updating items that have a laminate or metal finish, too. Many spray paints are designed to adhere to a variety of surfaces. This means you can give an old laminate dresser a whole new look.
Or repaint metal legs on a coffee table. Always check the paint can for compatibility with different materials.
When you want a very modern, sleek finish, spray paint is ideal. The fine mist creates a smooth surface that often looks like it was factory-finished. High-gloss spray paints, in particular, can give a very high-end look.
This is hard to achieve with traditional brush painting.
However, spray paint might not be the best choice for large, flat surfaces where brush strokes are less noticeable. For instance, a large, flat-top dining table might be better suited to a roller and brush application. This allows for a thicker application of paint.
It also gives you more control over leveling. While you can spray paint large surfaces, it requires more skill and a lot of careful technique to avoid unevenness.
Also, if the furniture has deep imperfections like significant peeling paint or rot, spray paint might not be the best solution. These issues usually require more intensive repair work, like stripping and refinishing. Spray paint is best for pieces that are in decent condition and just need a cosmetic update.
It’s for refreshing, not for major restoration.
Consider the durability needed. For items that will get heavy use, like a child’s high chair or a desk used daily, a spray paint finish might need extra protection. A good primer and a durable clear topcoat are essential.
Without them, the paint might chip or scratch more easily than a traditional brushed-on paint. If you’re looking for a super-tough, indestructible finish, some other methods might be more suitable. But for many common furniture pieces, spray paint is a fantastic, accessible option.
Common Pitfalls and How to Avoid Them
One of the most common mistakes is not preparing the surface properly. As we’ve stressed, this is crucial. Skipping cleaning, sanding, or priming leads to paint that doesn’t stick.
You’ll see peeling or chipping very quickly. Always take the time to clean, sand, and prime your wood furniture. Use a tack cloth to remove all dust.
A smooth, clean, primed surface is your foundation.
Another big pitfall is applying the paint too thickly. People often think one heavy coat will do the job. This is a mistake.
Thick coats lead to drips, runs, and an uneven finish. They also take much longer to dry. Always apply multiple thin coats.
Let each coat dry. This builds up the color gradually. It results in a much smoother and more durable finish.
Remember: thin coats are your friend.
Holding the spray can incorrectly is also a problem. If you spray too close, you’ll get drips and runs. If you spray too far away, the paint will be too fine and might not cover well, or it could be uneven.
Aim for that 6-8 inch distance. Keep the can moving in a steady, even sweep. Start and stop the spray motion off the furniture.
Not shaking the can enough is another common error. The paint needs to be thoroughly mixed for an even spray. If the can has been sitting for a while, give it an extra good shake.
Listen for the mixing ball. If it’s not rattling, shake it more. This ensures the pigment and propellant are combined properly.
Ignoring drying times is also a major mistake. Applying a second coat too soon can re-wet the previous layer. This causes sagging and an uneven texture.
It can even lift the paint. Always check the can for recommended recoat times. Be patient.
Let the paint dry properly. It’s worth the wait for a better finish.
Overlooking ventilation is dangerous. Spray paint fumes contain solvents. They can be harmful if inhaled.
Always paint in a well-ventilated area. Wear a respirator mask designed for organic vapors. Don’t try to spray paint in a small, unventilated room.
Your health is more important than a quick paint job.
Finally, not cleaning the nozzle can lead to clogs. This ruins the spray pattern. It can cause splatters.
After you’re done painting, turn the can upside down and spray until clear propellant comes out. This clears the paint from the nozzle. If it does clog, you might be able to fix it.
But it’s often easier to prevent it.
I once saw a friend try to spray paint a dresser without any primer. The dark wood bleed through the light-colored paint. It looked terrible.
Then, she tried to fix it by spraying another coat, but she sprayed it too close and too thick. The whole thing ended up with huge drips and an uneven texture. It was a mess.
It showed me how vital each step is, from prep to application.
Frequent Questions About Spray Painting Wood Furniture
Can I spray paint furniture directly over an old finish?
Yes, but only if the old finish is in good condition. You must clean it thoroughly and then sand it lightly to create a surface for the new paint to adhere to. Applying a good quality primer is also highly recommended.
If the old finish is peeling or damaged, you’ll need to remove it first.
How many coats of spray paint do I need?
This depends on the paint color and the original color of the furniture. You generally need two to four thin, even coats for good coverage. It’s always better to apply multiple thin coats rather than one or two thick ones.
This ensures a smoother, more durable finish and avoids drips.
How long does spray paint take to dry on furniture?
Spray paint is usually dry to the touch within 15-30 minutes. However, allow at least 1-2 hours between coats. Full curing can take 24 hours to several days, or even weeks for some types.
During the curing period, the paint is still vulnerable, so handle the furniture gently.
What is the best type of spray paint for wood furniture?
Acrylic enamel or oil-based enamel spray paints are generally best for wood furniture. Look for paints labeled for furniture, cabinets, or all surfaces. These are formulated for durability and adhesion.
For a very durable finish, automotive-grade paints or specialized furniture lacquers can also be used, but they might be harder to find.
Do I need to use a primer with spray paint on wood?
While some spray paints claim to be “primer and paint in one,” using a dedicated spray primer designed for wood is highly recommended. A good primer helps the paint adhere better, blocks stains from bleeding through (especially from dark wood tannins), and creates a uniform surface for a smoother finish.
How can I avoid drips and runs when spray painting furniture?
Drips and runs are usually caused by spraying too close, too thick, or not keeping the can moving. Always maintain a consistent distance of 6-8 inches from the surface. Apply thin coats.
Keep the can moving in a steady sweep, starting and stopping the spray motion off the furniture. If a drip starts, stop spraying and let it dry before fixing it.
Conclusion
Transforming wood furniture with spray paint is totally achievable. It requires patience and attention to detail. But the results can be incredibly rewarding.
By focusing on solid preparation, choosing the right materials, and mastering a simple technique, you can achieve that smooth, professional finish. Your furniture will look amazing, and you’ll feel a great sense of accomplishment. So, grab your mask and your favorite color, and get ready to bring that piece of furniture back to life!