Do You Remove Painters Tape When Wet or Dry? Best Answer
Removing painters tape at exactly the right moment is the single most critical step for achieving crisp, professional paint lines without peeling or bleeding. If you have ever pulled tape off a wall only to watch your fresh paint peel away with it, you know the frustration of guessing the timing. This guide reveals the definitive answer, explains the science of paint adhesion and tape removal windows, and provides a step-by-step method for flawless results on every project. If you are taping the tricky wall-to-ceiling line specifically, see our guide on how to paint walls without getting paint on the ceiling for the full taping and cutting-in method.
Simply put, you should remove painters tape while the paint is still slightly wet or “tacky” to the touch, typically within 1 to 24 hours after application. Removing it dry—waiting 48 hours or more—significantly increases the risk of tearing the fresh paint film. The exact window depends on paint type, humidity, and temperature, but the golden rule is to pull the tape when the paint is dry to the touch but not fully cured.
Key Takeaways
- Remove painters tape when the paint is dry to the touch but not fully cured (typically 1-24 hours) to prevent peeling.
- Removing painters tape dry (after 48+ hours) often tears the paint film, leaving jagged edges and requiring time-consuming touch-ups.
- Always use a putty knife or razor blade to score the edge of the tape before removal, regardless of timing.
- High-quality painter’s tapes like FrogTape or 3M ScotchBlue offer specific adhesion windows that vary by surface and environment.
- Heat, humidity, and paint sheen drastically affect how quickly you need to act for perfect results.
What Happens If You Remove Painters Tape When Dry?
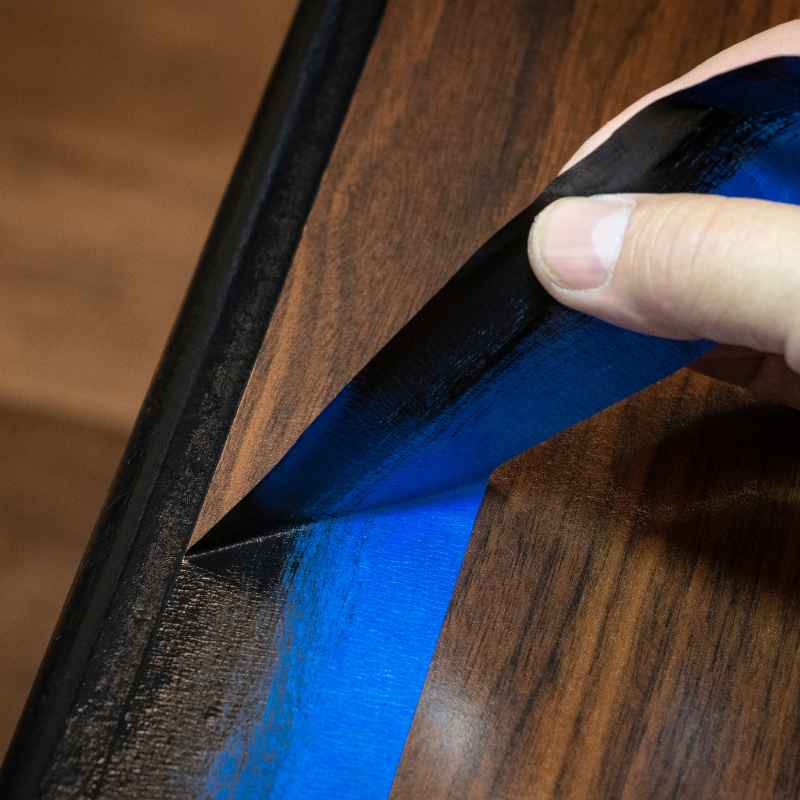
Waiting too long to remove painters tape is the most common DIY painting mistake. When paint fully cures, it forms a tough, continuous plastic film that bridges across the edge of the tape. Pulling the tape at this stage literally tears the paint, creating jagged, uneven lines that often require sanding, patching, and repainting.
According to a report from 3M, paint begins to form a continuous film over the tape edge within one hour of application. After 24 hours, the bond between the paint and the tape can become stronger than the bond between the paint and the substrate. This chemical reality means that waiting too long essentially welds your paint to the tape.
- Paint Peeling: The most common result of dry removal. The paint comes off in sheets along the tape line.
- Jagged Edges: Instead of a clean, sharp line, you get a rough, torn edge that looks unprofessional.
- Adhesive Transfer: Dried-out tape can leave sticky residue on the wall that attracts dirt and dust over time.
- Drywall Damage: Aggressively pulling dry tape can sometimes tear the paper facing on drywall, requiring compound repair.
- Time Waste: You will spend hours correcting mistakes that could have been avoided by pulling the tape a day earlier.
Warning: Never let painters tape sit for more than 14 days. Even if you have not painted, the adhesive can permanently bond to the surface, making removal a nightmare. 3M recommends removing ScotchBlue tape within 7 days for best results on finished walls.
How to Remove Painters Tape for Perfect Lines
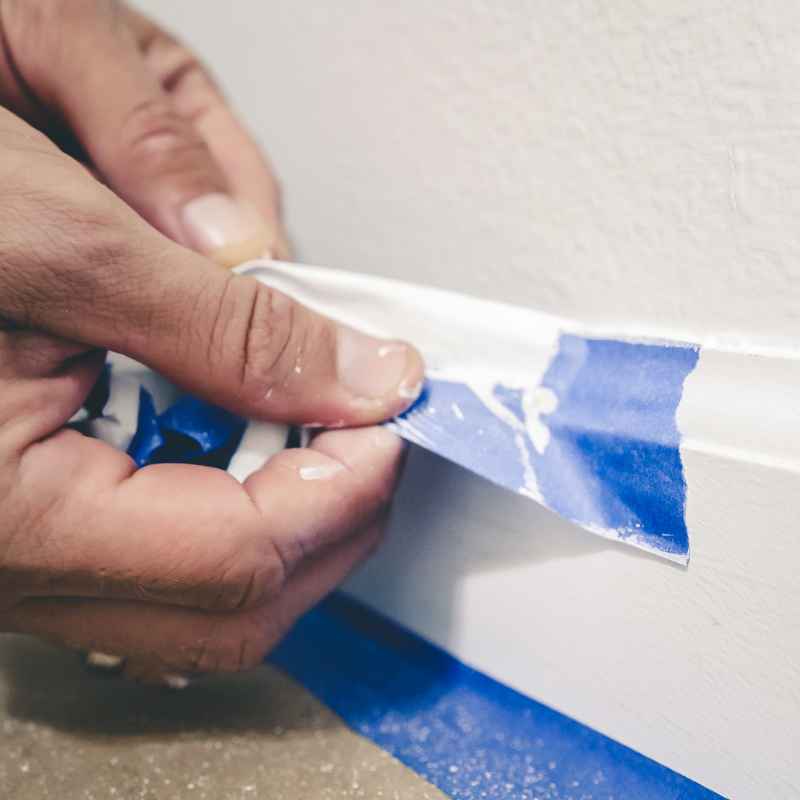
Mastering the technique of removing painters tape is just as important as the timing. Even if you hit the perfect window, poor removal technique can still ruin your edges. Follow this exact process for flawless results every time you paint.
- Wait for the Tacky Phase: Wait until the paint is dry to the touch but still slightly tacky. This is usually 1-4 hours for latex paint and 24 hours for oil-based paint.
- Score the Edge: Run a putty knife or a sharp razor blade along the edge of the tape to break the paint film. This is the most critical step for preventing peeling.
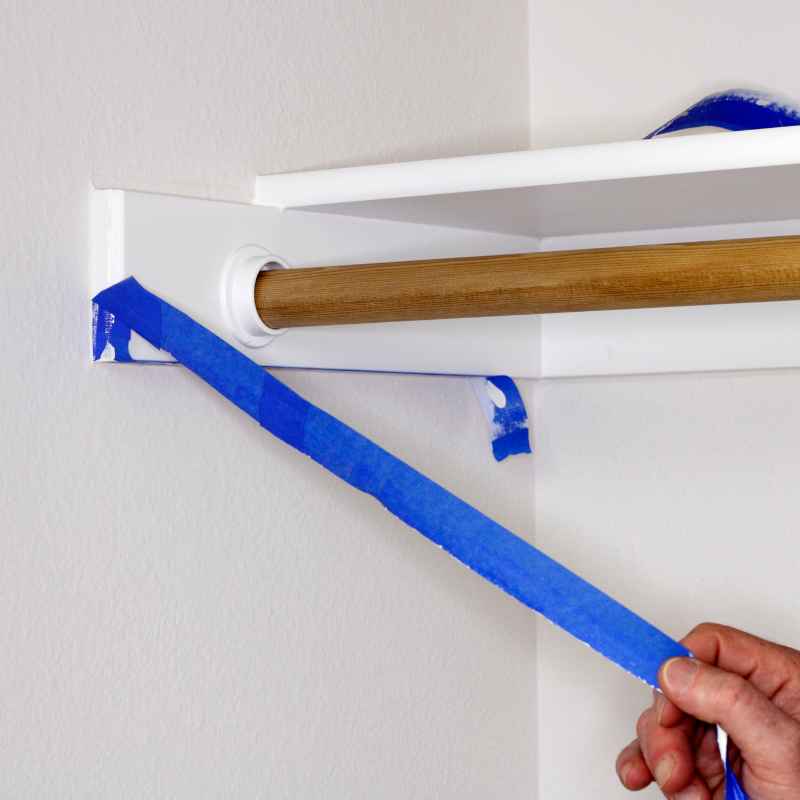
- Pull Slowly at a 45-Degree Angle: Grasp the end of the tape and pull it back slowly, keeping the tape close to the painted surface. A 45-degree angle applies even tension across the adhesive.
- Pull Back Over Itself: If the tape is long, pull it back over itself (doubled over) rather than pulling it straight out. This minimizes stress on the delicate paint edge.
- Use a Hairdryer for Stubborn Sections: If the tape resists pulling or has been on for too long, gently heat it with a hairdryer on low for 10-15 seconds to soften the adhesive.
Pro Tip: Pull the tape away from the painted surface, not towards it. If you just painted a wall, pull the tape towards the unpainted area or the window frame you were masking off.
What Is the “Flashing Off” Window for Painters Tape?
Painters refer to the “flashing off” window as the optimal time to remove tape. This is the period when the paint has lost its wet sheen and feels dry to the touch but has not yet fully cross-linked or cured at a molecular level.
The Sherwin-Williams technical team states that most latex paints are dry to the touch in 1-2 hours and recoat-ready in 4-6 hours. However, full cure takes 14-30 days. The flashing off window is that sweet spot between dry touch and full cure when the paint film is stable enough to hold its shape but flexible enough to release from the tape without tearing.
| Paint Type | Dry to Touch | Tape Removal Window | Full Cure Time |
|---|---|---|---|
| Latex / Acrylic | 1-2 hours | 1-12 hours | 14-30 days |
| Oil-Based | 6-8 hours | 24-48 hours | 7-21 days |
| Chalk Paint | 30-60 mins | Within 4 hours | 7-14 days |
| Spray Paint | 10-30 mins | 30 mins – 2 hours | 24-48 hours |
As the table shows, you have the widest window with oil-based paints, but you need to work fastest with chalk and spray paints. Latex paint sits comfortably in the middle, giving you most of a day to remove the tape safely.
Why the Type of Paint Matters for Tape Removal Timing
Not all paints are created equal when it comes to adhesion chemistry. The resin content, the solvent base, and the sheen level directly affect how quickly the paint bonds to the tape edge. Understanding these differences helps you set a precise timer for tape removal based on your specific paint.
- Flat / Matte Paint: Dries more slowly due to low resin content. You have a longer window (up to 24 hours) to remove tape. However, flat paint is also more prone to peeling if removed dry, so be vigilant.
- Eggshell / Satin Paint: These are the most forgiving options. They dry at a moderate rate and have good elasticity. Remove within 12 hours for best results.
- Semi-Gloss / Gloss Paint: These dry quickly to a hard, durable finish. You must remove the tape within 4-8 hours, or the paint film will crack sharply along the tape edge upon removal.
- Masonry / Cement Paint: Very porous surface. Tape can be removed once the paint is tacky, usually within 4 hours, because the paint absorbs into the substrate rather than sitting on top.
- Spray Paint: Dries incredibly fast due to solvent evaporation. Remove the tape immediately after the final coat becomes tacky, usually within 30 minutes.
Important: Always check the manufacturer’s instructions on the paint can. They usually list “Dry to Touch” and “Recoat” times. Use the “Dry to Touch” time as the starting point for your tape removal window. Benjamin Moore and PPG offer specific timing charts on their labels.
What Tools Do You Need for Clean Tape Removal?
Having the right tools on hand makes the difference between a stressful tape pull and a satisfying, clean finish. You do not need much, but the quality of your tools directly impacts the quality of your paint line. Do not skip the scoring step for lack of a good blade.
| Tool | Purpose | Estimated Cost |
|---|---|---|
| Putty Knife (1-2 inch) | Scoring the paint edge without scratching the wall | $5 |
| Razor Blade / Utility Knife | Precision scoring on glass, trim, or cured paint | $10 |
| Hair Dryer | Softening adhesive for dry or stubborn tape removal | $20 |
| Microfiber Cloth | Cleaning dust and debris off walls before taping | $5 |
| High-Quality Painters Tape | The foundation of clean lines and easy release | $10-$20 |
Investing in a sharp razor blade is the cheapest and most effective way to ensure clean lines. A dull blade will tear the paint rather than score it cleanly, which defeats the purpose of the entire removal process.
Common Mistakes to Avoid When Removing Painters Tape
Even experienced DIYers and professional painters make errors that can ruin hours of hard work. Being aware of these common pitfalls will help you achieve a finish that looks like it was done by a pro. Avoiding these mistakes is just as important as choosing the right paint color.
- Waiting Too Long: This is the number one mistake. Remove tape within 24 hours for water-based paints. The longer you wait, the higher the risk of paint peeling.
- Not Scoring the Edge: Failing to break the paint film with a knife is almost guaranteed to cause peeling. Ten seconds of scoring can save you hours of touch-up work.
- Pulling Straight Up: Pulling the tape away from the wall at a 90-degree angle puts enormous stress on the paint edge. Always pull at a 45-degree angle back over itself.
- Pulling Too Fast: Yanking the tape off quickly might feel efficient, but it frequently pulls paint off with it. Slow and steady wins the race for clean edges.
- Using Cheap Tape: Low-quality masking tape can leave adhesive residue behind and may not have the right level of adhesion for your specific paint type.
- Taping Over Dirty Walls: Paint adheres poorly to dust and grime. If you tape over a dusty wall, the paint will peel off with the tape, even if you remove it at the perfect time.
How Does Temperature Affect Painters Tape Adhesion?
Temperature and humidity are two of the biggest variables affecting paint and tape performance. You can follow all the timing rules perfectly and still get bad results if your environmental conditions are outside the recommended range for the tape.
According to the technical data sheet for 3M ScotchBlue tape, the ideal application temperature is between 60-80°F (15-27°C). Applying tape below 50°F can cause the adhesive to stiffen, leading to poor seal and paint bleed under the edge. Conversely, extreme heat can accelerate the bonding process too quickly.
- High Humidity: Slows down paint drying time. This extends your tape removal window but also increases the risk of the tape slipping or paint bleeding.
- Low Humidity: Speeds up paint drying significantly. You might only have a 4-hour window for tape removal before the paint cures too hard.
- Cold Temperatures (Below 50°F): Paint dries very slowly, and tape adhesive loses tack. You may need to wait 24-48 hours before removing the tape safely.
- Hot Temperatures (Above 85°F): Paint skins over rapidly. You may need to remove the tape within 1-2 hours to prevent the skin from tearing upon removal.
Tip: On hot, dry days, paint early in the morning and remove the tape by lunchtime. On cold, damp days, paint in the afternoon and remove the tape the next morning. Working with the weather, not against it, yields the best results.
What Do Professional Painters Recommend?
Professional painters treat tape removal as a critical skill that separates good work from great work. I have compiled advice from seasoned pros, and their consensus is remarkably consistent: “Remove the tape as soon as the paint is touch-dry, and always score the edge first.”
A master painter with over 20 years of experience teaching at Benjamin Moore paint stores emphasizes the “score and peel” technique. He notes that even the most expensive tape will fail if you neglect the scoring step. He also recommends using a high-quality tape like FrogTape for textured surfaces to prevent bleeding.
- Score Immediately: Pros score the tape edge with a razor blade immediately after the final coat is applied, before the paint fully skins over. This gives the cleanest possible break.
- Use FrogTape for Textured Walls: FrogTape’s “PaintBlock” technology reacts with water to create a micro-seal that prevents bleeding on textured surfaces like orange peel or knockdown.
- Pull at an Angle: A 45-degree angle allows the tape to stretch slightly as it pulls, reducing stress on the paint edge and preventing micro-tears.
- Don’t Rush the Process: Removing tape for an entire room takes time and patience. Pros budget 15-20 minutes just for careful tape removal at the end of a job.
Frequently Asked Questions
Can you leave painters tape on overnight?
Yes, for most latex paints, leaving painters tape on overnight is actually ideal. The paint will be dry to the touch but not fully cured, which is the perfect window for removal. However, avoid leaving it on for more than 24 hours for water-based paints.
What happens if you leave painters tape on too long?
Leaving painters tape on for too long (over 14 days) can cause the adhesive to permanently bond to the surface. When you finally remove it, the tape may tear, leave sticky residue, or pull off chunks of paint or drywall paper.
Should you remove painters tape before the paint dries completely?
Ideally, yes. You should remove painters tape when the paint is dry to the touch but still slightly tacky. This prevents the paint film from tearing when the tape is pulled.
Removing it completely dry is the riskiest approach.
How do you remove old painters tape without peeling paint?
Use a hairdryer on low heat to warm the tape for 15-30 seconds. This softens the aged adhesive. Then, use a razor blade to carefully score the edge, and pull the tape slowly at a 45-degree angle back over itself.
Is FrogTape better than ScotchBlue for preventing peeling?
Both are excellent brands with different strengths. FrogTape is generally superior on textured walls due to its PaintBlock technology. ScotchBlue is excellent on smooth surfaces and generally offers a longer adhesion window before becoming difficult to remove.
Final Thoughts
Removing painters tape at the optimal time is the simplest way to achieve professional-looking paint lines without the frustration of peeling or jagged edges. Remember the golden rules: remove the tape while the paint is still tacky, not fully cured, and always score the edge with a razor blade before pulling at a 45-degree angle. By respecting the timing and using the correct technique, you will save yourself hours of touch-up work and enjoy a flawless finish on your next painting project.
Sponsored / affiliate links. As an Amazon Associate I earn from qualifying purchases. I may earn additional commission from eligible campaigns.
 SmaringRobot Blue Masking Tape, Painters Tape, Painting Tape (1442.4yd=0.94IN*60.1yd*24), Original Multi-Surface Easy Removal Paint Tape with Medium Adhesive Backing for Indoor Outdoor Use, 24 Rolls
 BOMEI PACK 3 Pack Painters Tape, 1 inch x 30yds, Premium Painting Masking Tape, Clean Release Paper Tape for Home and Office (Yellow)