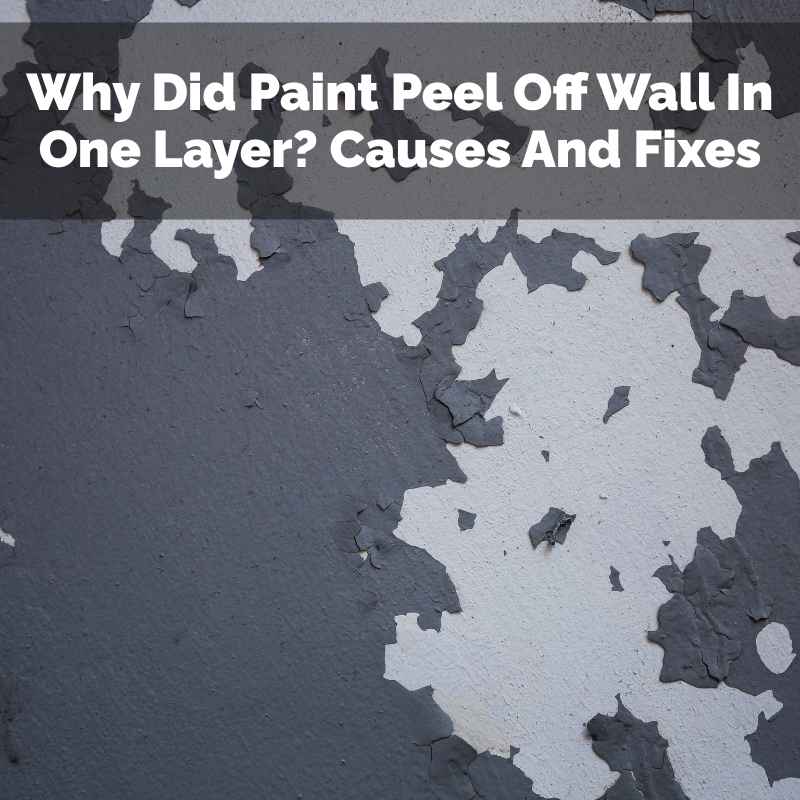
Why Did Paint Peel Off Wall In One Layer? Causes And Fixes
It can be super frustrating when you paint a wall, only to see the paint start to lift off in sheets. You might be left wondering, “Why did paint peel off my wall in one layer?” This isn’t just about looks; it can signal deeper issues. We’ll dive into why this happens and how to fix it for good.
Paint peels off walls in one layer mainly due to poor adhesion to the surface. This often stems from surface preparation issues, moisture problems, or incompatible paint layers. Addressing the root cause is key to a lasting paint job.
Understanding Why Paint Peels in Sheets
Paint acts like a protective skin for your walls. For it to stick well, the surface needs to be just right. When paint peels off in just one layer, it means the bond between that layer and the wall wasn’t strong enough. Think of it like trying to stick tape to a dusty surface. It might stick for a bit, but it won’t hold for long.
Several things can cause this weak bond. The wall surface might have been dirty, greasy, or still wet when the paint went on. Sometimes, the paint type used before might react badly with the new paint. Moisture is another big culprit. If water gets behind the paint, it loosens its grip.
My Own Paint Peeling Nightmare
I remember one time, I was helping a friend paint her living room. She’d just moved in and wanted a fresh look. We spent hours prepping. Or so we thought. We wiped down the walls, filled a few holes, and then slapped on a new coat of what we thought was great paint. Within a week, in a few spots, the paint started to bubble. Then, it peeled right off, like a sunburnt layer of skin.
My friend was so upset. I felt terrible because I’d helped. We discovered the walls had a strange, waxy buildup from years of old cleaning products. We hadn’t cleaned it off properly. That waxy layer was the problem. It stopped the new paint from sticking. We had to scrape everything off, clean it like crazy with a special degreaser, prime, and then repaint. It was a big lesson learned about not cutting corners on prep work.
Key Reasons for Single-Layer Paint Peeling
Let’s break down the most common reasons paint decides to abandon your walls. Understanding these will help you spot the issue quickly.
Surface Preparation Errors
This is the number one reason paint fails. If the surface isn’t clean and ready, the paint has nothing solid to grab onto.
Dust and Grime Buildup
Walls collect dust, dirt, and grease over time. Think about kitchens, where cooking oils build up. Or living rooms, where hands touch the walls. This film acts as a barrier. Wiping with a dry cloth might move dust around. You need to wash the walls. A mild soap and water solution usually does the trick. For tough grease, a degreaser might be needed.
Old, Loose Paint
If there was old, peeling paint already on the wall, you must remove it. Painting over loose paint is like building on shaky ground. It will eventually fail. Scraping is essential. Make sure all loose bits are gone before you start fresh.
Mold and Mildew
These tiny organisms can grow on walls, especially in damp areas like bathrooms or basements. They eat away at surfaces and prevent paint from adhering. You need to kill them. Special mold removers are available. You must clean the area thoroughly. Then, prime it with a stain-blocking primer.
Moisture Problems
Water is paint’s worst enemy. It loves to sneak in where it’s not wanted.
High Humidity Levels
In bathrooms, kitchens, or laundry rooms, high humidity is common. If the paint isn’t meant for these areas, or if ventilation is poor, moisture can get trapped. This moisture can weaken the paint bond over time. Using paints designed for high-moisture areas can help. Good ventilation is also crucial.
Leaks and Water Damage
A leaky pipe, a roof leak, or even condensation from an old window can lead to water getting behind the drywall or plaster. When the wall is wet, paint can’t stick. You’ll often see peeling or bubbling paint in these spots. The leak must be fixed first. Then, the wall needs to dry out completely. This can take days or even weeks. You might need to replace damaged drywall.
Condensation
In colder climates, warm, moist air inside can hit cold surfaces like windows or exterior walls. This causes condensation. If this happens regularly, the moisture will soak into the paint and drywall. It can cause peeling. Improving insulation or ventilation can help reduce this.
Incompatible Paint Layers
Not all paints play well together. Sometimes, a new coat clashes with what’s underneath.
Oil-Based vs. Water-Based Paints
A common issue is painting a water-based (latex) paint over an oil-based paint without proper priming. Latex paint can bead up and peel off oil-based surfaces. The reverse can also cause problems, though less often. The rule of thumb is: if you’re unsure, clean the surface well, lightly sand it, and then use a good quality primer. A primer designed for bridging different paint types is best.
Glossy Surfaces
If the previous paint has a high-gloss finish, it can be very slick. Paint needs a slightly rough surface to grip. If you paint directly over a very glossy finish without scuff-sanding or priming, the new paint might not adhere well. Lightly sanding the surface creates “tooth” for the new paint.
Improper Paint Application
How you apply the paint also matters.
Too Thin a Coat
If you try to stretch paint too far, you might end up with a very thin layer. This layer might not have enough body to stick properly. It can peel more easily. It’s better to apply two thin, even coats than one thick, splotchy one.
Painting Over Wet Surfaces
This is a big mistake. If the wall itself is still damp from cleaning, or if there’s residual moisture, paint won’t stick. Always let walls dry completely.
Environmental Factors
Sometimes, the environment plays a role.
Extreme Temperature or Humidity Changes
Painting in very hot, very cold, or very humid conditions can affect how the paint dries and adheres. Most paint cans list ideal application temperatures. Following these guidelines is important. Rapid changes in temperature or humidity after painting can also stress the paint film.
Types of Surfaces and Their Paint Peeling Tendencies
Different wall materials can behave differently.
Drywall
Drywall is common in most homes. It’s made of paper and gypsum. The paper is a good surface for paint. But if the drywall is damaged, wet, or not taped and mudded correctly, paint can peel. Moisture is a big enemy of drywall.
Plaster
Older homes often have plaster walls. Plaster is a harder, more durable surface. However, it can crack. If plaster is old and powdery, or if moisture gets behind it, paint can peel. In some cases, old plaster can be chalky. This needs a special primer to seal it.
Wood Paneling
Wood can expand and contract with changes in temperature and humidity. If paint is applied over wood that’s constantly moving, it can stress the paint film. This can lead to peeling, especially at joints or edges. Proper priming and using flexible paint can help.
Masonry (Brick, Concrete)
These surfaces are porous. They need specific masonry primers and paints. If standard paint is used, it can trap moisture. This leads to peeling. These materials also often require more robust surface preparation.
Infographic-Style Section: Quick Scan – Common Paint Peeling Culprits
Quick Scan: Paint Peeling Culprits
Surface Prep Issues
- Dust & Grease: Walls not cleaned.
- Loose Paint: Old flakes left behind.
- Mold/Mildew: Unaddressed growth.
Moisture Problems
- Humidity: High levels in rooms.
- Leaks: Plumbing or roof issues.
- Condensation: Cold surfaces meeting warm air.
Paint Mismatches
- Oil over Latex: Without primer.
- Glossy Surfaces: Not scuffed up.
What This Means for Your Walls: Normal vs. Concerning Signs
It’s good to know when a little peeling is just a minor issue and when it’s a sign of a bigger problem.
When a Little Peeling is Normal
Sometimes, you might see very small spots of peeling. This can happen if a tiny bit of dust was missed. Or if a corner was bumped hard. If it’s just a tiny chip and the rest of the paint looks good, it might not be a huge concern. You can often just touch it up.
When to Worry About Peeling Paint
You should worry if the peeling is widespread. If it’s happening in multiple spots. If the paint is coming off in large sheets. This means there’s a problem with adhesion over a larger area. Also, if you see signs of water damage with the peeling paint. This is a red flag.
Checking for Underlying Issues
Before you just re-paint, it’s wise to investigate.
Feel the Surface
After you scrape off the loose paint, feel the wall. Is it dusty? Greasy? Sticky? Damp? These sensations tell you what might be wrong. A dry, dusty surface points to poor cleaning. A damp feeling means moisture is present.
Look for Bubbles or Blisters
Small bubbles often mean moisture is trapped. These can grow into larger peeling areas.
Test Adhesion
After cleaning and prepping, you can do a simple adhesion test. Apply a small piece of strong tape (like duct tape) to the wall. Press it down firmly. Then, quickly pull it off. If a lot of paint comes off with the tape, you have an adhesion problem.
Quick Fixes and Tips for Preventing Peeling
Prevention is always better than a cure. And when you do need to fix it, doing it right matters.
The Golden Rule: Prep, Prep, Prep!
I can’t stress this enough.
Essential Prep Steps
- Clean Thoroughly: Wash walls with soap and water. Use a degreaser for kitchens.
- Remove Loose Paint: Scrape all peeling or bubbling paint until you reach solid edges.
- Repair Surface: Fill holes or cracks with spackle or joint compound. Let it dry and sand smooth.
- Sand: Lightly sand the entire surface, especially glossy areas. This creates “tooth.”
- Wipe Down Again: Remove all sanding dust with a damp cloth or tack cloth.
Choosing the Right Paint and Primer
Using the correct products makes a huge difference.
Priming is Key
Primer acts as a bridge. It helps the paint stick to the surface. It also seals porous surfaces and blocks stains. Always prime over bare drywall, repaired areas, or when switching paint types (oil to latex, for example). Use a high-quality primer.
Use the Right Paint for the Room
Kitchens and bathrooms need paints that can handle moisture and are easy to clean. Look for “kitchen and bath” paints or those with mold/mildew resistance. For living rooms and bedrooms, standard latex paints are usually fine.
Dealing with Moisture
If moisture is the issue, fixing the source is vital.
Ventilation
Ensure good airflow in bathrooms and kitchens. Use exhaust fans when cooking or showering. Open windows when possible.
Repair Leaks
Get any plumbing or roof leaks fixed immediately. Allow the affected area to dry out completely before painting. This might take time.
Applying Paint Correctly
Follow the directions on the paint can.
- Temperature: Paint within the recommended temperature range.
- Thin Coats: Apply thin, even coats. Let each coat dry completely before applying the next.
- Tools: Use good quality brushes and rollers.
Real-World Scenarios Where Paint Peels
Let’s look at places and times where you’re more likely to see this problem.
The Bathroom Blitz: Why Paint Peels After Showering
Bathrooms are a prime spot for paint issues. High humidity is constant. When you shower, steam fills the air. If the paint isn’t moisture-resistant, or if the fan isn’t used, this moisture gets trapped. It can seep into the paint layer. Over time, this weakens the bond. You might see peeling near the shower or sink. It’s a common place to find paint that didn’t stick well.
Kitchen Woes: Grease and Grime on Walls
Cooking creates grease particles. These float in the air and land on your walls. Over months and years, this forms a sticky film. When you try to paint over it without properly cleaning, the new paint just sits on top of the grease. It can’t bond to the actual wall surface. That’s why kitchen walls often need degreasing before painting.
The Basement Blues: Damp Walls and Peeling Paint
Basements are often prone to moisture. They can be below ground level. They might have issues with water seeping in through the foundation. Or they could have high humidity from lack of ventilation. This dampness is a perfect environment for mold and mildew. It also makes paint peel off easily. Proper waterproofing and ventilation are key here.
Older Homes: The Charm and Challenges of Plaster
In older homes, you find beautiful plaster walls. But plaster can be brittle. It can develop hairline cracks. If moisture gets behind the plaster, or if the plaster itself is old and powdery, paint will have trouble sticking. Sometimes, a special bonding primer is needed to seal the plaster before painting.
What This Means for You: What to Do Next
So, what’s the takeaway? How do you deal with peeling paint?
When to Call a Professional
If the peeling is widespread. If you suspect major water damage or mold. If you’re dealing with old, unmanageable surfaces. It might be time to call in a painting contractor or even a specialist who deals with water damage or mold remediation. They have the tools and experience to tackle complex issues.
DIY Fixes for Minor Peeling
For small areas, you can often fix it yourself.
DIY Peeling Paint Fix
1. Scrape: Use a putty knife to remove all loose paint. Go until you reach a solid edge of paint.
2. Sand: Smooth any rough edges left by scraping. Lightly sand the area to blend it.
3. Clean: Wipe the area with a damp cloth to remove dust. Let it dry.
4. Prime: Apply a good quality primer to the bare spot and slightly beyond. Let it dry.
5. Paint: Apply one or two coats of matching paint. Feather the edges so the patch blends in.
Frequent Questions About Paint Peeling
Why is paint peeling off a freshly painted wall?
Paint might peel off a freshly painted wall if the surface wasn’t prepped properly. This includes not cleaning off dust, grease, or old paint. Also, painting over a damp surface or using incompatible paint types can cause this.
Moisture issues behind the wall are another cause.
Can I just paint over peeling paint?
No, you should never just paint over peeling paint. The new paint will not adhere well to the loose paint. It will likely start peeling off too.
You must scrape off all the loose paint first. Then, prepare the surface before repainting.
How do I fix peeling paint in my bathroom?
In bathrooms, peeling paint is often due to moisture. First, fix any leaks or condensation issues. Ensure good ventilation.
Then, scrape off the peeling paint. Clean the wall thoroughly, possibly with a mold cleaner. Use a stain-blocking primer suitable for high-moisture areas.
Finally, repaint with a paint designed for bathrooms.
What is the best primer for peeling paint?
For peeling paint, you need a primer that seals the surface and provides good adhesion. A high-quality bonding primer or a stain-blocking primer is usually best. If you’ve scraped down to bare drywall or plaster, priming is essential to create a stable base for the new paint.
How long does paint need to cure before it can peel?
Paint cures over time, becoming harder and more durable. Even within a few days or weeks, new paint is still somewhat delicate. If the underlying adhesion issues are severe, paint can start to peel relatively soon after application, sometimes within days or a few weeks, as the film settles and experiences stress.
Is peeling paint a sign of lead?
Peeling paint in homes built before 1978 can be a sign of lead-based paint. Lead paint is hazardous if it chips or dust is inhaled. If you suspect lead paint, do not try to remove it yourself.
Contact a certified lead abatement professional. Test kits are available, but professional testing is more reliable.
Wrapping Up: Keeping Your Walls Looking Great
Seeing paint peel off your walls in one layer is disappointing. But it’s usually a clear sign that something went wrong with the adhesion. Most of the time, it comes down to the prep work or moisture. By understanding the causes, you can avoid this problem in the future. And when it happens, you’ll know exactly how to tackle it. A little effort upfront saves a lot of headaches later.