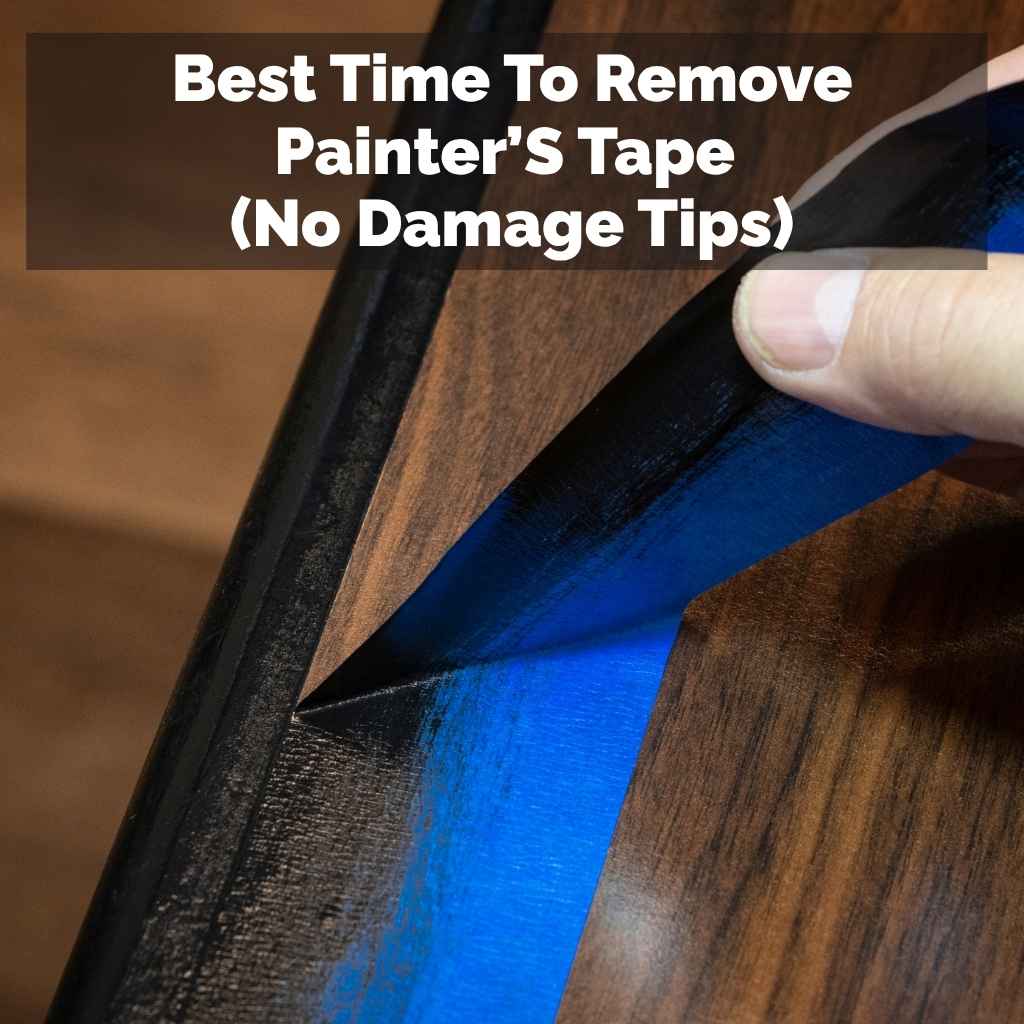
Best Time To Remove Painter’S Tape (No Damage Tips)
The best time to remove painter’s tape is when the paint is dry to the touch but not fully cured. For most latex or acrylic paints, this is usually between 24 to 72 hours after application. Removing it too soon can cause paint to lift, while waiting too long can lead to the paint bonding with the tape.
Understanding Paint Drying and Curing
Paint does not just dry. It goes through stages. First, it’s wet.
Then it’s dry to the touch. This means you can touch it gently. It won’t smudge.
But it’s not ready for heavy use. After that, it starts to cure. Curing is a deeper process.
The paint hardens. It becomes durable. This can take days or weeks.
Full cure makes paint very strong. It bonds well to the surface.
Knowing these stages is key. It tells you when it’s safe. It tells you when it’s not.
For painter’s tape, we want a sweet spot. The paint needs to be firm. It should hold its shape.
But it shouldn’t be too hard. If it’s too hard, it might stick to the tape. Then it will pull off your wall.
We need the paint to be set. But not fully locked in place.
Many factors affect drying time. The type of paint matters. Latex paints dry faster.
Oil-based paints take longer. The humidity in your home is a big deal. High humidity slows drying.
Low humidity speeds it up. Temperature plays a role too. Warmer temps help paint dry faster.
Colder temps slow it down. Surface porosity also matters. Some surfaces soak up paint more.
This can affect drying.
When is the Perfect Time to Pull?
The ideal moment to remove painter’s tape is often when the paint is just dry to the touch. This means it feels firm when you lightly press it. But it’s not completely hardened.
For most water-based paints, like latex or acrylic, this is usually between 24 hours and 72 hours after you finish painting. This is a crucial window.
If you pull the tape too early, while the paint is still wet, you risk smearing. The wet paint can get on the tape. It can then be dragged across your wall.
This creates ugly streaks. It can also pull up the paint from the edge. This leaves a jagged line.
It’s not the clean break you want. It looks messy. It’s very disappointing.
On the other hand, waiting too long is also a problem. As paint cures, it gets harder. It also bonds more strongly to things.
Including the painter’s tape. If the paint cures fully onto the tape’s edge, it can become one. Then, when you pull the tape, you pull the paint off the wall with it.
This is one of the most common painting mistakes. It ruins hours of careful work.
So, aim for that in-between stage. The paint is set. It has enough body.
It won’t run or smear easily. But it hasn’t fully fused with the tape. This is where you get those super clean lines.
It’s a delicate balance. But once you get it right, it’s worth it.
The Science Behind Paint Adhesion and Tape
Understanding how paint sticks to surfaces helps. Paint has binders. These bind the pigment.
They stick to the wall. As the solvent (water or oil) evaporates, the binders link up. This forms a solid film.
This is the paint layer. It gets stronger over time. This is the curing process.
Painter’s tape has a special adhesive. It’s designed to stick. But it’s also meant to be removed.
It shouldn’t leave much residue. It also shouldn’t damage most surfaces. However, this adhesive is still sticky.
It’s holding onto the paint edge. As the paint cures, it hardens. It can become brittle.
When the paint is still somewhat soft, it has a little give. The tape can be pulled away. The paint edge might stretch a tiny bit.
But it snaps back. This creates a clean line. If the paint is very hard, it has no give.
It’s rigid. When the tape pulls, the paint breaks. It breaks at the weakest point.
Often, this is where the paint meets the tape. So, it pulls off the wall.
Think of it like peeling a sticker off paper. If the paper is damp, the sticker might tear the paper. If the paper is very dry and brittle, the sticker might peel cleanly.
Or it might rip the paper too. Paint is somewhere in the middle. It needs some flexibility.
That flexibility is lost as it cures.
Paint Stages Explained
Wet: Paint is liquid. Easily smudged. Cannot touch.
Dry to Touch: Surface feels firm. No smudging. Can handle lightly.
Hard Dry: Paint is solid. Resists light pressure. Ready for light use.
Fully Cured: Paint is at its strongest. Bonds deeply. Resists heavy wear.
My Own Tape Removal Nightmare
I remember one project vividly. It was a bedroom I was redoing. I wanted a sharp contrast.
Dark blue on one wall. Crisp white on the others. I used a high-quality painter’s tape.
I took my time. I pressed it down firmly. I sealed the edges with a putty knife.
I felt so proud of my prep work. Then came the painting. Two coats of dark blue.
It looked amazing.
The next day, I was eager to see the result. I grabbed the end of the tape. I started pulling.
It felt smooth at first. Then, disaster struck. On one section, a chunk of blue paint lifted off the wall.
It was stuck to the tape. My heart sank. I pulled more.
More paint came with it. It left a jagged, horrible line. I had to get a tiny brush.
I tried to fix it. It never looked quite right.
I learned a hard lesson that day. Rushing the tape removal is a mistake. I had pulled the tape too soon.
The paint was still too soft. It wasn’t ready to let go. Or maybe I pulled too fast.
This is where technique also matters. But the timing was the main culprit. It was a good reminder that patience is key in painting.
Even when you’re excited to see the finished look.
Choosing the Right Painter’s Tape
Not all painter’s tapes are the same. This is a vital point. Using the wrong tape can cause trouble.
Even if you pull it at the right time. There are tapes for different surfaces. And for different paint types.
Some tapes are for delicate surfaces. They have a very light adhesive. These are good for wallpaper.
Or freshly painted walls that haven’t cured much.
Standard painter’s tape is for most walls. It has a medium adhesive. It holds well.
But it shouldn’t damage most paints. Then there’s exterior tape. It’s stronger.
It can handle weather. It’s not for interior use usually. It’s too sticky.
It will likely damage interior paint. Or leave residue.
Always read the tape’s packaging. It will tell you what it’s for. It will also say how long it can stay on.
Some tapes are designed for longer holds. Others are for short-term use. For most interior walls, a good quality blue or green painter’s tape is fine.
Avoid the cheap, brown paper kind. It often leaves residue.
I learned this when I helped a friend. He bought the cheapest tape he could find. We painted his living room.
The tape was a nightmare. It tore in places. It left sticky goo everywhere.
We spent more time cleaning up the tape mess. Than we did painting. It was a clear lesson.
Invest in good tape. It saves you headaches later.
Tape Types and Their Uses
Delicate Surface Tape (Purple/Pink): Light adhesive. For wallpaper, fresh paint, sensitive finishes.
General Purpose Tape (Blue/Green): Medium adhesive. For most interior walls, trim, windows.
High-Adhesion Tape (Yellow/Orange): Stronger adhesive. For rough surfaces, blocking paint bleed.
Exterior Tape (Tan/White): Weather-resistant. Strong adhesive. For outdoor use.
Factors Influencing Tape Removal Timing
We’ve talked about paint drying. But other things matter too. The type of paint is a big one.
Latex paints dry faster. They usually let you remove tape sooner. Oil-based paints take longer.
They need more time to harden. So, you might need to wait longer with oil paints.
The finish of the paint matters. Glossy paints are harder. They form a tougher skin.
Matte or flat finishes are softer. They might need more careful removal. Also, the number of coats is important.
Two or three coats of paint are thicker. They take longer to dry and cure. A single coat might be ready sooner.
The surface you’re painting is another factor. Drywall is porous. It absorbs paint.
Wood is less porous. Metal is not porous at all. The surface can affect how paint adheres.
It can also affect drying. Think about painting metal. The paint sits on top.
It’s different from painting drywall. It might be more prone to peeling if not fully set.
I once painted an old wooden cabinet. The wood was very dense. The paint seemed to dry fast on the surface.
But it was still soft underneath. I pulled the tape too soon. I got those jagged edges on the wood.
It was a real pain to fix. This taught me to consider the material. Not just the paint itself.
Techniques for Clean Tape Removal
Pulling the tape is an art. It’s not just yanking. There are smart ways to do it.
The first step is to score the edge. Use a sharp utility knife or a putty knife. Gently run it along the edge of the tape.
This breaks the seal. It cuts through any paint that might have seeped under. It creates a clean break point.
Do this before you pull the tape. It’s a critical step. Especially if you’re worried about paint lifting.
Make sure you don’t cut too deep. You don’t want to damage the wall itself. Just cut through the paint line.
It should be a light score.
When you pull, do it slowly. Pull at a 45-degree angle. This angle helps the tape lift away cleanly.
Pulling straight up can be more damaging. It can rip the paint. Pull in one continuous motion.
If you stop and start, you might get uneven lines.
Work in long sections. If a piece of tape is very long, pull it in one go. If you have corners, pull slowly around them.
Take your time. This is where patience pays off. Don’t rush the process.
Especially around detailed areas. Or intricate moldings.
I always keep a damp cloth handy. If I see a tiny bit of paint lifting, I can quickly dab it. This stops it from spreading.
Or I can use it to clean up any small drips. It’s a good habit to get into.
Quick Tape Removal Steps
1. Score the Edge: Gently cut along the tape edge with a knife.
2. Pull at 45 Degrees: Hold the tape low and pull away slowly.
3. Continuous Motion: Pull in one smooth, steady movement.
4. Small Sections: Break down long strips into manageable pulls.
5. Clean Up: Have a damp cloth ready for small mistakes.
What If Paint Peels Anyway?
It happens. Even with the best efforts. Paint can still lift.
Don’t panic. It’s usually fixable. If a small amount of paint peels, take a deep breath.
Get a small touch-up brush. Dip it in your paint. Carefully paint over the peeled area.
Try to match the surrounding texture. This is easier with flat or matte paints. Glossy paints can show brush strokes more.
If a larger section peeled, it’s more work. You might need to use a putty knife. Gently scrape away any loose paint.
Make the edge smooth. Then, you’ll need to re-tape. Be careful where you tape.
You want to cover the repaired area. But not overlap onto the good paint too much. Apply a thin coat of paint.
Let it dry. Then, remove the tape using the careful method.
Sometimes, the problem is the paint itself. If your paint is old or in bad condition, it might not adhere well. It might be brittle.
In such cases, you might need to prime the area first. After scraping and cleaning. Then apply your paint.
For serious peeling, it might be time for a full repaint.
I once had a rental unit. The previous tenant did a shoddy paint job. The tape removal was a disaster.
The paint was bubbling and peeling. It was everywhere. I had to scrape a lot.
Then prime. Then repaint. It was a much bigger job.
But it made the room look new. It showed me that sometimes, a small fix isn’t enough.
Dealing with Sticky Residue
Another common issue is tape residue. That sticky film left behind. It’s annoying.
It can attract dust. It looks messy. But it’s usually easier to clean than peeling paint.
For mild residue, warm, soapy water often works. Use a soft cloth. Gently wipe the area.
If that doesn’t work, try a solvent. Rubbing alcohol is often effective. Apply some to a cloth.
Test it in an inconspicuous spot first. Make sure it doesn’t damage your paint. Gently rub the residue.
It should start to dissolve.
Commercial adhesive removers are also available. Products like Goo Gone or WD-40 can work. Again, always test first.
Follow the product instructions carefully. Apply the remover to a cloth. Then wipe the sticky spot.
Wipe the area clean with a damp cloth afterward. To remove any residue from the cleaner itself.
I had a sticky mess on my window trim once. From some really cheap tape. Warm water didn’t touch it.
I used a bit of Goo Gone. I was worried it would eat the paint. But I tested it.
It worked like a charm. It took a few wipes. But the stickiness was gone.
Then I wiped it down with water. It looked perfect.
Residue Removal Options
Warm Soapy Water: Good for light stickiness.
Rubbing Alcohol: Effective for tougher adhesive.
Commercial Removers (Goo Gone, etc.): For stubborn residue.
Important: Always test in a hidden spot first!
When is it Too Late to Remove Tape?
There’s a point where the paint has cured too much. It has bonded too tightly. This is usually after several days.
Or even a week or two. If you wait that long, the risk of paint damage is very high. The paint is now a hard, solid layer.
It’s not flexible at all. It will crack or peel when you pull the tape.
So, if you’ve waited that long, you have a few choices. One is to accept that the tape might damage the paint. You’ll have to do touch-ups.
Or even repaint the section. Another option is to score the tape edge very carefully. Deeply score it.
Try to cut through the paint. Then slowly peel. But even then, damage is likely.
If you find yourself in this situation, it’s better to plan for repairs. Don’t expect a perfect peel. You might want to use a heat gun on a low setting.
Gently warm the tape. This can soften the adhesive. It might help it release easier.
But be careful. Too much heat can damage paint or the surface underneath.
I learned this the hard way after a vacation. I had painted a small closet. I put up tape for a clean edge.
I left for a week. When I got back, the paint was fully cured onto the tape. I tried to pull it.
It ripped off a huge section of paint. I had to repaint the whole closet. It was a lesson in not procrastinating.
Real-World Scenarios and Tape Behavior
Let’s look at some common places where tape is used. And how it behaves. Take windows.
You tape the trim. You paint the wall. You want a crisp line between wall and frame.
If you wait too long, the paint can stick to the window glass. Or the trim itself. Especially if the trim has a glossy finish.
Doors are similar. You tape off door frames. Or you tape off parts of the door.
If it’s an old door with many layers of paint, it can be tricky. Newer doors with smooth finishes are usually easier. But the principle is the same.
Dry to touch, not fully cured.
Baseboards are another common area. You tape the baseboard. You paint the wall above it.
Sometimes, the baseboard itself is painted. You might tape off the wall to paint the baseboard. In these cases, the material of the baseboard matters.
Wood, vinyl, or metal all react differently.
I’ve also used tape for creating designs. Like stripes or geometric patterns. This requires careful application and removal.
You have to let the base color dry completely. Then apply the tape. Then paint the new color.
The removal needs to be perfect. Any bleed-under or paint peeling ruins the design. This is where scoring the tape edge is crucial.
Common Painting Areas and Tape Tips
Windows/Doors: Score carefully to avoid paint chipping off frames or glass.
Baseboards: Choose tape appropriate for the baseboard material (wood, vinyl).
Accent Walls: Ensure the base color is fully dry before taping for designs.
Ceilings: Use high-quality tape to prevent drips and secure edges.
What This Means for Your Next Project
For your next painting project, remember this timing. It’s not just about the paint drying. It’s about the paint curing.
You want that sweet spot. The paint is firm enough. But not too hard.
This usually falls within 24 to 72 hours for latex paints.
Always check your paint can. It might give you specific drying times. But remember these are estimates.
Your home’s conditions matter. So, do a small test. Gently press a corner of the tape.
If the paint feels soft or sticky, wait longer. If it feels firm and set, you’re probably good to go.
Don’t let the excitement of finishing rush you. A few extra hours of waiting can save you a lot of repair work. And frustration.
It’s better to take your time. Ensure a clean, professional-looking finish. The extra patience is always worth it.
Think about the final look you want. Do you want sharp lines? Of course, you do.
That’s why you used tape. So, treat the tape removal as a critical step. Not an afterthought.
Your finished walls will thank you for it.

Quick Fixes and Best Practices
Here are some easy tips to keep in mind:
- Use Quality Tape: Invest in good painter’s tape. It makes a big difference.
- Press Edges Firmly: Seal the tape edge to prevent paint bleed. A putty knife is great for this.
- Paint Thin Coats: Thin coats dry faster and are less likely to bleed under tape.
- Score the Edge: Always score the tape line before removing. This breaks the paint seal.
- Pull Slowly and at an Angle: A 45-degree angle is best. Pull steadily.
- Don’t Wait Too Long: Aim for dry-to-the-touch, not fully cured paint.
- Test a Small Area: If unsure, test tape removal in a less visible spot first.
Frequently Asked Questions
What is the absolute earliest I can remove painter’s tape?
While you might be tempted to remove it as soon as the paint feels dry, it’s best to wait until it’s truly dry to the touch. This typically means waiting at least 12-24 hours for latex paints. Removing it much earlier risks smearing and lifting.
Can I use a hairdryer to speed up tape removal?
A hairdryer on a low heat setting can sometimes help soften the adhesive on the tape. This might make it easier to remove, especially if the paint has started to cure too much. However, be very careful.
Too much heat can damage the paint underneath or the surface itself. Always test in an inconspicuous area first.
My paint peeled. What should I do now?
If paint peeled, assess the damage. For small spots, gently touch them up with a small brush. For larger areas, you may need to scrape loose paint, prime, re-tape carefully, and repaint.
Patience is key here. Take your time to get a clean repair.
How do I remove sticky residue left by painter’s tape?
Start with warm, soapy water and a soft cloth. If that doesn’t work, try rubbing alcohol applied to a cloth. For stubborn residue, commercial adhesive removers like Goo Gone can be effective.
Always test any cleaning solution in a small, hidden area first to ensure it doesn’t damage the paint.
Does the type of paint (latex vs. oil) change when I can remove tape?
Yes, it does. Latex and acrylic paints (water-based) generally dry and cure faster than oil-based paints. This means you can often remove painter’s tape sooner for latex paints, typically within 24-72 hours.
Oil-based paints may require a longer waiting period, sometimes several days, before the tape can be removed without risk.
Can I leave painter’s tape on for several weeks?
It’s generally not recommended to leave painter’s tape on for extended periods, especially more than a week. As paint fully cures, it can bond strongly with the tape. This makes removal very difficult and significantly increases the risk of paint damage.
Always remove tape as soon as the paint is dry enough to handle without damage.
Conclusion
Removing painter’s tape is a crucial step. Timing is everything. Aim for paint that is dry to the touch.
But not fully cured. This typically means waiting 24 to 72 hours for latex paints. Use quality tape.
Score the edge. Pull slowly at an angle. These simple steps ensure clean lines.
They protect your hard work. Be patient. Your walls will look amazing.