How Long Does It Take To Sand A Wooden Floor? Full Guide
Sanding a wooden floor typically takes 2 to 5 days for a standard-sized room (150-250 sq ft), depending on the floor’s condition, type of wood, chosen finish, and whether you DIY or hire a professional. This includes prep, sanding passes, and drying time for finishes.
Understanding the Sanding Process
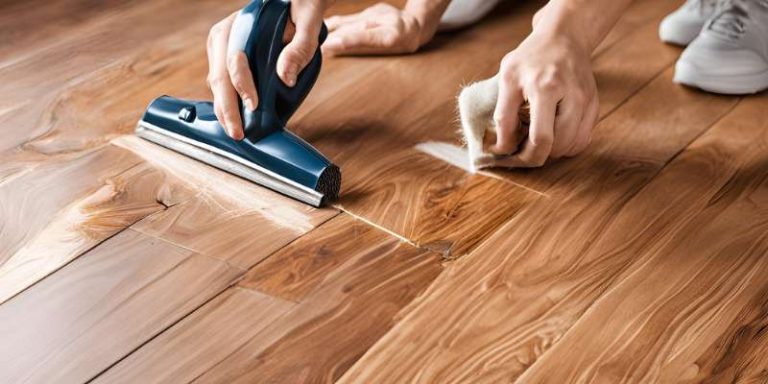
Sanding a wooden floor means smoothing its surface. You remove the old, worn-out finish. You also get rid of small scratches and dents.
Sanding gets the wood ready for a new coat of paint or stain. It makes the floor look brand new. It’s a big job.
It needs the right tools. It also needs patience.
There are different sanding steps. Each step uses a different grit of sandpaper. Grit refers to how rough the paper is.
You start with a coarse grit. This takes off the old finish. Then you use finer grits.
These smooth the wood. You might do three or four passes. Each pass makes the wood smoother.
This process is key to a good result.
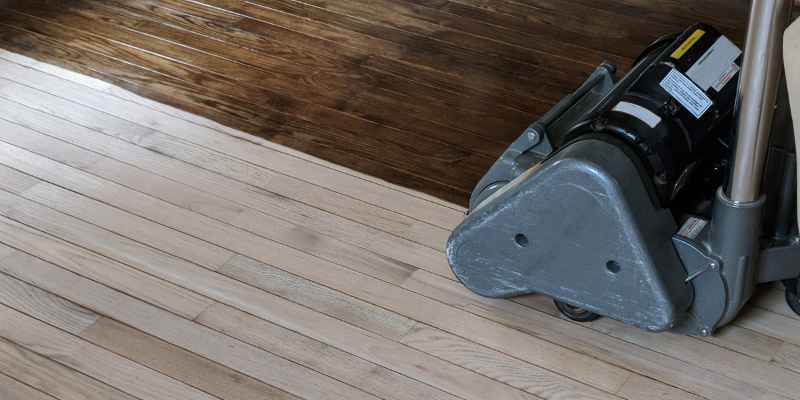
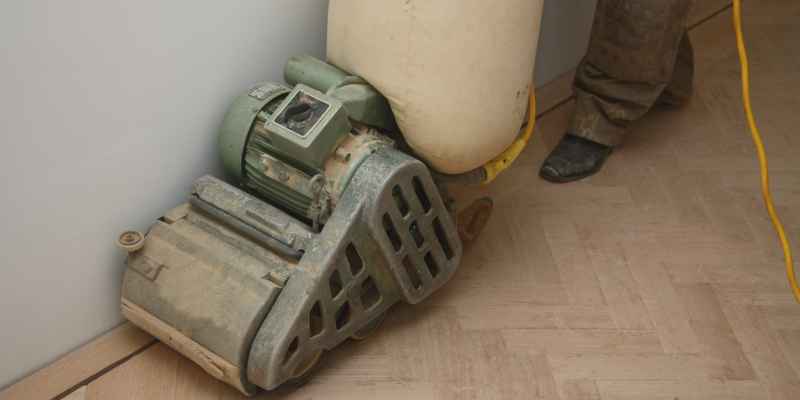
The type of sander matters too. You might use a drum sander. This is a big, heavy machine.
It’s great for deep sanding. You might also use an orbital sander. This is smaller.
It’s better for edges and corners. A floor edger is another tool. It helps you reach tight spots.
Factors That Influence Sanding Time
The total time for sanding depends on many things. Think about the size of the room first. A small bedroom will take less time.
A large living room will take much longer. A typical room might be around 150 to 250 square feet. Bigger rooms mean more work.
More sanding machines will be needed for large areas.
The condition of your floor is a big factor. Is the wood in good shape? Or is it badly damaged?
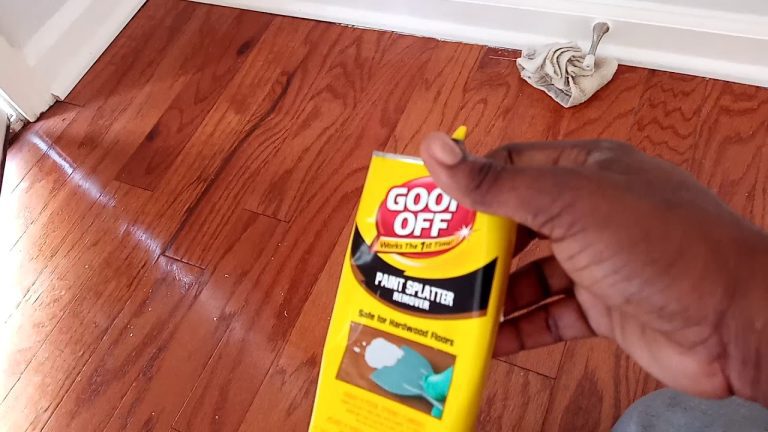
Floors with deep scratches or gouges take more time. If there are old glues or finishes, these are hard to remove. This adds extra effort.
It means more sanding passes. It also means using tougher sandpaper at first.
The type of wood you have makes a difference. Hardwoods like oak or maple are tough. They take longer to sand.
Softer woods like pine sand faster. But they can also get dents easily. You have to be more careful with soft woods.
This carefulness can slow you down.
What kind of finish are you putting on? Some finishes need more coats. Each coat needs drying time.
This drying time adds to the total project length. Polyurethane finishes can take days to fully cure. Other finishes might be quicker.
Consider the product’s instructions.
Room Size Breakdown
Small Room (under 150 sq ft): Could take 1-2 days.
Medium Room (150-250 sq ft): Typically 2-3 days.
Large Room (over 250 sq ft): Might take 3-5 days or more.
Multiple Rooms: Multiply estimates or plan sequential work.
Your skill level is also important. Are you new to floor sanding? Or have you done it before?
A pro will work faster. They know the best techniques. They have good equipment.
A DIYer might take longer. They might need to learn as they go. Mistakes can happen.
These slow down the process.
Finally, think about the preparation. You need to clear the room. Move all furniture out.
Remove baseboards if needed. This prep work adds time. But it’s very important for a good job.
You also need to clean up dust. This takes time too. Dust control is key.
The DIY Experience: A Personal Story
I remember my first time sanding a floor. It was a small room. My parents’ old attic bedroom.
The wood was pine. It had dark stains from years of neglect. I watched a few YouTube videos.
I thought, “How hard can it be?” Famous last words.
I rented a drum sander. It was heavy. It vibrated a lot.
The first pass took forever. I kept looking at the can of stain. It said “Allow 24 hours to dry between coats.” I had only thought about the sanding part.
The finishing steps would add days. I was already feeling tired and a bit overwhelmed by the dust. My friend helped me.
He had done it before. He showed me how to hold the machine steady. He warned me about going too fast.
That first day was mostly just figuring out the sander. And cleaning up the huge amount of dust that flew everywhere.
By the second day, I got into a rhythm. But I found I missed some spots. I had to go back over them.
The edges were tricky. The big sander couldn’t reach them. I had to use a smaller hand sander.
This took even longer. I learned that you can’t rush this work. You need to be thorough.
You need to do it right the first time. Or you’ll end up doing it again. That attic room took me four full days.
Not just for sanding, but for prep and clean up too. It was exhausting but rewarding to see the fresh wood.
Sanding Steps and Estimated Times
Let’s break down the typical steps in floor sanding. This will give you a better idea of the timeline. It helps to know what each part involves.
Step 1: Preparation (0.5 – 1 day)
This is crucial. You must clear the room of all furniture. Remove rugs and anything else on the floor.
If there are staples or nails sticking up, hammer them down. You might need to remove baseboards. This helps get a clean edge later.
Sweep and vacuum the floor well. Make sure there’s no dirt or debris. This prevents it from getting into the sandpaper.
It also stops it from scratching the wood during sanding.
Proper preparation saves time later. It also leads to a much better finish. Rushing this step is a common mistake.
You need to protect walls and other surfaces from dust. Use plastic sheeting and painter’s tape. This part can take a good chunk of the first day, especially for larger rooms.
Step 2: Rough Sanding (0.5 – 1 day)
This is where you use the coarsest sandpaper. Usually 36 or 40 grit. You’ll use a drum sander for the main area.
Go with the grain of the wood. Overlap your passes slightly. This removes the old finish, scratches, and imperfections.
It creates a lot of dust. You’ll need to vacuum often.
If you have a large room, this might take most of a day. For smaller rooms, it could be done in a few hours. Don’t try to get it perfectly smooth yet.
The goal is to remove the old layer. You’ll likely need to go over the room twice with this grit. This ensures all the old stuff is gone.
Pay attention to corners and edges. You’ll use an edger sander here.
Rough Sanding Tips
- Sander Choice: Drum sander for main area, edger for walls.
- Grit Size: Start with 36 or 40 grit.
- Direction: Always follow the wood grain.
- Overlap: Overlap passes by about 1/3.
- Dust: Vacuum frequently to collect dust.
Step 3: Intermediate Sanding (0.5 – 1 day)
Now you switch to a finer grit. Try 60 or 80 grit sandpaper. You’ll use the same drum sander and edger.
This step smooths out the marks left by the coarser grit. You’re refining the surface. Go over the floor again with this sandpaper.
Make sure you cover all areas. The wood will start to feel smoother.
This pass is often faster than the rough sanding. It’s about smoothing, not heavy removal. You’re cleaning up the work of the first pass.
Again, overlap your passes. Keep the sander moving. Don’t let it sit in one spot.
This can create dips. This stage might take a few hours or half a day.
Step 4: Fine Sanding (0.5 day)
For the final sanding, use a very fine grit. Aim for 100 or 120 grit sandpaper. This makes the wood surface super smooth.
It prepares it for stain or finish. You might use an orbital sander for this step, or the drum sander. Some people like to do a final hand-sanding with a sanding block for edges.
This pass is usually the quickest. It’s about the final polish. You want a surface that feels like silk.
After this, the floor is ready for cleaning and finishing. A thorough vacuum is needed. You might even wipe it down with a damp cloth.
This removes any lingering dust. This step might take a few hours.
Quick-Scan Time Estimates
| Task | Estimated Time |
|---|---|
| Preparation | 0.5 – 1 day |
| Rough Sanding (36-40 grit) | 0.5 – 1 day |
| Intermediate Sanding (60-80 grit) | 0.5 day |
| Fine Sanding (100-120 grit) | 0.5 day |
| Dust Cleanup | A few hours between passes + final cleanup |
| Finishing (coats & drying) | 2 – 3+ days |
Step 5: Dust Cleanup (A few hours)
After each sanding pass, you need to clean up dust. This is very important. Use a good shop vacuum.
A strong vacuum with a HEPA filter is best. You’ll want to vacuum the entire room. Then wipe surfaces with a tack cloth.
This sticky cloth picks up fine dust. This step might take an hour or two after each sanding session.
The final cleanup is the most thorough. You need to get every bit of dust off. Dust on the floor will get into the finish.
This makes the finish look bumpy and uneven. This can ruin the look. So, don’t skip this.
Spend time getting it right. This final clean can take a few hours for a larger room.
Step 6: Applying Finish (2 – 3+ days)
This is where the time adds up. You’ll apply multiple coats of your chosen finish. This could be stain, polyurethane, or oil.
Follow the product instructions exactly. Each coat needs to dry. Some dry in a few hours.
Others need 24 hours. You often need to lightly sand between coats. This is called ‘scuff sanding’.
A common finish is water-based polyurethane. It might dry enough to recoat in 4-6 hours. Oil-based finishes take longer, maybe 24 hours.
You might need 2-3 coats. This means at least two days for drying alone. Then add the application time.
This is why finishing takes the longest part of the project. You also need to let the floor cure. This means it’s fully hardened.
This can take several days to a week.
Finish Drying Times (General)
Water-Based Polyurethane:
- Recoat: 4-6 hours
- Light Foot Traffic: 24 hours
- Heavy Traffic/Furniture: 3-7 days
Oil-Based Polyurethane:
- Recoat: 24 hours
- Light Foot Traffic: 24-48 hours
- Heavy Traffic/Furniture: 7-14 days
Professional vs. DIY Time Differences
Hiring a professional floor sander will speed things up. Pros have the right tools. They also have the experience.
They know how to use the machines efficiently. They can often do the sanding in 1-2 days for a standard room. This is much faster than most DIYers.
They also have better dust containment systems. This means less mess. It also means less time spent on cleanup.
Professionals can also get the finish applied and cured faster. They know the best products. They also know how to apply them perfectly.
This saves you guesswork and mistakes.
However, hiring a pro costs more. You’re paying for their time and expertise. For a DIYer, the time is longer.
But the cost is lower. You’re paying for tool rentals and materials. You’re trading money for time and effort.
It’s a trade-off many homeowners make.
Real-World Context: What to Expect
In many American homes, hardwood floors are common. Older homes often have beautiful, but worn, wood floors. These are prime candidates for sanding.
The environment where the floor is located matters. A basement with high humidity might affect drying times for finishes. A sunny room might have faster drying due to heat.
Habits of the people living there also matter. Are kids or pets active? This might mean a tougher finish is needed.
This could influence the type of product and its drying time. The design of the floor itself is also a factor. Intricate patterns or very old, uneven planks might take more careful sanding.
This slows down the process.
User behavior is key. Do you want to use the room quickly? This might push you to choose a faster-drying finish.
But be aware that faster drying can sometimes mean less durable. It’s about finding a balance. Understanding these factors helps set realistic expectations for your project timeline.
The goal is always a beautiful, lasting floor.
When is it Normal, When to Worry?
It’s normal for sanding a floor to take several days. Especially when you include prep and finishing. A typical DIY project for a 200 sq ft room might span a full weekend and a few more days for finishing.
Don’t expect to do it in just one afternoon.
You might worry if the sanding process seems to be taking far too long. Are you on day three of just rough sanding a small area? That’s a sign something is wrong.
It could be a dull sandpaper grit. Or the machine might not be working right. If you’re struggling to get the old finish off, that’s a red flag.
It might mean you need a coarser grit or a different approach.
Another worry sign is excessive dust. If your dust containment isn’t working, it makes the job unpleasant. It can also affect the finish.
Check your vacuum and sander for leaks. Ensure your sheeting is sealed well.
If the wood starts to splinter or tear badly, stop. This could mean you’re going too fast. Or the wood is too damaged.
Reassess your technique. Sometimes, a professional opinion is worth it. They can spot problems you might miss.
They can advise on the best way forward.
Normal vs. Concerning Signs
Normal:
- Project takes 3-5 days total.
- Significant dust generation during sanding.
- Need for multiple sanding passes.
- Finishing coats require drying time.
Concerning:
- Sanding takes much longer than expected (e.g., 3 days for rough pass).
- Wood is splintering or tearing.
- Poor dust containment creating huge messes.
- Inability to remove old finish or deep scratches.
Quick Fixes & Tips for Efficiency
To make the process smoother and quicker, consider these tips. Renting good quality equipment is key. A worn-out sander will slow you down.
Make sure the sandpaper is fresh. Dull sandpaper makes the job harder and takes longer. Plan your passes carefully.
Know where you’re going to start and end. This prevents missed spots. Have plenty of sandpaper on hand.
You don’t want to run out mid-job.
Work methodically. Take breaks when you need them. It’s tiring work.
Staying focused helps prevent mistakes. Clean up dust thoroughly. This is not a quick fix, but a vital step.
It saves you from a bad finish later. For finishing, choose a product that fits your timeline. Water-based polyurethanes are faster drying.
They are a good choice if you need to use the room sooner.
If you’re doing it yourself, enlist help. An extra pair of hands makes a big difference. One person can operate the sander while the other vacuums or cleans.
This speeds up the whole process. Sharing the workload also makes it less physically demanding. Remember to wear protective gear.
This includes a mask, eye protection, and ear protection.
Frequently Asked Questions
How long does it take to sand a 200 sq ft room?
For a 200 sq ft room, expect 2-3 days for the actual sanding process. This includes preparation, multiple sanding passes, and dust cleanup. Adding finishing coats and their drying times will extend the total project to 4-5 days or more.
Can I sand my floor in one day?
It’s highly unlikely you can sand a floor properly in one day, especially if you are new to it. Sanding involves multiple steps with different grits, and each requires careful execution and dust cleanup. Finishing also adds significant time.
What’s the biggest factor affecting sanding time?
The biggest factor is usually the condition of the floor. Deep scratches, old finish buildup, or warped boards will require more time and effort to sand smooth compared to a floor in good shape.
Do I need to hire a professional?
Hiring a professional will save you time and effort, often yielding better results due to their experience and equipment. However, it comes at a higher cost. DIY is feasible if you have the time and patience.
How long does the finish take to dry?
Drying times vary by product. Water-based finishes typically dry enough for recoating in 4-6 hours, while oil-based finishes need 24 hours. Full curing for heavy traffic can take several days to two weeks.
Is it dusty to sand a wood floor?
Yes, sanding a wood floor is very dusty. Renting professional-grade sanders with good dust collection systems helps, but you’ll still need to clean up thoroughly afterwards.
Conclusion
So, how long does it take to sand a wooden floor? It’s a journey, not a sprint. For most standard rooms, plan for at least 2-3 days of active sanding work.
Then add 2-3 more days for finishing and drying. This project demands patience and thoroughness. But the reward of beautiful, renewed wood floors is well worth the effort.