How To Shine Wood Floors Without Refinishing (Easy Ways)
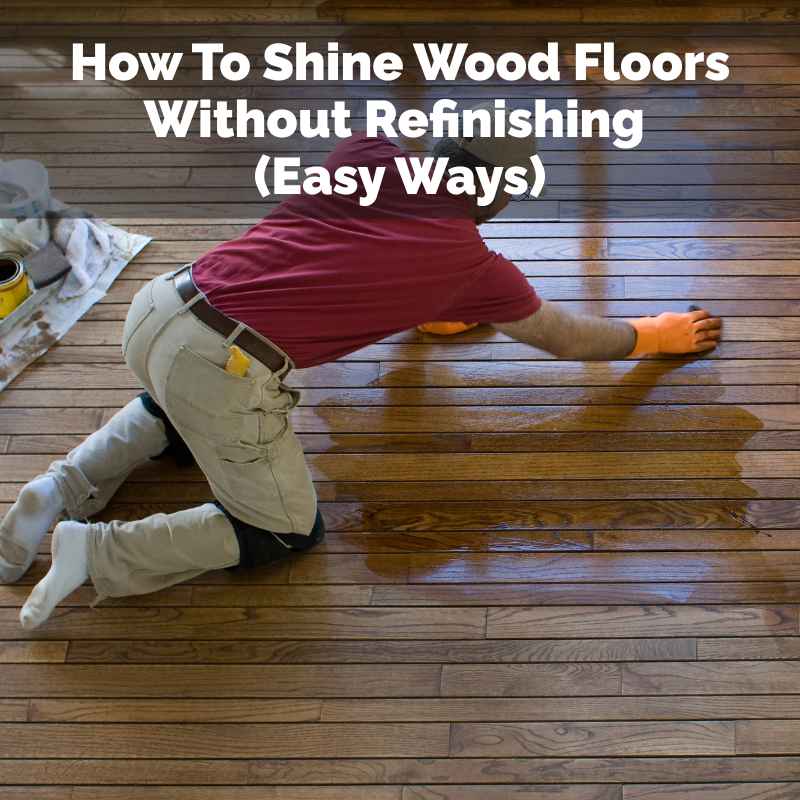
You can often restore shine to wood floors without a full refinish by using specialized cleaning products, applying wood polishes or revitalizers, and maintaining a regular cleaning routine. These methods focus on surface treatment rather than removing and reapplying the wood’s top layer.
Understanding Wood Floor Shine
Wood floors get their shine from the finish on top. This is usually a protective layer. It might be polyurethane, wax, or oil.
This finish is what reflects light. When it’s clean and smooth, it looks bright and inviting. Over time, this finish can get dull.
Dirt, scuffs, and tiny scratches build up. They make the surface uneven. This unevenness scatters light.
It makes the floor look less shiny.
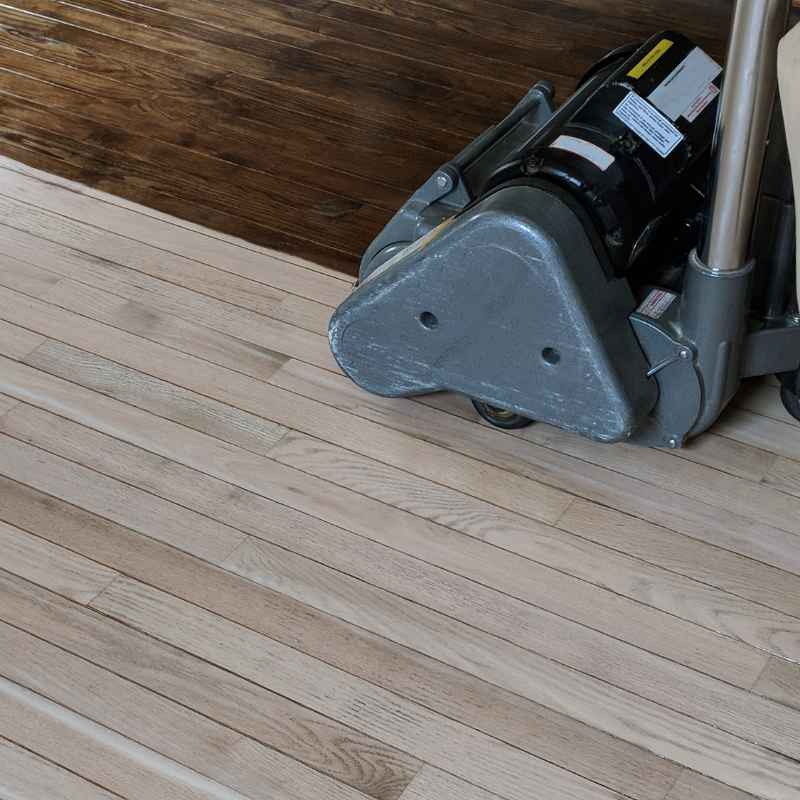
Refinishing means sanding down the old finish. Then, you apply new coats of finish. This is a big job.
It creates dust. It takes time. It can be expensive.
But shine is more than just the finish. It’s also about how clean the floor is. It’s about how smooth the surface feels.
Sometimes, a good cleaning is all that’s needed. Other times, a special product can add a temporary shine. These products fill in tiny scratches.
They create a smoother surface for light to bounce off.
Think of it like your car. When it gets dirty, it looks dull. Washing it helps.
But waxing it makes it really shine. Wood floor products work in a similar way. They clean away grime.
They then add a new, smooth layer. This layer reflects light better. It makes the floor look vibrant.
It can hide minor wear and tear. This avoids the need for costly repairs or total overhauls. We’ll explore the best ways to achieve this.
My Own Floor Shine Fiasco
I remember one evening, about five years ago. I’d just hosted a big family gathering. My usually lovely oak floors looked… sad.
They were covered in footprints. There were smudges everywhere. They seemed to have lost all their luster.
I’d always kept them clean. But this was different. They looked worn.
I felt a pang of dread. My mind immediately went to sanding. I pictured dust everywhere.
I imagined days of not being able to use my living room.
I remember sitting on the floor, running my hand over a dull spot. It felt gritty. I thought, “This is it.
I have to refinish them.” I started looking up prices. They were staggering. Then I remembered a conversation with a friend.
She’d mentioned wood floor polishes. I was skeptical. Could a simple polish really fix this?
It seemed too easy. But the thought of avoiding sanding was very appealing. I decided to try a highly-rated wood floor polish.
I followed the instructions carefully.
The difference was surprising. It wasn’t a perfect, brand-new look. But the dullness was gone.
The smudges disappeared. The floor had a lovely sheen. It looked so much better.
It was a relief. That experience taught me a lot. It showed me that sometimes, a simpler approach works wonders.
It saved me time and money. It also made me appreciate how much a good cleaner and a bit of polish can do. It’s a trick I’ve used ever since for quick touch-ups.
Quick Floor Shine Checklist
- Inspect your floor: What is the current finish?
- Clean thoroughly: Remove all dirt and grime first.
- Choose the right product: Polish or reviver for your floor type.
- Test in a small spot: Always check for compatibility.
- Apply carefully: Follow product instructions precisely.
- Buff for extra shine: Use a soft cloth or buffer.
The Deep Clean: Your First Step to Shine
Before you even think about polishes or waxes, a really good clean is essential. This is the bedrock of getting any shine back. If you try to polish over dirt, you’ll just be trapping the dirt.
This can make things look worse. It can create a cloudy effect. So, let’s get those floors sparkling clean first.
Start by sweeping or vacuuming. Use a soft brush attachment on your vacuum. You want to get up all the loose debris.
Think dust bunnies, pet hair, and tiny grit. These things can scratch your floor if they get rubbed around. Pay attention to corners and edges.
Next, you need to damp mop. The key word here is damp. You do not want to soak your wood floors.
Too much water is bad for wood. It can cause swelling. It can also damage the finish.
Use a good wood floor cleaner. Mix it with water according to the product’s instructions. Use a mop that doesn’t hold too much water.
Microfiber mops are excellent for this. Wring out the mop really well.
Mop in the direction of the wood grain. This helps lift dirt more effectively. Work in sections.
This way, the floor doesn’t sit wet for too long. You might need to rinse your mop often. This keeps you from spreading dirty water.
For stubborn spots, you might need a bit more cleaner. Gently scrub the spot with a soft brush or cloth. Then, wipe it up with your damp mop.
After mopping, let the floor air dry completely. Open windows if you can. You should not see any standing water.
If you do, grab a clean, dry towel and wipe those spots up. A clean floor is the foundation. It lets the shine products work their magic.
It makes a huge difference. This simple step is often overlooked.
Wood Floor Cleaner Tips
- Use pH-neutral cleaners: These are safest for most wood finishes.
- Avoid harsh chemicals: Like ammonia or bleach.
- Follow product dilution: More isn’t always better.
- Check your floor type: Some finishes need special care.
Wood Floor Polishes: Adding Back the Gleam
Once your floors are spotless, it’s time to bring back the shine. Wood floor polishes are designed for this. They are not cleansers.
They are treatments that add a glossy layer. Many polishes contain very fine abrasives. They also have reflective particles.
These help fill in tiny scratches. This makes the surface smooth again. This smoothness allows light to bounce off evenly.
This creates that desired shine.
There are different types of polishes. Some are for polyurethane finishes. Others are for waxed floors.
It’s very important to use the right one. Using the wrong type can ruin the finish. It can make it cloudy or sticky.
Always check your floor’s finish. If you don’t know, look up your home’s records. Or, test a cleaner in an inconspicuous spot.
For example, inside a closet.
Application is key. Read the product label carefully. Most polishes suggest applying with a soft cloth or a mop.
Use a thin, even coat. You don’t want to put it on too thick. Thick coats can build up.
They can look streaky. Work in the direction of the wood grain. Allow the polish to dry according to the product’s instructions.
This is usually 20 minutes to an hour.
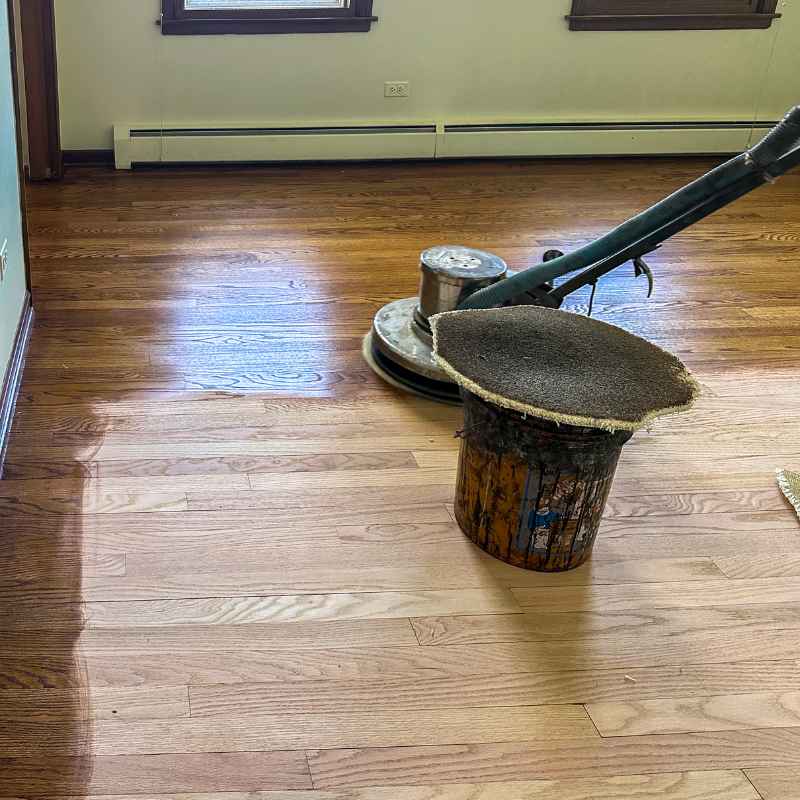
Some polishes can be buffed after drying. This step can really enhance the shine. Use a soft buffing pad or a clean, soft cloth.
You can do this by hand or with a floor buffer. Buffing helps create a really smooth, reflective surface. It’s like polishing a car after waxing.
The results can be quite dramatic. A good polish can hide minor scuffs. It makes the floor look refreshed.
Keep in mind that polish is a temporary fix. It sits on top of your existing finish. It doesn’t replace it.
You will need to reapply it every few months. The frequency depends on foot traffic. The look can fade over time.
But it’s a fantastic way to maintain your floors. It keeps them looking good between more intensive treatments.
Polish vs. Revitalizer
Polish: Adds a glossy, protective layer on top. Great for general shine and minor scratch hiding. Typically needs reapplication every 2-6 months.
Revitalizer: Often contains polymers that bond to the finish. Can restore some of the finish’s original properties and fill deeper scratches. May last longer than polish.
Wood Floor Revitalizers: A Deeper Fix
Wood floor revitalizers are a step up from polish. They are designed to do more than just add shine. They can actually help restore some of the original finish’s properties.
Think of them as a cosmetic treatment for your wood floor’s existing top coat. They can penetrate slightly. They can fill in deeper scratches.
They can also help to seal micro-fissures in the finish. This creates a more robust and smoother surface.
Revitalizers often contain polymers. These polymers bond to your floor’s existing finish. This creates a new, durable layer.
This layer is often more resilient than a polish. It can make the floor look like it’s been re-coated. They can help hide wear and tear more effectively.
They can also provide a bit more protection against future damage.
Application is usually similar to polish. You’ll need a clean floor. You apply the product evenly.
Work with the grain. Let it dry. Buffing is often recommended to achieve the best results.
The drying time might be a bit longer for revitalizers. This is because they are often more substantial in their formulation. Always check the specific product’s instructions.
Revitalizers can be a fantastic option if your floors have more visible wear. They can make a worn-out finish look much newer. They can bridge the gap between simple cleaning and a full refinish.
The shine they provide is often deeper and longer-lasting than a basic polish. However, they are still not a substitute for a true refinish. If your finish is severely damaged or worn through, a refinish is likely needed.
It’s crucial to use a revitalizer meant for your floor’s specific finish. Some are for water-based polyurethanes. Others are for oil-based.
Using the wrong one can cause serious issues. It might create a sticky or cloudy surface. This can be very hard to fix without refinishing.
So, take the time to identify your floor’s finish. This step ensures you get the best results and avoid costly mistakes.
What About Waxed Floors?
If you have older floors, they might be finished with wax. Waxed floors have a different kind of shine. It’s a softer, warmer glow compared to the high gloss of polyurethane.
Cleaning and shining waxed floors requires different products. You cannot use polyurethane polishes on waxed floors. They will react badly.
They can make the wax gummy or sticky.
For waxed floors, you need a good wax cleaner. This cleaner will lift dirt without stripping the wax. After cleaning, you reapply a coat of paste wax.
This is the traditional way to care for waxed floors. You apply it thinly. Then you buff it vigorously.
Buffing is very important for waxed floors. It’s what brings out the shine. A good buffer or a wool pad on a machine works best.
You can also find liquid wax products. These are easier to apply than paste wax. They often contain solvents that evaporate.
This leaves the wax behind. They can be a good option for maintaining shine. However, they might not provide the same depth of shine as paste wax.
They also might not be as durable.
The key with waxed floors is regular maintenance. They need to be buffed often. A fresh coat of wax is needed every few months.
This sounds like a lot of work. But once you get into a routine, it’s not so bad. The beautiful, warm glow of a well-maintained waxed floor is hard to beat.
It’s a classic look.
Waxed Floor Care
- Clean: Use a pH-neutral wax cleaner.
- Wax: Apply paste wax thinly.
- Buff: Vigorously buff to a shine.
- Reapply: Every 3-6 months, or as needed.
Dealing with Scuffs and Minor Scratches
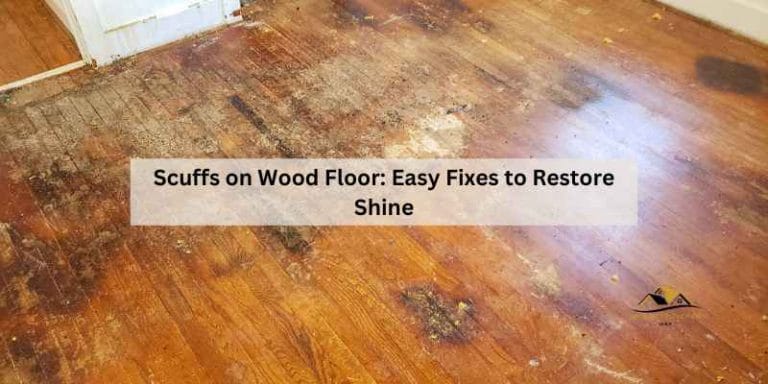
Scuffs are those dark marks left behind by shoes, furniture legs, or rubber items. They are usually on the surface of the finish. They are often easier to remove than scratches.
For light scuffs, a clean, damp cloth might be enough. For tougher ones, try a bit of your regular wood floor cleaner on the cloth.
You can also use a pencil eraser. Yes, a regular pencil eraser can work wonders on scuffs. Gently rub the scuff mark.
The eraser will often lift the mark. Wipe away any eraser residue with a clean cloth. Tennis balls can also be used to rub away scuff marks.
They are soft enough not to damage the finish.
Minor scratches are a bit trickier. These are actual marks in the finish itself. This is where polishes and revitalizers shine.
They can fill in these tiny scratches. This makes them less noticeable. Some people use a wood crayon or filler stick.
You match the color to your floor. You fill the scratch. Then you wipe away the excess.
This is a more targeted repair.
For deeper scratches, these surface treatments might not be enough. You might still see the scratch. But they can often make it less obvious.
If you have many minor scratches, a good revitalizer is probably your best bet. It will smooth out the surface. This makes the scratches harder to see.
It will also bring back the shine.
Remember, these are for minor issues. If you have gouges or deep damage, you will need professional repair or refinishing. Don’t try to cover up major damage with polish.
It won’t last. And it can make the problem worse.
The Power of Buffing
Buffing is a step that often gets overlooked. But it can make a huge difference to the final shine. After applying polish or wax, and after it has dried, buffing is key.
It’s the final polish. It removes any slight haze. It also helps to create that smooth, light-reflecting surface.
You can buff by hand. Use a soft, clean cloth like microfiber. Rub the floor in a circular motion or with the grain.
It takes some effort. But you’ll see the shine improve as you go. For larger areas, an electric floor buffer is a great investment.
You can rent them too. They have large buffing pads. They do the work much faster and more effectively.
Use the right pad for the job. A soft cotton or microfiber pad is usually best for polishing. Avoid abrasive pads.
They can scratch your finish. Buffing isn’t just about shine. It also helps to further smooth out the surface.
This can help to make minor imperfections less visible.
Buffing is also crucial for waxed floors. It’s how you activate the wax. It’s how you get that deep, warm glow.
Don’t skip this step if you want the best shine. It really does make your floors look professionally done. It’s a finishing touch that’s worth the extra effort.
Buffing Tools
- Soft Microfiber Cloths: For hand buffing.
- Electric Floor Buffer: For larger areas. Rent or buy.
- Buffing Pads: Soft cotton or microfiber pads.
When to Call the Professionals
While these methods can work wonders, they have limits. If your floors are deeply scratched, gouged, or worn through the finish, you’ll need more. This is when refinishing becomes necessary.
Refinishing removes the damaged top layer. It then applies new finish. This makes the floor look like new again.
It’s a bigger project. But it’s often the only way to truly restore very damaged floors.
Also, if you have a water-based finish and you accidentally used an oil-based product (or vice versa), you might have a problem. This can cause stickiness or cloudiness that you can’t buff out. In such cases, professional advice is best.
They can assess the damage. They can tell you if refinishing is the only option.
If you’re unsure about your floor’s finish, it’s always wise to test products in a hidden spot first. A closet or under a large rug is perfect for this. If you see any adverse reactions, stop immediately.
Consult a professional floor installer or refinisher.
Don’t be afraid to ask for help. Sometimes, a professional can apply a coating that can last for many years. It’s an investment.
But it can protect your floors for a long time. They have the tools and expertise. They can often achieve results that are hard to get on your own.
They can also advise on the best maintenance plan going forward.
Maintaining That Shine: Everyday Habits
Keeping your wood floors looking their best isn’t just about special treatments. It’s also about your daily habits. Small things can prevent dullness and damage from happening in the first place.
This makes your shine last much longer.
Use doormats. Place them both inside and outside your main doors. This catches a lot of dirt and grit before it even gets onto your floors.
Grit is like sandpaper for your finish. It wears it down over time.
Take off your shoes. Encourage family and guests to do the same. Shoes track in dirt, oils, and moisture.
They can also carry tiny pebbles that scratch the floor. Slippers or clean socks are much better for indoor wear.
Clean up spills immediately. Wood and water don’t mix well. Don’t let liquids sit on the floor.
Blot them up right away with a clean, dry cloth. This prevents water damage and stains.
Use furniture pads. Put felt or rubber pads on the legs of all furniture. This includes chairs, tables, and sofas.
When furniture is moved, these pads prevent scratches and scuffs. Check them regularly. They can wear out or get clogged with debris.
Avoid harsh cleaners. As mentioned before, stick to pH-neutral cleaners designed for wood floors. Avoid anything with ammonia, bleach, or oil soaps that aren’t specifically for wood.
These can damage the finish and make it dull.
Regular sweeping or vacuuming is also key. Aim to do this daily or every other day. This prevents dirt from building up.
It stops grit from being ground into the finish.
These simple habits make a big difference. They protect your investment. They keep your floors looking brighter.
They extend the time between needing special treatments like polish or revitalizers. It’s about consistent care.
Daily Habits for Floor Shine
- Use Doormats
- No Shoes Indoors
- Clean Spills Fast
- Furniture Pads on Legs
- Regular Sweeping/Vacuuming
Addressing Specific Floor Types
It’s important to remember that not all wood floors are the same. The type of wood and the type of finish play a big role. Pine floors, for example, are softer than oak.
They scratch more easily. They might need more frequent use of protective products.
Engineered wood floors have a top layer of real wood. This layer is often thinner than solid wood planks. This means they are not as forgiving when it comes to deep scratches or sanding.
For engineered wood, it’s crucial to use products designed for them. Polishes and revitalizers made for solid wood might be too harsh. Always check the product description.
Laminate flooring often looks like wood but is not. It has a plastic wear layer. You should not use wood polishes or waxes on laminate.
They can make the surface slippery. They can also damage the wear layer. Use cleaners specifically made for laminate floors.
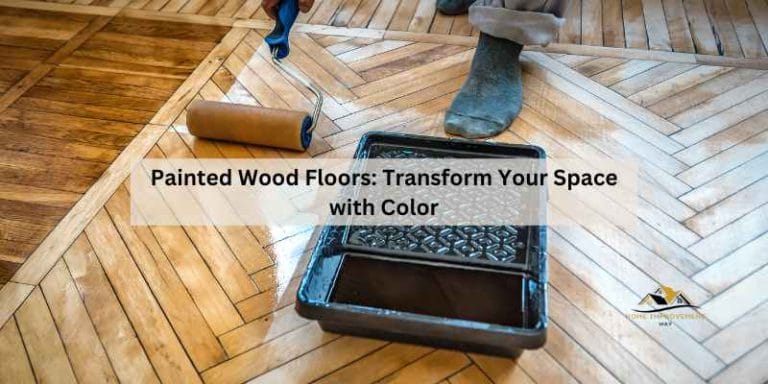
If you have a painted wood floor, the rules change again. You’ll need specific cleaners for painted surfaces. Polishes are usually not recommended.
They can make painted floors gummy. They can also lift the paint. Focus on gentle cleaning and avoiding excess moisture.
Understanding your floor type is step one. It ensures you use the right products and methods. This prevents damage.
It helps you achieve the best shine safely. When in doubt, consult the manufacturer of your flooring. Or, seek advice from a flooring professional.
They can help identify your floor type and the best care routine.
How Often Should You Shine?
The frequency of polishing or using a revitalizer depends on several factors. The amount of foot traffic is a big one. If you have a busy household with kids and pets, you’ll need to do it more often.
Areas with high traffic, like hallways and entryways, will dull faster.
The type of product you use also matters. A basic polish might last 2–4 months. A more robust revitalizer might last 4–6 months, or even longer.
The original finish of your floor also plays a role. A thicker, more durable finish will hold up better.
Generally, most people find that applying a wood floor polish or revitalizer every 3–6 months is sufficient. You’ll start to notice the shine fading. The floor might look a bit duller.
That’s usually a good sign it’s time for another application.
Don’t wait until the floor looks really bad. Consistent, regular maintenance is much easier. It keeps the floors looking good all the time.
It prevents the finish from wearing down too much. It’s better to do a light touch-up more often than wait for a major restoration.
Always follow the specific product’s recommendations. Some products are designed for more frequent use. Others are for less frequent application.
Reading the label is the best way to know. Observing your floors is also important. They will tell you when they need a little extra attention to bring back their glow.
Quick Fixes vs. Long-Term Care
It’s helpful to think of these shining methods as either quick fixes or part of long-term care. A quick clean and polish can revive your floors for an event or a season. It gives them a boost of shine and makes them look refreshed.
This is often what people are looking for when they want to shine wood floors without refinishing.
However, these methods are not permanent solutions. They are surface treatments. They add a layer that wears down over time.
They fill in minor imperfections. But they don’t fix the underlying issues of a worn-out finish. If your floor finish is badly damaged, these methods will only provide a temporary improvement.
Long-term care involves the daily habits we discussed. It’s about protecting your floors. It’s about preventing damage.
It’s about regular, gentle cleaning. This consistent care helps your floor’s finish last longer. It reduces the need for more intensive treatments.
It keeps the floor looking good for years.
Refinishing is the ultimate long-term solution for severely damaged floors. It’s a reset. It brings the floor back to its original glory.
But for most homes, regular cleaning, occasional polishing, and good habits are enough. They keep the floors looking their best. They maintain that beautiful shine without the major effort of refinishing.
Frequently Asked Questions
Can I use furniture polish on my wood floors?
No, it’s not recommended. Furniture polish is designed for different surfaces. It can leave a greasy residue on wood floors.
This residue attracts dirt. It can also make the floor slippery and dull its shine. Always use products specifically made for wood floors.
Will polishing my wood floors make them slippery?
Some polishes can make floors slightly more slippery. This is especially true if you apply too much or use a product not suited for your floor type. Buffing well after application helps reduce slipperiness.
If you have concerns about slip, look for ‘low-sheen’ or ‘matte’ finish polishes. Always test in a small area first.
How do I know if my wood floor needs refinishing or just polishing?
If your floor has deep scratches, gouges, or the finish is worn through in many spots (you see the bare wood), it likely needs refinishing. If the floor is mostly intact but looks dull, has minor scuffs, and scratches that aren’t deep, polishing or a revitalizer might be enough. A good cleaning is always the first step.
Can I use a steam mop on my wood floors?
Generally, no. Most manufacturers advise against using steam mops on wood floors. The heat and moisture from steam can penetrate the wood.
This can cause swelling, warping, and damage to the finish. Stick to damp mopping with a wood floor cleaner.
What’s the difference between a wood cleaner and a wood polish?
A wood cleaner is meant to remove dirt, grime, and debris. It prepares the floor for treatment or just keeps it clean. A wood polish is designed to add a protective, shiny layer on top of the existing finish.
It can fill minor scratches and enhance gloss. You clean first, then polish if needed.
My floors have white spots. What are they and how do I fix them?
White spots on wood floors are often caused by moisture trapped in the finish. This can happen from spills that weren’t cleaned up quickly or from potted plants. For minor spots, you can try rubbing them gently with steel wool (grade #0000) dipped in mineral spirits or a paste of baking soda and water.
For deeper white spots, refinishing might be necessary.
Bringing Back the Shine
It’s amazing what a little attention can do for your wood floors. You don’t always need a full refinish to get them looking great. A thorough cleaning is the vital first step.
Then, using the right polish or revitalizer can bring back that lost shine. Remember to choose products suited for your floor’s finish.
Pay attention to the details. Buffing makes a big difference. Consistent daily habits protect your floors.
They keep them looking good longer. By using these methods, you can enjoy beautiful, gleaming wood floors. They will add warmth and beauty to your home.
It’s all about smart care.
Sponsored / affiliate links. As an Amazon Associate I earn from qualifying purchases. I may earn additional commission from eligible campaigns.