Can You Restain Wood Floors Without Sanding? Here’S How
While the idea of restaining wood floors without full sanding is appealing, it’s often not a complete solution for a lasting, beautiful finish. Minor touch-ups or specific situations might allow for it, but a true restaining typically requires preparing the surface, which usually involves some form of sanding to ensure adhesion and a smooth outcome.
Understanding the Wood Floor Refinishing Process
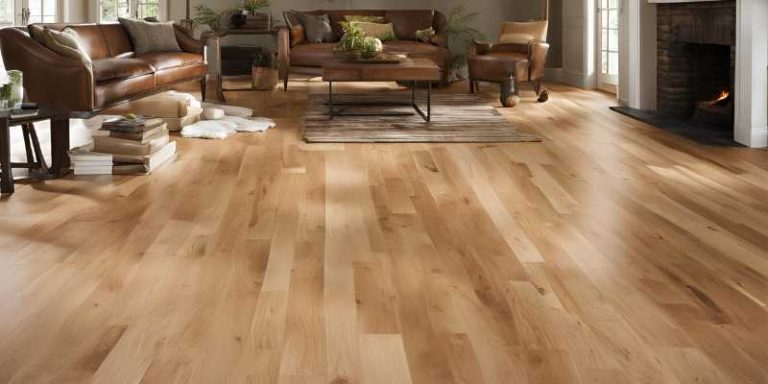
Wood floors are beautiful. Over time, they can look worn. Scratches and fading happen.
You might want a different color. This is where refinishing comes in. Refinishing means bringing your floors back to life.
It can also mean changing their look.
The goal is usually a smooth, even finish. This finish protects the wood. It also makes the floor look new again.
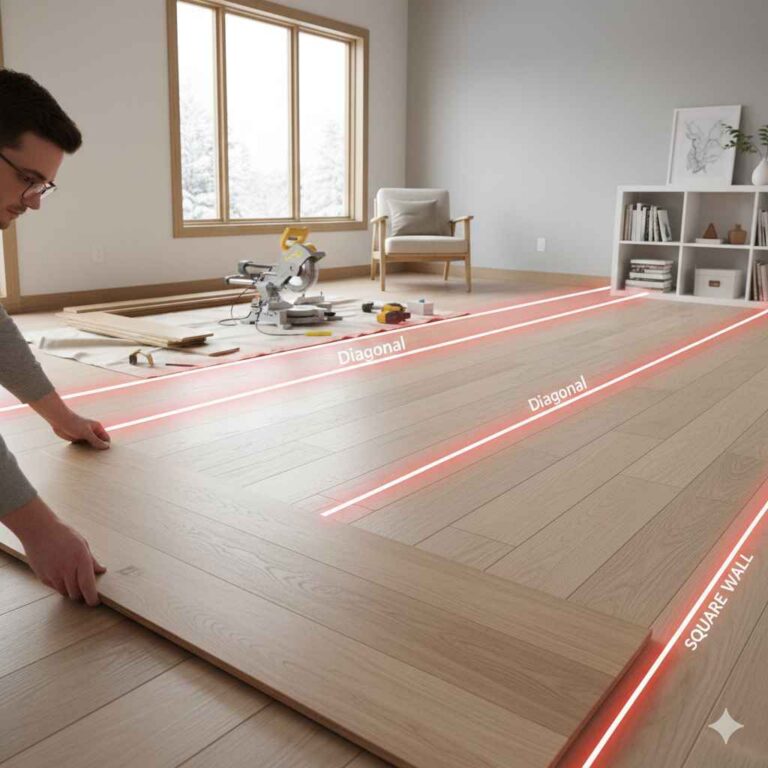
There are a few ways to do this. Sanding is the most common. But many ask if there’s a way around it.
Let’s explore why sanding is usually part of the plan.
Why Sanding is Often Key
Think of your floor like a canvas. To paint it a new color, the old paint needs to be gone. Or at least roughed up.
Sanding does just that. It removes the old top coat. This is often a finish like polyurethane or varnish.
It also takes away tiny scratches. It smooths out dents and wear. This clean surface is vital.
It lets the new stain soak in evenly. It also helps the new finish stick. Without this prep, the new stain might not hold.
It could peel or look blotchy. This is why sanding is a big part of most refinishing jobs.
The “No Sanding” Dream: What’s Really Possible?
Let’s talk about the hope. The hope is to just slap on a new coat of color. And have it look great.
This is where many DIY guides lead you. They talk about “restaining” without sanding.
What they often mean is a “refresher” or a “toner.” These products can change the floor’s look. But they don’t replace a full refinish. They work differently.
They sit more on top of the old finish. They don’t soak into the wood itself.
So, can you restain without sanding? For a true restaining, where you change the wood’s actual color, the answer is usually no. Not if you want it to last and look professional.
Restaining vs. Refinishing vs. Re-coating
It’s easy to mix these terms up. Let’s clear them up.
- Re-coating: This is adding a new layer of the same finish. Like a new coat of polyurethane over old. It doesn’t change the color. It just refreshes protection. This needs minimal prep, often just cleaning.
- Refinishing: This is the big job. It means removing the old finish and color. Then applying a new stain and new finish. Sanding is almost always involved here.
- Restaining: This usually implies changing the color. So, it falls under refinishing. It means taking off the old color and putting on a new one. Sanding is needed to get to bare wood for a true stain.
The “no sanding” methods are more like a toner or a deep-colored re-coat.
When a “No Sand” Method Might Seem to Work
There are some cases where you might get away with less work. I saw this in a client’s home once. They had a small water stain on a section of their hardwood.
It wasn’t deep. It had only slightly affected the finish.
We used a special wood patch. Then we matched the stain color. It looked okay from a distance.
But up close, you could see the repair. It wasn’t a full floor restain. It was a spot fix.
This is the kind of thing “no sand” methods are good for.
They might help with minor scuffs. Or small scratches that only broke the top coat. They can add a bit of color.
But they won’t transform worn-out floors. They won’t fix deep scratches or gouges. They won’t make dark floors light.
Methods for “Restaining” Without Full Sanding
So, what are these methods people talk about? They usually involve products that are applied over the existing finish. Here are the main ones:
1. Wood Toners and Conditioners
Toners are thin, colored finishes. They add a hint of color. They don’t penetrate deep into the wood.
They’re more like a colored glaze. They sit on top of the existing finish.
Wood conditioners are similar. They help even out the wood’s ability to take stain. But on a finished floor, they don’t do much for color change.
They are best used on bare wood.
Pros:
- Can add a subtle tint.
- May hide very minor imperfections.
- Less messy than sanding.
Cons:
- Doesn’t change the base color deeply.
- Color might not be even.
- May not adhere well to slick finishes.
- Durability is often poor.
2. Gel Stains
Gel stains are thicker than traditional stains. They sit more on the surface. Some people use them over existing finishes.
The idea is they offer more coverage.
I tried this on an old cabinet once. It was a dark gel stain. It covered the old finish okay.
But it didn’t look like real wood stain. It looked more like painted wood. It had a plastic feel.
It also took a lot of careful wiping.
Pros:
- Thicker, so can offer more coverage.
- Less likely to drip.
Cons:
- Still needs some surface prep. A light scuff sanding is usually advised for adhesion.
- Can look more like paint than stain.
- May not penetrate deeply enough for true color change.
- Adhesion can still be an issue without proper prep.
3. Re-coating with a Tinted Polyurethane or Varnish
This is what many “no-sand restain” kits offer. You clean the floor. Then you add a polyurethane that has color mixed in.
It’s like painting with a clear coat. It adds color and protection in one step.
I saw a friend try this in their guest room. They wanted a slightly darker look. They prepped well, cleaning and deglossing.
It worked. The color was a bit darker. But it didn’t look like a deep, rich stain.
It looked like tinted varnish. It was a decent cosmetic fix for them.
Pros:
- Combines color and protection.
- Easier than traditional sanding and staining.
Cons:
- Requires deglossing or very light sanding for adhesion.
- The look is not the same as a true stain. It’s a surface coat.
- Can look streaky if not applied perfectly.
- Deep color changes are difficult.
- Doesn’t fix deep scratches or wear.
Quick Scan: “No Sanding” Methods
| Method | Prep Needed | Color Change Depth | Expected Look | Best For |
| Toner/Conditioner | Light cleaning | Minimal | Subtle tint | Minor scuffs, slight shade change |
| Gel Stain | Light sanding/deglossing | Moderate | More opaque, can look painted | Darkening floors, cabinets |
| Tinted Poly | Deglossing/light sanding | Moderate | Surface coat, tinted varnish | Refreshing color, light darkening |
The Reality of Preparing Floors Without Sanding
Even the “no-sand” methods often require some form of preparation. This is key for the product to stick. If it doesn’t stick, it will peel.
This is a waste of time and money.
What kind of prep are we talking about? It’s usually not the heavy-duty sanding you do for a full refinish. But it’s more than just mopping.
It’s about creating a surface the new product can grip.
This often involves:
- Thorough Cleaning: You need to remove all dirt, grease, and wax. A good degreaser is often used.
- Deglossing: This means using a chemical or a very fine abrasive pad to dull the shine of the old finish. This gives the new coat something to grab onto. It’s like giving the old surface a light scratch.
- Scuff Sanding: This is a lighter form of sanding. You use a very fine grit sandpaper (like 180-220 grit). The goal is just to create tiny scratches. Not to remove the old finish.
I remember helping a friend with their deck. They wanted to re-stain it. They skipped the sanding step.
They just cleaned it really well. The stain looked okay at first. But after the first rainy season, parts of it started to flake off.
The old finish was too slick. The stain had nowhere to grab.
This is the risk with avoiding proper prep. Even if you avoid full sanding, you still need to etch the surface. Otherwise, your new color won’t last.
It will be a temporary fix at best.
When “No Sanding” Might Be Enough: Specific Scenarios
Let’s be clear. There are times when a full sanding is overkill. Or not the best approach.
These are usually for minor cosmetic changes.
1. Refreshing Faded Areas
If your floor is generally in good shape. But a few spots are faded from sunlight. You might be able to use a toner or a lightly tinted polish.
This can blend the faded areas with the rest of the floor.
The key here is that the old finish is still intact. You are not trying to change the base color. You are just trying to match it or deepen it slightly.
2. Covering Minor Scratches with a Tinted Finish
Small scratches that haven’t gone through the finish can sometimes be masked. A gel stain or a tinted polyurethane can fill them in. They add color to the scratch itself.
This makes it less noticeable.
But this is cosmetic. It won’t fix the structural damage. If the wood is gouged, no amount of surface color will truly hide it.
You’ll still feel the scratch with your foot.
3. Changing the Shade Slightly
If you have oak floors and they are a medium brown. And you want them a slightly darker brown. A tinted polyurethane or a gel stain might work.
Especially if the existing finish is well-maintained.
This is not about going from honey oak to dark walnut. That requires bare wood. This is about shifting the hue a few shades.
It’s a subtle change.
Myth vs. Reality: No-Sand Floor Restaining
Myth: You can completely change the color of your floors without any sanding. Reality: True color change requires removing the old finish to allow stain to penetrate bare wood. “No-sand” methods are more like tints or surface coatings.
Myth: “No-sand” restain kits are a quick fix for worn-out floors. Reality: They are best for light cosmetic updates. They won’t restore heavily damaged or deeply worn floors.
Myth: No sanding means no dust and no mess. Reality: While less dusty than full sanding, cleaning, deglossing, and application still create some mess and require ventilation.
4. Over Existing Stained Floors (with caution)
Sometimes, people have floors that are already stained but the finish is worn. If the stain itself is still good, you might be able to apply a new finish. This isn’t “restaining,” but it’s a way to refresh.
Some tinted finishes can add a bit of color depth here too.
The crucial part is the integrity of the existing stain. If it’s faded or patchy, a new coat on top won’t fix that. You’ll just be covering up the unevenness.
Which might look worse.
The Dangers of Skipping Sanding Entirely
I’ve seen floors that were “restained” without sanding. The results are usually not good in the long run. It’s like building a house on a shaky foundation.
It might stand for a little while.
One homeowner I spoke to was frustrated. They had used a gel stain over their old finish. It looked okay for a few months.
Then, in high-traffic areas, the color started to wear off. It looked like a patchy, uneven mess. They ended up having to sand it properly anyway.
It cost them more in the end because they had to fix their previous attempt.
Here’s what can go wrong:
1. Poor Adhesion and Peeling
This is the most common issue. Most finishes are designed to bond to bare wood or a specific primer. Applying them over a slick, old finish is like trying to glue a sticker to a mirror.
It just won’t stick well.
You’ll start seeing chips and peels. Especially in areas that get a lot of foot traffic. Like hallways and entryways.
2. Uneven Color and Blotches
Stain needs to penetrate the wood to give a uniform color. When you apply it over an existing finish, the finish might be worn in some spots. Or it might have tiny cracks.
This means the stain will soak in unevenly.
You’ll end up with dark spots and light spots. It will look patchy and unprofessional. This is hard to fix without sanding.
3. Durability Issues
The new stain or color coat won’t be as durable as a properly applied finish. It’s essentially sitting on top of the old finish. If that old finish wears away, so does your new color.
You’ll be back to square one, or worse, with a floor that looks damaged and unappealing.
4. Difficulty in Future Refinishing
If you try a “no-sand” method and it fails, you’ll likely have to sand anyway. But now, you have multiple layers of product on the floor. This can make the sanding process more difficult.
It might clog your sandpaper faster. Or require more aggressive sanding.
You might even need specialized strippers to remove the old, failed coating before you can sand. This adds cost and complexity.
When to Consider “No-Sand” Methods (and what they really are)
Scenario: You have a few very minor scuffs on your dark floor.
“No-Sand” Approach: Use a dark-colored furniture polish or a very thin, dark tinted glaze. Apply with a soft cloth.
What it is: Surface touch-up, not restaining.
Scenario: Your floor finish is dull but the color is still good. You want a bit more sheen.
“No-Sand” Approach: Use a high-quality floor polish or a re-coater like polyurethane with UV protection. Clean and degloss thoroughly first.
What it is: Re-coating, not restaining.
Scenario: You want to slightly deepen the existing color of your medium-toned floors.
“No-Sand” Approach: Try a gel stain applied over a scuff-sanded surface, or a tinted polyurethane.
What it is: A surface color application, requires prep.
The True Path to Restaining Wood Floors
If you want a real change. A new color that lasts. You need to prepare the floor properly.
This usually means sanding.
The process involves several steps:
1. Clearing the Space
You need to move all furniture off the floors. This is a big task. It means emptying closets, moving appliances, and finding a temporary spot for everything.
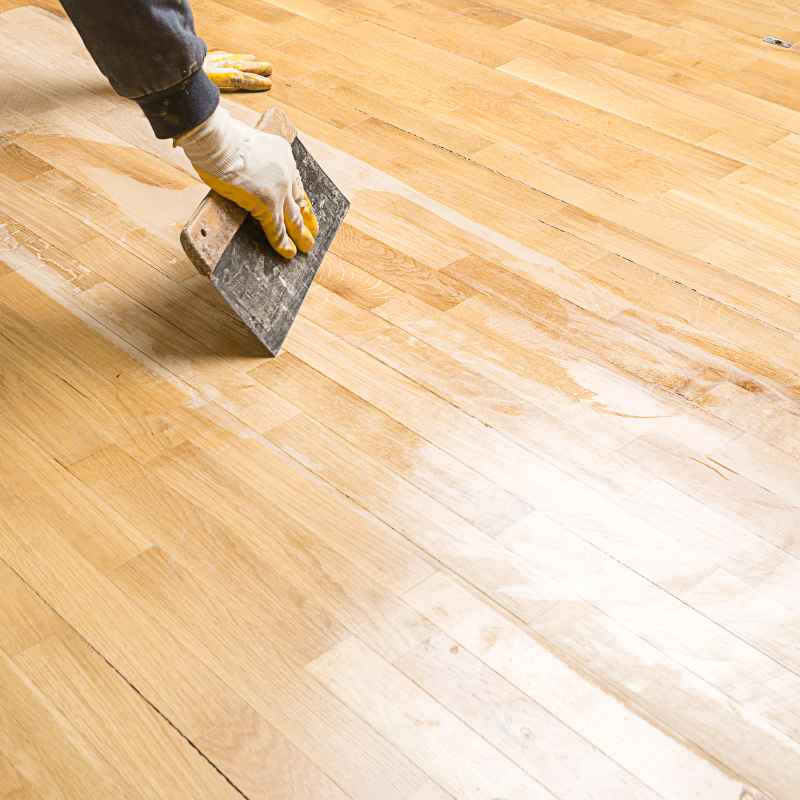
2. Cleaning and Degreasing
Even before sanding, a deep clean is needed. You want to remove any wax, polish, or grime. This ensures the sander works efficiently.
3. Sanding
This is the main event. You’ll start with a coarser grit sandpaper. Then move to finer grits.
This removes the old finish and any damage. It creates a smooth, bare wood surface.
There are different types of sanders. Drum sanders are powerful. Edge sanders get corners.
Orbital sanders are easier for DIYers but take longer.
I remember the first time I rented a drum sander. It was intimidating! The noise was intense.
And the dust! I wore a respirator mask and goggles. But fine dust still got everywhere.
It took days to clean up. But the bare wood underneath looked amazing. Ready for a new life.
4. Vacuuming and Tack Cloths
After sanding, you must remove all dust. Multiple passes with a shop vacuum are needed. Then, you use tack cloths.
These sticky cloths pick up the finest dust particles.
This step is critical. Any dust left will be trapped in the new finish. It will make the floor look rough and dirty.
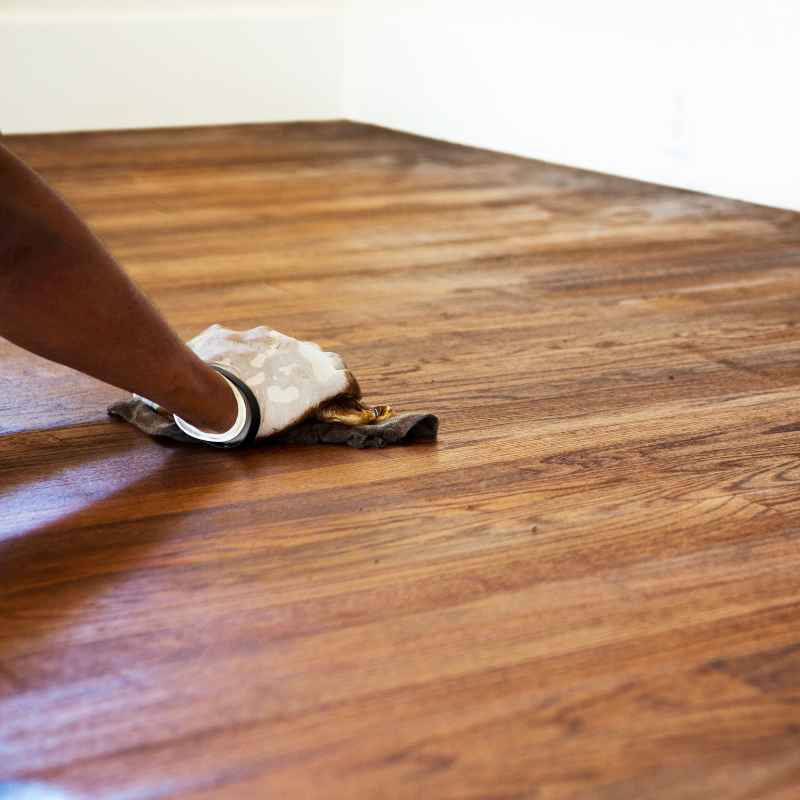
5. Staining
Now you apply your chosen wood stain. Work in small sections. Wipe off excess stain within the time recommended by the product.
This allows the stain to penetrate evenly.
The type of wood matters. Some woods take stain darker than others. Pine takes stain very blotchy.
Oak takes it more evenly. Always test stain on a scrap piece or an inconspicuous area first.
6. Applying the Finish (Top Coat)
After the stain dries completely, you apply a protective finish. Polyurethane is common. Oil-based finishes are durable but have strong fumes.
Water-based finishes dry faster and have less odor.
You’ll typically need 2-3 coats. Lightly sanding between coats with a very fine grit (like 220-320) helps create a super smooth surface. This is called “buffing” or “deglossing” between coats.
7. Curing Time
The floor will feel dry to the touch quickly. But it takes weeks for the finish to fully cure and harden. Avoid heavy furniture and rugs during this time.
Use felt pads on furniture legs.
This entire process is a commitment. It takes time, effort, and patience. But the results are worth it.
A beautifully transformed floor.
Real-World Context: Why Your Floor Wears Differently
High-Traffic Zones: Hallways, entryways, and paths between rooms get the most wear. The finish here will fade or scratch faster. This is where “no-sand” attempts are most likely to fail.
Sunlight Exposure: Direct sunlight can fade wood colors over time. If certain areas get more sun, they might look different. This can make “no-sand” tinting look uneven.
Pets and Kids: Scratches from pet claws or toys are common. These deeper marks need sanding to be truly fixed.
Moisture: Spills or leaks can damage wood. If the finish is compromised, water can get into the wood and cause stains or warping. This requires more than a surface coat.
What This Means for You: Assessing Your Floors
Before you jump into any project, look closely at your floors. What condition are they in? What are you trying to achieve?
When It’s Okay to Consider “No-Sand” (with caveats)
If your floors are in great shape. The finish is intact. There are no deep scratches or gouges.
You just want a slight color shift. Or a bit more vibrancy. Then a “no-sand” method, done carefully with proper prep (deglossing/scuff sanding), might be a temporary option.
Think of it as a color refresh. Not a full makeover.
When You Absolutely Need to Sand
If your floors are:
- Deeply scratched or gouged.
- Worn in high-traffic areas.
- Showing signs of peeling or flaking finish.
- Unevenly colored or stained already.
- You want a significant color change (light to dark, or vice versa).
- You want a durable, long-lasting finish.
In these cases, skipping sanding is a mistake. You’ll end up doing it later. And it will be harder.
Simple Checks You Can Do
The Fingernail Test: Run your fingernail over a small scratch. If you can feel a significant divot or catch your nail, it needs sanding.
The Water Drop Test: Put a drop of water on the floor. If it beads up and stays there, the finish is likely intact. If it soaks in or leaves a dark mark, the finish is compromised.
The Visual Check: Look at the floor from different angles in good light. Do you see widespread dullness, wear patterns, or deep scratches? If yes, sanding is likely needed.
Quick Tips for Floor Color Refreshment (Not Restaining)
If you’ve decided a minor refresh is all you need, here are some pointers:
- Always Test First: Never apply any product to your entire floor without testing it in a hidden spot. Closets or under large furniture are good places.
- Clean, Clean, Clean: This cannot be stressed enough. Use a good degreaser. Any dirt or wax will prevent adhesion.
- Degloss or Scuff Sand: Use a liquid deglosser or 180-220 grit sandpaper. This creates the necessary grip.
- Follow Product Instructions Exactly: Each product is different. Read and follow the manufacturer’s directions carefully.
- Ventilation is Key: Even “low-VOC” products can have fumes. Ensure good airflow.
- Use the Right Applicator: A good quality synthetic brush or roller made for your specific product is important.
- Work in Sections: Don’t try to do too much at once. Work in small, manageable areas.
- Patience is a Virtue: Allow proper drying and curing times. Rushing the process will lead to failure.
Frequently Asked Questions About Restaining Floors Without Sanding
Can I really restain my hardwood floors without any sanding at all?
While there are products that add color without heavy sanding, a true restaining that changes the wood’s base color requires removing the old finish to allow the new stain to penetrate bare wood. Methods that avoid sanding are generally surface applications like toners or tinted finishes, which offer limited depth and durability compared to traditional staining.
What is the difference between re-coating, refinishing, and restaining floors?
Re-coating adds a new protective layer of the same finish (like polyurethane) over the existing one to refresh its look and protection. Refinishing involves removing the old finish and color down to the bare wood, then applying new stain and finish. Restaining typically implies changing the color of the wood, which is a part of the refinishing process and requires sanding to bare wood.
Will a gel stain work on my existing finished wood floors without sanding?
Gel stains can sometimes be applied over existing finishes with proper preparation, like deglossing or light scuff sanding, to improve adhesion. However, they act more like a surface coating than a penetrating stain. The result might look more like painted wood than stained wood, and the durability may be less than with traditional staining on bare wood.
Always test first.
What are the risks of not sanding my wood floors before applying a new stain?
The main risks include poor adhesion, leading to peeling and chipping, especially in high-traffic areas. You may also end up with uneven color, blotchy patches, and a less durable finish. The new color might not last as long, and fixing a failed “no-sand” job often requires sanding anyway, potentially making the process more difficult.
Are there any products that can truly change the color of my wood floors without sanding?
Products like wood toners, gel stains, or tinted polyurethanes can add or deepen color. However, they do not penetrate the wood like traditional stains. For a significant color change (e.g., from light to dark), you need to remove the existing finish and stain the bare wood.
These “no-sand” products are more for subtle color shifts or cosmetic touch-ups.
How do I prepare my floors if I choose a “no-sand” restaining method?
Even without full sanding, you must prepare the surface. This involves thorough cleaning to remove all dirt, grease, and wax. You’ll likely need to degloss the existing finish using a liquid deglosser or very fine-grit sandpaper (around 180-220 grit) to create a surface the new product can adhere to.
Always follow the specific product’s preparation instructions.
Conclusion
The dream of restaining wood floors without the dust and effort of sanding is a strong one. While some products can add color or refresh your floors with minimal prep, they are not a true restaining solution. For a lasting, beautiful color change that penetrates the wood, proper sanding is almost always necessary.
Understand what you are trying to achieve, and choose the method that best fits your goals and your floors’ condition.