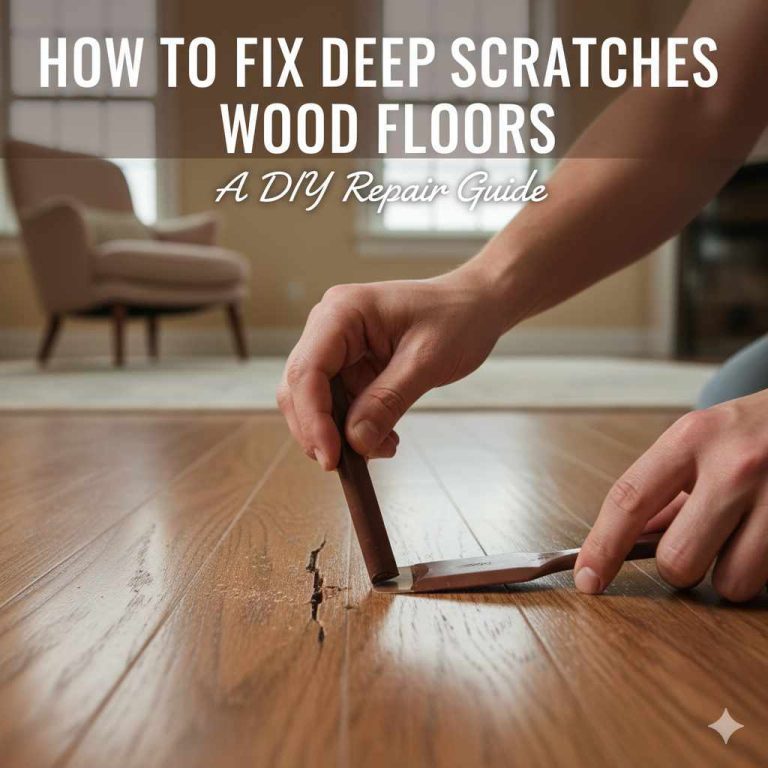
How To Get Scratches Out Of Fake Wood Floors Easily At Home
Finding a scratch on your fake wood floors can feel like a punch to the gut. You know the ones. They look so real and feel so nice underfoot, right?
Then, bam! A drag of a chair leg or a dropped toy leaves a tell-tale mark. It’s frustrating, and you just want it gone.
You wonder if you can even fix it yourself without making things worse.
Don’t worry, you’re not alone in this. Many of us have been there. We’ve walked into our living rooms and seen that shiny new scratch.
The good news is, you often don’t need a pro to make those blemishes disappear. With a little know-how and some common household items, you can often buff out those unwelcome lines.
This guide will walk you through simple, effective ways to tackle scratches on your fake wood floors. We’ll cover what works best for different types of fake wood. We’ll also touch on how to keep them looking great for years to come.
Let’s get those floors looking smooth again.
Finding scratches on your laminate or vinyl wood floors is common. Fortunately, many shallow scratches can be fixed at home using simple methods. This guide explains easy ways to repair them and prevent future damage, helping you restore your floor’s appearance without professional help.
What Are Fake Wood Floors?
Fake wood floors are a smart alternative to real hardwood. They include types like laminate flooring and luxury vinyl plank (LVP). These floors mimic the look of real wood.
They use a printed layer for the wood grain design. A tough, clear wear layer sits on top. This layer protects the print and the core.
Laminate flooring often has a fiberboard core. It’s quite durable. Luxury vinyl plank, or LVP, is made mostly of PVC.
It’s known for being very water-resistant. Both are popular choices for homes. They offer beauty and practicality without the high cost of real wood.
They are also easier to maintain for most people.
The protective wear layer is key. It handles daily foot traffic and minor spills. However, this layer can still get scratched.
Heavy impacts or sharp objects can break through. Sometimes, cleaning methods that are too harsh can dull the finish. Understanding your floor type helps pick the right fix.
Laminate and vinyl can scratch differently.
Why Do Fake Wood Floors Get Scratched?
Even though fake wood floors are tough, they aren’t immune to damage. Scratches happen for many reasons. Often, it’s just regular wear and tear.
Little bits of grit and sand on shoes act like sandpaper. As you walk, they grind against the floor. This wears down the surface.
Moving furniture is a big culprit. If you drag a heavy couch or even a chair without felt pads, it can leave a deep gouge. Pets can also cause scratches.
Their claws, especially if they’re long, can mark the floor surface. Even vacuum cleaner brushes can sometimes cause fine scratches if dirt is trapped.
Kids’ toys can be surprisingly harsh. A dropped hard plastic toy can leave a visible mark. Sometimes, cleaning products that are too abrasive can dull the finish.
This can make minor imperfections look worse. It’s like using steel wool on a new car. It doesn’t cut, but it sure does dull the shine.
So, it’s usually a combination of things. Tiny particles of dirt are like a constant slow attack. Larger events like moving furniture are the sudden blows.
Knowing these causes helps us prevent future issues too. We can be more mindful of what we track in and how we move things around.
My Own Scratch Scare
I remember one Saturday afternoon. I was helping a friend move into a new apartment. She had just put down beautiful new laminate wood flooring.
It looked fantastic, really high-end. We were bringing in a large armchair. I thought we had it clear, but the metal leg caught the edge of the floor near the doorway.
I heard a distinct scraaaape. My heart sank. I froze.
My friend rushed over. There it was, a long, white line cutting across the dark wood pattern. It looked terrible.
She looked so upset, and I felt awful. I immediately started thinking, “This is ruined. We’ll need a whole new floor.”
She was pretty distressed. I felt a surge of panic and guilt. I wanted to fix it instantly.
But I also knew I shouldn’t just grab any old cleaner. I didn’t want to make the scratch even more obvious. We paused, took a breath, and decided to look up solutions later.
That scratch taught me a lot about how easily these floors can be marked. And how important it is to know the right way to fix them.
Understanding Scratch Depth
Not all scratches are created equal. The fix depends a lot on how deep the scratch goes. Shallow scratches often only affect the very top layer.
This is the clear wear layer. These are the easiest to repair. They might just need a good buffing or a bit of polish.
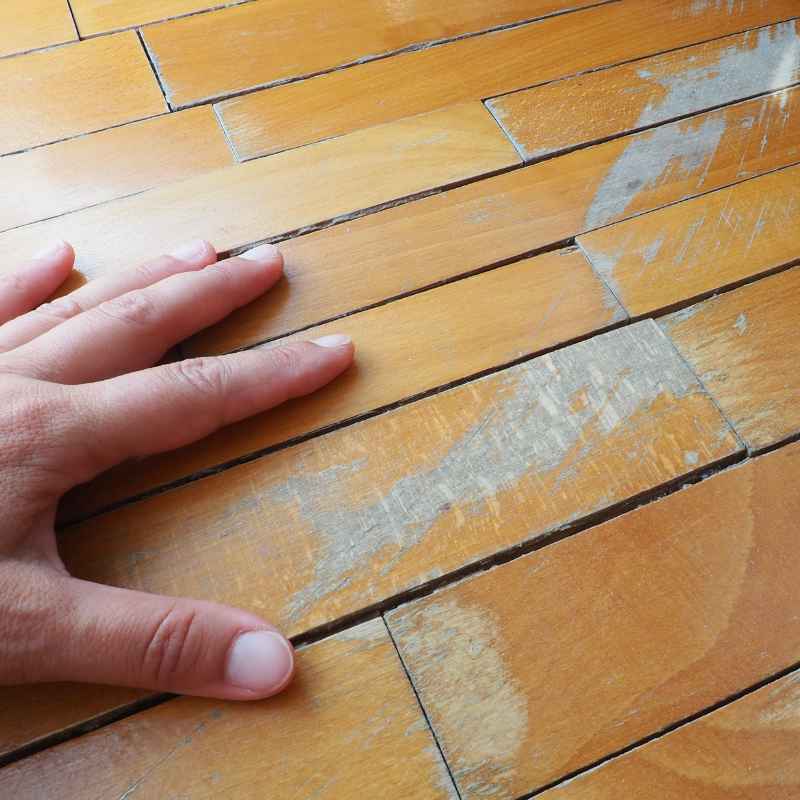
Deeper scratches go through the wear layer. They might reach the printed design layer. This means the wood grain pattern itself is damaged.
These are trickier. You might see a white or lighter color where the scratch is. It’s because you’re seeing the core material.
The deepest scratches can even go into the core material. This is less common for typical use but can happen. These might leave a dent or a gouge.
Fixing these can be harder. Sometimes, you can’t make them invisible. You can only try to blend them in as much as possible.
Before you try any fix, look closely at the scratch. Is it a light scuff? Or is it a clear line that has removed color?
This will guide you to the right method. It’s like deciding if you need a band-aid or stitches. Both help, but they are for different kinds of wounds.
Quick Scratch Assessment
Surface Scuffs: These are faint marks. They don’t go deep. They might be dull spots.
They often look like someone just dragged something light across the floor.
Minor Scratches: These are visible lines. They might show a lighter color. They haven’t damaged the core.
The printed wood grain is slightly marred.
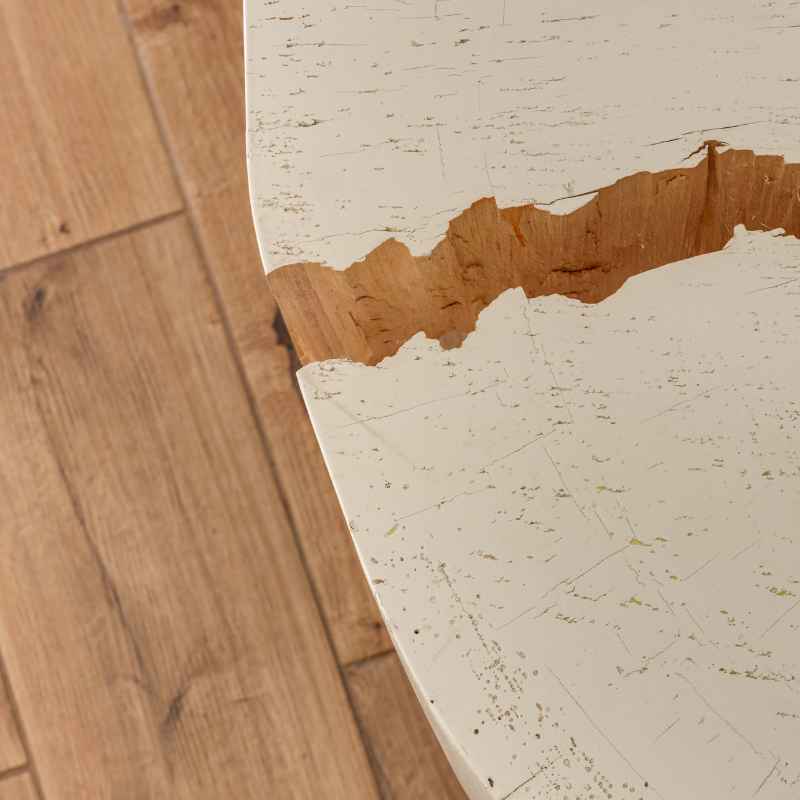
Deep Gouges: These are significant indentations. They go into the core material. They can be wide.
They often show the color of the floor’s core.
Easy Fixes for Light Scratches and Scuffs
For those annoying light scratches and scuffs, you have a few simple options. Often, you can use things you already have at home. The goal here is to gently buff out the mark or fill it in subtly.
One of the most popular methods is using a tennis ball. Yes, a regular tennis ball! Cut a small ‘X’ into it.
Then, place the ‘X’ over the end of a broom handle or mop handle. Use the tennis ball to gently buff the scratched area. The mild abrasiveness can help polish out light scuffs.
Another common trick is using a pencil eraser. A soft, white eraser works best. Gently rub the eraser over the scratch.
This can lift away surface marks. Be sure to use a clean eraser so you don’t transfer color. After erasing, wipe the area with a dry, soft cloth.
For slightly more noticeable scuffs, you can try a rubber eraser. Some people use art gum erasers. They are very gentle.
They work on the same principle as a pencil eraser. They lift away residue. Always test on an inconspicuous spot first.
This way, you know it won’t damage the finish.
A damp microfiber cloth can also help. Sometimes, what looks like a scratch is just scuff marks from shoes or furniture. Dampen the cloth with water only.
Gently wipe the area. Dry it immediately with a separate dry cloth. This often removes minor surface marks.
Remember to always work gently. The goal is to remove the mark, not create more damage. These methods are best for the very top layer of your floor.
Quick Tips for Light Scratches
Tennis Ball Buff: Cut an ‘X’ in a tennis ball. Fit it on a broom handle. Gently rub scratches.
Eraser Power: Use a soft, white pencil eraser. Rub gently over the mark. Wipe clean.
Microfiber Magic: Dampen a microfiber cloth with water. Wipe scuffs. Dry immediately.
Using Household Items for Minor Scratches
Sometimes, the best solutions are hiding in your kitchen or bathroom. These items can help fill in or disguise minor scratches. They work by adding a little color or polish to the damaged area.
Walnuts are surprisingly effective. Take a shelled walnut. Rub the nutmeat over the scratch.
The natural oils and pigment in the walnut can help fill and darken the scratch. It’s a temporary fix. But it can make a light scratch much less noticeable.
Wipe away any excess. This works best on darker wood-look floors.
Another option is petroleum jelly. Apply a tiny amount of petroleum jelly to the scratch. Use a cotton swab for precision.
Gently work it into the scratch. Then, wipe away the excess with a clean cloth. The jelly can fill the scratch and reduce its visibility.
Again, this is a temporary solution.
You can also try a bit of furniture polish. Make sure it’s a type safe for vinyl or laminate floors. Apply a small amount to a soft cloth.
Gently rub it into the scratch. Then, buff the area. This can add shine and help blend the scratch.
Always check the product label to ensure it’s suitable.
Some people use crayon wax. Find a wax crayon that matches your floor color. Gently rub the crayon over the scratch.
Fill the scratch with wax. Then, carefully scrape away any excess wax. You can use a plastic scraper or a credit card.
Buff the area with a soft cloth. This fills the scratch with color.
These methods are great for minor damage. They don’t permanently alter the floor. They just help disguise the problem temporarily.
Always test these methods in a hidden spot first. This ensures they don’t stain or discolor your floor.
Household Item Tricks
Walnut Oil: Rub a walnut over light scratches. It can fill and darken them.
Petroleum Jelly: A small dab can fill minor scratches temporarily. Wipe excess well.
Furniture Polish: Use a floor-safe polish. Apply sparingly. Buff gently.
Color Wax Crayon: Fill scratches with matching wax. Scrape excess. Buff smooth.
Specialized Scratch Repair Kits and Products
When household items aren’t quite enough, there are specialized products. These are designed specifically for laminate and vinyl floors. They offer more targeted solutions for various scratch depths.
You can find repair pens or markers. These come in many wood tones. You choose the color that best matches your floor.
You simply color over the scratch. The ink or dye fills the gap and adds color. It’s a quick way to mask visible lines.
Make sure you get a marker designed for flooring, not just furniture.
There are also touch-up kits. These often include a filler compound and a color tint. You mix the color to match your floor.
Then, you apply the filler to the scratch. It hardens and fills the damage. These are good for slightly deeper scratches.
They provide a more durable repair than a simple marker.
For vinyl floors, you might find vinyl repair kits. These can sometimes involve heat. You use a special tool to blend a filler material into the scratch.
This can create a seamless repair. However, these kits can be more complex to use. They are best for those who are comfortable with DIY projects.
Another option is floor polish or restorer products. These are applied over the entire floor or to specific areas. They can fill in very fine scratches and scuffs.
They also add a protective layer. This can make the floor look newer and more uniform. It’s a good way to revive the overall look.
When buying these products, read reviews. Look for ones that match your floor type (laminate or vinyl). Always test in an inconspicuous area first.
This ensures the product works as expected and doesn’t harm your floor.
Specialty Floor Repair Options
Repair Markers/Pens: Good for quick touch-ups. Choose a matching color.
Touch-Up Kits: Contain filler and tint. Better for slightly deeper scratches.
Vinyl Repair Kits: For vinyl floors. Can be more involved, sometimes using heat.
Floor Polish/Restorers: Fill fine scratches. Renew the overall finish.
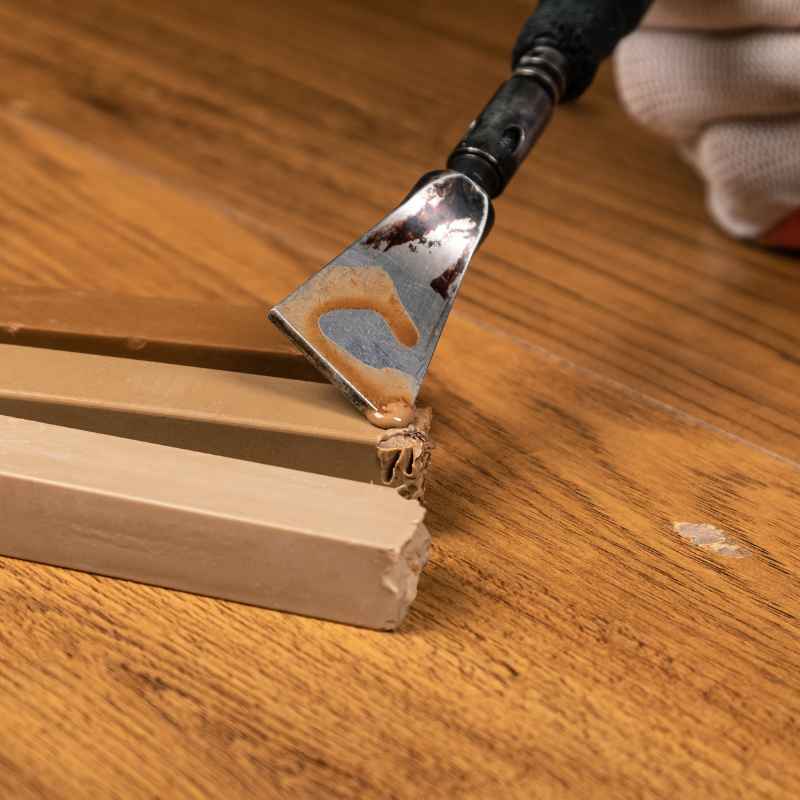
Fixing Deeper Scratches and Gouges
When scratches are deep, they go beyond simple buffing or coloring. These require a bit more effort to fill and make less obvious. The goal is to fill the void created by the scratch.
A common method for deeper scratches involves wood filler. You can buy wood filler in colors that match wood. Find one that is as close to your floor color as possible.
For laminate, the filler needs to be flexible. Use a small putty knife to press the filler into the scratch. Smooth it flat with the floor surface.
Let the filler dry completely according to the package instructions. Once dry, you can gently sand it. Use very fine-grit sandpaper.
Sand just enough to make it smooth. Be careful not to sand the surrounding floor. After sanding, you might need to touch up the color with a paint pen or marker.
For luxury vinyl plank, you can sometimes use a vinyl repair kit. These kits often come with a bonding agent and a flexible filler. You apply the filler into the gouge.
Then, you might use a heat tool to help it set. This fuses the filler to the vinyl. It creates a more seamless repair.
Another approach for deeper damage is using a colored wax stick. These are harder than crayon wax. They are designed for furniture and flooring.
You melt the wax stick into the scratch. You can use a special melting tool or even a low-heat iron with protection. Once the wax cools, you trim away excess and buff.
If the scratch is very deep and creates a significant dent, it might be impossible to hide perfectly. The goal then becomes making it less noticeable. Filling the void and blending the color can go a long way.
Always manage your expectations. Some damage is permanent. But you can often greatly improve its appearance.
Tackling Deeper Damage
Wood Filler: For laminate floors. Fill scratch, let dry, sand gently, touch up color.
Vinyl Repair Kits: Use for LVP. Often involves a filler and heat tool.
Colored Wax Sticks: Melt wax into the scratch. Trim excess, then buff.
Focus on Blending: For deep gouges, aim to fill the void and blend color.
What if the Scratch is Too Deep?
Sometimes, no matter how hard you try, a scratch is just too deep. It might be a significant gouge. Or it could be a tear in the vinyl.
In these cases, DIY fixes might not be enough to make it look perfect. You have a few options to consider.
One option is to embrace it. If the scratch is in a low-traffic area, you might decide to live with it. It’s a sign of a lived-in home.
Not every floor needs to look like a showroom. This is a valid choice for many people.
Another option is to replace the damaged plank or tile. Many laminate and LVP floors are installed as individual planks. If you have extra planks from installation, you can try replacing the damaged one.
This is a more involved DIY project. You’ll need to carefully remove the damaged plank and insert a new one.
For LVP, you might be able to carefully lift a plank. Then, slide in a new one. For laminate, it can be trickier.
Some types are click-lock. Others might require more destructive removal. Check your flooring manufacturer’s recommendations.
If replacing a plank isn’t feasible, or if the damage is widespread, you might need professional help. A flooring company can assess the damage. They can tell you if repairs are possible.
They might offer solutions like color-matching and refinishing for certain types of vinyl. For laminate, replacement is often the only real solution for deep damage.
Be realistic about the results. A perfectly invisible repair for a deep gouge is very difficult. The goal of professional repair is often to make it much less noticeable.
It’s about improving the appearance significantly.
When DIY Isn’t Enough
Acceptance: Sometimes it’s okay to live with minor damage.
Plank Replacement: If you have extras, replace the damaged plank/tile.
Professional Help: Consult flooring specialists for severe damage.
Manage Expectations: Deep damage is hard to hide completely.
Preventing Future Scratches
The best way to deal with scratches is to stop them from happening in the first place. Prevention is always easier than repair. A few simple habits can make a big difference.
Use felt pads on furniture legs. This is probably the most important step. Make sure all your chairs, tables, sofas, and other furniture have felt pads on the bottom of their legs.
Check them regularly and replace them when they get worn out. This stops chairs from scratching when you move them.
Wipe your feet before walking on the floor. Keep doormats at all entrances. These trap dirt, sand, and grit before it gets tracked onto your nice floors.
Encourage everyone in the household to use them. This small habit makes a huge impact.
Avoid wearing high heels or hard-soled shoes indoors. Stiletto heels can leave dents and scratches. Hard-soled shoes can also contribute to wear.
Suggest soft slippers or socks for walking around the house.
Trim your pets’ nails regularly. Long nails can scratch vinyl and laminate floors. Keep them filed down.
For very active pets, consider protective booties or paw covers when they’re inside.
Clean up spills immediately. While LVP is often water-resistant, standing water can still cause issues over time. For laminate, spills need to be cleaned up quickly to prevent damage to the core.
Also, use gentle cleaning products. Harsh chemicals can dull the finish.
When moving heavy items, protect your floors. Use moving blankets, cardboard, or furniture sliders. Never drag heavy objects across the floor.
Lift them or use proper moving equipment.
Regular sweeping and vacuuming are also crucial. This removes the grit that can act like sandpaper. Use a soft brush attachment on your vacuum.
Avoid abrasive brushes or beater bars that can scratch the surface.
Top Prevention Tips
Furniture Felt Pads: Use them on all furniture legs. Replace when worn.
Doormats: Place mats at all entrances. Wipe feet thoroughly.
Footwear Choice: Avoid high heels and hard-soled shoes indoors.
Pet Nail Care: Keep pet nails trimmed and filed.
Prompt Spill Cleanup: Address spills quickly, especially on laminate.
Protective Moving: Use blankets and sliders when moving heavy items.
Regular Cleaning: Sweep and vacuum often with a soft brush.
Real-World Scenarios and Solutions
Let’s look at some common situations and how to handle them. It helps to see these ideas in action.
Scenario 1: The Coffee Table Drag
You’re rearranging your living room. You slide the coffee table a few inches. Oops.
A visible scratch appears. It’s shallow but noticeable on the dark vinyl floor.
Solution: First, try the damp microfiber cloth trick. Wipe the area. If that doesn’t remove the scuff, use a matching colored repair marker.
Color carefully into the scratch. Buff gently. This should blend it in well.
Scenario 2: The Dropped Toy in the Playroom
Your toddler drops a hard plastic truck on the laminate floor. There’s a small, white line where it hit. It looks like the top layer is damaged.
Solution: For this type of shallow scratch, try the pencil eraser method. Use a clean, white eraser and rub gently. If that doesn’t work, a bit of floor polish might help fill the very fine scratch and restore shine.
Scenario 3: The Pet Paw Mark
Your dog runs in from the yard. His nails leave tiny, light scratches across the floor. They aren’t deep but they dull the finish.
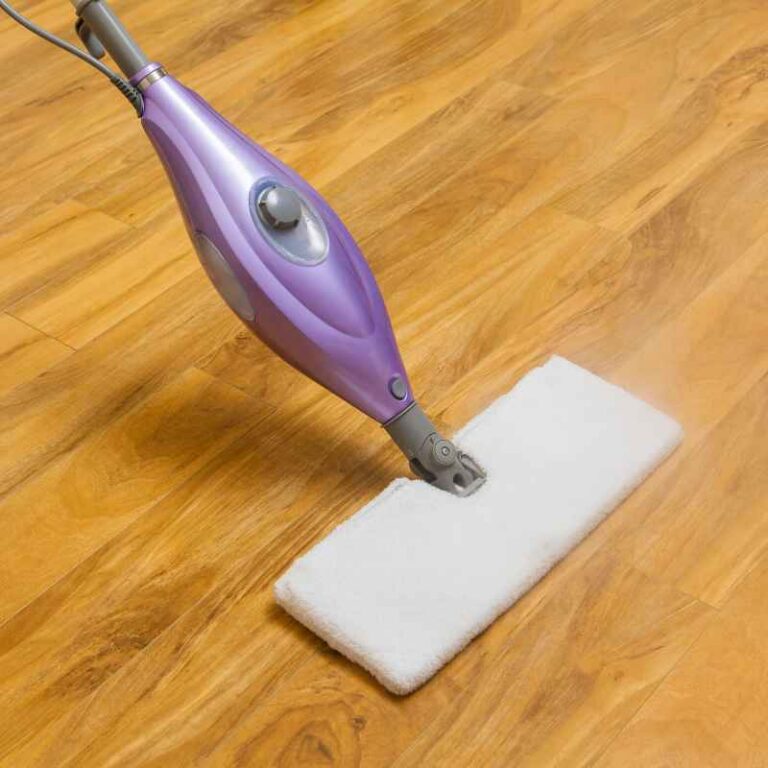
Solution: Regular cleaning is key here. A good sweeping or vacuuming removes the grit. For the dulling effect, try a laminate floor restorer or a high-quality vinyl floor polish.
Apply it evenly to give the floor a uniform shine.
Scenario 4: The Heavy Box Scrape
You’re moving a large box. The corner catches the floor and leaves a definite, deeper scratch. It’s a few inches long and shows a lighter color.
Solution: This might need a bit more. Try a colored wax stick. Melt the wax into the scratch, let it cool, then trim and buff.
If that’s not enough, consider a touch-up kit with a filler. Carefully apply the filler, smooth it, and let it cure. You may need to tint it to match.
These real-world examples show how the depth and type of scratch guide your repair choice. It’s all about matching the solution to the problem.
When to Call a Professional
While many scratches are fixable at home, there are times when professional help is the best route. Don’t hesitate to call in an expert if you’re unsure or if the damage is extensive.
Extensive Damage: If your floors have numerous deep scratches, gouges, or tears across a large area, DIY might not be enough. A professional can assess the full extent of the damage and suggest the most effective solutions.
High-Value Flooring: If you have expensive or specialty vinyl flooring, you might want professional advice. They have the expertise to handle premium materials without causing further damage.
Lack of Confidence: If you’re not comfortable with DIY repairs, or if you’re worried about making the problem worse, a professional is a good choice. They have the tools and experience to do the job right.
Difficult-to-Match Colors: Some flooring colors are very specific. A professional might have access to a wider range of repair materials or custom-tinting services to achieve a near-perfect match.
Warranty Concerns: In some cases, attempting DIY repairs might void your flooring’s warranty. Check your warranty information. If it’s a concern, consult the manufacturer or a certified installer.
Professionals can also perform more advanced repairs. This might include heat-fusing vinyl or using specialized fillers that are more durable. They can often achieve a more seamless look than typical home methods.
Maintaining Your Fake Wood Floors
Keeping your fake wood floors looking good involves more than just fixing scratches. Regular maintenance is key to preserving their beauty and preventing future damage.
Daily Cleaning: Sweep or vacuum your floors daily. Use a soft brush attachment on your vacuum. This removes dirt and grit that can scratch the surface.
For spills, wipe them up immediately with a soft cloth. This is especially important for laminate.
Damp Mopping: About once a week, damp mop your floors. Use a cleaning solution specifically made for laminate or vinyl floors. Avoid using too much water.
Wring out your mop well. Never let water stand on laminate floors. For vinyl, a slightly damp mop is usually fine.
Avoid Harsh Chemicals: Never use abrasive cleaners, ammonia-based products, or wax-based polishes on laminate or vinyl floors. These can damage the wear layer or leave a dull residue. Always check the product label to ensure it’s safe for your floor type.
Protect from Sun: Prolonged exposure to direct sunlight can cause fading over time. Use curtains or blinds to protect your floors from harsh UV rays, especially during peak sun hours.
Watch for Moisture: While vinyl is water-resistant, standing water is never good for any flooring. Be careful with pet water bowls, and clean up any leaks from appliances promptly. Laminate is particularly sensitive to moisture, so keep it as dry as possible.
By following these maintenance tips, you can keep your fake wood floors looking great and minimize the chances of needing scratch repairs.
Frequently Asked Questions About Fake Wood Floor Scratches
Can I really get scratches out of fake wood floors with a walnut?
Yes, for light scratches, a walnut can help. The oils and pigment in the walnut can temporarily fill and darken the scratch. It’s a good trick for minor scuffs on darker floors.
Just rub the nutmeat over the scratch and wipe away excess. Remember to test it first in an unseen area.
Will a pencil eraser damage my fake wood floor finish?
A clean, soft white pencil eraser is generally safe for most laminate and vinyl finishes. It works by lifting surface scuffs. Be gentle and don’t rub too hard.
If you’re concerned, test it on a hidden spot first. Always use a clean eraser to avoid transferring any color.
What is the best way to fix deep scratches in laminate flooring?
For deep scratches in laminate, wood filler is often recommended. Choose a filler color that matches your floor. Carefully apply it to the scratch with a putty knife.
Smooth it flat. Let it dry completely. You may need to gently sand it smooth and then touch up the color with a paint pen or marker.
Is luxury vinyl plank (LVP) harder to scratch than laminate?
LVP is generally more durable and water-resistant than laminate. However, both can be scratched. LVP’s wear layer is often thicker and more resilient.
Deep scratches on LVP can sometimes be repaired with specialized vinyl repair kits that may involve heat. Laminate is more susceptible to moisture damage.
Can I use car wax on my fake wood floors?
It’s generally not recommended to use car wax on laminate or vinyl floors. Car waxes can leave a residue that is difficult to remove. They are also not designed for flooring surfaces and can make them slippery or dull the finish.
Stick to products specifically designed for your floor type.
How can I prevent my cat’s claws from scratching my fake wood floors?
Regularly trimming your cat’s nails is the best preventative measure. Keep them filed down. You can also provide scratching posts to redirect their scratching behavior.
For added protection, consider temporary paw covers or booties for your cat during certain times, though this may require training them to accept it.
Conclusion
Dealing with scratches on your fake wood floors doesn’t have to be a major headache. You’ve learned that many common marks are fixable with simple tools and items from around your home. From tennis balls and erasers to specialized repair kits, there are options for almost every type of scratch.
Remember, the key is to identify the scratch’s depth and your floor type. Then, choose the most appropriate method. And don’t forget the power of prevention!
Simple habits can save you a lot of repair work down the line.