How Long Does It Take To Install Wood Floors? Real Times
Thinking about new wood floors? It’s a big step! You might be excited about the beauty.
But you might also worry about the mess and the time it takes. People often ask, “How long does it take to install wood floors?” It’s a very common question. And the answer is… it depends.
But we can break it down. We’ll look at all the things that make it faster or slower. So you can plan better.
Let’s get into it.
Installing wood floors typically takes 1 to 3 days for a single room. Larger homes or complex layouts can extend this to 5 days or even a full week. This timeline includes preparation, installation, and finishing touches, but doesn’t account for drying times if a finish is applied on-site.
Understanding Wood Floor Installation Time
So, why the big range? Several things change how long it takes. Think about the size of your house.
A small bedroom is quick. A whole downstairs? That takes much longer.
The type of wood floor matters too. Some are faster to put down than others. And is someone doing it for you?
Or are you doing it yourself? This is a huge factor.
We’re talking about getting brand new wood floors in your home. That means taking up old flooring. It means getting the subfloor ready.
Then, laying down the beautiful new wood. Sometimes, you might need to sand and finish the floors right there. Other times, the wood is already finished when it arrives.
Every step adds time.
Most people want a good estimate. They want to know when they can walk on their new floors. Or when they can move furniture back.
Knowing the steps helps you see why it takes the time it does. Let’s look at what actually happens.
The Step-by-Step Process: What Takes Time?
To really understand the timeline, we need to see the work involved. It’s not just laying planks. There’s prep work that’s super important.
Without good prep, the floor might not last. Or it might look bad. Here are the main steps and why they take time.
1. Preparation (The Unseen Work)
This is often the longest part. And it’s easy to rush. But you shouldn’t.
First, you have to move everything out of the room. Furniture, rugs, everything. This can take hours, especially if you have a lot of stuff.
Then, the old flooring has to go. If it’s old carpet, that’s usually fast. But if it’s tile or glued-down wood, it can be a tough job.
It might involve scraping and a lot of dust. This needs care.
Next, the subfloor. This is the layer under your flooring. It needs to be clean and level.
If it’s not, the new floor will feel soft or make noise when you walk. Fixes here can add a lot of time. This could mean sanding down high spots or adding leveling compound to low spots.
All this takes drying time too.
Preparation Checklist
- Remove all furniture.
- Tear out old flooring.
- Clean subfloor completely.
- Check for moisture.
- Level or repair subfloor.
- Acclimate new flooring.
2. Acclimation (Patience is Key)
This is a step many people forget. Wood is a natural material. It moves with the air’s moisture.
Before installing, the wood needs to get used to the air in your home. This is called acclimation. You leave the wood planks in the room where they will be installed.
This lets them adjust their moisture level.
How long? Usually 48 to 72 hours. Sometimes longer.
This time depends on how different the wood’s moisture is from your home’s air. This step is critical. If you skip it, the wood can swell or shrink after it’s down.
This can cause gaps or buckling. So, this waiting time is important for a good floor.
3. Installation (The Visible Part)
This is where you see the floor coming to life. How long this takes depends on the type of wood flooring. There are several kinds.
- Solid Hardwood: This is the most traditional. Planks are thick wood. They are usually nailed down. This takes skill and time. A pro can do a room fast. But it’s slow work.
- Engineered Hardwood: These planks have layers. The top is real wood. The bottom layers are stable material. They can be nailed, glued, or floated. Floating means the planks lock together. This is often faster.
- Laminate Flooring: Not real wood. But looks like it. It has a tough top layer. It usually clicks together. This is one of the fastest types to install.
- Luxury Vinyl Plank (LVP): Also not wood. It’s very durable. It looks like wood. Most LVP clicks together. It’s also a very fast install.
The method of installation also affects time. Nailing is slower than click-lock systems. Glue-down can be messy and take time for the glue to set.
Floating floors are usually the quickest to lay down.
Installation Method Speed (Quick Scan)
| Method | Typical Speed (per day) |
| Floating (Click-Lock) | 500-1000 sq ft |
| Nail Down | 300-600 sq ft |
| Glue Down | 300-500 sq ft |
4. Finishing (If Needed)
Some wood floors come pre-finished. This means they are stained and sealed at the factory. This is much faster for installation.
You just lay them down. The total time is just for prep and laying the planks.
But some floors are “unfinished.” These are raw wood. They get installed first. Then, they are sanded smooth.
After sanding, they are stained. Finally, they are sealed with a protective coat. This process takes much longer.
Sanding can be dusty. Staining needs careful work to be even. Multiple coats of finish are needed.
Each coat needs drying time. This can add several days to the total project.
This is a key point for the timeline. If you choose unfinished wood, expect the project to take much longer. You also have to plan for the smell of the finish.
And you can’t walk on it for a few days after the final coat.
Real-World Scenarios: How Long Does It Really Take?
Let’s look at some common situations. This will give you a better idea of what to expect. These are based on real homes and real projects.
Scenario 1: Small Room, Pre-Finished Engineered Wood
Imagine you want to put new floors in a 12×15 foot bedroom. You choose pre-finished engineered wood. It’s a click-lock system.
You hire a pro. They move your dresser and bed. They remove old carpet.
They check the subfloor and find it’s pretty good. They might do a light skim coat on one spot.
The wood acclimates for 2 days. Then, the installer starts. They work quickly with the click-lock system.
They cut around the door frames. They finish the room by late afternoon on the second day of work. The total time for this project is about 2 days of active work, plus the 2 days of acclimation.
So, roughly 4 days from start to walking on it.
Scenario 2: Large Area, Nail-Down Solid Hardwood, Unfinished
Now, consider a whole downstairs area, maybe 1200 square feet. You want solid oak floors. You choose unfinished wood.
You want it stained a dark walnut color and then sealed.
Moving furniture out takes a full day. The old flooring is tile. Removing it is tough and takes 2 days.
The subfloor needs some repairs. This adds another day. The new solid hardwood acclimates for 3 days.
Installation of the solid hardwood begins. This is slow work, nailing each board. It takes 3 full days for the installers to cover 1200 sq ft.
Now the sanding begins. This is dusty work, taking 1 full day. Then comes staining.
This needs careful, even application. This takes another half day. The first coat of finish goes on.
It needs to dry for 24 hours. Then a light scuff sand and the second coat. Another 24 hours to dry.
A final coat goes on. Then it needs to cure for 3 days before heavy furniture is moved.
In this case, you have 2 days moving, 2 days tile removal, 1 day subfloor, 3 days acclimation, 3 days install, 1 day sanding, 0.5 days staining, 1 day finish coat 1, 1 day finish coat 2, 1 day finish coat 3. That’s about 15.5 days of work and drying. Plus 3 days to cure.
So, nearly 3 weeks until full use. This is a much bigger project.
Contrast Matrix: Pre-Finished vs. Unfinished
Pre-Finished
Pros: Fast install, no mess, no smell, ready sooner.
Cons: Limited stain options, can be less durable finish.
Unfinished
Pros: Custom stain, high-quality finish possible, very durable.
Cons: Long install time, dust, smell, longer wait to use.
Factors That Speed Up or Slow Down Installation
We’ve touched on many factors. Let’s list them out clearly. Understanding these helps you get a better estimate.
1. Size of the Area
This is the most obvious. More square footage means more time. It’s simple math.
A professional installer might cover 500 sq ft a day for a simple click-lock floor. But a whole house could take a week or more.
2. Type of Wood Flooring
As we saw, click-lock (laminate, LVP, some engineered) is faster. Nail-down solid hardwood is slower. Glue-down can also be slow due to drying times for the adhesive.
3. Subfloor Condition
A perfect subfloor means a faster install. If it’s uneven, damaged, or needs repair, this adds significant time. We’re talking about potential days of work to fix it.
This includes time for patching materials to dry.
4. Existing Flooring Removal
Old flooring removal can be quick or a real headache. Simple carpet is fast. Old, glued-down vinyl or tile can be very difficult and dusty.
This can add a day or more.
5. Finishing Choices
Pre-finished floors save a lot of time. Unfinished floors add days for sanding, staining, and multiple coats of finish with drying times.
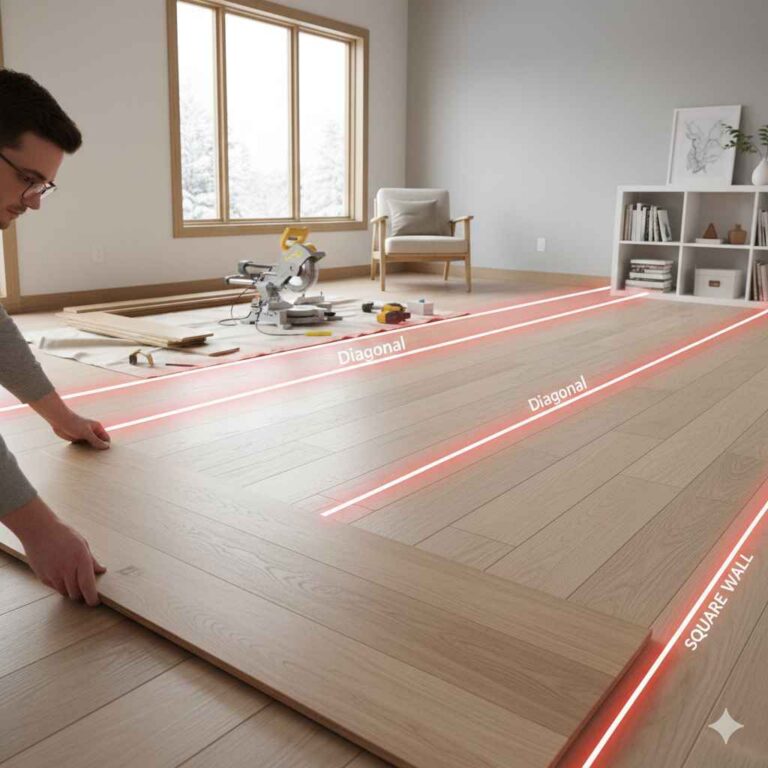
6. Complexity of the Room Shape
Simple square or rectangle rooms are fast. Rooms with many corners, closets, or awkward angles take much longer. Cutting around these areas is time-consuming work.
7. Obstacles in the Room
Built-in cabinets, islands, or fireplaces can slow things down. They require more precise cutting and fitting. This adds to the labor time.
8. Professional vs. DIY
A professional installer has the tools, experience, and speed. They know the tricks. DIYers might take much longer.
They learn as they go. Mistakes can happen. This can cost time and money to fix.
9. Time of Year and Weather
This might seem odd, but it matters. Extreme humidity or cold can affect drying times for glues and finishes. It can also make working conditions uncomfortable, slowing down the crew.
How Long Does DIY Wood Floor Installation Take?
If you’re thinking of doing it yourself, you need to add extra time. A lot of extra time. You’re learning as you go.
You might not have all the specialized tools a pro uses. You have to account for mistakes. For example, you might cut a board too short.
You’ll have to go back and get another one. Or you might misalign a few planks and have to take them apart.
For a simple, pre-finished click-lock floor in a small room (like a 10×10 space), a DIYer might spend 2-3 full days. This includes prep work. A larger area, or something more complex like nail-down solid hardwood, could take a week or more of weekend work.
And if you’re finishing the floors yourself, add many more days for learning the techniques and waiting for drying.
It’s important to be realistic. DIY can save money on labor. But it costs time.
And sometimes, if done poorly, it can cost more to fix. If you’re not experienced, focus on easier systems like click-lock vinyl plank or laminate.
DIY Timeline Boosters
- Learning Curve: First-timers are slower.
- Tool Access: Pro tools speed things up.
- Mistake Correction: Fixing errors adds time.
- Physical Strain: DIY is tiring; breaks needed.
- Weekend Only: If you can’t work weekdays, it takes longer.
What This Means for Your Home Project
Knowing the timeline is key to planning. You need to know how long your home will be disrupted. If you have a big event coming up, maybe schedule the floors for after.
Or focus on just one room first.
When is the Timeline Normal?
For a typical 12×15 room with pre-finished flooring and professional installation, 2-3 days of work is normal. This includes prep and acclimation. If you’re doing a whole house with pre-finished flooring, 5-7 days of installation work is a reasonable expectation.
For unfinished floors, add 4-7 days for sanding, staining, and finishing.
When Should You Worry About the Timeline?
If the installer says they can do a whole house in one day, be very skeptical. That’s usually too fast. It means corners are likely being cut.
Also, if a simple room takes longer than 4-5 days of active work (without significant subfloor issues), ask why. Communication is important.
Simple Checks for Your Project Timeline
Before hiring, ask for a detailed schedule. Ask about their plan for prep, acclimation, installation, and any finishing. Get it in writing.
Ask about their experience with the specific type of flooring you chose. A good installer will walk you through their process and give you a realistic time frame.
After they start, check in daily. See how they are progressing. Are they on track?
If there are delays, understand the reason. Good communication prevents surprises.
Quick Tips for a Smoother Installation Timeline
Want to help your project go as smoothly and quickly as possible? Here are a few tips.
- Clear the Space Early: Move furniture out well before the crew arrives. The more cleared the space, the faster they can start.
- Choose Pre-Finished: If time is your biggest concern, pre-finished flooring is the way to go.
- Prepare the Subfloor Yourself (If Able): If you’re handy, you could do some of the prep work yourself. This means cleaning and basic repairs. But check with your installer first. They may want to do it their way.
- Have Materials Ready: Make sure all your flooring, underlayment, and any transition strips are on-site and ready to go.
- Be Available for Questions: If the installer has a question about a tricky area or a design choice, be available to answer quickly.
- Avoid Scheduling Major Events: Don’t plan a big party right after the floors are installed. Allow for the curing time, especially if you chose a site-finished floor.
Frequently Asked Questions About Wood Floor Installation Time
How long does it take to install 1000 square feet of wood floors?
For a professional crew using pre-finished, click-lock flooring, 1000 square feet can often be done in 2 to 3 days of active installation. This doesn’t include prep or acclimation time, which could add another 2-3 days. If you choose solid hardwood that needs to be nailed down, it could take 4-5 days for installation alone.
Can I walk on my new wood floors immediately after installation?
With pre-finished flooring, you can usually walk on it right away. However, it’s best to wait 24 hours before moving heavy furniture back. If the floors were sanded and finished on-site, you’ll need to wait at least 24 hours for the first coat, and then follow the manufacturer’s specific curing instructions, which can be several days.
Does the type of subfloor affect installation time?
Yes, absolutely. A clean, flat, and stable subfloor is much faster to work with. If the subfloor is uneven, has old adhesive that needs removal, or needs repairs, this will significantly increase the installation time.
It’s crucial to have a solid foundation.
How much time should I budget for acclimation?
Most wood flooring manufacturers recommend at least 48 to 72 hours for acclimation in the room where it will be installed. This allows the wood to adjust to your home’s temperature and humidity. Some conditions may require longer, so always check the manufacturer’s guidelines.
What’s the fastest way to install wood-look flooring?
The fastest options are typically click-lock Luxury Vinyl Plank (LVP) or laminate flooring. These materials are designed for easy installation and don’t require glue or nails in many cases. A professional can often install a large area of these types in just a couple of days.
If I hire a pro, how long does a typical room installation take?
For a standard-sized room (e.g., 10×12 to 15×15 feet) using pre-finished engineered or solid hardwood, a professional installer will likely take 1 to 2 full days. This includes preparation and installation. If they also need to remove old flooring, that could add another half to a full day.
Conclusion: Planning for Your New Floors
Installing wood floors is an investment in your home. Knowing the timeline helps you prepare. It lets you manage expectations.
From prep work to the final polish, each step plays a role. Remember to factor in acclimation and drying times.
Whether you choose a quick click-lock system or a site-finished beauty, planning makes it smoother. Talk to your installer. Understand the process.
Then, you can relax and enjoy your beautiful new wood floors.